

Window track cleaning hack: Let’s be honest, cleaning window tracks is nobody’s favorite chore. It’s that grimy, dusty, often-overlooked crevice where dirt, bugs, and who-knows-what-else accumulate. But fear not, fellow homeowners and renters! I’m here to share a game-changing DIY window track cleaning hack that will transform this dreaded task into a breeze.
While window tracks might seem like a modern nuisance, the need to keep windows clean has been around for centuries. Think about the grand palaces of Europe, where sparkling windows were a symbol of wealth and status. Or consider the traditional Japanese homes, where meticulously clean shoji screens allowed light to filter through beautifully. Clean windows, and therefore clean window tracks, have always contributed to a sense of well-being and pride in our living spaces.
Why do you need this window track cleaning hack? Because nobody wants to spend hours scrubbing away at stubborn grime! This DIY solution is not only incredibly effective but also uses ingredients you likely already have in your home. Say goodbye to expensive cleaning products and hello to a sparkling clean window track, achieved with minimal effort. I’m excited to share this simple yet powerful method that will leave your windows looking their best and your home feeling fresher than ever!
DIY Window Track Cleaning: The Ultimate Guide to Sparkling Clean Tracks!
Okay, let’s face it, cleaning window tracks is nobody’s favorite chore. They’re grimy, dusty, and just plain unpleasant. But, a clean window track not only looks better, it also helps your windows slide smoothly and seals properly, saving you energy in the long run. I’m going to walk you through my tried-and-true method for getting those tracks sparkling clean without breaking a sweat (well, maybe just a little!).
What You’ll Need: Your Cleaning Arsenal
Before we dive in, let’s gather our supplies. Having everything ready will make the process so much smoother. Here’s what I always keep on hand:
- Vacuum Cleaner with a Hose Attachment and Brush: This is crucial for getting rid of loose debris.
- Old Toothbrush or Small Scrub Brush: Perfect for getting into those tight corners.
- Putty Knife or Flathead Screwdriver (Wrapped in Cloth): For scraping away stubborn gunk. Be careful not to scratch the tracks!
- Microfiber Cloths or Paper Towels: For wiping and drying.
- Spray Bottle: To hold your cleaning solution.
- Cleaning Solution: You have a few options here:
- Vinegar and Baking Soda Paste: My go-to for tough grime.
- Dish Soap and Warm Water: A milder option for less stubborn dirt.
- Commercial Window Cleaner: If you prefer a store-bought solution.
- Q-tips: For those super hard-to-reach spots.
- Optional: Shop Vac: If you have one, it can be super helpful for sucking up excess water and debris.
Step-by-Step Cleaning Process: Let’s Get Started!
Alright, now that we’re armed with our cleaning supplies, let’s get those window tracks looking brand new!
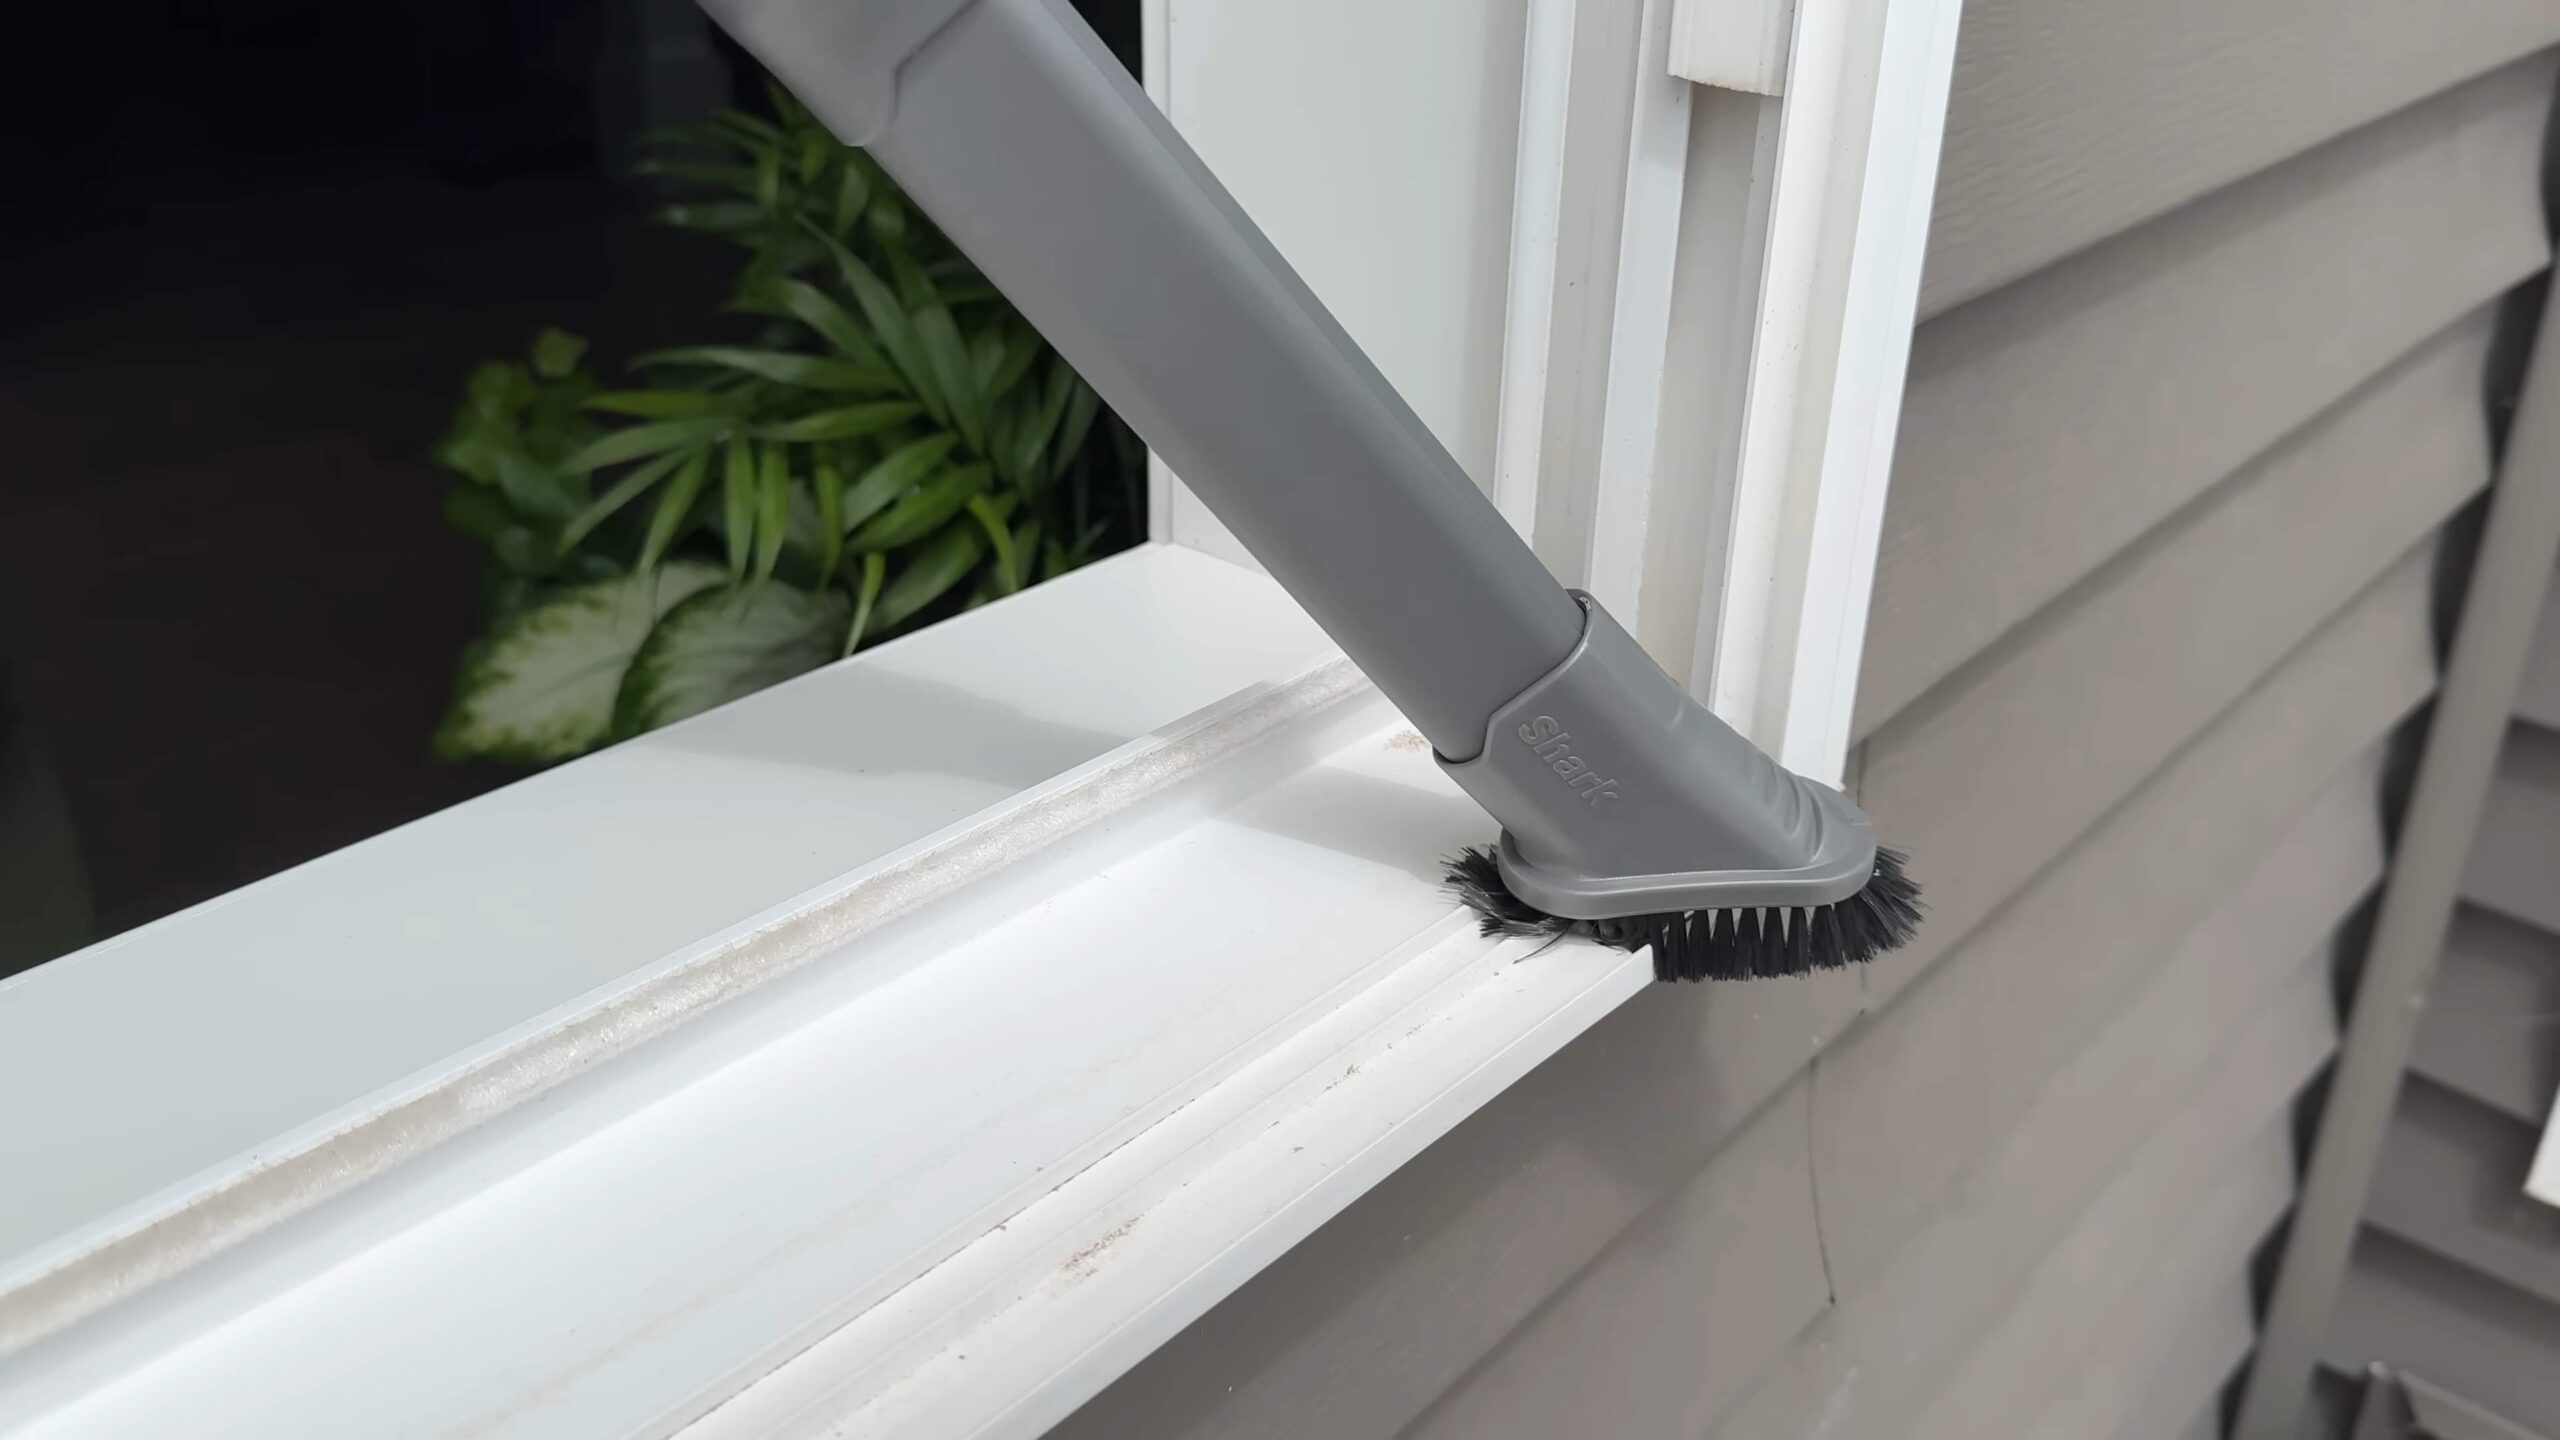
- Vacuum the Loose Debris:
This is the first and most important step. Use the hose attachment of your vacuum cleaner to suck up all the loose dirt, dust, dead bugs (yuck!), and other debris from the window tracks. Pay close attention to the corners and any areas where dirt has accumulated. The brush attachment will help loosen stubborn particles.
- Prepare Your Cleaning Solution:
Now, let’s mix up our cleaning solution. If you’re going with the vinegar and baking soda method (my personal favorite for really tough grime), here’s how I do it:
- Sprinkle a generous amount of baking soda into the window track.
- Slowly pour white vinegar over the baking soda. It will fizz – that’s exactly what we want! The fizzing action helps to loosen the grime.
- Let the mixture sit for about 5-10 minutes to work its magic.
If you’re using dish soap and water, simply mix a few drops of dish soap into a spray bottle filled with warm water. If you’re using a commercial window cleaner, follow the instructions on the bottle.
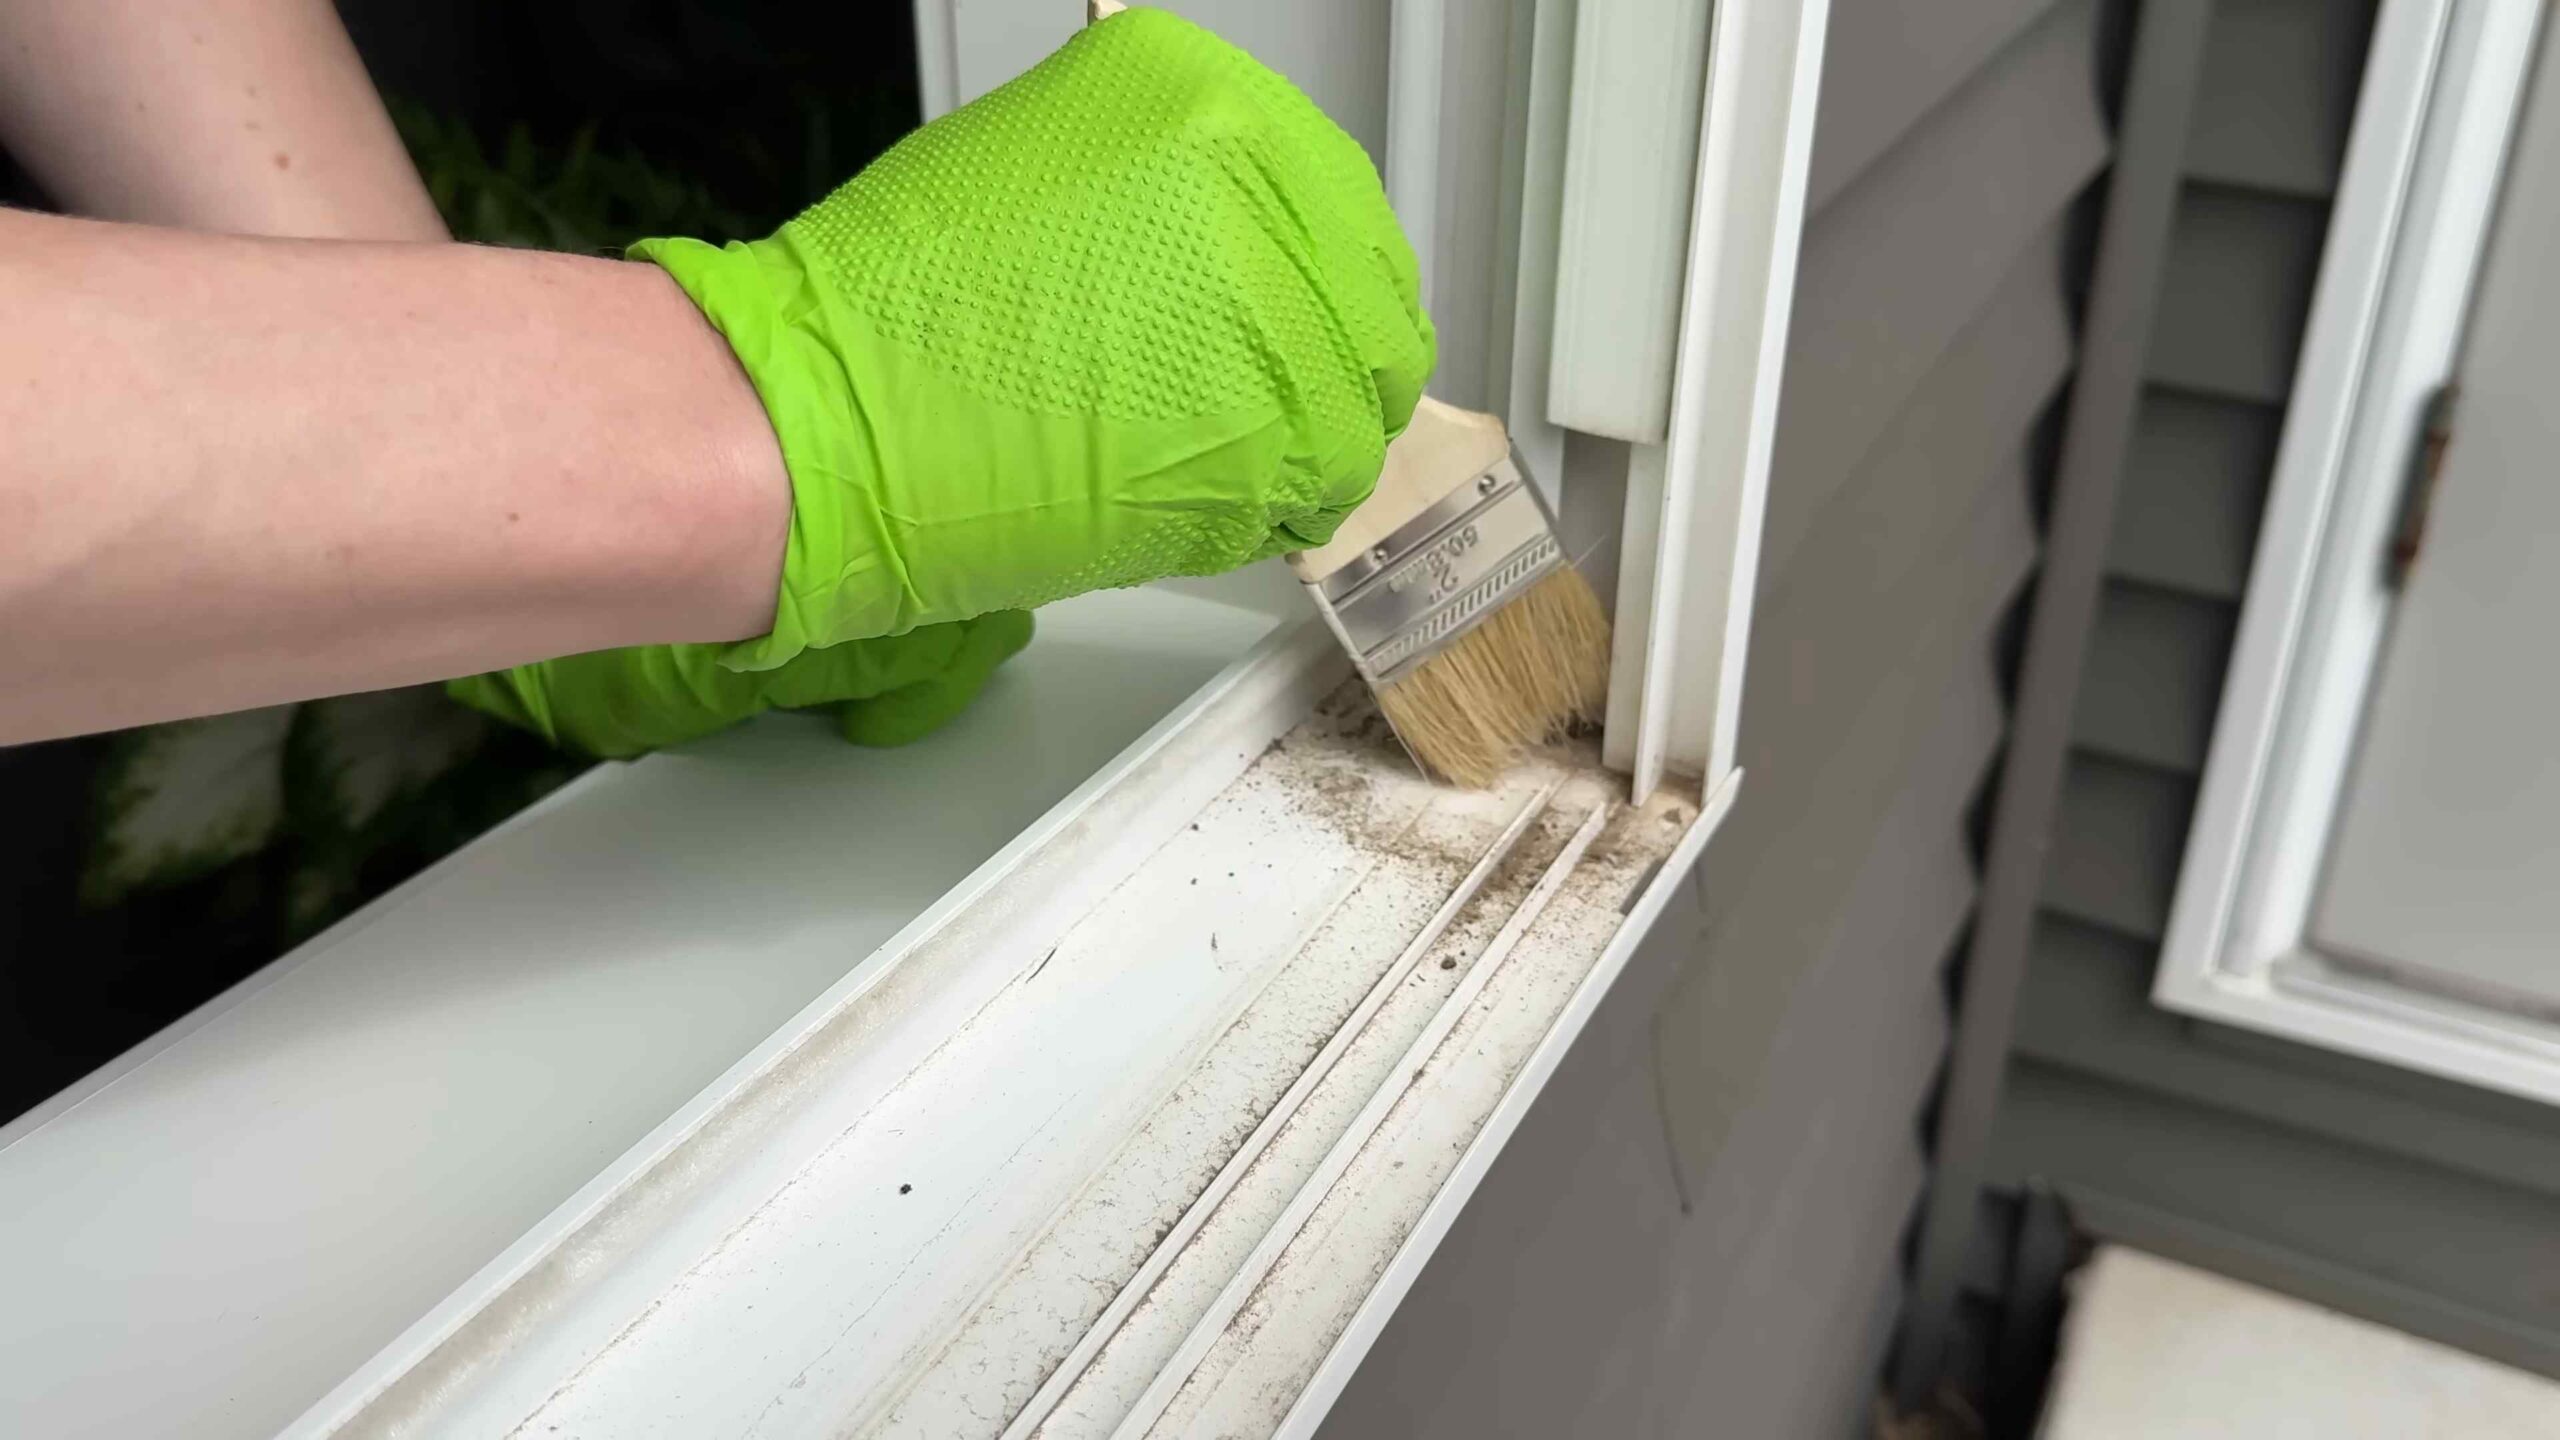
- Scrub the Tracks:
Grab your old toothbrush or small scrub brush and get to work! Dip the brush into your cleaning solution (or, if you used the vinegar and baking soda method, just use the existing paste) and scrub the window tracks thoroughly. Pay extra attention to the corners and any areas where grime is particularly stubborn. Use a circular motion to loosen the dirt.
- Scrape Away Stubborn Gunk:
For those really tough spots that the brush can’t handle, it’s time to bring out the putty knife or flathead screwdriver. Important: Wrap the blade of the putty knife or screwdriver in a soft cloth to prevent scratching the window tracks. Gently scrape away the stubborn gunk. Be patient and apply steady pressure. You might need to repeat this step a few times for particularly stubborn areas.
- Wipe Away the Dirt:
Now that you’ve scrubbed and scraped, it’s time to wipe away all the dirt and grime. Use a clean microfiber cloth or paper towel to wipe the window tracks thoroughly. Rinse the cloth frequently with clean water to avoid spreading the dirt around. If you’re using paper towels, use fresh ones as needed.
- Rinse and Dry:
Once you’ve wiped away all the dirt, it’s important to rinse the window tracks with clean water. You can do this by spraying the tracks with water from a spray bottle and then wiping them dry with a clean cloth. Alternatively, if you have a shop vac, you can use it to suck up any excess water. Make sure the tracks are completely dry to prevent mold and mildew growth.
- Clean the Corners with Q-tips:
Those corners can be tricky! Dip a Q-tip into your cleaning solution and use it to clean those hard-to-reach spots. This will ensure that every nook and cranny is sparkling clean.
- Repeat if Necessary:
If your window tracks were particularly dirty, you might need to repeat steps 3-7. Don’t be discouraged! Sometimes it takes a little extra elbow grease to get them looking their best.
- Final Wipe Down:
Once you’re satisfied with the cleanliness of your window tracks, give them one final wipe down with a clean, dry microfiber cloth. This will remove any remaining streaks or water spots.
Tackling Different Types of Window Track Grime
Sometimes, you’re not just dealing with regular dust and dirt. Here’s how I handle some specific types of window track grime:
Mold and Mildew
If you notice mold or mildew in your window tracks, it’s important to address it promptly. Mold can be harmful to your health, so take precautions.
- Wear gloves and a mask: Protect yourself from mold spores.
- Use a mold-killing cleaner: You can find these at most hardware stores. Follow the instructions on the bottle carefully.
- Vinegar and hydrogen peroxide: A natural alternative is to spray the affected area with vinegar, let it sit for a few minutes, and then spray with hydrogen peroxide. Let it sit for another few minutes, then scrub and wipe clean.
- Ensure proper ventilation: Open a window or use a fan to ventilate the area while you’re cleaning.
Sticky Residue
Sometimes, you might find sticky residue in your window tracks, especially if you have kids or pets.
- Goo Gone: This is a great product for removing sticky residue. Apply it to the affected area, let it sit for a few minutes, and then wipe clean.
- Rubbing alcohol: Rubbing alcohol can also be effective at removing sticky residue. Soak a cotton ball in rubbing alcohol and apply it to the sticky area. Let it sit for a few minutes, then wipe clean.
- Warm soapy water: For less stubborn sticky residue, warm soapy water might do the trick.
Hard Water Stains
Hard water stains can be unsightly and difficult to remove.
- Vinegar: Vinegar is a natural descaler and can be effective at removing hard water stains. Soak a cloth in vinegar and apply it to the affected area. Let it sit for a few minutes, then scrub and wipe clean.
- Lemon juice: Lemon juice is another natural descaler. Apply lemon juice to the affected area, let it sit for a few minutes, then scrub and wipe clean.
- Commercial hard water stain remover: If natural methods don’t work, you can try a commercial hard water stain remover. Follow the instructions on the bottle carefully.
Preventative Measures: Keeping Those Tracks Clean!
Now that your window tracks are sparkling clean, let’s talk about how to keep them that way!
- Regular Vacuuming: Vacuum your window tracks regularly (at least once a month) to remove loose dirt and debris.
- Wipe Up Spills Immediately: If you spill anything in your window tracks, wipe it up immediately to prevent it from drying and becoming sticky.
- Use Window Track Protectors: You can buy window track protectors that fit inside the tracks and catch dirt and debris. These are easy to remove and clean.
- Consider Weather Stripping: Properly installed weather stripping can help to prevent dirt and debris from entering your window tracks.
And there you have it! My complete guide to cleaning window tracks. It might seem like a lot of work,
Conclusion
So, there you have it! This simple, yet incredibly effective, window track cleaning hack is a game-changer for anyone tired of battling grimy, dust-filled window tracks. It’s not just about aesthetics; clean window tracks allow your windows to operate smoothly, preventing wear and tear on the mechanisms and potentially saving you money on repairs down the line. Think of it as preventative maintenance disguised as a satisfying cleaning project!
Why is this a must-try? Because it’s fast, affordable, and uses ingredients you likely already have in your home. No more expensive, harsh chemicals or specialized tools are needed. This DIY approach is gentle on your windows and the environment, making it a win-win situation. Plus, the immediate gratification of seeing those tracks transform from a dusty mess to sparkling clean is incredibly rewarding.
Beyond the Basics: Variations and Suggestions
While the core method of baking soda, vinegar, and a trusty brush is highly effective, feel free to experiment and adapt it to your specific needs. For particularly stubborn grime, let the baking soda and vinegar paste sit for a longer period – even overnight – before scrubbing. You can also add a few drops of your favorite essential oil, like lemon or tea tree, to the vinegar for an extra boost of cleaning power and a pleasant scent.
If you don’t have vinegar on hand, a solution of warm water and dish soap can work as a substitute, although it might require a bit more elbow grease. For those hard-to-reach corners, consider using a cotton swab or a thin, flexible tool like a butter knife wrapped in a microfiber cloth. Remember to always test any cleaning solution on a small, inconspicuous area first to ensure it doesn’t damage the window frame or track material.
Another variation involves using a vacuum cleaner with a brush attachment to remove loose debris before applying the cleaning paste. This can significantly reduce the amount of scrubbing required and prevent the paste from becoming overly muddy.
Your Turn: Embrace the Clean!
We wholeheartedly encourage you to give this window track cleaning hack a try. It’s a small investment of time that yields significant results. Imagine the satisfaction of opening and closing your windows with ease, knowing that the tracks are free of dirt and debris.
But don’t just take our word for it! We want to hear about your experiences. Did this hack work wonders for you? Did you discover any helpful variations or tips? Share your stories, photos, and feedback in the comments below. Let’s create a community of clean window enthusiasts and help each other achieve sparkling results! Your insights could be invaluable to others struggling with dirty window tracks. So go ahead, tackle those tracks, and let us know how it goes! We’re confident you’ll be amazed by the difference this simple DIY trick can make.
Frequently Asked Questions (FAQ)
Q: How often should I clean my window tracks?
A: The frequency of cleaning depends on several factors, including your location, the amount of dust and pollen in the air, and whether you have pets. As a general guideline, cleaning your window tracks every 3-6 months is a good starting point. However, if you live in a dusty area or have pets that shed a lot, you may need to clean them more frequently. Regularly inspecting your window tracks will help you determine the optimal cleaning schedule. If you notice a build-up of dirt and debris, it’s time for a cleaning session.
Q: What kind of brush is best for cleaning window tracks?
A: A small, stiff-bristled brush is ideal for cleaning window tracks. An old toothbrush works well for this purpose, as do specialized window track cleaning brushes that are available at most hardware stores. The key is to find a brush that is small enough to fit into the narrow tracks and has bristles that are stiff enough to dislodge dirt and grime. You can also use a small paint brush or even a detailing brush designed for cars.
Q: Can I use bleach to clean my window tracks?
A: While bleach is a powerful cleaning agent, it’s generally not recommended for cleaning window tracks. Bleach can be harsh on certain materials, such as vinyl and aluminum, and can cause discoloration or damage. It can also release harmful fumes, especially when mixed with other cleaning products. A safer and more effective alternative is the baking soda and vinegar method described above. If you do choose to use bleach, be sure to dilute it properly, wear gloves and eye protection, and ventilate the area well. Always test it on an inconspicuous area first.
Q: What if the baking soda and vinegar mixture doesn’t remove all the grime?
A: For particularly stubborn grime, you may need to repeat the cleaning process or try a different approach. Let the baking soda and vinegar paste sit for a longer period – even overnight – before scrubbing. You can also try using a stronger cleaning solution, such as a mixture of warm water and dish soap or a commercial window cleaner. If the grime is really caked on, you may need to use a scraper or a putty knife to loosen it before scrubbing. Be careful not to scratch the window frame or track material.
Q: How can I prevent my window tracks from getting dirty in the first place?
A: There are several things you can do to prevent your window tracks from getting dirty. Regularly vacuuming the area around your windows can help to remove dust and debris before it accumulates in the tracks. You can also use weather stripping to seal gaps around your windows and prevent dirt from entering. Regularly wiping down your window tracks with a damp cloth can also help to keep them clean. Consider using window screens to prevent insects and debris from entering your home.
Q: Is it safe to use this cleaning method on all types of window tracks?
A: This cleaning method is generally safe for most types of window tracks, including vinyl, aluminum, and wood. However, it’s always a good idea to test any cleaning solution on a small, inconspicuous area first to ensure it doesn’t damage the material. If you have painted window tracks, be especially careful not to scrub too hard, as this can remove the paint. For wooden window tracks, avoid using excessive amounts of water, as this can cause the wood to warp or rot.
Q: Can I use a power washer to clean my window tracks?
A: While a power washer can be tempting for quickly blasting away dirt and grime, it’s generally not recommended for cleaning window tracks. The high pressure of the water can damage the window frame, track material, and even the window itself. It can also force water into the walls and cause mold growth. A safer and more effective approach is to use the baking soda and vinegar method described above.
Q: What if my window tracks are rusty?
A: If your window tracks are rusty, you may need to use a rust remover to clean them. There are many commercial rust removers available, or you can make your own by mixing lemon juice and salt. Apply the rust remover to the affected area and let it sit for a few minutes before scrubbing with a brush. Be sure to rinse the area thoroughly with water after cleaning. You may also need to apply a rust inhibitor to prevent the rust from returning.
Q: My window tracks have mold growing in them. How do I get rid of it?
A: Mold growth in window tracks can be a sign of moisture problems. To remove mold, mix equal parts of bleach and water. Apply the solution to the affected area and let it sit for 10-15 minutes before scrubbing with a brush. Be sure to wear gloves and eye protection when working with bleach. Rinse the area thoroughly with water after cleaning. To prevent mold from returning, address the underlying moisture problem by improving ventilation or sealing any leaks. You can also use a mold inhibitor to prevent future growth.


Leave a Comment