

Growing Bell Peppers in Pots might seem daunting, but trust me, it’s easier than you think! Have you ever dreamed of stepping outside your door and picking fresh, vibrant bell peppers for your dinner? Imagine the satisfaction of knowing exactly where your food comes from and the joy of nurturing something from seed to table. That’s the magic of home gardening, and it’s totally achievable, even without a sprawling backyard.
Bell peppers have a rich history, originating in South America and spreading throughout the world thanks to explorers. They’ve been a culinary staple for centuries, adding color and flavor to dishes across countless cultures. But you don’t need to be a seasoned farmer to enjoy their deliciousness.
In today’s busy world, knowing how to grow your own food, even in a small space, is more important than ever. Not only does it provide you with fresh, healthy produce, but it also connects you to nature and offers a rewarding hobby. Plus, let’s be honest, store-bought bell peppers can sometimes be bland and expensive. With these simple DIY tricks and hacks, I’m going to show you how to successfully start growing bell peppers in pots, saving you money and providing you with the tastiest peppers you’ve ever had. Get ready to unleash your inner gardener!
Growing Bell Peppers in Pots: A Beginner’s Guide
Hey there, fellow gardening enthusiasts! I’m so excited to share my experience with growing bell peppers in pots. It’s easier than you might think, and the satisfaction of harvesting your own colorful, crunchy peppers is truly rewarding. I’ve learned a few tricks along the way, and I’m happy to guide you through the process. Let’s get started!
Choosing the Right Pot and Soil
Before we even think about seeds, let’s talk about the foundation of our pepper-growing adventure: the pot and the soil.
* Pot Size Matters: Bell peppers need room to spread their roots. I recommend a pot that’s at least 12 inches in diameter and 12 inches deep. A 5-gallon pot is a good starting point, but bigger is always better! The larger the pot, the more room for root growth, and the more peppers you’re likely to get.
* Drainage is Key: Make sure your pot has drainage holes! Bell peppers hate sitting in soggy soil. If your pot doesn’t have enough drainage, you can drill a few extra holes in the bottom.
* Choosing the Right Soil: Don’t just grab any old dirt from your backyard! Bell peppers thrive in well-draining, nutrient-rich soil. I prefer using a potting mix specifically formulated for vegetables. These mixes usually contain a blend of peat moss, perlite, and vermiculite, which provide excellent drainage and aeration. You can also amend your potting mix with compost or aged manure for an extra boost of nutrients.
Starting Your Bell Pepper Seeds (or Buying Seedlings)
You have two main options here: starting your own seeds or buying seedlings from a nursery. Both have their pros and cons.
* Starting from Seed: This is the more economical option, and it gives you a wider variety of pepper choices. However, it requires more time and effort. Bell pepper seeds need to be started indoors 6-8 weeks before the last expected frost.
* Buying Seedlings: This is the easier and faster option. You can find healthy bell pepper seedlings at most garden centers in the spring. Just make sure to choose plants that are sturdy, green, and free from pests or diseases.
Step-by-Step Guide: Starting from Seed
If you’re feeling adventurous, let’s start those seeds!
1. Gather Your Supplies: You’ll need bell pepper seeds, seed starting trays or small pots, seed starting mix, a spray bottle, and a heat mat (optional but recommended).
2. Sow the Seeds: Fill your seed starting trays or pots with seed starting mix. Moisten the mix with the spray bottle. Sow the seeds about 1/4 inch deep, and gently cover them with more mix.
3. Provide Warmth and Light: Bell pepper seeds need warmth to germinate. Place the trays or pots on a heat mat, if you have one. Otherwise, find a warm spot in your house. You’ll also need to provide plenty of light. A sunny windowsill is okay, but a grow light is even better.
4. Keep the Soil Moist: Don’t let the soil dry out! Mist the soil with the spray bottle whenever it feels dry to the touch.
5. Transplant the Seedlings: Once the seedlings have developed their first set of true leaves (the leaves that look like miniature pepper leaves), it’s time to transplant them into larger pots. Gently remove the seedlings from the seed starting trays or pots, and transplant them into 4-inch pots filled with potting mix.
Step-by-Step Guide: Planting Seedlings
If you opted for seedlings, here’s how to get them planted in their final pots:
1. Prepare the Pot: Fill your chosen pot (at least 12 inches in diameter) with potting mix, leaving a few inches of space at the top.
2. Remove the Seedling: Gently remove the seedling from its container. If the roots are tightly bound, gently loosen them with your fingers.
3. Plant the Seedling: Dig a hole in the potting mix that’s large enough to accommodate the seedling’s root ball. Place the seedling in the hole, and backfill with potting mix. Make sure the top of the root ball is level with the surrounding soil.
4. Water Thoroughly: Water the seedling thoroughly after planting. This will help settle the soil and encourage root growth.
Caring for Your Bell Pepper Plants
Now that your bell pepper plants are in their pots, it’s time to provide them with the care they need to thrive.
* Sunlight: Bell peppers need at least 6-8 hours of sunlight per day. Place your pots in a sunny location, such as a patio, balcony, or deck. If you don’t have a sunny spot, you can supplement with a grow light.
* Watering: Water your bell pepper plants regularly, especially during hot, dry weather. The soil should be consistently moist, but not soggy. Check the soil moisture by sticking your finger into the soil. If the top inch of soil feels dry, it’s time to water.
* Fertilizing: Bell peppers are heavy feeders, so they need regular fertilization. I recommend using a balanced fertilizer (such as 10-10-10) every 2-3 weeks. You can also use a liquid fertilizer, such as fish emulsion or seaweed extract, every week.
* Support: As your bell pepper plants grow, they may need support to prevent them from falling over. You can use stakes, cages, or trellises to provide support.
* Pruning: Pruning can help improve air circulation and encourage fruit production. Remove any suckers (small shoots that grow from the base of the plant) and any yellowing or diseased leaves.
* Pest and Disease Control: Keep an eye out for pests and diseases. Common pests of bell peppers include aphids, spider mites, and whiteflies. Common diseases include blossom end rot and fungal infections. If you notice any pests or diseases, take action immediately. You can use insecticidal soap or neem oil to control pests, and fungicide to control diseases.
Dealing with Blossom End Rot
Blossom end rot is a common problem with bell peppers, especially when they’re grown in pots. It’s caused by a calcium deficiency, which can be exacerbated by inconsistent watering. The bottom of the pepper will turn brown and leathery.
* Consistent Watering: The most important thing you can do to prevent blossom end rot is to water your bell pepper plants consistently. Don’t let the soil dry out completely, and don’t overwater.
* Calcium Supplement: You can also add a calcium supplement to the soil. Bone meal or eggshells are good sources of calcium. You can also use a commercial calcium supplement.
* Foliar Spray: A foliar spray of calcium chloride can also help prevent blossom end rot.
Harvesting Your Bell Peppers
The moment you’ve been waiting for! Harvesting your own bell peppers is so satisfying.
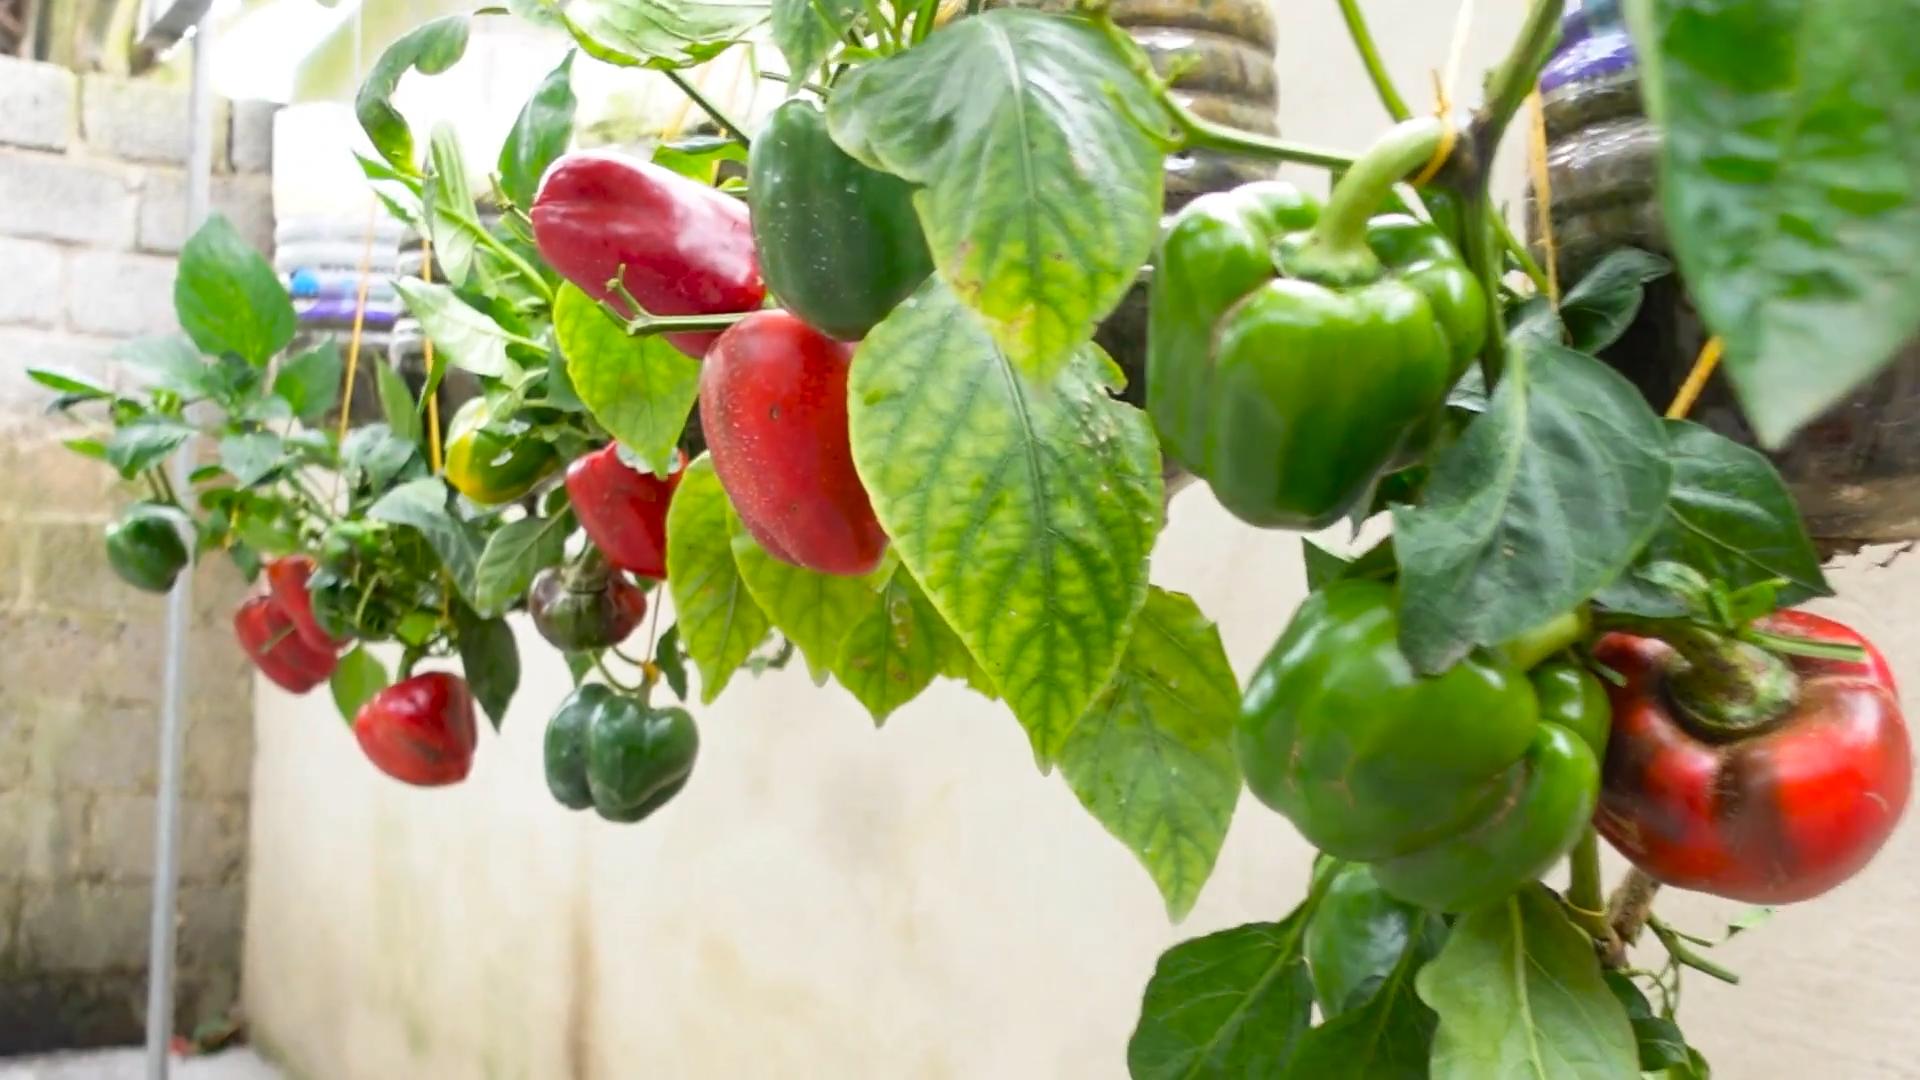
* When to Harvest: Bell peppers can be harvested at any stage of maturity. Green bell peppers are less ripe and have a slightly bitter taste. Red, yellow, and orange bell peppers are fully ripe and have a sweeter taste.
* How to Harvest: Use a sharp knife or pruning shears to cut the bell pepper from the plant. Leave a small stem attached to the pepper.
Troubleshooting Tips
Even with the best care, you might encounter some challenges along the way. Here are a few troubleshooting tips:
* Yellowing Leaves: Yellowing leaves can be caused by a variety of factors, including nutrient deficiencies, overwatering, and underwatering. Check the soil moisture and fertilize your plants if necessary.
* Lack of Fruit: A lack of fruit can be caused by a lack of pollination, insufficient sunlight, or extreme temperatures. Make sure your plants are getting enough sunlight, and hand-pollinate the flowers if necessary.
* Small Peppers: Small peppers can be caused by a lack of nutrients or water. Fertilize your plants regularly and water them consistently.
Choosing Your Bell Pepper Variety
There are so many bell pepper varieties to choose from! Here are a few of my favorites:
* California Wonder: This is a classic green bell pepper that’s perfect for stuffing.
* Yolo Wonder: Another popular green bell pepper that’s known for its disease resistance.
* Golden Bell: A sweet and flavorful yellow bell pepper.
* Red Knight: A beautiful red bell pepper that’s perfect for salads.
* Purple Beauty: A unique purple bell pepper that adds a pop of color to your garden.
Extending the Growing Season
If you live in a cooler climate, you can extend the growing season by using a few simple techniques:
* Start Seeds Indoors Early: Start your bell pepper seeds indoors 8-10 weeks before the last expected frost.
* Use a Cold Frame or Greenhouse:

Conclusion
So, there you have it! Growing bell peppers in pots is not only achievable, but it can be incredibly rewarding. We’ve walked through the essential steps, from selecting the right pot and soil to providing adequate sunlight and consistent watering. The beauty of this method lies in its accessibility and adaptability. Whether you have a sprawling garden or a tiny balcony, you can enjoy the satisfaction of harvesting your own vibrant, flavorful bell peppers.
This isn’t just about saving money at the grocery store; it’s about connecting with nature, understanding the growing process, and enjoying the unparalleled taste of homegrown produce. Imagine the pride you’ll feel serving a salad featuring bell peppers you nurtured from seedling to maturity. Think of the delicious stuffed peppers, fajitas, and countless other dishes you can create with your own fresh harvest.
But the real magic happens when you personalize the process. Experiment with different bell pepper varieties. Try growing a mix of colors – red, yellow, orange, and even purple – for a visually stunning and diverse harvest. Consider companion planting. Basil, for example, is known to deter pests and improve the flavor of bell peppers. Marigolds are another excellent choice for pest control.
Don’t be afraid to get creative with your container gardening setup. Use repurposed materials like old buckets or even grow bags. Just ensure they have adequate drainage. You can also explore different soil amendments to tailor the growing medium to your specific bell pepper variety. Some varieties might prefer slightly more acidic soil, while others thrive in a more neutral environment.
The key to success with growing bell peppers in pots is observation. Pay close attention to your plants. Monitor their growth, check for pests or diseases, and adjust your watering and fertilizing schedule as needed. Remember, every plant is unique, and what works for one might not work for another.
We’ve provided you with a solid foundation, but the real learning happens through experience. So, grab a pot, some soil, and a bell pepper seedling, and get started! Don’t be discouraged if you encounter challenges along the way. Gardening is a journey of learning and discovery.
We are confident that you will find the experience of growing bell peppers in pots to be both enjoyable and fulfilling. And we encourage you to share your experiences with us! Post photos of your bell pepper plants, share your tips and tricks, and let us know what varieties you’re growing. Let’s create a community of bell pepper enthusiasts and learn from each other.
Start your bell pepper journey today and taste the difference homegrown makes! We can’t wait to hear about your success.
Frequently Asked Questions (FAQ)
What is the best size pot for growing bell peppers?
A pot that is at least 12 inches in diameter and 12 inches deep is generally recommended for growing bell peppers. However, larger pots (14-16 inches) are even better, as they provide more room for the roots to grow and allow for better water retention. A larger pot also reduces the frequency of watering, which can be particularly helpful during hot summer months. Remember to choose a pot with drainage holes to prevent waterlogging, which can lead to root rot.
What type of soil is best for bell peppers in pots?
Bell peppers thrive in well-draining, nutrient-rich soil. A good potting mix specifically formulated for vegetables is ideal. Avoid using garden soil, as it can be too heavy and compact in containers, hindering root growth and drainage. You can also create your own potting mix by combining equal parts of peat moss (or coconut coir), perlite, and compost. Adding a slow-release fertilizer to the potting mix at planting time will provide a steady supply of nutrients to your bell pepper plants.
How much sunlight do bell peppers need?
Bell peppers require at least 6-8 hours of direct sunlight per day to produce a good harvest. Choose a sunny location for your potted bell peppers, such as a south-facing balcony or patio. If you live in a particularly hot climate, providing some afternoon shade can help prevent the plants from getting scorched. If you don’t have enough natural sunlight, you can supplement with grow lights.
How often should I water my bell peppers in pots?
Water bell peppers regularly, especially during hot, dry weather. The soil should be kept consistently moist, but not waterlogged. Check the soil moisture by sticking your finger about an inch deep into the soil. If it feels dry, it’s time to water. Water deeply, until water drains out of the drainage holes. Avoid overhead watering, as this can promote fungal diseases. Instead, water at the base of the plant.
What kind of fertilizer should I use for bell peppers?
Bell peppers are heavy feeders and benefit from regular fertilization. Use a balanced fertilizer (e.g., 10-10-10) or a fertilizer specifically formulated for vegetables. Follow the instructions on the fertilizer label for application rates. You can also use organic fertilizers, such as compost tea or fish emulsion. Fertilize every 2-3 weeks during the growing season.
How do I prevent pests and diseases on my bell peppers?
Regularly inspect your bell pepper plants for pests and diseases. Common pests include aphids, whiteflies, and spider mites. You can control these pests with insecticidal soap or neem oil. Fungal diseases, such as powdery mildew and blossom end rot, can be prevented by providing good air circulation, avoiding overhead watering, and ensuring proper calcium levels in the soil. If you notice any signs of disease, treat the plants promptly with a fungicide.
When can I harvest my bell peppers?
Bell peppers are typically ready to harvest 60-90 days after transplanting, depending on the variety. The peppers should be firm, glossy, and fully colored. You can harvest them at any stage of ripeness, but they will be sweetest and most flavorful when fully ripe. Use pruning shears or a sharp knife to cut the peppers from the plant, leaving a short stem attached.
Can I overwinter my bell pepper plants?
In colder climates, you can overwinter your bell pepper plants indoors. Before the first frost, prune the plants back to about 6-8 inches tall and transplant them into smaller pots. Bring the plants indoors and place them in a sunny location. Water sparingly during the winter months. In the spring, gradually acclimate the plants to outdoor conditions before transplanting them back into larger pots or the garden.
Why are my bell pepper flowers falling off?
Bell pepper flower drop can be caused by several factors, including high temperatures, low temperatures, insufficient pollination, and nutrient deficiencies. Ensure that your plants are getting adequate sunlight, water, and fertilizer. You can also try hand-pollinating the flowers by gently shaking the plants or using a small paintbrush to transfer pollen from one flower to another.
Can I grow different varieties of bell peppers in the same pot?
While it’s technically possible to grow multiple bell pepper plants in a single large pot, it’s generally not recommended. Each plant will compete for resources, such as water, nutrients, and sunlight, which can result in smaller yields and less healthy plants. It’s best to give each bell pepper plant its own pot to ensure optimal growth and productivity. However, if you have a very large container, you could try planting two smaller varieties together, but monitor them closely.
Leave a Comment