

Clean Humidifier DIY Guide: Breathe Easy with These Simple Tricks! Are you tired of that musty smell wafting from your humidifier? Or maybe you’re just concerned about the invisible nasties lurking within? I get it! A humidifier is a fantastic tool for combating dry air, especially during those harsh winter months, but a dirty one can actually do more harm than good.
Humidifiers have been around for centuries, with early forms used in ancient civilizations to preserve precious artifacts and create comfortable environments. Today, they’re a staple in many homes, but their effectiveness hinges on one crucial factor: cleanliness. Neglecting to properly clean your humidifier can lead to the growth of mold, bacteria, and mineral buildup, all of which can be dispersed into the air you breathe. Yikes!
That’s where this Clean Humidifier DIY Guide comes in! I’m going to walk you through some super simple, cost-effective methods to keep your humidifier sparkling clean and functioning optimally. No need for expensive cleaning solutions or complicated procedures. These DIY tricks will not only improve the air quality in your home but also extend the lifespan of your humidifier. Let’s dive in and make sure you’re breathing easy and healthy!
DIY Deep Clean: Breathe Easy with a Sparkling Humidifier
Hey there, fellow DIY enthusiasts! Are you tired of that funky smell coming from your humidifier? Or maybe you’re just worried about all the gunk that’s building up inside? Don’t worry, I’ve got you covered! Cleaning your humidifier regularly is super important for your health and to keep it running smoothly. Trust me, a clean humidifier makes a HUGE difference in air quality and can even help you sleep better. So, let’s dive into this step-by-step guide to get your humidifier sparkling clean!
What You’ll Need
Before we get started, let’s gather our supplies. You probably already have most of these things lying around the house, which is always a win!
* White Vinegar: This is our star player! Vinegar is a natural disinfectant and does a fantastic job of breaking down mineral buildup and killing bacteria.
* Water: Plain old tap water will do.
* Mild Dish Soap: Just a little bit to help cut through any stubborn grime.
* Soft-Bristled Brush: An old toothbrush, bottle brush, or even a small cleaning brush works great for scrubbing those hard-to-reach areas.
* Clean Rags or Paper Towels: For wiping and drying.
* Gloves (Optional): If you have sensitive skin, gloves can protect your hands from the vinegar.
* Q-tips (Optional): For getting into really tiny crevices.
* Sink or Tub: Somewhere to easily rinse and soak the humidifier parts.
Disassembling Your Humidifier
Okay, let’s get our hands dirty! The first step is to take your humidifier apart. Every model is a little different, so refer to your humidifier’s instruction manual if you’re unsure about anything. But generally, here’s what you’ll do:
1. Unplug the Humidifier: This is super important for safety! Make sure the humidifier is completely disconnected from the power outlet before you start taking it apart.
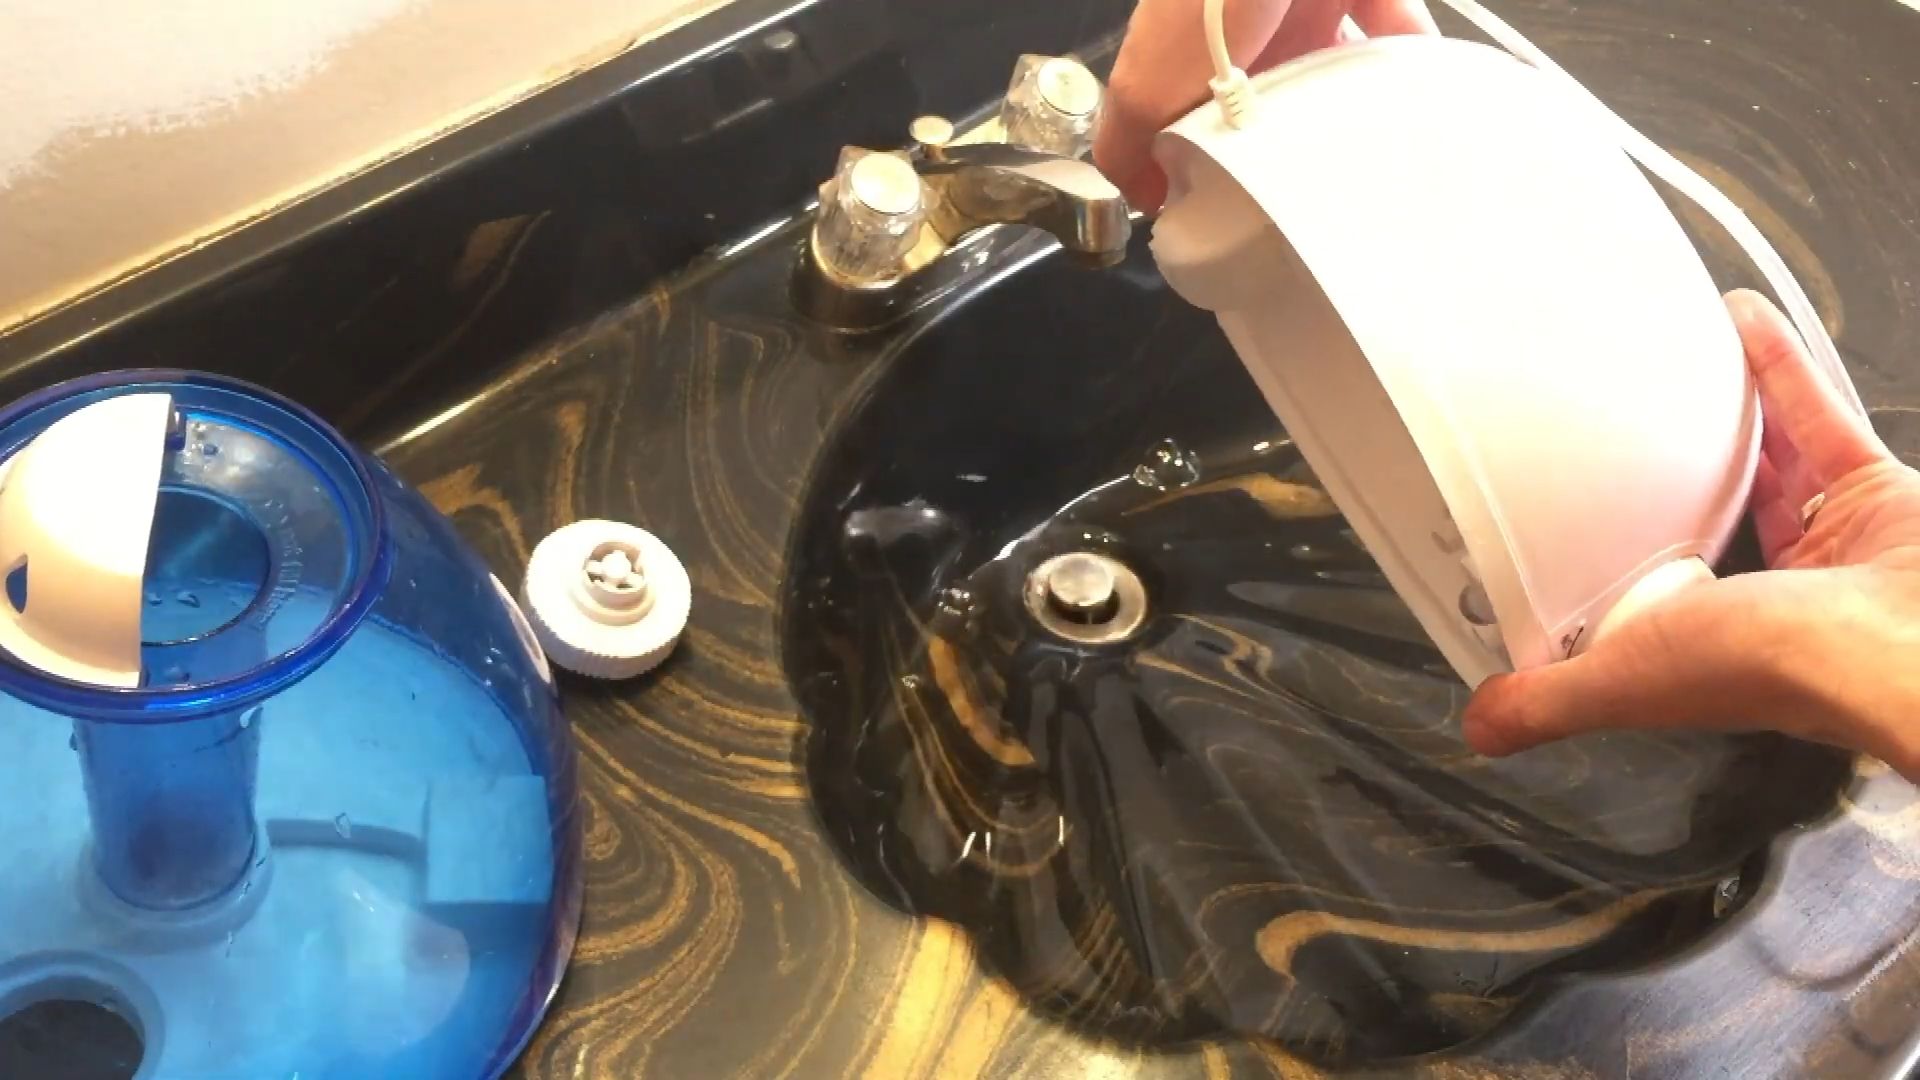
2. Empty the Water Tank: Pour out any remaining water from the tank and the base. You don’t want any stagnant water hanging around.
3. Remove the Water Tank: Most humidifiers have a removable water tank. Simply lift it off the base.
4. Disassemble Other Removable Parts: Look for any other parts that can be easily removed, such as a mist nozzle, a water tray, or a filter. Take these out as well.
5. Consult Your Manual: If you’re unsure about how to remove a particular part, check your humidifier’s manual. It should have detailed instructions and diagrams.
Cleaning the Water Tank
The water tank is where all the action happens, so it’s usually the dirtiest part. Let’s give it a good scrub!
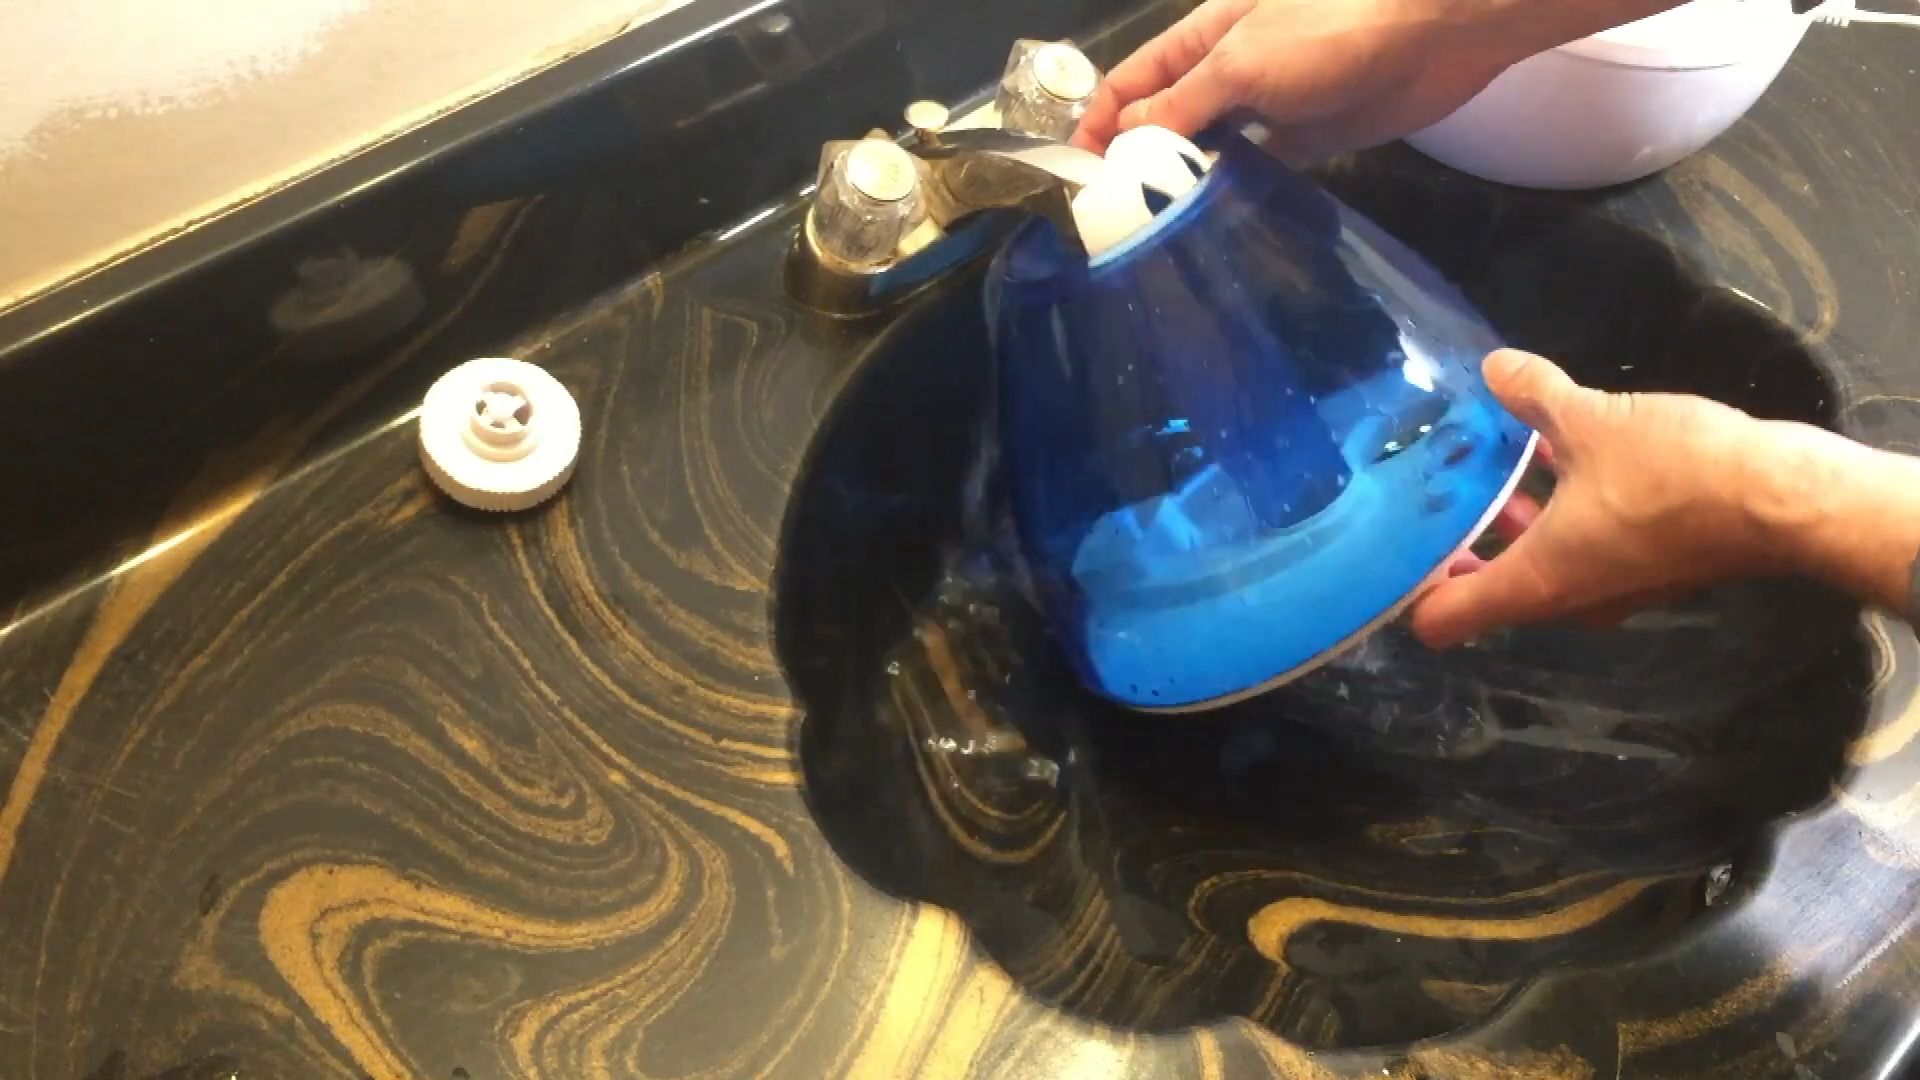
1. Rinse the Tank: Start by rinsing the water tank with clean water to remove any loose debris.
2. Vinegar Soak: Fill the tank with equal parts white vinegar and water. Make sure the solution reaches all the areas that come into contact with water.
3. Soak for at Least 30 Minutes: Let the vinegar solution sit in the tank for at least 30 minutes, or even longer if there’s a lot of mineral buildup. I sometimes let mine soak overnight for a really deep clean.
4. Scrub the Tank: After soaking, use your soft-bristled brush to scrub the inside of the tank. Pay special attention to any areas with visible mineral deposits or mold.
5. Rinse Thoroughly: Rinse the tank several times with clean water until all traces of vinegar are gone. You don’t want your humidifier smelling like vinegar!
6. Inspect and Repeat if Necessary: If you still see any stubborn buildup, repeat the soaking and scrubbing process.
Cleaning the Humidifier Base
The base of the humidifier is another area that can accumulate a lot of gunk. Let’s get it clean!
1. Rinse the Base: Rinse the base with clean water to remove any loose debris.
2. Vinegar Solution: In a separate container, mix a solution of equal parts white vinegar and water.
3. Wipe Down the Base: Dip a clean rag or paper towel into the vinegar solution and wipe down all the surfaces of the base, including the water tray and any other nooks and crannies.
4. Scrub Hard-to-Reach Areas: Use your soft-bristled brush or Q-tips to scrub any hard-to-reach areas, such as the mist outlet or the water level sensor.
5. Clean the Transducer (If Applicable): Some humidifiers have a transducer, which is a small metal disc that vibrates to create mist. This part can be particularly prone to mineral buildup. Gently clean the transducer with a soft-bristled brush and the vinegar solution. Be careful not to scratch or damage it.
6. Rinse Thoroughly: Rinse the base several times with clean water until all traces of vinegar are gone.
7. Dry the Base: Use a clean rag or paper towel to dry the base thoroughly.
Cleaning Other Removable Parts
Don’t forget about those other removable parts! They need some love too.
1. Soak in Vinegar Solution: Place all the removable parts in a container filled with the vinegar solution.
2. Soak for at Least 30 Minutes: Let them soak for at least 30 minutes to loosen any buildup.
3. Scrub and Rinse: Scrub each part with your soft-bristled brush and rinse them thoroughly with clean water.
4. Dry Thoroughly: Make sure all the parts are completely dry before reassembling the humidifier.
Disinfecting with Bleach (Optional, Use with Caution!)
If you’re dealing with a particularly stubborn case of mold or mildew, you can use a diluted bleach solution to disinfect the humidifier. However, use bleach with extreme caution and always follow these guidelines:
1. Dilute the Bleach: Mix 1 teaspoon of bleach with 1 gallon of water. Never use concentrated bleach!
2. Apply the Bleach Solution: Use a clean rag or paper towel to apply the bleach solution to the affected areas.
3. Let it Sit for 5 Minutes: Allow the bleach solution to sit for about 5 minutes to disinfect the surfaces.
4. Rinse Thoroughly: Rinse the humidifier parts very thoroughly with clean water until all traces of bleach are gone. This is crucial! Bleach residue can be harmful if inhaled.
5. Dry Thoroughly: Make sure all the parts are completely dry before reassembling the humidifier.
Important Note: I personally prefer to stick with vinegar for cleaning my humidifier, as it’s a safer and more natural option. But if you choose to use bleach, be sure to follow the instructions carefully and rinse thoroughly.
Reassembling Your Humidifier
Now that all the parts are clean and dry, it’s time to put everything back together!
1. Reassemble the Parts: Carefully reassemble all the parts of the humidifier, following the instructions in your humidifier’s manual.
2. Ensure Proper Alignment: Make sure all the parts are properly aligned and securely in place.
3. Fill the Water Tank: Fill the water tank with clean, distilled water. Distilled water helps to prevent mineral buildup in the humidifier.
4. Plug in the Humidifier: Plug the humidifier back into the power outlet.
5. Test the Humidifier: Turn on the humidifier and make sure it’s working properly.
Tips for Maintaining a Clean Humidifier
Cleaning your humidifier regularly is key to keeping it running smoothly and preventing the growth of mold and bacteria. Here are some tips to help you maintain a clean humidifier:
* Empty and Dry Daily: Empty the water tank and base every day and let them air dry. This will help to prevent the growth of mold and bacteria.
* Clean Weekly: Clean your humidifier thoroughly at least once a week, following the steps outlined above.
* Use Distilled Water: Use distilled water instead of tap water to prevent mineral buildup.
* Replace Filters Regularly: If your humidifier has a filter, replace it regularly according to the manufacturer’s instructions.
* Store Properly: When you’re not using your humidifier, store it in a clean, dry place.
Troubleshooting Common Humidifier Problems
Even with regular cleaning, you might encounter some common humidifier problems. Here are a few troubleshooting tips:
* Humidifier Not Producing Mist: Check the water level, make sure the humidifier is plugged in, and clean the transducer.
* Humidifier Smells Bad: Clean the humidifier thoroughly with vinegar or a diluted bleach solution.
* Humidifier is Le
Conclusion
So, there you have it! A simple, effective, and budget-friendly way to keep your humidifier sparkling clean and functioning optimally. We’ve walked you through the steps, highlighting the importance of regular cleaning to prevent the build-up of harmful bacteria and mold that can negate the very purpose of using a humidifier in the first place. Remember, a clean humidifier is a healthy humidifier, contributing to cleaner air and a more comfortable living environment, especially during dry seasons or when battling allergies.
This DIY humidifier cleaning method isn’t just about saving money; it’s about taking control of your indoor air quality and ensuring the well-being of yourself and your family. The commercial cleaning solutions can be harsh and expensive, often containing chemicals you might prefer to avoid. Our method utilizes readily available household ingredients like white vinegar and hydrogen peroxide, making it a safer and more environmentally conscious choice.
But don’t just take our word for it! We strongly encourage you to try this DIY humidifier cleaning trick for yourself. You’ll be amazed at the difference it makes. Not only will your humidifier run more efficiently, but you’ll also notice a significant improvement in the air quality.
Looking for variations? Consider adding a few drops of tea tree oil or eucalyptus oil to the water reservoir after cleaning for an extra boost of freshness and antimicrobial properties. Just be sure to use essential oils sparingly and only if your humidifier is designed to handle them. Another variation is to use a diluted bleach solution (always handle bleach with extreme care and ensure thorough rinsing) for particularly stubborn mineral deposits, but vinegar and hydrogen peroxide are generally sufficient for regular maintenance. For ultrasonic humidifiers, pay special attention to the transducer, gently cleaning it with a soft brush or cotton swab to remove any mineral buildup that can affect its performance.
We’re confident that this DIY humidifier cleaning guide will become an essential part of your home maintenance routine. It’s a small investment of time that yields significant returns in terms of health, comfort, and the longevity of your humidifier.
Now, we want to hear from you! Have you tried this method? What were your results? Do you have any tips or tricks of your own to share? Please leave a comment below and let us know your experience. Your feedback will not only help other readers but also contribute to refining this guide and making it even more helpful. Let’s work together to create a community of clean air enthusiasts! Share your before-and-after photos, your favorite cleaning hacks, and any challenges you encountered. We’re all in this together, breathing easier one clean humidifier at a time. Don’t forget to share this article with your friends and family who could benefit from this simple yet powerful DIY humidifier cleaning solution. A cleaner humidifier means a healthier home for everyone!
Frequently Asked Questions (FAQ)
Why is it so important to clean my humidifier regularly?
Regular cleaning of your humidifier is absolutely crucial for several reasons. First and foremost, humidifiers create a moist environment that is ideal for the growth of bacteria, mold, and mildew. These microorganisms can then be dispersed into the air you breathe, potentially leading to respiratory problems, allergies, and other health issues. Secondly, mineral deposits from hard water can build up inside the humidifier, reducing its efficiency and potentially damaging its components. Finally, a dirty humidifier can simply smell unpleasant, negating the benefits of using it in the first place. Think of it like this: you wouldn’t drink water from a dirty glass, so why would you want to breathe air from a dirty humidifier? Regular cleaning ensures that your humidifier is providing clean, healthy moisture to your home.
How often should I clean my humidifier?
The frequency of cleaning depends on how often you use your humidifier and the type of water you use. As a general rule, you should aim to clean your humidifier at least once a week. If you use your humidifier daily or use hard water, you may need to clean it more frequently, perhaps every 2-3 days. Always refer to your humidifier’s manufacturer instructions for specific cleaning recommendations. A good practice is to empty and dry the humidifier daily to prevent stagnant water from becoming a breeding ground for bacteria. When in doubt, err on the side of caution and clean it more often than you think you need to.
What type of vinegar should I use for cleaning?
Plain white vinegar is the best choice for cleaning your humidifier. It’s readily available, inexpensive, and effective at dissolving mineral deposits and killing bacteria. Avoid using flavored vinegars or cleaning vinegars with added scents or chemicals, as these can leave behind residues that could be harmful or unpleasant. The acidity of white vinegar is what makes it so effective at cleaning, so stick with the standard 5% acidity level.
Is hydrogen peroxide safe to use in my humidifier?
Yes, hydrogen peroxide is generally safe to use in your humidifier as a cleaning agent, but it’s important to use it properly. Always dilute the hydrogen peroxide with water, typically a 1:1 ratio. Avoid using concentrated hydrogen peroxide, as it can be corrosive. After cleaning with hydrogen peroxide, be sure to rinse the humidifier thoroughly with clean water to remove any residue. Hydrogen peroxide is a good alternative to bleach for those who prefer a less harsh cleaning solution.
Can I use essential oils in my humidifier?
Whether or not you can use essential oils in your humidifier depends on the type of humidifier you have. Some humidifiers, particularly those designed for aromatherapy, are specifically made to be used with essential oils. However, other humidifiers, especially ultrasonic humidifiers, may be damaged by essential oils. The oils can clog the humidifier’s components or degrade the plastic. Always check your humidifier’s manufacturer instructions before adding essential oils. If your humidifier is not designed for essential oils, consider using a diffuser instead.
What if I have hard water? Will that affect the cleaning process?
Yes, hard water can significantly affect the cleaning process. Hard water contains high levels of minerals, such as calcium and magnesium, which can leave behind stubborn deposits inside your humidifier. If you have hard water, you may need to clean your humidifier more frequently and use a stronger vinegar solution. You can also consider using distilled water in your humidifier to prevent mineral buildup. Distilled water is free of minerals and will help keep your humidifier cleaner for longer. Another option is to use a water softening system in your home.
How do I clean the small, hard-to-reach areas of my humidifier?
Cleaning the small, hard-to-reach areas of your humidifier can be challenging, but it’s important to do so to ensure thorough cleaning. Use a small brush, such as a toothbrush or bottle brush, to scrub these areas. Cotton swabs can also be helpful for cleaning tight corners and crevices. For particularly stubborn deposits, you can soak the affected area in a vinegar solution for a longer period of time. Make sure to rinse thoroughly after cleaning to remove any residue.
What if my humidifier still smells after cleaning?
If your humidifier still smells after cleaning, it could be due to lingering bacteria or mold. Try cleaning it again, paying close attention to all the nooks and crannies. You can also try using a stronger vinegar solution or adding a few drops of tea tree oil or eucalyptus oil to the water reservoir after cleaning (if your humidifier is designed for essential oils). Make sure to let the humidifier air dry completely after cleaning to prevent moisture buildup. If the smell persists, it may be time to replace your humidifier.
How can I prevent my humidifier from getting dirty so quickly?
There are several things you can do to prevent your humidifier from getting dirty so quickly. First, use distilled water instead of tap water. Distilled water is free of minerals and will help prevent mineral buildup. Second, empty and dry your humidifier daily to prevent stagnant water from becoming a breeding ground for bacteria. Third, clean your humidifier regularly, even if it doesn’t look dirty. Finally, store your humidifier in a clean, dry place when not in use.
Is it okay to put my humidifier parts in the dishwasher?
Whether or not you can put your humidifier parts in the dishwasher depends on the type of humidifier you have and the specific parts in question. Always refer to your humidifier’s manufacturer instructions for guidance. Some humidifier parts are dishwasher safe, while others are not. Putting non-dishwasher-safe parts in the dishwasher can damage them. If you’re unsure, it’s best to err on the side of caution and hand wash the parts with warm, soapy water.

Leave a Comment