

Sticker Residue Removal with Salt: We’ve all been there, haven’t we? You peel off a price tag, a label, or even a child’s enthusiastic sticker art, only to be left with that sticky, frustrating residue. It’s like a tiny, adhesive ghost haunting your belongings! For centuries, people have battled this sticky nemesis, resorting to harsh chemicals and endless scrubbing, often damaging the very surfaces they were trying to clean. But what if I told you there’s a simple, natural, and incredibly effective solution hiding in your pantry?
This DIY trick isn’t just about cleaning; it’s about reclaiming your sanity and saving your precious items from sticky doom. Think of all the times you’ve struggled with sticker residue removal with salt. From removing labels from repurposed jars for your homemade jams to cleaning up after a child’s artistic endeavors, this hack will become your go-to solution. I’m going to show you how to banish that sticky stuff using just salt and a few other common household items. It’s gentle, eco-friendly, and surprisingly powerful. Get ready to say goodbye to sticky frustration and hello to sparkling clean surfaces!
DIY Sticker Residue Removal with Salt: A Surprisingly Effective Hack
Hey everyone! Ever been plagued by that sticky, stubborn residue left behind after peeling off a sticker? It’s the bane of every crafter, parent, and anyone who’s ever tried to remove a price tag. I’ve tried countless methods – from harsh chemicals to endless scrubbing – and honestly, most of them either didn’t work well or damaged the surface underneath. But then I stumbled upon a simple, natural solution: salt! Yes, plain old table salt. I was skeptical at first, but trust me, this hack is a game-changer. It’s cheap, readily available, and surprisingly effective. Let’s dive into how you can banish that sticky mess for good!
What You’ll Need
Before we get started, gather these simple supplies:
* Table Salt: The coarser, the better, but regular table salt works just fine.
* Cooking Oil: Olive oil, vegetable oil, or even coconut oil will do the trick. This acts as a carrier for the salt and helps loosen the adhesive.
* Soft Cloth or Sponge: Microfiber cloths are ideal, but any soft cloth will work. Avoid abrasive scrubbers that could scratch the surface.
* Warm Water: For rinsing.
* Mild Dish Soap (Optional): For cleaning up any oily residue afterwards.
* Plastic Scraper or Credit Card (Optional): For gently lifting stubborn residue.
The Salt and Oil Paste Method: Step-by-Step
This method is my go-to for most sticker residue situations. It’s gentle yet effective, and I’ve used it on everything from glass jars to plastic containers.
1. Prepare the Surface: Before you start, make sure the surface is dry. If there’s any loose debris or large pieces of sticker remaining, gently remove them by hand. You can also use a plastic scraper or old credit card to carefully lift off any large chunks. Be gentle to avoid scratching the surface.
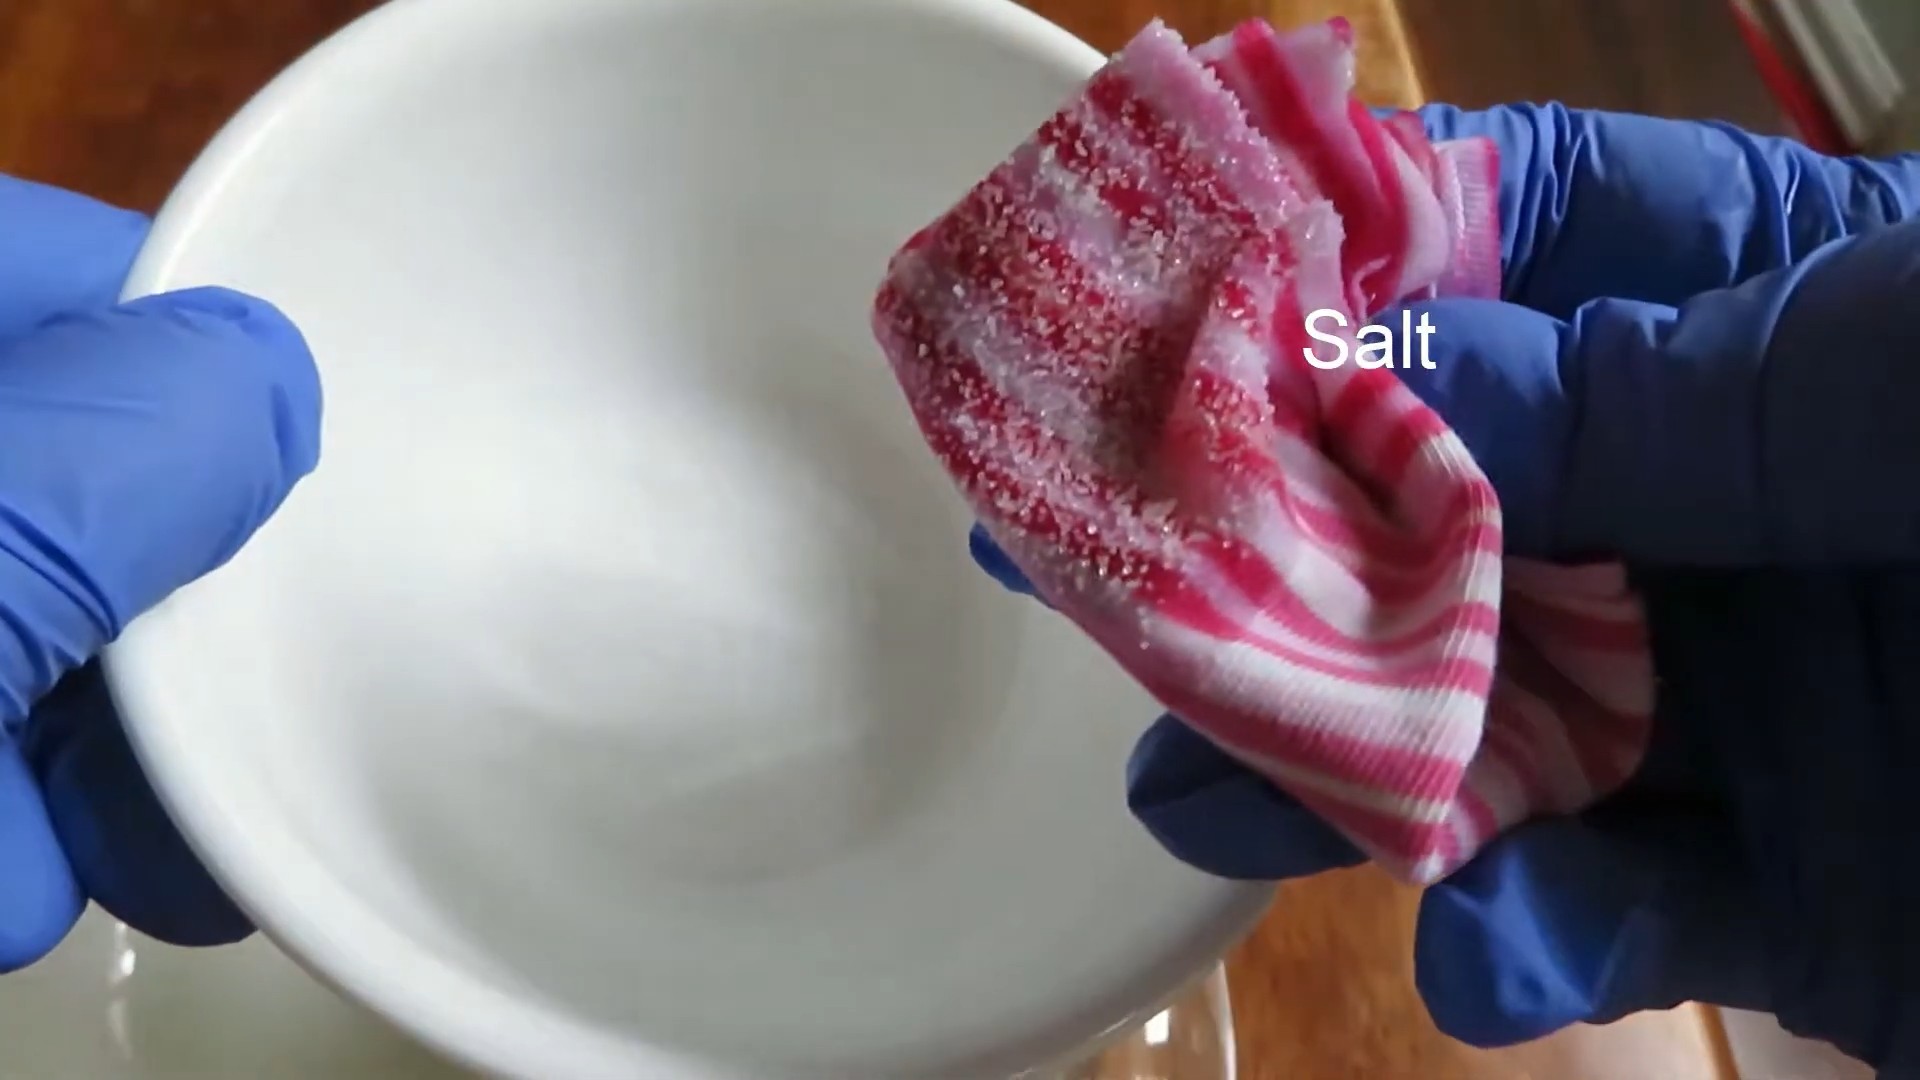
2. Mix the Salt and Oil: In a small bowl, combine the salt and oil to create a paste. I usually start with a 2:1 ratio of salt to oil (e.g., 2 tablespoons of salt and 1 tablespoon of oil). The consistency should be like a thick scrub. You want enough oil to bind the salt together, but not so much that it becomes runny.
3. Apply the Paste: Using your finger or a soft cloth, generously apply the salt and oil paste to the sticker residue. Make sure the entire sticky area is covered.
4. Let it Sit: This is the crucial step! Allow the paste to sit on the residue for at least 15-30 minutes. This gives the oil time to penetrate the adhesive and loosen its grip. For really stubborn residue, you can even let it sit for an hour or two. I often leave it overnight if I’m dealing with a particularly sticky situation.
5. Gently Scrub: After the soaking time, use a soft cloth or sponge to gently scrub the area in a circular motion. The salt acts as a mild abrasive, helping to lift the softened residue. Don’t apply too much pressure, as you don’t want to scratch the surface.
6. Wipe Away the Residue: As you scrub, you should see the sticky residue starting to break down and lift away. Continue scrubbing until most of the residue is gone.
7. Rinse with Warm Water: Once you’ve removed as much residue as possible, rinse the area with warm water. This will remove the salt and oil paste.
8. Clean with Dish Soap (Optional): If there’s any oily residue remaining, wash the area with a mild dish soap and warm water. This will help remove the oil and leave the surface clean and shiny.
9. Dry Thoroughly: Finally, dry the area thoroughly with a clean cloth. This will prevent water spots and ensure that the surface is completely clean.
Dealing with Stubborn Residue
Sometimes, even with the salt and oil paste, you might encounter some stubborn residue that just won’t budge. Don’t worry, here are a few tips to tackle those tough spots:
* Reapply the Paste: If the residue is particularly stubborn, try reapplying the salt and oil paste and letting it sit for a longer period of time. Sometimes, a second application is all it takes.
* Use a Plastic Scraper: After the paste has soaked, use a plastic scraper or old credit card to gently lift the residue. Hold the scraper at a low angle and carefully scrape away the softened adhesive. Be careful not to apply too much pressure, as you could scratch the surface.
* Try a Different Oil: Different oils have different properties. If olive oil isn’t working, try vegetable oil or coconut oil. Coconut oil, in particular, can be very effective at dissolving adhesives.
* Heat it Up (Carefully!): For some types of residue, gently heating the area can help loosen the adhesive. You can use a hairdryer on a low setting, but be careful not to overheat the surface, especially if it’s plastic. Apply the heat for a few seconds at a time, then try scrubbing with the salt and oil paste.
* Patience is Key: Sometimes, removing sticker residue takes time and patience. Don’t get discouraged if it doesn’t come off immediately. Keep trying different techniques and eventually, you’ll get it!
Salt and Water Paste: A Gentler Approach
For delicate surfaces or very light residue, you can try a gentler approach using a salt and water paste. This method is less abrasive than the salt and oil paste, but it can still be effective.
1. Mix the Salt and Water: In a small bowl, mix salt and warm water to create a paste. Use just enough water to create a thick, spreadable paste.
2. Apply the Paste: Apply the paste to the sticker residue and let it sit for 10-15 minutes.
3. Gently Scrub: Gently scrub the area with a soft cloth or sponge.
4. Rinse and Dry: Rinse the area with warm water and dry thoroughly.
Important Considerations
* Test on an Inconspicuous Area: Before applying the salt and oil paste to a large or visible area, always test it on an inconspicuous spot first. This will ensure that the paste doesn’t damage or discolor the surface.
* Avoid Abrasive Scrubbers: Never use abrasive scrubbers or steel wool to remove sticker residue. These can scratch and damage the surface.
* Be Gentle: When scrubbing, always use a gentle touch. Applying too much pressure can scratch the surface.
* Safety First: When using any cleaning products, always follow the manufacturer’s instructions and take appropriate safety precautions.
Why This Works: The Science Behind the Hack
You might be wondering why salt and oil (or water) are so effective at removing sticker residue. Here’s a little bit of the science behind it:
* Oil as a Solvent: The oil acts as a solvent, helping to dissolve the adhesive in the sticker residue. Many adhesives are oil-based, so oil can effectively break down their chemical bonds.
* Salt as an Abrasive: The salt acts as a mild abrasive, helping to physically lift the softened residue from the surface. The small, granular particles of salt gently scrub away the sticky mess without causing significant damage.
* Penetration and Loosening: The combination of oil and salt allows the mixture to penetrate the residue and loosen its grip on the surface. The oil seeps into the adhesive, while the salt provides a gentle scrubbing action.
Beyond Sticker Residue: Other Uses for Salt and Oil
The salt and oil paste isn’t just for removing sticker residue. It can also be used for a variety of other cleaning and household tasks, including:
* Removing Grease Stains: The abrasive action of the salt can help lift grease stains from clothing, countertops, and other surfaces.
* Cleaning Cast Iron Pans: Salt is a great alternative to soap for cleaning cast iron pans. It helps remove food particles without stripping the seasoning.
* Exfoliating Skin: Salt and oil can be used as a natural exfoliating scrub for the skin.
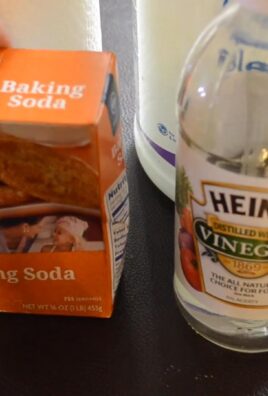
* Polishing Copper: A paste of salt, vinegar, and flour can be used to polish copper and remove tarnish.
So, there you have it! My go-to method for removing sticker residue using the power of salt. I hope this helps you tackle those sticky situations with ease. Happy cleaning!

Conclusion
So, there you have it! Removing stubborn sticker residue doesn’t require harsh chemicals or expensive specialized products. This simple, effective, and readily available solution using common table salt is a game-changer for anyone who’s ever battled that sticky, frustrating mess. We’ve shown you how to harness the abrasive power of salt to gently lift and eliminate residue from a variety of surfaces, saving you time, money, and potential damage.
Why is this DIY trick a must-try? Because it’s incredibly accessible. You likely already have salt in your pantry, making it an instant solution to your sticker residue woes. It’s also a safer alternative to many commercial adhesive removers, which can contain harsh chemicals that are harmful to your health and the environment. Plus, it’s surprisingly effective! The gentle abrasion of the salt, combined with a little oil, breaks down the adhesive bonds, allowing you to wipe away the residue with ease.
But don’t just take our word for it! We encourage you to experiment with different types of oils to find what works best for your specific situation. For delicate surfaces, consider using a lighter oil like baby oil or mineral oil. For tougher residues, coconut oil or even a small amount of peanut butter (yes, really!) can provide extra cleaning power. Remember to always test a small, inconspicuous area first to ensure the oil doesn’t damage the surface.
And speaking of variations, consider the type of salt you use. While regular table salt works perfectly well, you can also try using sea salt or Epsom salt for a slightly different abrasive texture. The key is to use a fine-grained salt to avoid scratching the surface you’re cleaning.
The beauty of this method lies in its simplicity and adaptability. It’s a cost-effective, eco-friendly, and surprisingly powerful way to tackle that pesky sticker residue removal problem.
We’re confident that this DIY trick will become your go-to solution for removing sticker residue from everything from glass jars to furniture to car windows. So, ditch the harsh chemicals and embrace the power of salt!
Now it’s your turn! Give this DIY sticker residue removal method a try and let us know how it works for you. Share your experiences, tips, and variations in the comments below. We’re eager to hear your success stories and learn from your experiences. Together, we can conquer the world of sticky residue, one grain of salt at a time!
Frequently Asked Questions (FAQ)
What types of surfaces can I use this salt method on?
This method is generally safe for use on a wide variety of surfaces, including glass, plastic, metal, wood (finished and unfinished), and ceramic. However, it’s always best to test a small, inconspicuous area first to ensure that the oil and salt combination doesn’t damage or discolor the surface. Avoid using this method on delicate or porous surfaces like leather, suede, or unsealed stone, as the oil could stain.
What kind of oil should I use?
The best type of oil to use depends on the surface you’re cleaning and the severity of the residue. Vegetable oil, olive oil, coconut oil, baby oil, and mineral oil are all good options. For delicate surfaces, start with a lighter oil like baby oil or mineral oil. For tougher residues, coconut oil or even a small amount of peanut butter can be more effective. Remember to always test a small area first.
Can I use this method to remove sticker residue from clothing?
While this method can be used on some fabrics, it’s important to proceed with caution. The oil could stain delicate fabrics. Test a small, hidden area of the garment first. If the oil doesn’t stain, gently rub the salt and oil mixture onto the residue, then wash the garment according to the care instructions. You may need to pre-treat the oily area with a stain remover before washing.
How long should I let the salt and oil mixture sit on the residue?
The amount of time you let the mixture sit depends on the stubbornness of the residue. For light residue, a few minutes may be sufficient. For tougher residue, you may need to let it sit for 15-30 minutes, or even longer. Check the area periodically to see if the residue is softening.
What if the salt scratches the surface?
To minimize the risk of scratching, use a fine-grained salt like table salt or sea salt. Avoid using coarse salt or rock salt. Also, apply gentle pressure when rubbing the salt and oil mixture onto the surface. If you’re concerned about scratching, you can also try making a paste of salt and oil and applying it to the residue without rubbing. Let the paste sit for a while, then gently wipe it away with a soft cloth.
Is there a specific type of cloth I should use?
A soft, lint-free cloth is ideal for removing sticker residue. Microfiber cloths are a great option, as they are gentle and absorbent. Avoid using abrasive cloths or scrub brushes, as they could scratch the surface.
What if the residue is still there after trying this method?
If the residue is particularly stubborn, you may need to repeat the process several times. You can also try using a different type of oil or letting the salt and oil mixture sit for a longer period. If all else fails, you may need to resort to a commercial adhesive remover, but be sure to follow the manufacturer’s instructions carefully and test it on a small, inconspicuous area first.
How do I clean up the oily residue after removing the sticker residue?
After removing the sticker residue, wipe the area with a clean, damp cloth to remove any remaining oil. You may need to use a mild soap or detergent to remove stubborn oil residue. For porous surfaces, you may need to use a degreaser.
Can I use this method to remove residue from electronics?
Use extreme caution when removing sticker residue from electronics. Avoid getting any liquid inside the device. Apply the salt and oil mixture sparingly to a cloth, then gently dab the residue. Do not rub vigorously. Wipe away any excess oil with a clean, dry cloth. If you’re not comfortable cleaning the electronics yourself, it’s best to consult a professional.
Is this method safe for children and pets?
While salt and oil are generally safe, it’s important to keep them out of reach of children and pets. Avoid letting children or pets ingest the mixture. If you’re concerned about potential allergies, test a small amount of the oil on your skin before using it on a larger area.
Leave a Comment