

Growing Gourds at Home might seem like a whimsical endeavor, but trust me, it’s incredibly rewarding! Imagine transforming your backyard into a miniature pumpkin patch, overflowing with unique shapes and sizes, all thanks to your own green thumb. Have you ever thought about crafting your own birdhouses, dippers, or even decorative art pieces from something you grew yourself? That’s the magic of gourds!
Gourds have a rich history, dating back thousands of years. They weren’t just pretty faces; ancient civilizations relied on them for everything from containers and utensils to musical instruments. In many cultures, gourds symbolize prosperity and good fortune. So, when you’re growing gourds at home, you’re not just cultivating a plant; you’re connecting with a long and fascinating tradition.
But why should *you* bother with gourds? Well, in a world of mass-produced everything, there’s something incredibly satisfying about creating something beautiful and functional from scratch. Plus, let’s be honest, store-bought decorations can be expensive! With a little effort and these DIY tricks, you can have a unique and sustainable supply of crafting materials right in your backyard. I’m going to share some simple, yet effective, tips and hacks that will help you successfully grow gourds at home, even if you’re a complete beginner. Get ready to unleash your inner artist and gardener!
Growing Gourds: A Beginner’s Guide to a Bountiful Harvest
Hey there, fellow gardening enthusiasts! Ever thought about growing your own gourds? It’s a surprisingly rewarding experience, and you end up with some fantastic decorations or even crafting materials. I’ve been growing gourds for a few years now, and I’m excited to share my knowledge with you. This guide will walk you through everything you need to know, from seed to harvest.
Choosing Your Gourds
Before we dive into the nitty-gritty, let’s talk about the types of gourds you can grow. There are two main categories: ornamental gourds and hard-shelled gourds.
* Ornamental Gourds: These are the colorful, uniquely shaped gourds you often see in fall decorations. They come in a wide variety of shapes, sizes, and colors. Think of the warty gourds, the apple gourds, and the pear gourds. They’re generally not edible, but they’re beautiful!
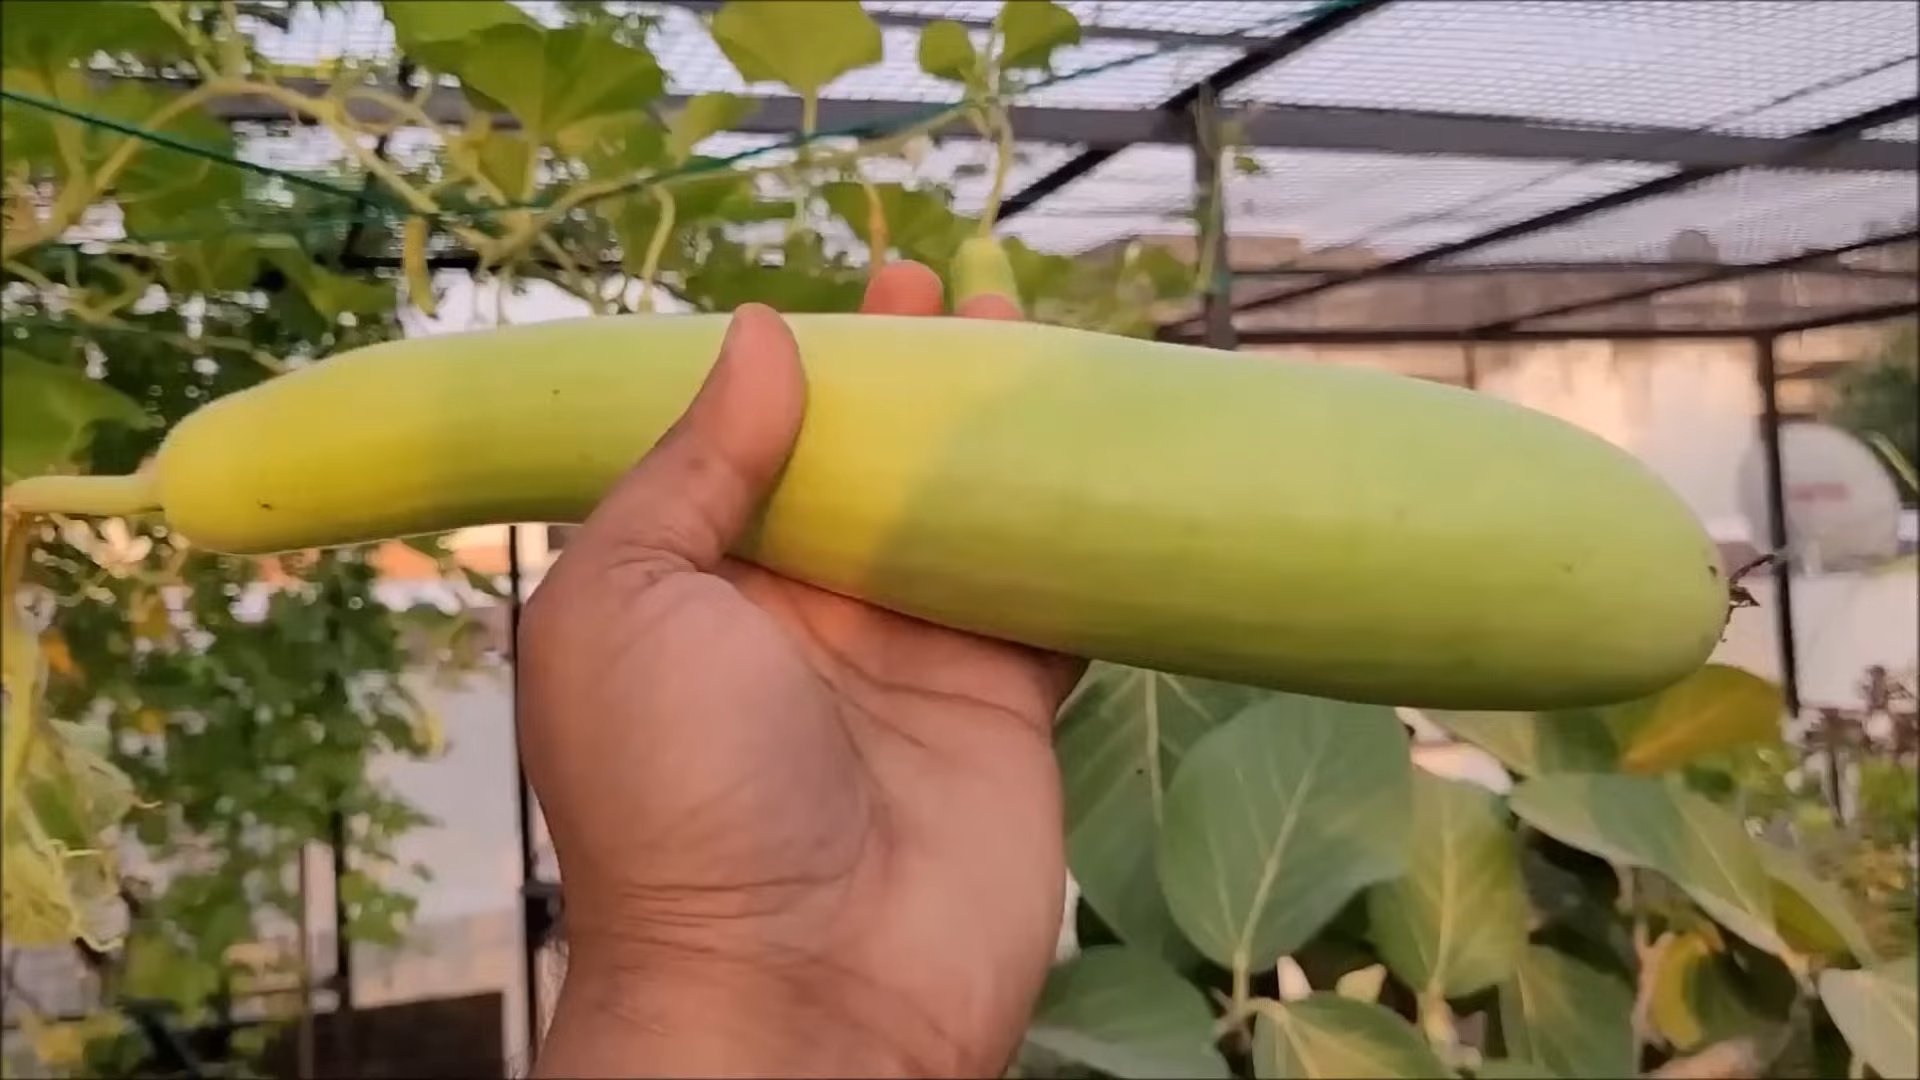
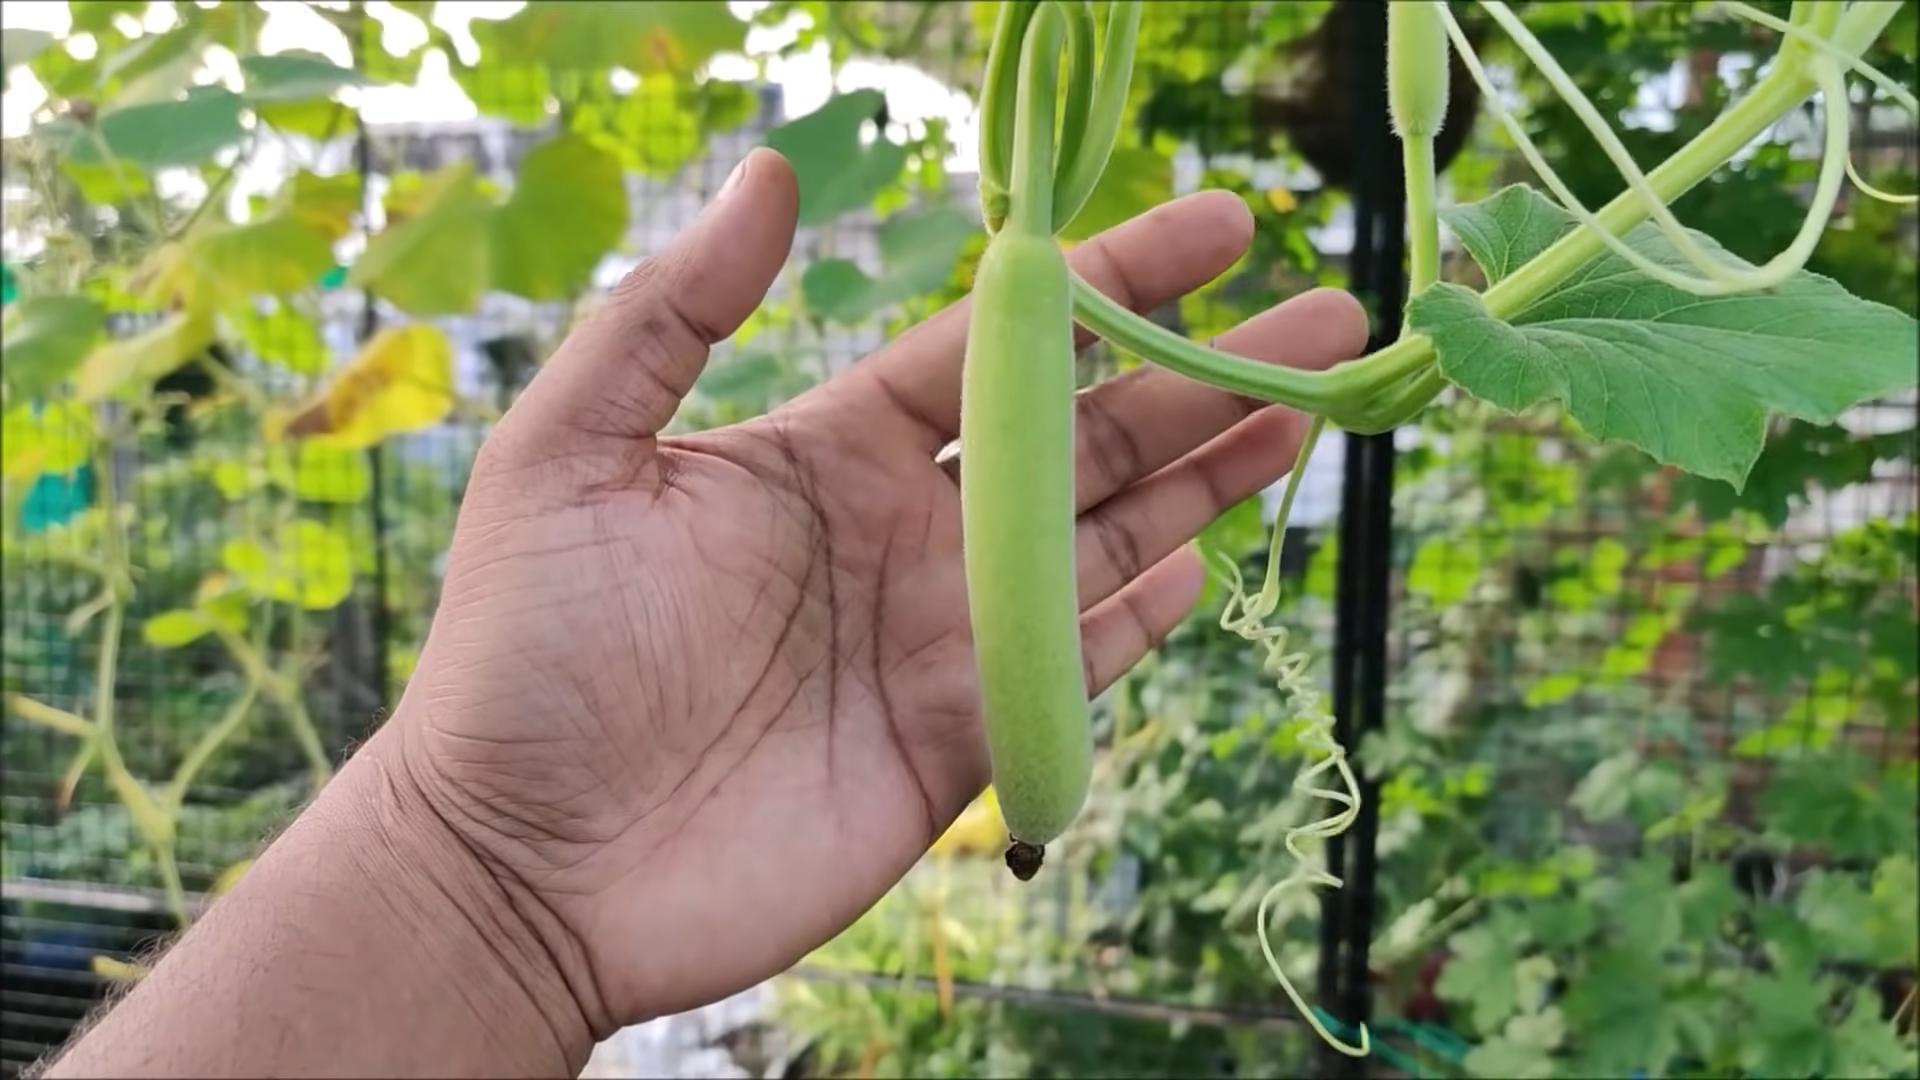
* Hard-Shelled Gourds: These gourds, like the bottle gourd (also known as a calabash) and the dipper gourd, have a thick, hard shell when dried. They can be used to make bowls, birdhouses, musical instruments, and all sorts of other cool things.
When choosing your gourds, consider your climate and the space you have available. Some gourds need a long growing season, so if you live in a colder climate, you might want to start them indoors. Also, gourds are vines, and they need a lot of space to spread out.
Getting Started: Planting Your Gourd Seeds
Alright, let’s get our hands dirty! Here’s how to plant your gourd seeds:
1. Soaking the Seeds: This is a crucial step to help the seeds germinate faster. I usually soak my gourd seeds in warm water for 24-48 hours before planting. You’ll notice they swell up a bit – that’s a good sign!
2. Starting Seeds Indoors (Optional): If you have a short growing season, starting your seeds indoors is a great idea. About 4-6 weeks before the last expected frost, plant the soaked seeds in small pots filled with seed-starting mix. Plant them about an inch deep. Keep the soil moist and warm (around 70-80°F). A heat mat can be really helpful here.
3. Direct Sowing: If you live in a warmer climate with a long growing season, you can direct sow the seeds into the ground after the last frost. Choose a sunny spot with well-drained soil. Plant the seeds about an inch deep and space them about 2-3 feet apart.
4. Preparing the Soil: Gourds are heavy feeders, so it’s important to prepare the soil properly. Amend the soil with plenty of compost or well-rotted manure. This will provide the nutrients the gourds need to thrive. I also like to add a slow-release fertilizer at planting time.
5. Watering: Keep the soil consistently moist, especially during germination. Once the seedlings emerge, water deeply but less frequently. Avoid overhead watering, as this can lead to fungal diseases.
Providing Support: Trellising Your Gourds
Gourds are vines, and they need something to climb on. Trellising your gourds not only saves space but also helps to keep the gourds off the ground, which prevents rot and allows for better air circulation.
* Choosing a Trellis: You can use a variety of trellises, such as a fence, an arbor, a pergola, or even a sturdy tomato cage. The trellis should be strong enough to support the weight of the gourds, which can get quite heavy.
* Setting Up the Trellis: Install the trellis before the gourd vines start to spread. Make sure it’s securely anchored in the ground.
* Training the Vines: As the gourd vines grow, gently guide them onto the trellis. You may need to tie them to the trellis with twine or plant ties.
Caring for Your Gourds: Watering, Fertilizing, and Pest Control
Once your gourds are growing, it’s important to provide them with the care they need to thrive.
1. Watering: Water deeply and regularly, especially during dry spells. Gourds need consistent moisture to produce healthy fruit.
2. Fertilizing: Fertilize your gourds every few weeks with a balanced fertilizer. You can also use a liquid seaweed fertilizer for an extra boost.
3. Pest Control: Gourds can be susceptible to pests like squash bugs, squash vine borers, and aphids. Inspect your plants regularly for signs of pests. You can handpick pests off the plants or use insecticidal soap or neem oil to control them.
4. Disease Control: Gourds can also be susceptible to diseases like powdery mildew and downy mildew. To prevent these diseases, provide good air circulation, avoid overhead watering, and apply a fungicide if necessary.
5. Pollination: Gourds have separate male and female flowers. The female flowers need to be pollinated in order to produce fruit. If you’re not seeing any fruit develop, you may need to hand-pollinate the flowers. To do this, use a small paintbrush to transfer pollen from the male flowers to the female flowers.
Harvesting Your Gourds: Knowing When to Pick
Knowing when to harvest your gourds is crucial for ensuring they dry properly and last a long time.
1. Ornamental Gourds: Harvest ornamental gourds when the stems start to dry and turn brown. The skin of the gourd should be hard and resistant to scratching.
2. Hard-Shelled Gourds: Harvest hard-shelled gourds when the stems are completely dry and brown. The gourd should feel lightweight and the seeds should rattle inside. This usually happens after the first frost.
3. Cutting the Gourds: Use a sharp knife or pruning shears to cut the gourds from the vine, leaving a few inches of stem attached. This will help to prevent rot.
4. Handling with Care: Be careful not to bruise or damage the gourds during harvest. Bruises can lead to rot.
Drying Your Gourds: The Key to Longevity
Drying your gourds properly is essential for preserving them. Here’s how I do it:
1. Washing the Gourds: Wash the gourds with soapy water to remove any dirt or debris. You can also use a bleach solution (1 part bleach to 10 parts water) to disinfect them.
2. Drying the Surface: Dry the gourds thoroughly with a clean cloth.
3. Choosing a Drying Location: Find a well-ventilated, dry, and dark location to dry your gourds. A shed, garage, or attic works well.
4. Elevating the Gourds: Place the gourds on a wire rack or hang them from the ceiling to allow for good air circulation. I often use old pantyhose to hang them individually.
5. Checking for Rot: Inspect the gourds regularly for signs of rot. If you see any soft spots or mold, remove the gourd immediately to prevent it from spreading to the other gourds.
6. Drying Time: The drying process can take several weeks or even months, depending on the size and type of gourd. You’ll know the gourds are dry when they are lightweight and the seeds rattle inside. The outer shell will be hard and durable.
Cleaning Your Dried Gourds: Preparing for Decoration
Once your gourds are completely dry, you’ll need to clean them before you can decorate them.
1. Soaking the Gourds (Optional): If the gourds are very dirty, you can soak them in warm water for a few hours to soften the outer layer.
2. Scrubbing the Gourds: Use a scrub brush or steel wool to remove the outer layer of skin. This can be a messy process, so do it outside or in a well-ventilated area.
3. Sanding the Gourds: Once you’ve removed the outer layer of skin, you can sand the gourds with sandpaper to smooth them out.
4. Cleaning the Inside: To clean the inside of the gourds, you can drill a hole in the bottom and shake out the seeds and pulp. You can also use a long, flexible brush to clean the inside.
5. Disinfecting the Gourds: After cleaning the inside, disinfect the gourds with a bleach solution (1 part bleach to 10 parts water).
6. Drying the Gourds: Dry the gourds thoroughly before decorating them.
Decorating Your Gourds: Unleash Your Creativity!
Now for the fun part! There are endless ways to decorate your gourds. Here are a few ideas:
* Painting: Paint your gourds with acrylic paints, using stencils or freehand designs.
* Carving: Carve intricate designs into your gourds using a wood-burning
Conclusion
So, there you have it! Growing gourds at home isn’t just a gardening project; it’s an adventure into a world of natural art, sustainable living, and rewarding creativity. From the initial thrill of planting the seeds to the satisfaction of harvesting your uniquely shaped creations, the entire process is a testament to the wonders of nature.
Why is this DIY trick a must-try? Because it connects you to the earth in a tangible way. It allows you to cultivate something beautiful and functional from a simple seed. It’s a chance to escape the sterile uniformity of mass-produced goods and embrace the organic, unpredictable beauty of nature. Plus, imagine the conversations sparked by a birdhouse you grew yourself, or the unique gifts you can create for friends and family!
But the fun doesn’t stop at harvest. The possibilities for gourd crafting are truly endless. Consider painting your gourds with vibrant colors and intricate designs. Carve them into whimsical lanterns that cast enchanting shadows. Transform them into musical instruments, decorative bowls, or even unique planters for your other favorite plants. For a rustic touch, try staining your gourds with natural dyes made from coffee grounds or walnut hulls. You can also experiment with different gourd varieties to achieve a range of shapes and sizes, adding even more diversity to your crafting palette. Think about adding embellishments like beads, feathers, or leather accents to elevate your gourd art to the next level.
Don’t be intimidated if you’re a beginner. Growing gourds at home is surprisingly accessible, even for those with limited gardening experience. With a little patience, some basic knowledge, and a willingness to experiment, you can successfully cultivate your own gourd patch. Remember to provide your gourds with plenty of sunlight, well-drained soil, and a sturdy trellis to climb. Regular watering and fertilization will also contribute to healthy growth and abundant yields.
We wholeheartedly encourage you to embark on this rewarding journey. Start small, learn as you go, and don’t be afraid to make mistakes. Each gourd you grow will be a unique masterpiece, reflecting your personal touch and the unpredictable beauty of nature.
Most importantly, we want to hear about your experiences! Share your gourd-growing adventures with us. Post photos of your gourd patches, your crafting creations, and any tips or tricks you’ve discovered along the way. Let’s create a community of gourd enthusiasts, sharing our knowledge and inspiring each other to explore the endless possibilities of this amazing plant. So, grab some seeds, get your hands dirty, and discover the joy of growing gourds at home. You won’t regret it!
Frequently Asked Questions (FAQ)
What is the best time to plant gourd seeds?
The ideal time to plant gourd seeds is after the last frost in your area, when the soil has warmed up to at least 65 degrees Fahrenheit (around 18 degrees Celsius). Gourds need a long growing season, typically 100-130 days, so starting them indoors 4-6 weeks before the last frost can give them a head start. If you live in a region with a short growing season, starting indoors is highly recommended. Check your local frost dates to determine the best planting time for your specific location.
What kind of soil do gourds need?
Gourds thrive in well-drained, fertile soil that is rich in organic matter. Before planting, amend your soil with compost, aged manure, or other organic materials to improve its structure and nutrient content. A slightly acidic to neutral soil pH (around 6.0 to 7.0) is ideal. Avoid heavy clay soils, as they can retain too much moisture and lead to root rot. If you have clay soil, consider planting your gourds in raised beds or containers to improve drainage.
How much sunlight do gourds need?
Gourds require at least 6-8 hours of direct sunlight per day to grow and produce healthy fruits. Choose a planting location that receives full sun throughout the day. If your gourds are not getting enough sunlight, they may produce fewer fruits, and the fruits may be smaller and less vibrant in color.
How often should I water my gourds?
Gourds need consistent moisture, especially during hot, dry weather. Water deeply and regularly, aiming to keep the soil consistently moist but not waterlogged. Avoid overhead watering, as this can promote fungal diseases. Instead, water at the base of the plants, using a soaker hose or drip irrigation system. Mulching around the plants can help to retain moisture and suppress weeds.
Do gourds need a trellis?
Yes, most gourd varieties are vining plants that require a trellis or other support structure to climb. A sturdy trellis will help to keep the gourds off the ground, preventing rot and allowing them to develop their characteristic shapes. You can use a variety of materials to build a trellis, such as wood, metal, or even strong netting. Make sure the trellis is strong enough to support the weight of the mature gourds.
How do I know when my gourds are ripe?
Gourds are typically ready to harvest in the fall, after the vines have died back and the gourds have turned hard and dry. The skin of the gourd should be firm and resistant to scratching. The stem connecting the gourd to the vine should also be dry and brown. Before a hard frost, harvest all of your gourds, even if they are not completely dry.
How do I cure gourds after harvesting?
Curing is essential for preserving gourds and preventing them from rotting. To cure gourds, first wash them with soapy water and allow them to dry completely. Then, place them in a well-ventilated, dry, and dark location for several weeks or months. A garage, shed, or attic is ideal. Turn the gourds regularly to ensure even drying. The curing process is complete when the gourds are lightweight and the seeds rattle inside.
What are some common pests and diseases that affect gourds?
Common pests that affect gourds include squash bugs, squash vine borers, and cucumber beetles. Diseases that can affect gourds include powdery mildew, downy mildew, and blossom-end rot. Monitor your plants regularly for signs of pests or diseases and take appropriate action to control them. Organic pest control methods, such as hand-picking pests and using insecticidal soap, can be effective. Ensure good air circulation around your plants to prevent fungal diseases.
Can I eat gourds?
While some gourds are edible when young, many ornamental gourds are not safe to eat. It’s crucial to identify the specific variety of gourd you are growing before consuming it. If you are unsure whether a gourd is edible, it’s best to err on the side of caution and avoid eating it. Some edible gourds include zucchini, squash, and pumpkins.
How can I decorate my gourds?
The possibilities for decorating gourds are endless! You can paint them with acrylic paints, carve them with intricate designs, wood burn patterns onto their surface, or embellish them with beads, feathers, or other decorative materials. Sealing the decorated gourds with a clear coat of varnish or polyurethane will help to protect them and prolong their lifespan. Let your creativity guide you and experiment with different techniques to create unique and beautiful gourd art.
Leave a Comment