

Grow Potatoes Backyard – sounds like a dream, right? Imagine stepping out your back door and harvesting fresh, earthy potatoes for dinner. No more trips to the grocery store for bland, mass-produced spuds! This isn’t just a pipe dream; it’s an achievable reality with a few simple tricks and DIY hacks. For centuries, cultivating potatoes has been a cornerstone of sustenance for cultures worldwide, from the Incas of the Andes to the humble gardens of Ireland.
But why should you bother to grow potatoes backyard? Well, beyond the sheer satisfaction of nurturing your own food, home-grown potatoes taste infinitely better. They’re fresher, more flavorful, and you know exactly what went into growing them – no nasty chemicals or hidden additives. Plus, it’s a fantastic way to connect with nature, de-stress, and get your hands dirty (literally!).
In this article, I’m going to share my favorite DIY tricks and hacks for successfully growing potatoes in your backyard, even if you have limited space or gardening experience. We’ll cover everything from choosing the right potato varieties to maximizing your yield with clever planting techniques. Get ready to transform your backyard into a potato paradise!
Growing Potatoes in Your Backyard: A Beginner’s Guide
Okay, so you want to grow potatoes in your backyard? Awesome! It’s surprisingly easy and incredibly rewarding. There’s nothing quite like digging up your own homegrown spuds. I’m going to walk you through everything you need to know, from choosing the right potatoes to harvesting your bounty. Let’s get started!
Choosing Your Seed Potatoes
First things first, you can’t just plant any old potato from the grocery store. Those are often treated to prevent sprouting. You need “seed potatoes.” These are potatoes specifically grown for planting.
* Certified Seed Potatoes: These are the best option. They’re disease-free and guaranteed to sprout. You can find them at garden centers, nurseries, and online retailers.
* Organic Potatoes (with caveats): If you can’t find seed potatoes, you *might* be able to use organic potatoes from the grocery store. The key is to make sure they haven’t been treated with sprout inhibitors. Look for potatoes that are already starting to sprout. If they aren’t sprouting, they probably won’t.
* Variety Matters: Consider what kind of potatoes you like to eat. Russets are great for baking and fries, Yukon Golds are buttery and delicious, and red potatoes are perfect for boiling. Do some research and choose a variety that suits your taste.
Preparing Your Seed Potatoes
Once you have your seed potatoes, you need to “chit” them. Chitting is basically encouraging them to sprout before planting.
* Why Chit? Chitting gives your potatoes a head start, leading to earlier harvests and potentially larger yields.
* How to Chit:
* Place your seed potatoes in a cool, bright location (but not direct sunlight). An egg carton or a shallow tray works well.
* Allow them to sit for 2-3 weeks, until they develop short, green sprouts (about 1/2 to 1 inch long).
* Turn the potatoes occasionally to ensure even sprouting.
Preparing Your Planting Area
Potatoes need well-drained soil and plenty of sunlight (at least 6-8 hours per day).
* Soil Preparation:
* Choose a sunny spot in your backyard.
* Loosen the soil to a depth of at least 12 inches. Potatoes need room to grow!
* Amend the soil with compost or well-rotted manure. This will improve drainage and provide essential nutrients. Potatoes are heavy feeders.
* Remove any rocks, weeds, or debris from the planting area.
* Ideally, your soil pH should be between 6.0 and 6.5. You can test your soil with a kit from a garden center.
Planting Your Potatoes
Now for the fun part!
1. Cut the Seed Potatoes (if necessary): If your seed potatoes are large (bigger than an egg), you can cut them into smaller pieces. Make sure each piece has at least one or two “eyes” (sprouts). Let the cut pieces dry for a day or two to callous over. This helps prevent rot.
2. Dig Trenches: Dig trenches that are about 6-8 inches deep and 2-3 feet apart.
3. Plant the Seed Potatoes: Place the seed potato pieces (or whole small potatoes) in the trenches, with the sprouts facing up. Space them about 12 inches apart.
4. Cover with Soil: Cover the seed potatoes with about 3-4 inches of soil.
5. Water Well: Water the planting area thoroughly.
Hilling Your Potatoes
This is a crucial step for maximizing your potato harvest. Hilling involves gradually adding more soil around the potato plants as they grow.
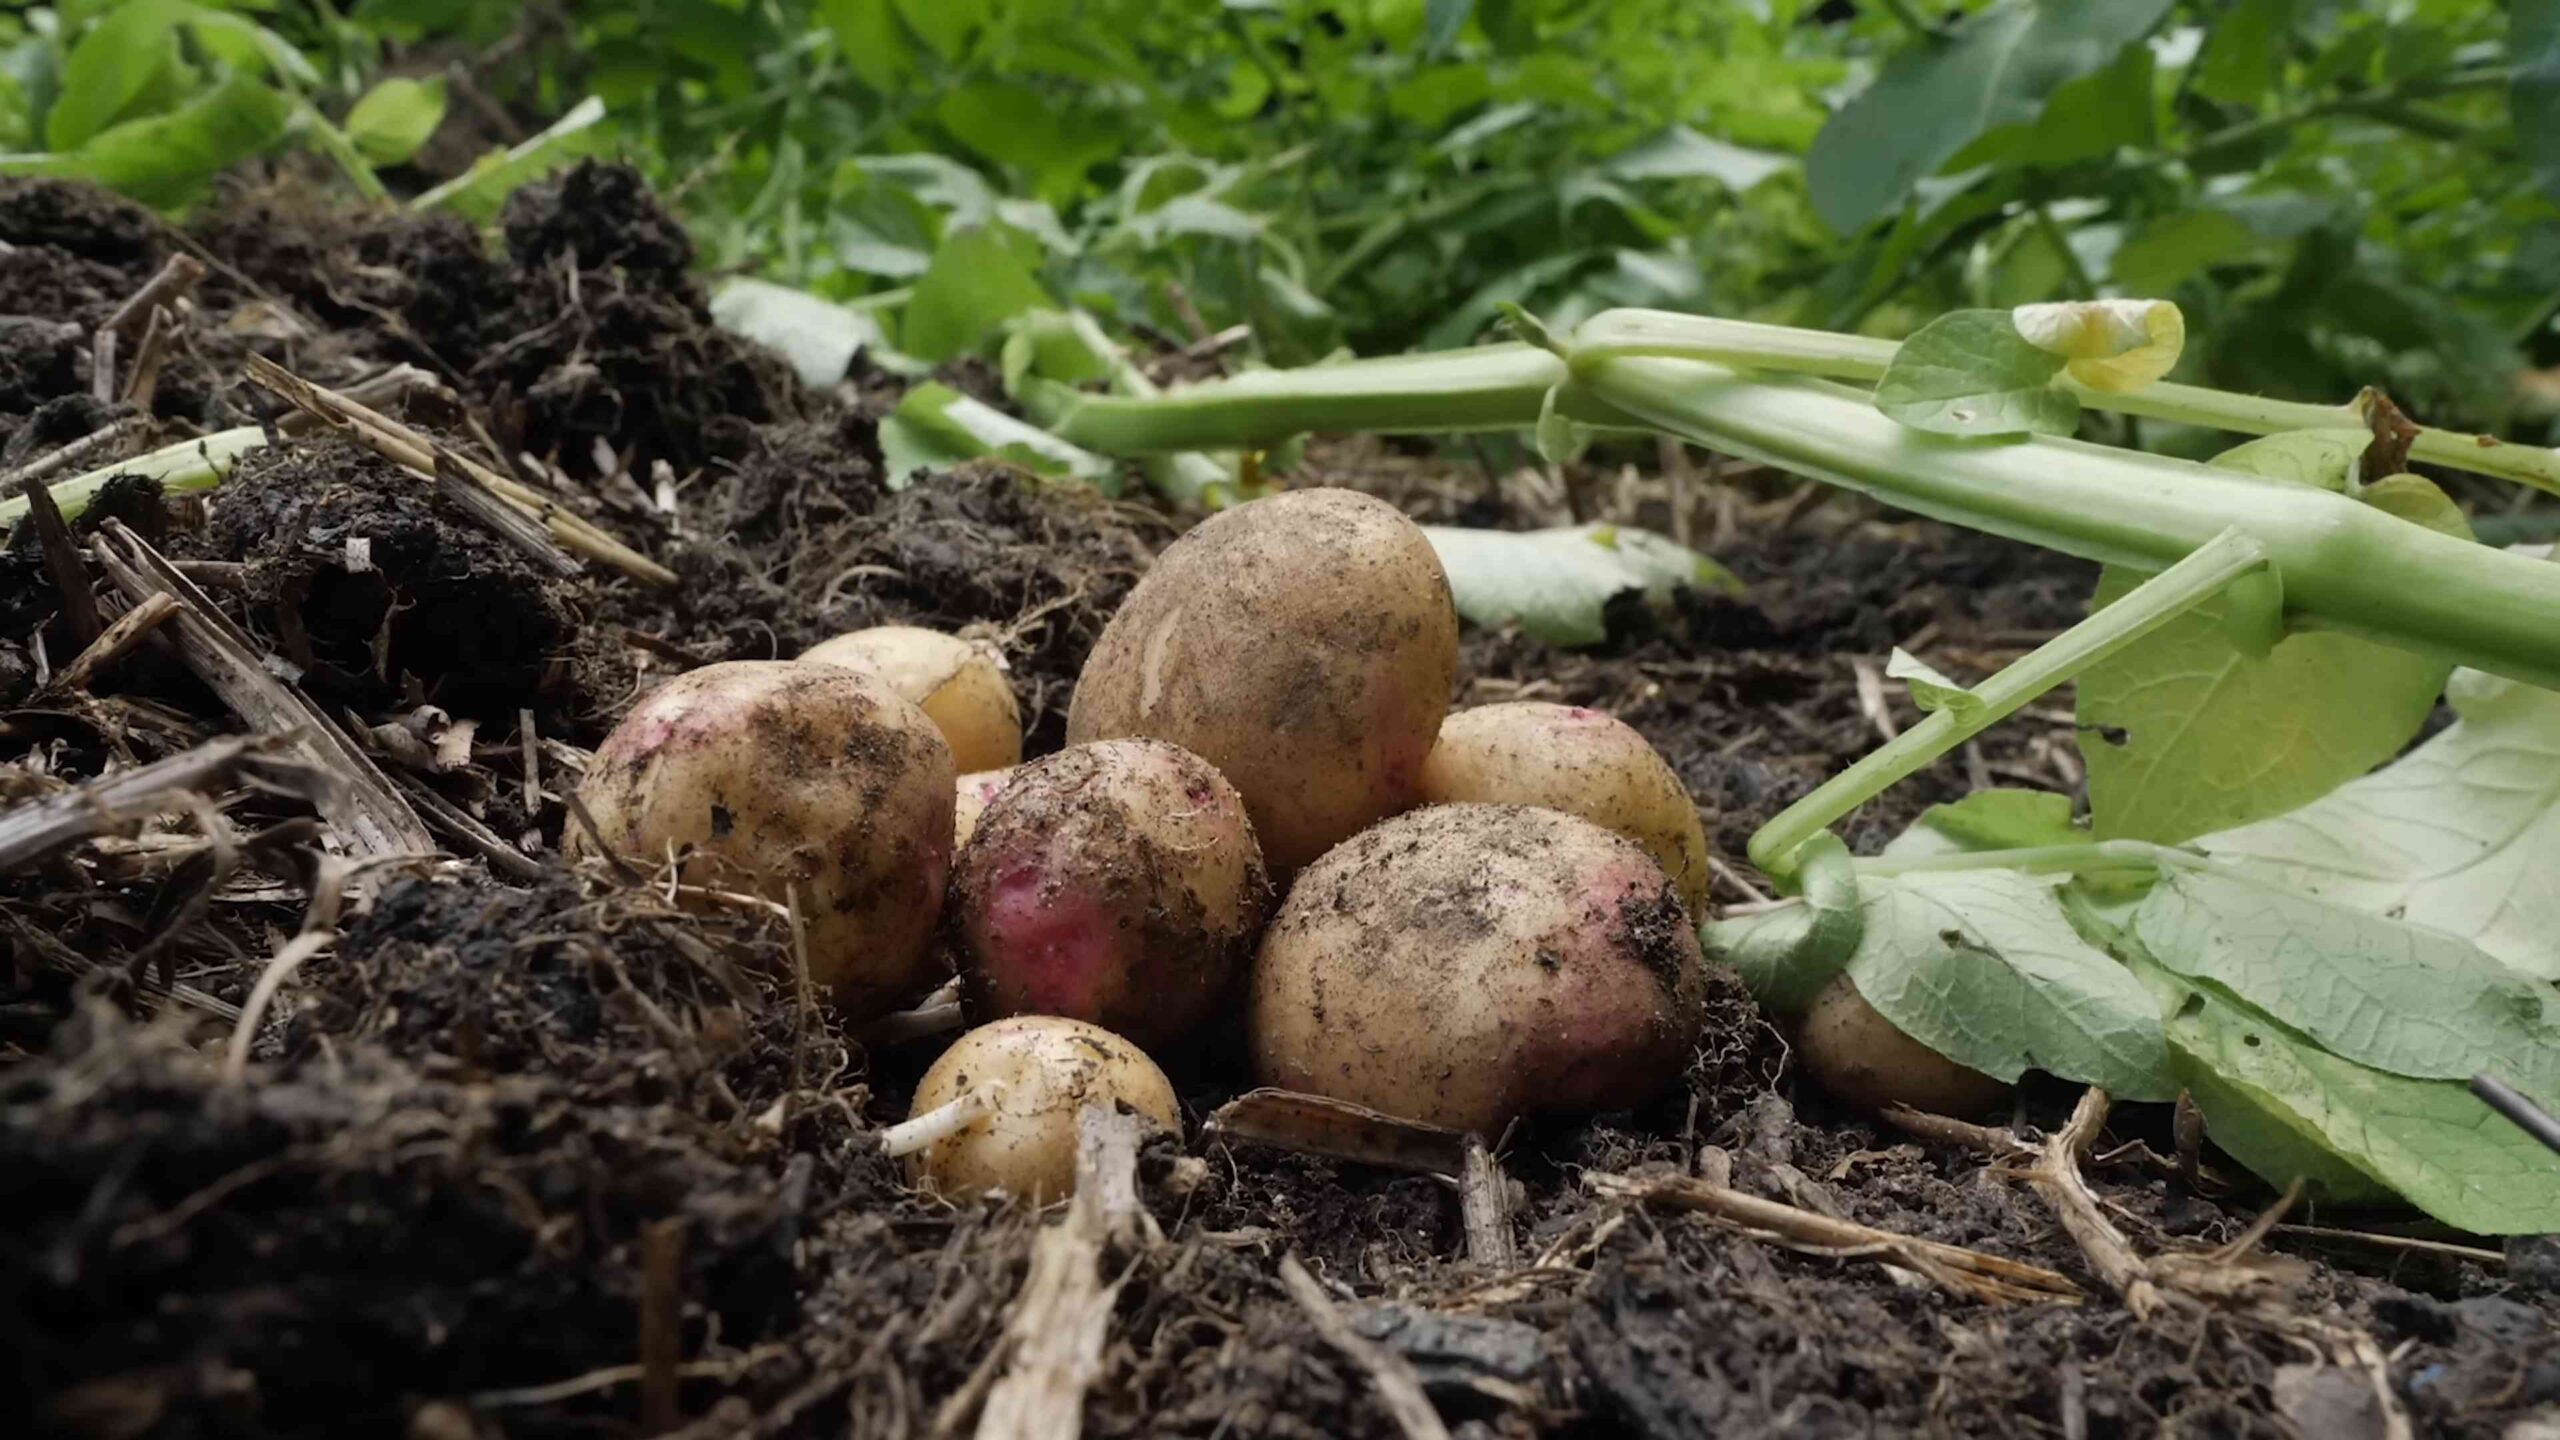
* Why Hill? Hilling encourages the plants to produce more potatoes along the buried stems. It also protects the developing potatoes from sunlight, which can cause them to turn green and produce solanine, a toxic compound.
* When to Hill: When the potato plants are about 6-8 inches tall, it’s time to start hilling.
* How to Hill:
* Use a hoe or shovel to pull soil from the sides of the trench up around the base of the plants, burying the stems up to the lower leaves.
* Repeat this process every 2-3 weeks as the plants grow, gradually building up a mound of soil around them. Aim for a mound that’s about 12 inches high.
Caring for Your Potato Plants
Potatoes need consistent moisture and nutrients to thrive.
* Watering: Water your potato plants regularly, especially during dry periods. Aim for about 1-2 inches of water per week. Avoid overwatering, as this can lead to rot.
* Fertilizing: Potatoes are heavy feeders, so you may need to fertilize them during the growing season. Use a balanced fertilizer (e.g., 10-10-10) according to the package directions. You can also side-dress with compost or well-rotted manure.
* Weeding: Keep the planting area free of weeds, which can compete with the potatoes for nutrients and water.
* Pest and Disease Control: Keep an eye out for pests and diseases. Common potato pests include potato beetles, aphids, and flea beetles. Common diseases include early blight and late blight. Use organic pest control methods whenever possible. For example, you can handpick potato beetles or spray with insecticidal soap. For diseases, ensure good air circulation and avoid overhead watering. If necessary, use a fungicide labeled for use on potatoes.
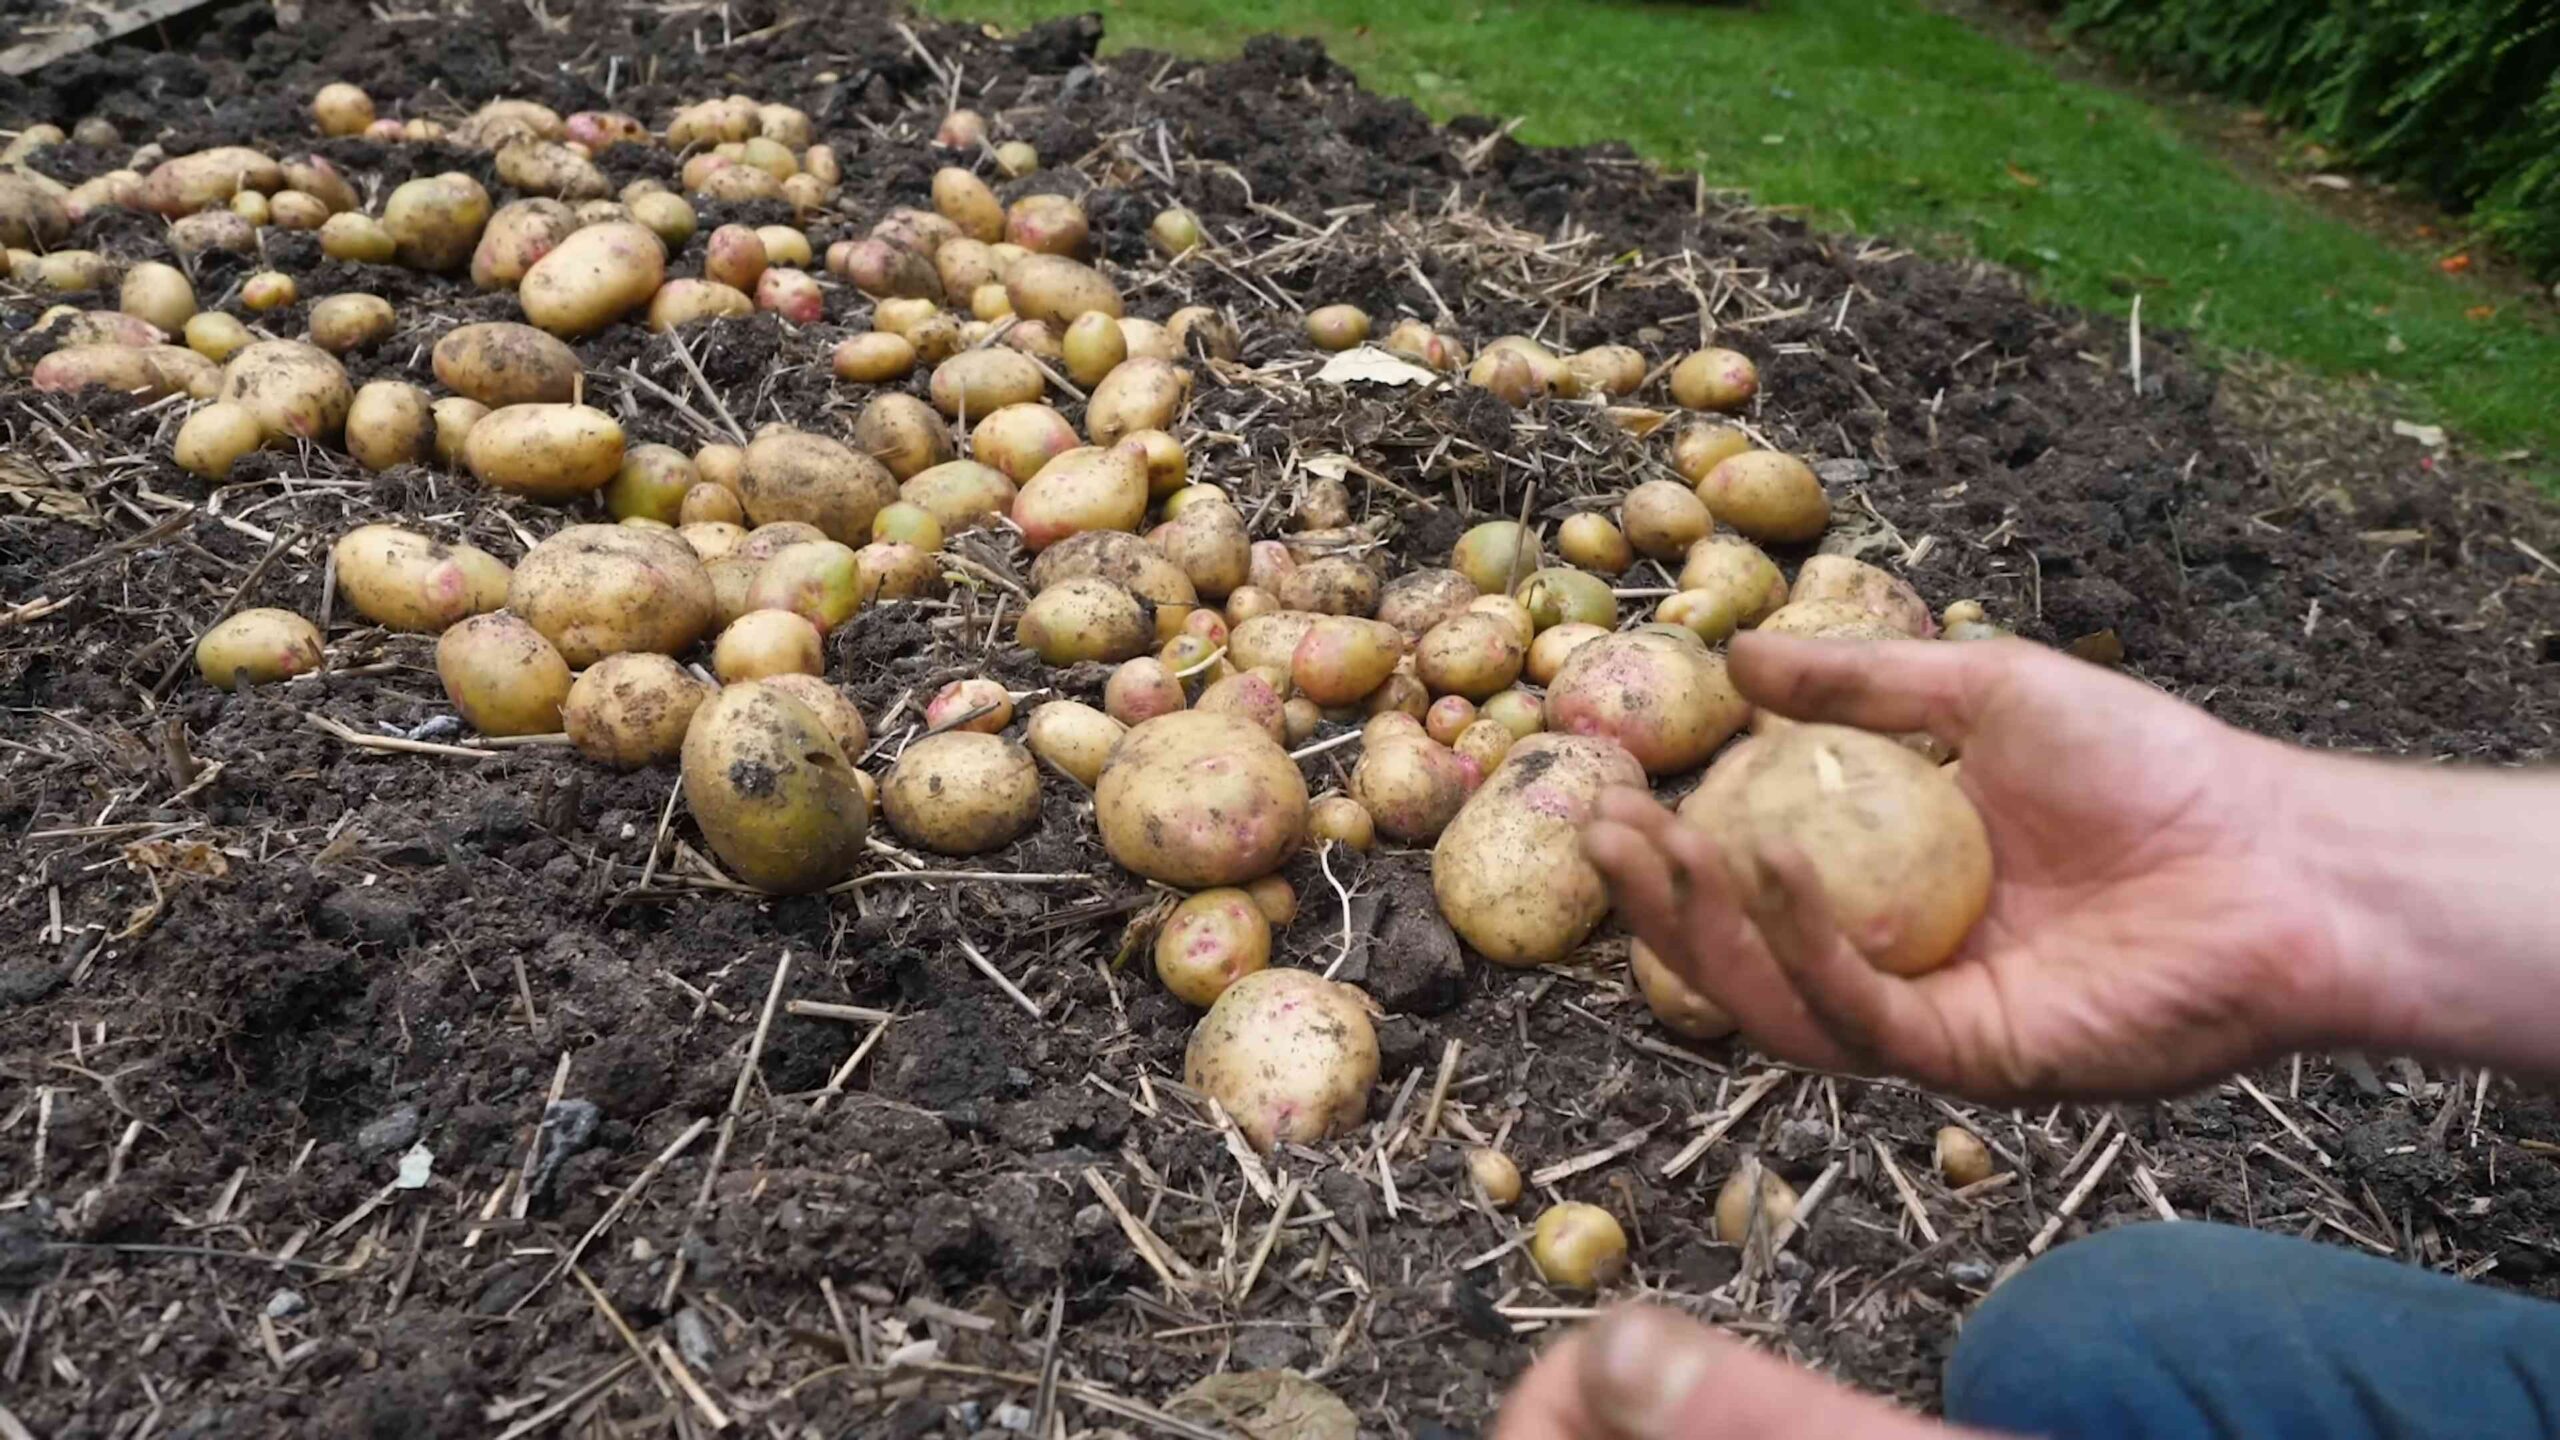
Harvesting Your Potatoes
The moment you’ve been waiting for!
* When to Harvest:
* “New” Potatoes: You can harvest “new” potatoes (small, tender potatoes) about 2-3 weeks after the plants flower. Gently dig around the base of the plants and remove a few potatoes, leaving the rest to continue growing.
* Mature Potatoes: For mature potatoes, wait until the plants have flowered and the foliage starts to die back. This usually takes about 80-100 days from planting.
* How to Harvest:
* Use a garden fork or shovel to carefully dig up the potatoes. Be careful not to damage them.
* Loosen the soil around the plants and gently lift them out of the ground.
* Collect the potatoes and brush off any excess soil.
* Curing and Storing:
* Curing: Cure the potatoes by spreading them out in a cool, dry, dark place for about 1-2 weeks. This allows the skins to harden, which helps prevent rot during storage.
* Storing: Store the cured potatoes in a cool, dark, and well-ventilated place (ideally around 40-50°F). A root cellar is ideal, but a cool basement or garage can also work. Avoid storing potatoes near apples or onions, as they can cause them to sprout prematurely.
Troubleshooting
Even with the best planning, things can sometimes go wrong. Here are a few common problems and how to deal with them:
* No Sprouts: If your seed potatoes don’t sprout, they may be too old or treated with sprout inhibitors. Try using fresh seed potatoes from a reputable source.
* Yellowing Leaves: Yellowing leaves can be a sign of nutrient deficiency, overwatering, or disease. Check the soil moisture and nutrient levels. If necessary, fertilize or adjust your watering schedule.
* Potato Beetles: Potato beetles can quickly defoliate your plants. Handpick them or spray with insecticidal soap.
* Scab: Scab is a common potato disease that causes rough, scabby patches on the potato skins. It’s more common in alkaline soils. Amend your soil with sulfur to lower the pH.
Enjoying Your Homegrown Potatoes
Congratulations! You’ve successfully grown potatoes in your backyard. Now it’s time to enjoy the fruits (or rather, tubers) of your labor. There are endless ways to cook and enjoy your homegrown potatoes. Bake them, boil them, mash them, fry them, roast them – the possibilities are endless! And trust me, they’ll taste so much better than anything you can buy in the store. Happy gardening!
Conclusion
So, there you have it! Growing potatoes in your backyard is not only achievable, but it’s also incredibly rewarding. From the satisfaction of nurturing a plant from seed to the sheer delight of harvesting your own homegrown spuds, this DIY project offers a unique connection to your food source. Forget the bland, mass-produced potatoes from the grocery store; imagine the earthy, fresh flavor of potatoes you’ve cultivated yourself, ready to be transformed into crispy fries, creamy mashed potatoes, or hearty potato salad.
This method, particularly the container gardening approach, makes growing potatoes accessible even if you have limited space. Balconies, patios, or small yards become fertile grounds for potato production. It’s a fantastic way to introduce children to gardening, teaching them about the life cycle of plants and the importance of sustainable food practices. Plus, it’s a fun and engaging activity for the whole family!
But the benefits don’t stop there. By growing your own potatoes, you have complete control over the growing process. You can choose organic methods, avoiding harmful pesticides and herbicides, ensuring that your potatoes are as healthy and nutritious as possible. You’ll also reduce your carbon footprint by eliminating the transportation and packaging associated with store-bought potatoes.
Ready to take your potato growing to the next level? Consider experimenting with different potato varieties. From the classic Russet to the vibrant Yukon Gold or the fingerling potatoes with their unique shape and flavor, there’s a whole world of potatoes waiting to be explored. You can also try companion planting, adding herbs like rosemary or thyme to your potato patch to deter pests and enhance flavor. Another variation is to use different types of containers, from traditional pots to repurposed burlap sacks or even old tires. Each method offers its own set of advantages and challenges, so feel free to experiment and find what works best for you.
Don’t be intimidated if you’re a beginner gardener. Growing potatoes is surprisingly easy, and with a little bit of care and attention, you’ll be harvesting your own delicious potatoes in no time. Remember to provide your plants with plenty of sunlight, well-draining soil, and consistent watering. And don’t forget to hill the soil around the stems as the plants grow to encourage more potato production.
We wholeheartedly encourage you to give this DIY trick a try. It’s a simple, affordable, and incredibly satisfying way to enjoy fresh, homegrown potatoes. Once you’ve experienced the taste of your own backyard bounty, you’ll never look at store-bought potatoes the same way again.
So, grab your seed potatoes, prepare your soil, and get ready to embark on a potato-growing adventure! We’re confident that you’ll be amazed by the results. And most importantly, don’t forget to share your experience with us! We’d love to hear about your successes, your challenges, and any tips or tricks you’ve discovered along the way. Share your photos and stories on social media using [Your Hashtag] and let’s inspire others to embrace the joy of growing their own food. Let’s all get growing potatoes in our backyards!
Frequently Asked Questions (FAQs)
What kind of soil is best for growing potatoes?
Potatoes thrive in well-draining, slightly acidic soil with a pH between 6.0 and 6.8. Amend your soil with compost or well-rotted manure to improve drainage and fertility. Avoid heavy clay soils, as they can become waterlogged and hinder potato development. If you have clay soil, consider growing potatoes in raised beds or containers with a suitable potting mix. A good mix would be equal parts of garden soil, compost, and peat moss or coco coir.
How much sunlight do potatoes need?
Potatoes need at least six to eight hours of direct sunlight per day to produce a good yield. Choose a location in your backyard that receives ample sunlight throughout the day. If you’re growing potatoes in containers, you can move them around to ensure they get enough sunlight. Insufficient sunlight can result in smaller potatoes and reduced overall production.
How often should I water my potato plants?
Water your potato plants regularly, especially during dry periods. Keep the soil consistently moist, but avoid overwatering, which can lead to root rot. Water deeply when the top inch of soil feels dry to the touch. The frequency of watering will depend on the weather conditions, soil type, and the size of your plants. During hot, sunny weather, you may need to water daily.
What does “hilling” potatoes mean, and why is it important?
Hilling potatoes involves mounding soil around the stems of the plants as they grow. This encourages the development of more potatoes along the buried stems. As the potato plants grow taller, gradually add more soil around the stems, leaving only the top few leaves exposed. Hilling also helps to protect the developing potatoes from sunlight, which can cause them to turn green and produce solanine, a toxic compound.
When is the best time to harvest potatoes?
The timing of your potato harvest depends on the variety you’re growing and whether you want “new potatoes” or mature potatoes. New potatoes are small, tender, and have thin skins. They can be harvested a few weeks after the plants flower. Mature potatoes are larger, have thicker skins, and can be stored for longer periods. They are typically harvested after the foliage has died back. To harvest, carefully dig around the plants with a garden fork, being careful not to damage the potatoes.
How do I store potatoes after harvesting?
Store potatoes in a cool, dark, and well-ventilated place. The ideal temperature is between 45°F and 50°F (7°C and 10°C). Avoid storing potatoes in the refrigerator, as this can cause them to convert starch to sugar, resulting in a sweet taste. Store potatoes away from apples and bananas, as these fruits release ethylene gas, which can cause potatoes to sprout. Properly stored potatoes can last for several months.
What are common pests and diseases that affect potato plants, and how can I prevent them?
Common pests that affect potato plants include aphids, potato beetles, and flea beetles. Diseases include early blight, late blight, and scab. To prevent pests and diseases, practice crop rotation, use disease-resistant potato varieties, and inspect your plants regularly for signs of infestation or disease. You can also use organic pest control methods, such as insecticidal soap or neem oil. Ensure good air circulation around your plants to prevent fungal diseases.
Can I grow potatoes from store-bought potatoes?
While you can technically grow potatoes from store-bought potatoes, it’s not always recommended. Store-bought potatoes may have been treated with chemicals to prevent sprouting, and they may also carry diseases. It’s best to use certified seed potatoes, which are specifically grown for planting and are guaranteed to be disease-free. If you do use store-bought potatoes, choose organic varieties and look for potatoes that have already started to sprout.
What are some good companion plants for potatoes?
Companion planting can help to deter pests, attract beneficial insects, and improve the overall health of your potato plants. Good companion plants for potatoes include beans, cabbage, corn, garlic, horseradish, marigolds, peas, and thyme. Avoid planting potatoes near tomatoes, cucumbers, pumpkins, raspberries, sunflowers, and turnips, as these plants can compete for nutrients or attract pests that also affect potatoes.
How do I know if my potatoes have been exposed to too much sunlight and are producing solanine?
Potatoes that have been exposed to too much sunlight will turn green. The green color is due to the production of solanine, a toxic compound that can cause nausea, vomiting, and diarrhea if consumed in large quantities. If you find green potatoes, discard them or cut away the green parts before cooking. Hilling the soil around the stems of the plants helps to prevent potatoes from being exposed to sunlight.
Leave a Comment