

Growing Bananas at Home might sound like a tropical dream reserved for sun-drenched climates, but I’m here to tell you it’s more achievable than you think! Imagine plucking a perfectly ripe, homegrown banana right from your own backyard – the taste is simply unparalleled. For centuries, bananas have been a staple food and a symbol of abundance in many cultures, from Southeast Asia where they originated, to the vibrant Caribbean islands. Now, you can bring a touch of that tropical magic to your own space.
But why bother with the effort? Well, store-bought bananas, while convenient, often lack the intense flavor and freshness of homegrown varieties. Plus, growing bananas at home is incredibly rewarding! It’s a fantastic way to connect with nature, learn about plant life cycles, and even impress your friends and family with your green thumb. In this article, I’m going to share some easy-to-follow DIY tricks and hacks that will help you successfully cultivate these delicious fruits, even if you don’t live in a tropical paradise. Get ready to embark on a fun and fruitful gardening adventure!
Growing Bananas at Home: A DIY Guide to Tropical Delights
Hey there, fellow plant enthusiasts! Ever dreamt of harvesting your own bananas right in your backyard? It might sound like a tropical fantasy, but trust me, with a little know-how, you can absolutely grow bananas at home, even if you don’t live in the tropics! I’m going to walk you through everything you need to know, from choosing the right variety to harvesting your delicious homegrown fruit. Let’s get started!
Choosing the Right Banana Variety
Not all banana plants are created equal, especially when it comes to growing them in different climates. Some varieties are more cold-hardy than others, and some are better suited for container growing. Here’s a breakdown of some popular choices:
* Dwarf Cavendish: This is a classic choice for home growers. It’s relatively small (reaching about 6-10 feet), making it perfect for containers or smaller gardens. The fruit is sweet and delicious, just like the bananas you find in the store.
* Rajapuri: Another excellent dwarf variety, Rajapuri bananas are known for their cold tolerance and sweet, creamy fruit. They typically grow to around 5-8 feet.
* Ice Cream (Blue Java): If you’re feeling adventurous, try growing Ice Cream bananas! They have a unique flavor that’s often compared to vanilla ice cream. They’re also relatively cold-hardy.
* Orinoco: This variety is known for its exceptional cold hardiness. The bananas are shorter and thicker than Cavendish, with a slightly tangy flavor.
* Goldfinger: A disease-resistant variety that produces flavorful bananas. It’s a good option if you’re concerned about common banana plant diseases.
Important Note: Before you choose a variety, research its specific needs and cold hardiness for your region.
Preparing Your Banana Plant for Success
Okay, you’ve picked your banana variety – awesome! Now, let’s get your plant ready for a thriving life.
* Sourcing Your Plant: You can typically find banana plants at local nurseries, garden centers, or online retailers. Look for healthy plants with well-developed roots. Avoid plants that look wilted or have signs of disease.
* Choosing the Right Location: Bananas love sunshine! Aim for a spot that gets at least 6-8 hours of direct sunlight per day. They also need protection from strong winds, which can damage the large leaves.
* Soil Preparation: Bananas are heavy feeders, so they need rich, well-draining soil. Amend your soil with plenty of compost, aged manure, or other organic matter. The ideal soil pH is between 6.0 and 6.5.
* Container Growing (Optional): If you’re growing in a container, choose a large pot (at least 20 gallons) with drainage holes. Use a high-quality potting mix that’s designed for container gardening.
Planting Your Banana Plant
Alright, time to get your hands dirty! Planting your banana plant is a crucial step, so follow these instructions carefully:
1. Dig the Hole: Dig a hole that’s twice as wide as the root ball and just as deep.
2. Amend the Soil (Again!): Mix some compost or aged manure into the soil you removed from the hole.
3. Gently Remove the Plant: Carefully remove the banana plant from its container, being careful not to damage the roots. Gently loosen any circling roots.
4. Position the Plant: Place the plant in the hole, making sure the top of the root ball is level with the surrounding soil.
5. Backfill the Hole: Fill the hole with the amended soil, gently tamping it down to remove any air pockets.
6. Water Thoroughly: Water the plant deeply after planting to help settle the soil.
Caring for Your Banana Plant
Now that your banana plant is in the ground (or container), it’s time to provide it with the care it needs to thrive.
* Watering: Bananas need consistent moisture, especially during the growing season. Water deeply whenever the top inch of soil feels dry. Avoid overwatering, which can lead to root rot.
* Fertilizing: As I mentioned, bananas are heavy feeders. Fertilize regularly with a balanced fertilizer (e.g., 10-10-10) or a fertilizer specifically formulated for bananas. Follow the instructions on the fertilizer label. I like to fertilize every 4-6 weeks during the growing season.
* Mulching: Apply a layer of mulch around the base of the plant to help retain moisture, suppress weeds, and regulate soil temperature. Use organic mulch like straw, wood chips, or shredded leaves.
* Pruning: Remove any dead or damaged leaves regularly. You’ll also want to remove any “suckers” (small shoots that grow from the base of the plant) that you don’t want to develop into new plants. Usually, I keep only one or two suckers to replace the main plant after it fruits.
* Pest and Disease Control: Keep an eye out for common banana plant pests like aphids, spider mites, and nematodes. Treat infestations promptly with insecticidal soap or neem oil. Prevent fungal diseases by ensuring good air circulation and avoiding overwatering.
Protecting Your Banana Plant from Cold Weather
If you live in an area with cold winters, you’ll need to take steps to protect your banana plant from frost and freezing temperatures.
* Container Plants: The easiest way to protect container plants is to bring them indoors before the first frost. Place them in a sunny location and water them sparingly during the winter.
* In-Ground Plants: For in-ground plants, you can try several methods:
* Mulching Heavily: Apply a thick layer of mulch around the base of the plant to insulate the roots.
* Wrapping the Trunk: Wrap the trunk of the plant with burlap or blankets to protect it from frost.
* Building a Frame: Build a frame around the plant and cover it with plastic or frost cloth. This will create a mini-greenhouse effect.
* Cutting Back: In colder climates, you can cut the plant back to the ground in the fall and let it regrow from the roots in the spring. This is a good option if you don’t want to deal with wrapping or covering the plant.
Harvesting Your Bananas
The moment you’ve been waiting for! Harvesting your own bananas is incredibly rewarding. Here’s how to know when they’re ready:
1. Timing is Key: It takes about 9-15 months from planting to harvest, depending on the variety and growing conditions.
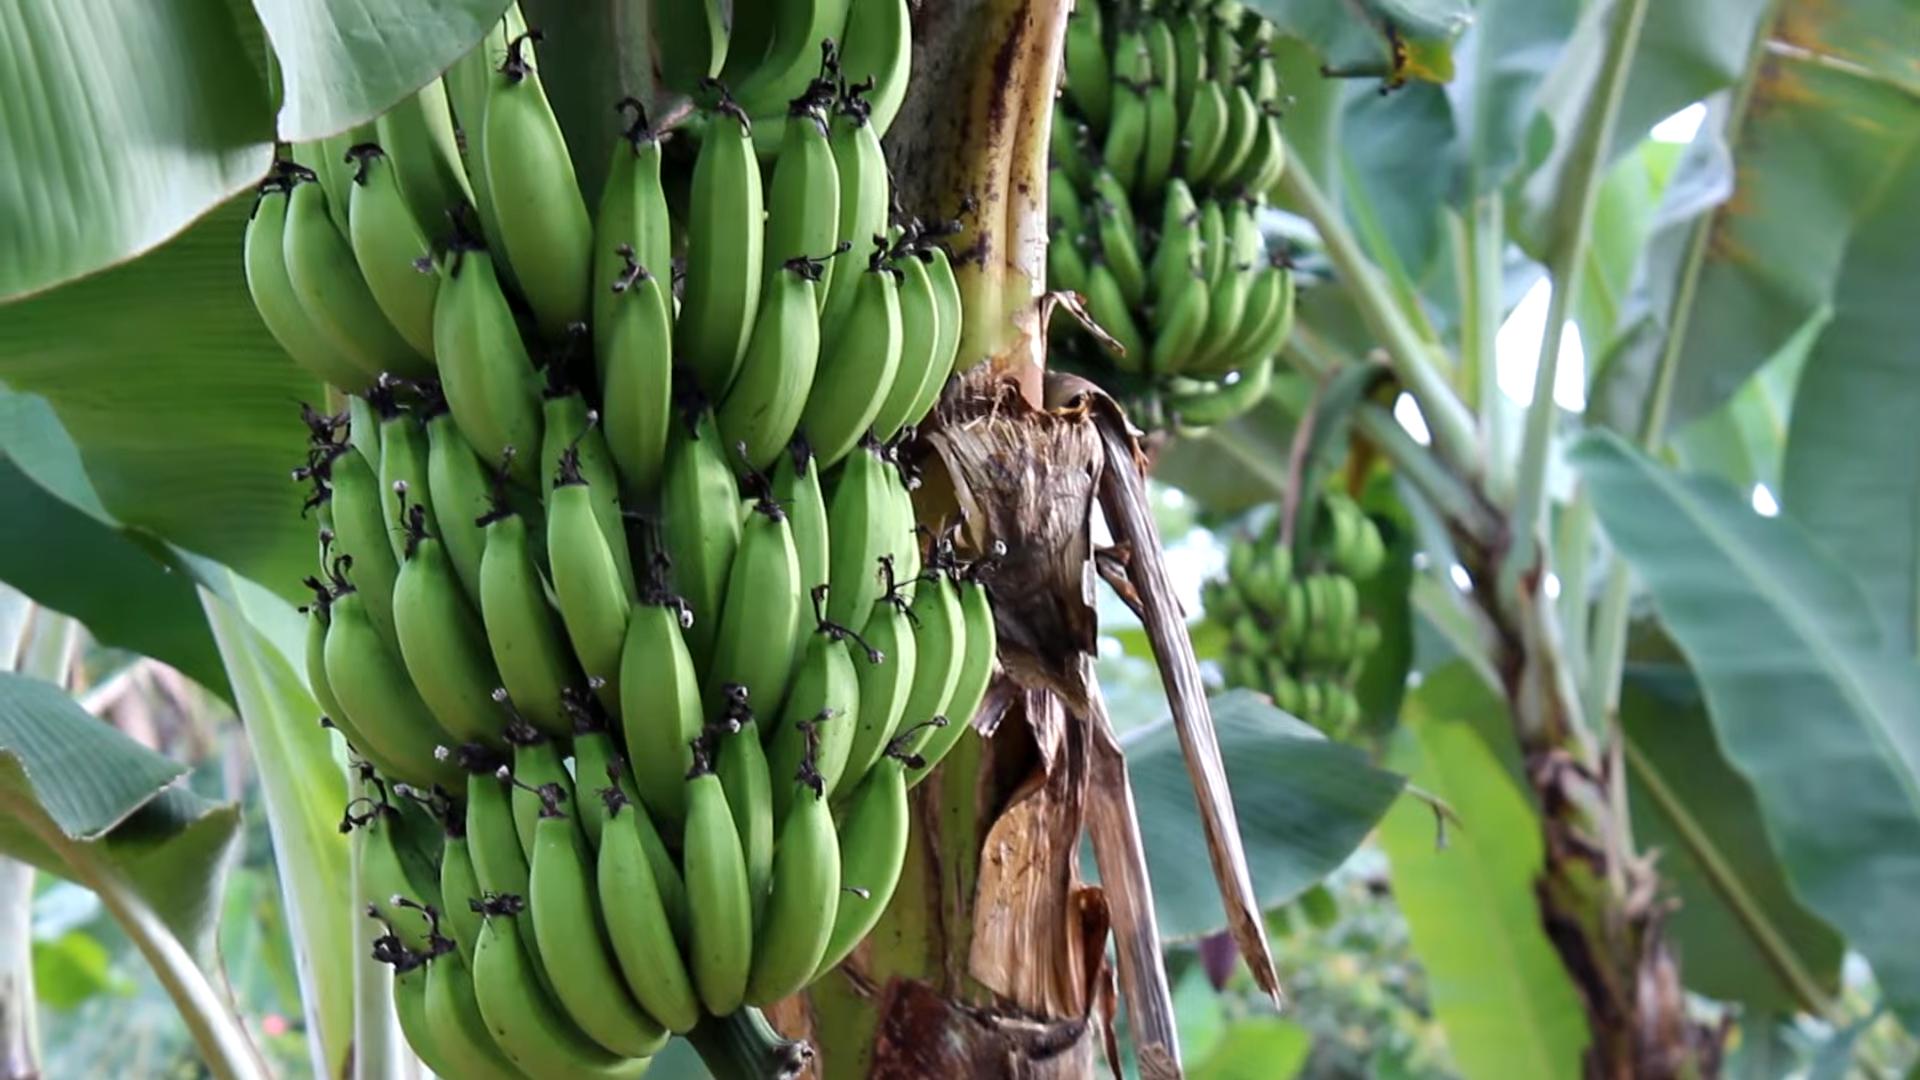
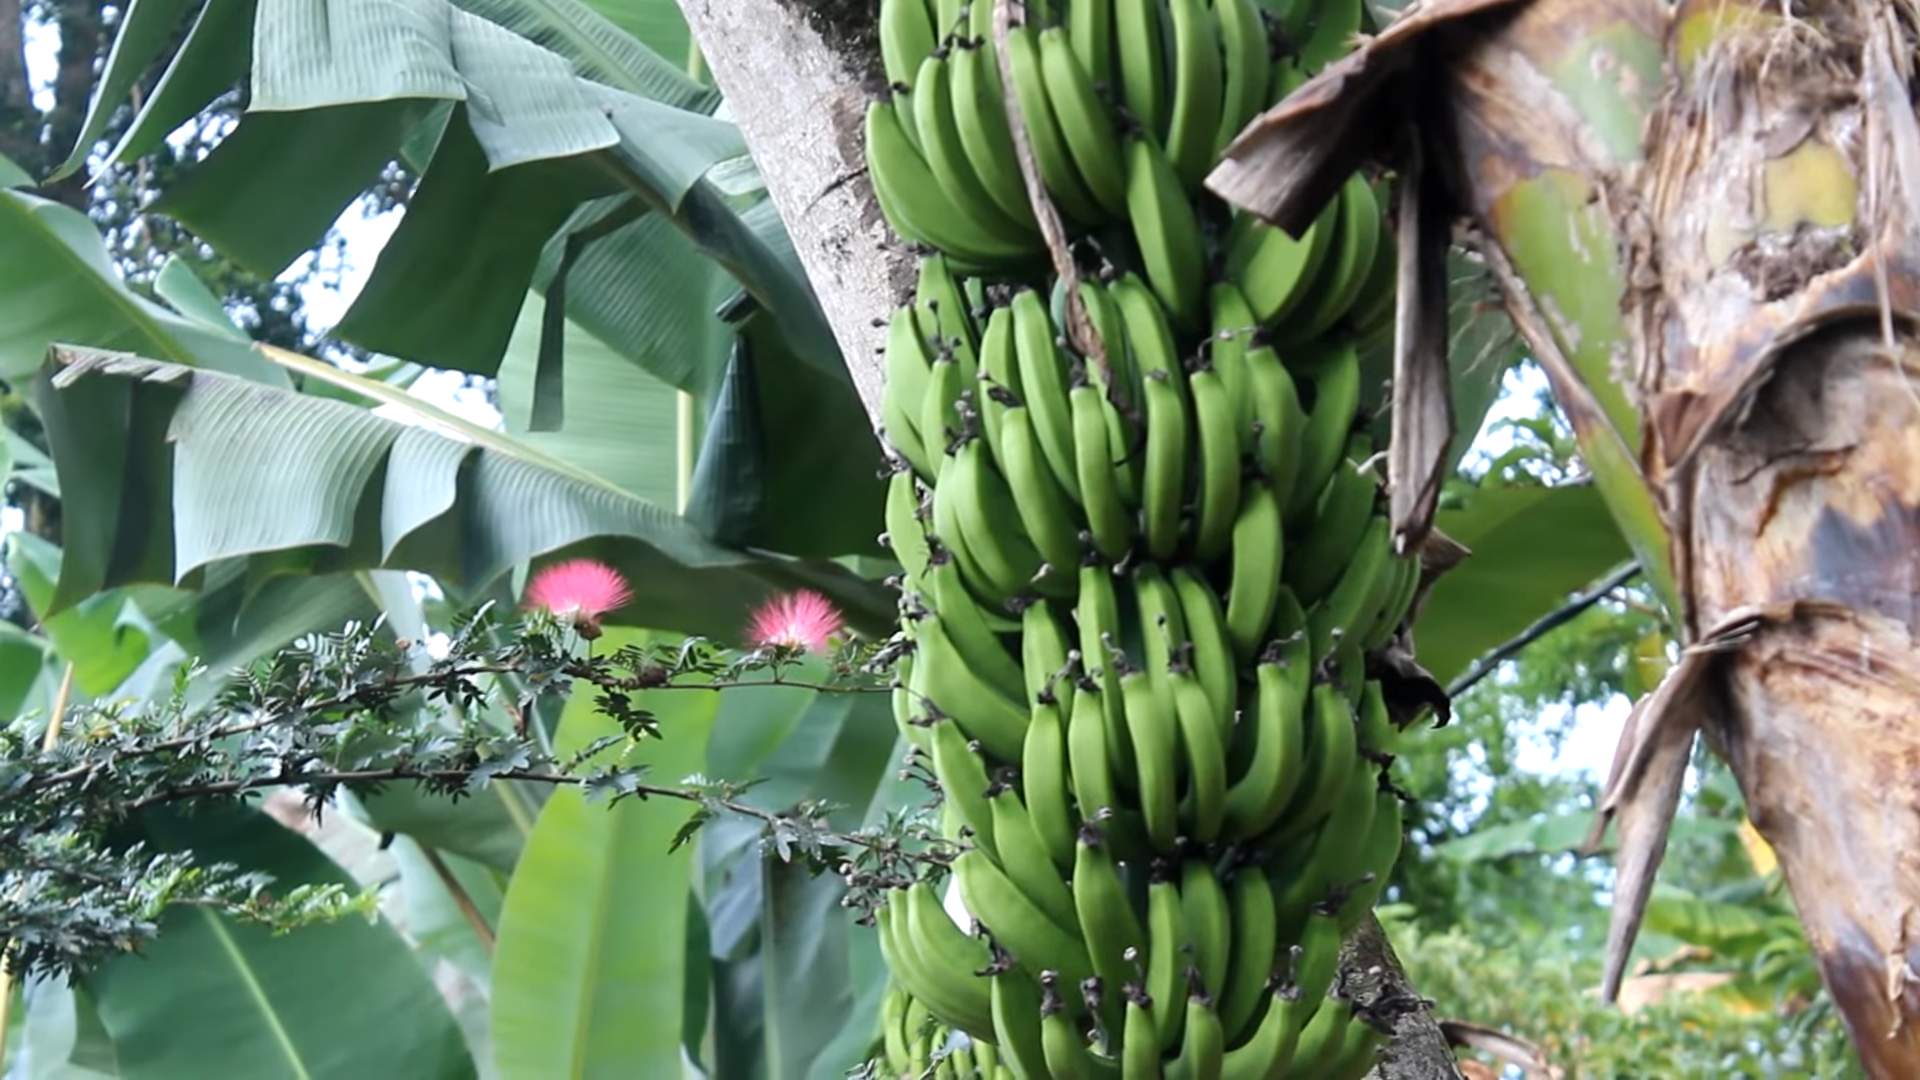
2. Observe the Fruit: The bananas will become plump and rounded, and the ridges on the fruit will become less prominent.
3. Check the Color: The color of the bananas will change from dark green to a lighter green or yellowish-green.
4. Tap Test: Gently tap the bananas. They should sound hollow.
5. Harvest the Bunch: Once the bananas are ready, cut the entire bunch from the plant with a sharp knife.
6. Ripening: Hang the bunch in a cool, dry place to ripen. You can also speed up the ripening process by placing the bananas in a paper bag with an apple or banana.
Important Note: Don’t let the bananas ripen completely on the plant, as they may split and attract pests.
Post-Harvest Care
After you harvest the bananas, the main plant will die back. Don’t worry, this is normal!
* Cut Down the Plant: Cut down the main plant to the ground.
* Allow Suckers to Grow: Allow one or two of the suckers to grow into new plants. These suckers will produce bananas in the following season.
* Continue Fertilizing: Continue fertilizing the new plants to ensure they have the nutrients they need to thrive.
Troubleshooting
Even with the best care, you might encounter some challenges along the way. Here are some common problems and how to address them:
* Yellowing Leaves: This could be a sign of overwatering, underwatering, nutrient deficiency, or pest infestation. Check the soil moisture, fertilize the plant, and inspect for pests.
* Brown Spots on Leaves: This could be a sign of fungal disease. Improve air circulation and treat with a fungicide if necessary.
* Slow Growth: This could be due to insufficient sunlight, poor soil, or lack of fertilizer. Make sure the plant is getting enough sunlight, amend the soil, and fertilize regularly.
* No Fruit: This could be due to a variety of factors, including insufficient sunlight, lack of water, nutrient deficiency, or cold temperatures. Make sure the plant is getting enough sunlight and water, fertilize regularly, and protect it from cold weather.
Enjoying Your Homegrown Bananas
Congratulations! You’ve successfully grown your
Conclusion
So, there you have it! Growing bananas at home might seem like a tropical dream reserved for equatorial climates, but with a little know-how and this simple DIY trick, you can cultivate your own little slice of paradise, no matter where you live. We’ve shown you how to create the perfect microclimate, mimicking the warmth and humidity that banana plants crave, even in cooler regions.
This isn’t just about having a conversation starter in your backyard; it’s about experiencing the joy of nurturing a plant from start to finish and reaping the delicious rewards of your labor. Imagine plucking a perfectly ripe, homegrown banana, bursting with flavor, knowing you cultivated it yourself. That’s an experience that store-bought fruit simply can’t replicate.
The beauty of this DIY approach is its adaptability. Feel free to experiment with different container sizes to accommodate your space. If you live in a particularly windy area, consider adding extra support to your banana plant to prevent damage. You can also explore different banana varieties suited to container growing, such as Dwarf Cavendish or Rajapuri, each offering unique flavors and textures.
Don’t be afraid to get creative with your DIY setup. Some gardeners have successfully used repurposed materials like old tires or plastic drums to create insulated planters. Others have incorporated heating cables into their containers for extra warmth during colder months. The possibilities are endless!
Ultimately, the success of growing bananas at home hinges on providing the right conditions. This DIY trick is your key to unlocking those conditions, creating a mini-tropical haven where your banana plant can thrive. It’s a cost-effective, environmentally friendly, and incredibly rewarding project that will bring a touch of the tropics to your doorstep.
We wholeheartedly encourage you to give this DIY banana-growing method a try. It’s easier than you might think, and the results are well worth the effort. Once you’ve embarked on your banana-growing adventure, we’d love to hear about your experiences! Share your photos, tips, and challenges in the comments below. Let’s create a community of home banana growers and learn from each other’s successes and failures. Together, we can transform our backyards into thriving banana plantations, one DIY project at a time. So, grab your gardening gloves, gather your materials, and get ready to experience the magic of growing your own bananas at home!
Frequently Asked Questions (FAQ)
What is the best location for my containerized banana plant?
The ideal location for your containerized banana plant is one that receives at least 6-8 hours of direct sunlight per day. A south-facing location is generally best, as it provides the most consistent sunlight throughout the day. However, if you live in a particularly hot climate, some afternoon shade may be beneficial to prevent leaf scorch. Ensure the location is also sheltered from strong winds, which can damage the large leaves of the banana plant. Consider the mature size of your chosen banana variety when selecting a location, as some varieties can grow quite tall.
How often should I water my banana plant?
Banana plants are heavy drinkers and require consistent moisture, especially during the growing season (spring and summer). Water deeply whenever the top inch of soil feels dry to the touch. Avoid letting the soil dry out completely, as this can stress the plant and hinder its growth. In hotter climates, you may need to water daily. During the dormant season (fall and winter), reduce watering frequency, but still ensure the soil doesn’t completely dry out. Good drainage is essential to prevent root rot, so make sure your container has adequate drainage holes.
What type of soil is best for growing bananas in containers?
Banana plants thrive in well-draining, fertile soil that is rich in organic matter. A good potting mix for containerized bananas should consist of a blend of peat moss, perlite, and compost. You can also add some aged manure or worm castings to further enrich the soil. Avoid using heavy clay soils, as they can retain too much moisture and lead to root rot. The ideal soil pH for banana plants is between 6.0 and 7.0.
How often should I fertilize my banana plant?
Banana plants are heavy feeders and require regular fertilization to support their rapid growth. During the growing season (spring and summer), fertilize your banana plant every 2-3 weeks with a balanced fertilizer that is high in potassium. A fertilizer with an N-P-K ratio of 10-5-20 is a good choice. You can also supplement with organic fertilizers such as compost tea or fish emulsion. Reduce fertilization frequency during the dormant season (fall and winter).
How do I protect my banana plant from frost?
Banana plants are sensitive to frost and can be damaged or killed by freezing temperatures. If you live in an area with occasional frosts, you will need to take steps to protect your banana plant during the winter months. One option is to move the container indoors to a bright, sunny location. If you cannot move the container indoors, you can wrap the plant in burlap or horticultural fleece to provide insulation. You can also mulch around the base of the plant to protect the roots. For more severe freezes, consider building a temporary shelter around the plant using plastic sheeting or blankets.
When will my banana plant produce fruit?
The time it takes for a banana plant to produce fruit depends on the variety, growing conditions, and overall health of the plant. Generally, it takes about 9-15 months from planting to harvest. Once the plant reaches maturity, it will produce a flower stalk, which will eventually develop into a bunch of bananas. It takes about 3-6 months for the bananas to ripen after the flower stalk appears.
How do I know when my bananas are ripe?
Bananas are ripe when they turn from green to yellow and the tips of the bananas become rounded. The skin may also develop some brown spots. To test for ripeness, gently squeeze the banana. If it gives slightly, it is ripe and ready to eat. You can also cut open a banana and check the flesh. Ripe bananas will have a sweet, creamy flavor.
Can I grow bananas indoors?
Yes, you can grow bananas indoors, but it requires providing the right conditions. Choose a dwarf variety that is well-suited to container growing. Provide plenty of bright, indirect light, and maintain a warm, humid environment. Water regularly and fertilize as needed. You may need to hand-pollinate the flowers to encourage fruit production.
What are some common pests and diseases that affect banana plants?
Some common pests that can affect banana plants include aphids, spider mites, and mealybugs. These pests can be controlled with insecticidal soap or neem oil. Common diseases that can affect banana plants include root rot, Panama disease, and black Sigatoka. Root rot can be prevented by ensuring good drainage and avoiding overwatering. Panama disease and black Sigatoka are fungal diseases that can be controlled with fungicides.
How do I propagate banana plants?
Banana plants can be propagated from pups, which are small offshoots that grow from the base of the plant. To propagate from pups, carefully dig up the pup and separate it from the mother plant. Make sure the pup has its own roots. Plant the pup in a separate container with well-draining soil. Water regularly and fertilize as needed.


Leave a Comment