

Grow Tamarind Tree: Ever dreamt of having your own exotic fruit tree right in your backyard? Imagine plucking fresh, tangy tamarind pods straight from your own tree, ready to add a unique twist to your favorite dishes! It sounds like a tropical fantasy, right? Well, it’s more achievable than you think, and this DIY guide is your passport to making that dream a reality.
The tamarind tree, with its graceful, spreading canopy, boasts a rich history. Originating in Africa, it has journeyed across continents, becoming deeply embedded in the culinary traditions of India, Southeast Asia, and Latin America. For centuries, tamarind has been prized not only for its distinctive sweet and sour flavor but also for its medicinal properties. From chutneys and curries to refreshing drinks and traditional remedies, the tamarind tree has played a vital role in diverse cultures.
But why should you learn to grow tamarind tree at home? In today’s world, where we’re increasingly conscious of where our food comes from, growing your own tamarind offers a sustainable and rewarding experience. You’ll have control over the growing process, ensuring your tamarind is free from harmful chemicals. Plus, imagine the satisfaction of sharing your homegrown tamarind with friends and family! This guide will provide you with simple, step-by-step instructions and insider tips to successfully cultivate your own tamarind tree, even if you’re a beginner gardener. Let’s get started and bring a touch of the tropics to your home!
Growing Your Own Tamarind Tree: A DIY Guide
Okay, so you want to grow your own tamarind tree? Awesome! It’s a bit of a journey, but trust me, the reward of having your own source of those tangy pods is totally worth it. This guide will walk you through everything, from starting with seeds to caring for your young tree. Let’s get started!
Sourcing and Preparing Tamarind Seeds
First things first, you need tamarind seeds. You have a couple of options here:
* Fresh Tamarind Pods: This is my preferred method. Buy some ripe tamarind pods from your local Asian market or specialty grocery store. The fresher the pods, the better the germination rate.
* Online Retailers: You can also find tamarind seeds online, but make sure you’re buying from a reputable source. Read reviews and check for seed viability guarantees.
Once you have your tamarind pods, it’s time to extract the seeds:
1. Open the Pods: Crack open the tamarind pods and remove the pulp. This can be a bit sticky, so don’t be afraid to get your hands dirty!
2. Clean the Seeds: Separate the seeds from the pulp. You’ll want to thoroughly clean them to remove any remaining sticky residue. I usually soak them in warm water for a few hours, then scrub them gently with a soft brush.
3. Dry the Seeds: Spread the cleaned seeds on a paper towel and let them air dry completely. This prevents mold growth during storage.
Now that you have your clean, dry tamarind seeds, it’s time for scarification. This process helps to break down the hard outer shell of the seed, making it easier for water to penetrate and trigger germination.
* Scarification Methods:
* Nicking: Use a sharp knife or nail clipper to carefully nick the seed coat. Be careful not to damage the inner part of the seed! Just a small nick is enough.
* Sanding: Gently rub the seeds with sandpaper. This is a less precise method than nicking, but it can still be effective.
* Hot Water Treatment: Soak the seeds in hot (not boiling!) water for 12-24 hours. This softens the seed coat and helps with germination. I usually use this method in conjunction with nicking.
I personally prefer the nicking method combined with the hot water treatment. I find it gives me the best germination rates.
Germinating Tamarind Seeds
Okay, your seeds are prepped and ready to go! Now it’s time to germinate them. You have a couple of options here as well:
* Paper Towel Method: This is a great way to monitor germination progress.
* Direct Sowing: Plant the seeds directly into small pots.
Here’s how to germinate using the paper towel method:
1. Moisten a Paper Towel: Dampen a paper towel with water. Make sure it’s not soaking wet, just damp.
2. Arrange the Seeds: Place the scarified tamarind seeds on the damp paper towel, spacing them about an inch apart.
3. Fold and Seal: Fold the paper towel over the seeds and place it in a plastic bag or container. This will help to retain moisture.
4. Warm Location: Place the bag or container in a warm location, like on top of your refrigerator or near a sunny window.
5. Check Regularly: Check the paper towel every day to make sure it’s still damp. If it starts to dry out, mist it with water.
6. Wait for Germination: Germination can take anywhere from a few days to a few weeks, so be patient! You’ll know the seeds have germinated when you see a small root emerging.
Once the roots are about half an inch long, it’s time to transplant the seedlings into pots.
Here’s how to germinate using direct sowing:
1. Prepare Small Pots: Fill small pots (about 3-4 inches in diameter) with a well-draining potting mix. I like to use a mix of peat moss, perlite, and vermiculite.
2. Plant the Seeds: Make a small hole in the center of each pot, about half an inch deep. Place a scarified tamarind seed in each hole and cover it with soil.
3. Water Gently: Water the pots gently to moisten the soil.
4. Warm Location: Place the pots in a warm, sunny location.
5. Keep Moist: Keep the soil consistently moist, but not waterlogged.
6. Wait for Germination: Germination can take anywhere from a few days to a few weeks, so be patient!
Transplanting and Caring for Seedlings
Whether you germinated your seeds in paper towels or directly in pots, the next step is transplanting them into larger containers once they have a few leaves.
1. Prepare Larger Pots: Choose pots that are at least 6 inches in diameter. Fill them with a well-draining potting mix.
2. Carefully Remove Seedlings: Gently remove the seedlings from their current containers. If you germinated them in paper towels, be extra careful not to damage the roots.
3. Plant the Seedlings: Make a hole in the center of each pot and carefully place the seedling in the hole. Cover the roots with soil and gently pat it down.
4. Water Thoroughly: Water the seedlings thoroughly after transplanting.
5. Sunlight: Place the pots in a sunny location. Tamarind trees need at least 6 hours of sunlight per day.
6. Watering: Water regularly, but allow the soil to dry out slightly between waterings. Overwatering can lead to root rot.
7. Fertilizing: Fertilize your tamarind seedlings every few weeks with a balanced fertilizer. Follow the instructions on the fertilizer package.
Caring for Your Growing Tamarind Tree
As your tamarind tree grows, it will need more space and attention. Here are some tips for caring for your growing tree:
* Repotting: Repot your tamarind tree every year or two as it grows. Choose a pot that is slightly larger than the previous one.
* Pruning: Prune your tamarind tree regularly to maintain its shape and encourage branching. Remove any dead or diseased branches.
* Pest Control: Keep an eye out for pests, such as aphids and scale. Treat any infestations promptly with an appropriate insecticide.
* Winter Protection: Tamarind trees are not cold-hardy. If you live in a cold climate, you’ll need to bring your tree indoors during the winter months. Place it in a sunny location and water it sparingly.
* Soil: Tamarind trees prefer well-draining soil that is slightly acidic. You can amend your soil with peat moss or compost to improve drainage and acidity.
* Fertilizer: Continue to fertilize your tamarind tree regularly with a balanced fertilizer. You can also use a fertilizer that is specifically formulated for fruit trees.
* Sunlight: Ensure your tamarind tree receives at least 6 hours of direct sunlight each day.
* Watering: Water deeply but infrequently, allowing the soil to dry out slightly between waterings. Avoid overwatering, as this can lead to root rot.
* Humidity: Tamarind trees thrive in humid environments. If you live in a dry climate, you can increase humidity by misting your tree regularly or placing it near a humidifier.
* Pollination: Tamarind trees are typically pollinated by insects. If you’re growing your tree indoors, you may need to hand-pollinate the flowers to ensure fruit production. Use a small brush to transfer pollen from one flower to another.
Potential Challenges and Troubleshooting
Growing a tamarind tree isn’t always smooth sailing. Here are some common challenges you might encounter and how to address them:
* Slow Germination: Tamarind seeds can be slow to germinate. Be patient and make sure the seeds are kept warm and moist. If they still haven’t germinated after a few weeks, try scarifying them again.
* Seedling Death: Seedlings can sometimes die due to damping-off, a fungal disease. To prevent damping-off, use a sterile potting mix and avoid overwatering.
* Leaf Drop: Leaf drop can be caused by a variety of factors, including overwatering, underwatering, lack of sunlight, and pest infestations. Identify the cause and address it accordingly.
* Lack of Fruit Production: It can take several years for a tamarind tree to start producing fruit. Make sure your tree is getting enough sunlight, water, and fertilizer. You may also need to hand-pollinate the flowers.
* Pest Infestations: Tamarind trees can be susceptible to pests such as aphids, scale, and mealybugs. Inspect your tree regularly and treat any infestations promptly with an appropriate insecticide.
Conclusion
So, there you have it! Growing your own tamarind tree from seed might seem like a journey, but it’s a deeply rewarding one. Forget relying solely on nurseries or expensive saplings. This DIY method empowers you to cultivate your own exotic fruit-bearing tree, right from the comfort of your home. The satisfaction of nurturing a tiny seed into a thriving tamarind tree is unparalleled.
Why is this a must-try? Because it offers a cost-effective and engaging way to connect with nature. You’ll gain a profound understanding of the tamarind tree’s life cycle, from germination to maturity. Plus, you’ll have the unique opportunity to select the perfect spot in your garden and tailor the growing conditions to your specific climate. Imagine the pride you’ll feel when you harvest your first batch of tangy tamarind pods!
But the benefits don’t stop there. Growing your own tamarind tree contributes to biodiversity and promotes sustainable practices. You’ll be reducing your carbon footprint by avoiding the transportation associated with purchasing mature trees. And you’ll be creating a haven for pollinators and other beneficial insects in your garden.
Variations and Suggestions:
* Grafting for Faster Fruiting: While growing from seed is fulfilling, it can take several years for your tamarind tree to bear fruit. Consider grafting a branch from a mature, fruit-producing tree onto your seedling to accelerate the process. This technique can significantly shorten the waiting time and ensure you get the desired fruit quality.
* Container Gardening: If you live in a colder climate or have limited space, growing your tamarind tree in a large container is a viable option. Choose a pot with excellent drainage and use a well-draining potting mix. You can move the container indoors during the winter months to protect your tree from frost.
* Experiment with Different Varieties: Tamarind trees come in various varieties, each with its unique flavor profile and characteristics. Research different cultivars and choose one that suits your taste preferences and growing conditions. Some varieties are sweeter, while others are more tart.
* Soil Amendments: Tamarind trees thrive in slightly acidic soil. Amend your soil with organic matter, such as compost or peat moss, to improve drainage and nutrient content. You can also add sulfur to lower the pH of the soil if necessary.
* Pest and Disease Management: Keep an eye out for common pests and diseases that can affect tamarind trees, such as aphids, scale insects, and fungal infections. Implement preventative measures, such as regular pruning and proper watering, to minimize the risk of infestations. Use organic pest control methods whenever possible to protect your tree and the environment.
We wholeheartedly encourage you to embark on this exciting journey of growing your own tamarind tree. It’s a rewarding experience that will connect you with nature and provide you with a bountiful harvest for years to come. Don’t be afraid to experiment, adapt the techniques to your specific environment, and most importantly, have fun!
We’d love to hear about your experiences! Share your progress, tips, and photos in the comments section below. Let’s create a community of tamarind tree enthusiasts and learn from each other. Your insights could inspire others to take the plunge and discover the joy of growing their own tamarind tree.
Frequently Asked Questions (FAQs)
How long does it take for a tamarind tree grown from seed to bear fruit?
Patience is key! Tamarind trees grown from seed typically take anywhere from 7 to 10 years to begin producing fruit. This is because the tree needs to reach a certain level of maturity before it can allocate resources to fruit production. Grafting, as mentioned earlier, can significantly reduce this timeframe.
What kind of climate is best for growing a tamarind tree?
Tamarind trees are tropical and subtropical plants, thriving in warm climates with plenty of sunshine. They prefer temperatures between 75°F and 95°F (24°C and 35°C). They are frost-sensitive and cannot tolerate prolonged exposure to freezing temperatures. If you live in a colder climate, consider growing your tamarind tree in a container so you can bring it indoors during the winter.
What type of soil is ideal for tamarind trees?
Tamarind trees prefer well-draining soil that is slightly acidic to neutral (pH 6.0 to 7.0). They can tolerate a variety of soil types, including sandy loam and clay loam, as long as the drainage is good. Avoid planting in heavy clay soil that retains too much water, as this can lead to root rot. Amending the soil with organic matter, such as compost or well-rotted manure, will improve drainage and provide essential nutrients.
How often should I water my tamarind tree?
Water your tamarind tree regularly, especially during the first few years after planting. Keep the soil consistently moist but not waterlogged. Water deeply whenever the top inch of soil feels dry to the touch. Reduce watering during the dormant season (winter) when the tree is not actively growing. Mature tamarind trees are relatively drought-tolerant but will still benefit from occasional watering during dry spells.
What are some common pests and diseases that affect tamarind trees?
Tamarind trees are generally resistant to pests and diseases, but they can be susceptible to certain problems, including aphids, scale insects, mealybugs, and fungal infections. Inspect your tree regularly for signs of infestation or disease. Treat any problems promptly with appropriate organic pest control methods or fungicides. Proper pruning and good air circulation can help prevent fungal diseases.
How do I prune my tamarind tree?
Pruning is essential for maintaining the health and shape of your tamarind tree. Prune regularly to remove dead, damaged, or diseased branches. Also, prune to improve air circulation and sunlight penetration within the canopy. Shape the tree to encourage a strong central leader and well-spaced branches. The best time to prune is during the dormant season (winter).
Can I grow a tamarind tree indoors?
While it’s possible to grow a tamarind tree indoors, it can be challenging. Tamarind trees need plenty of sunlight, so you’ll need to provide supplemental lighting if you don’t have a sunny window. Also, indoor conditions tend to be drier than outdoor conditions, so you’ll need to mist your tree regularly to increase humidity. Choose a large container with good drainage and use a well-draining potting mix. Be prepared to repot your tree as it grows.
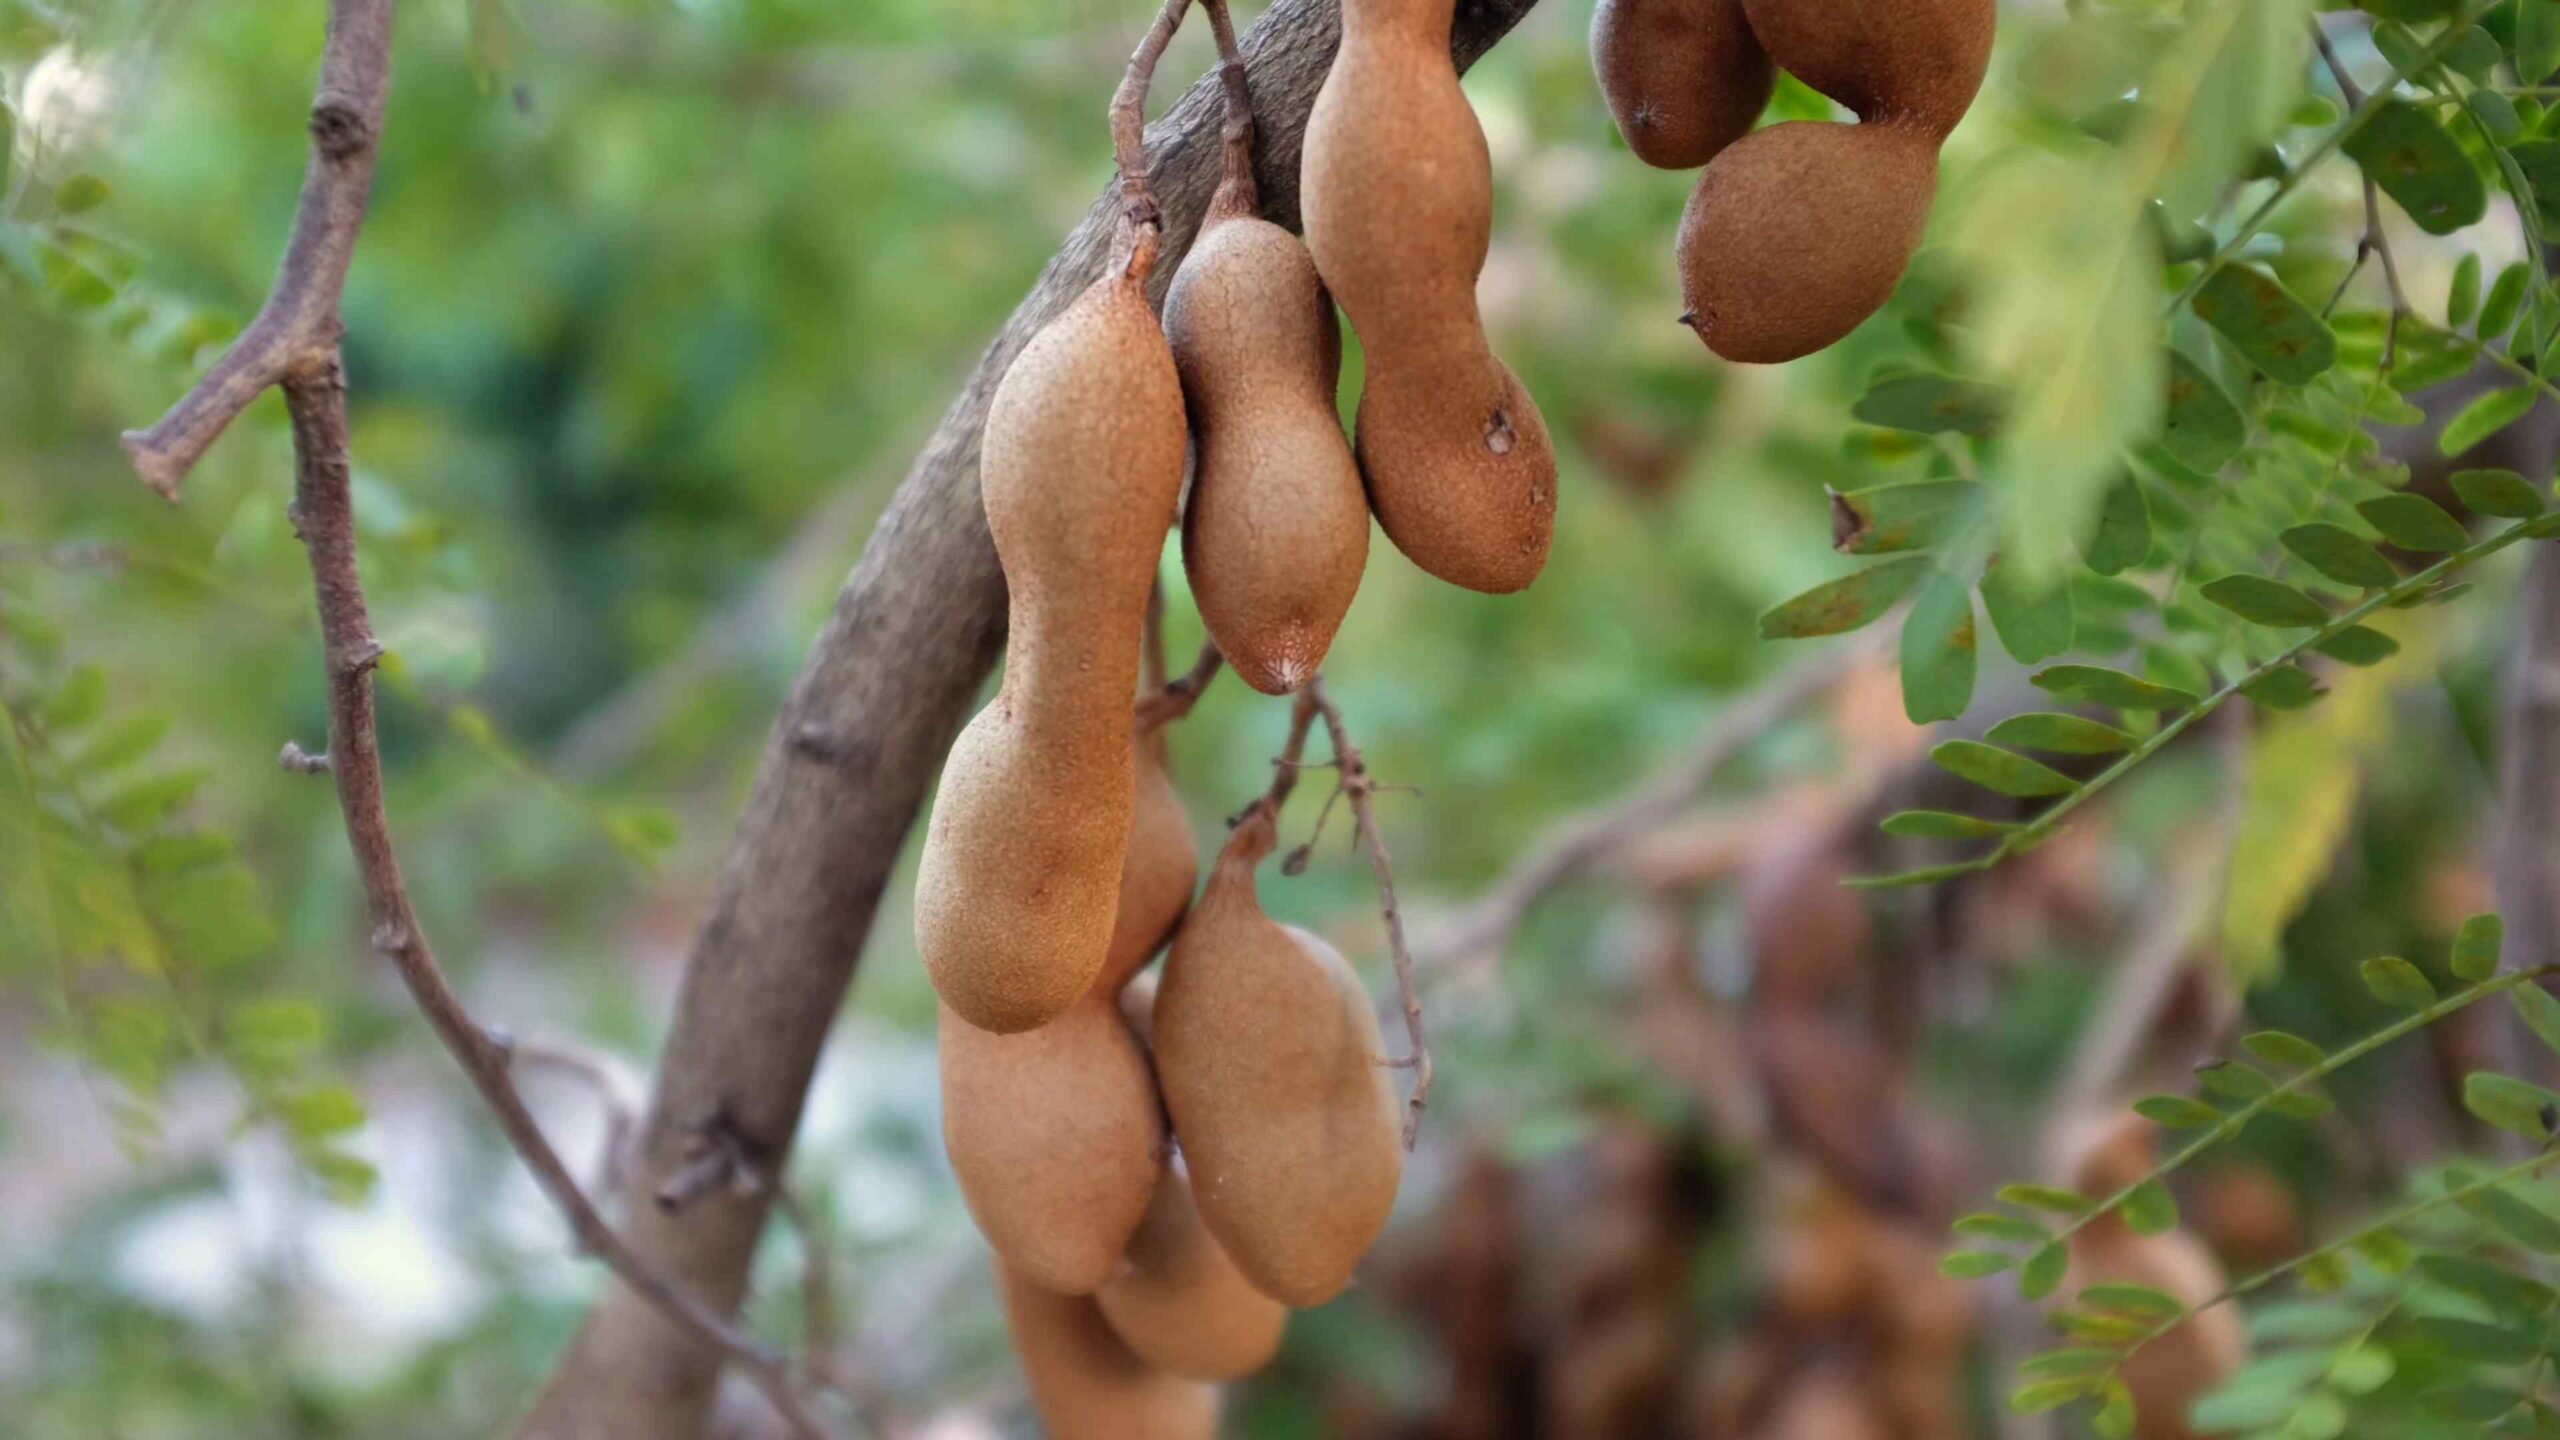
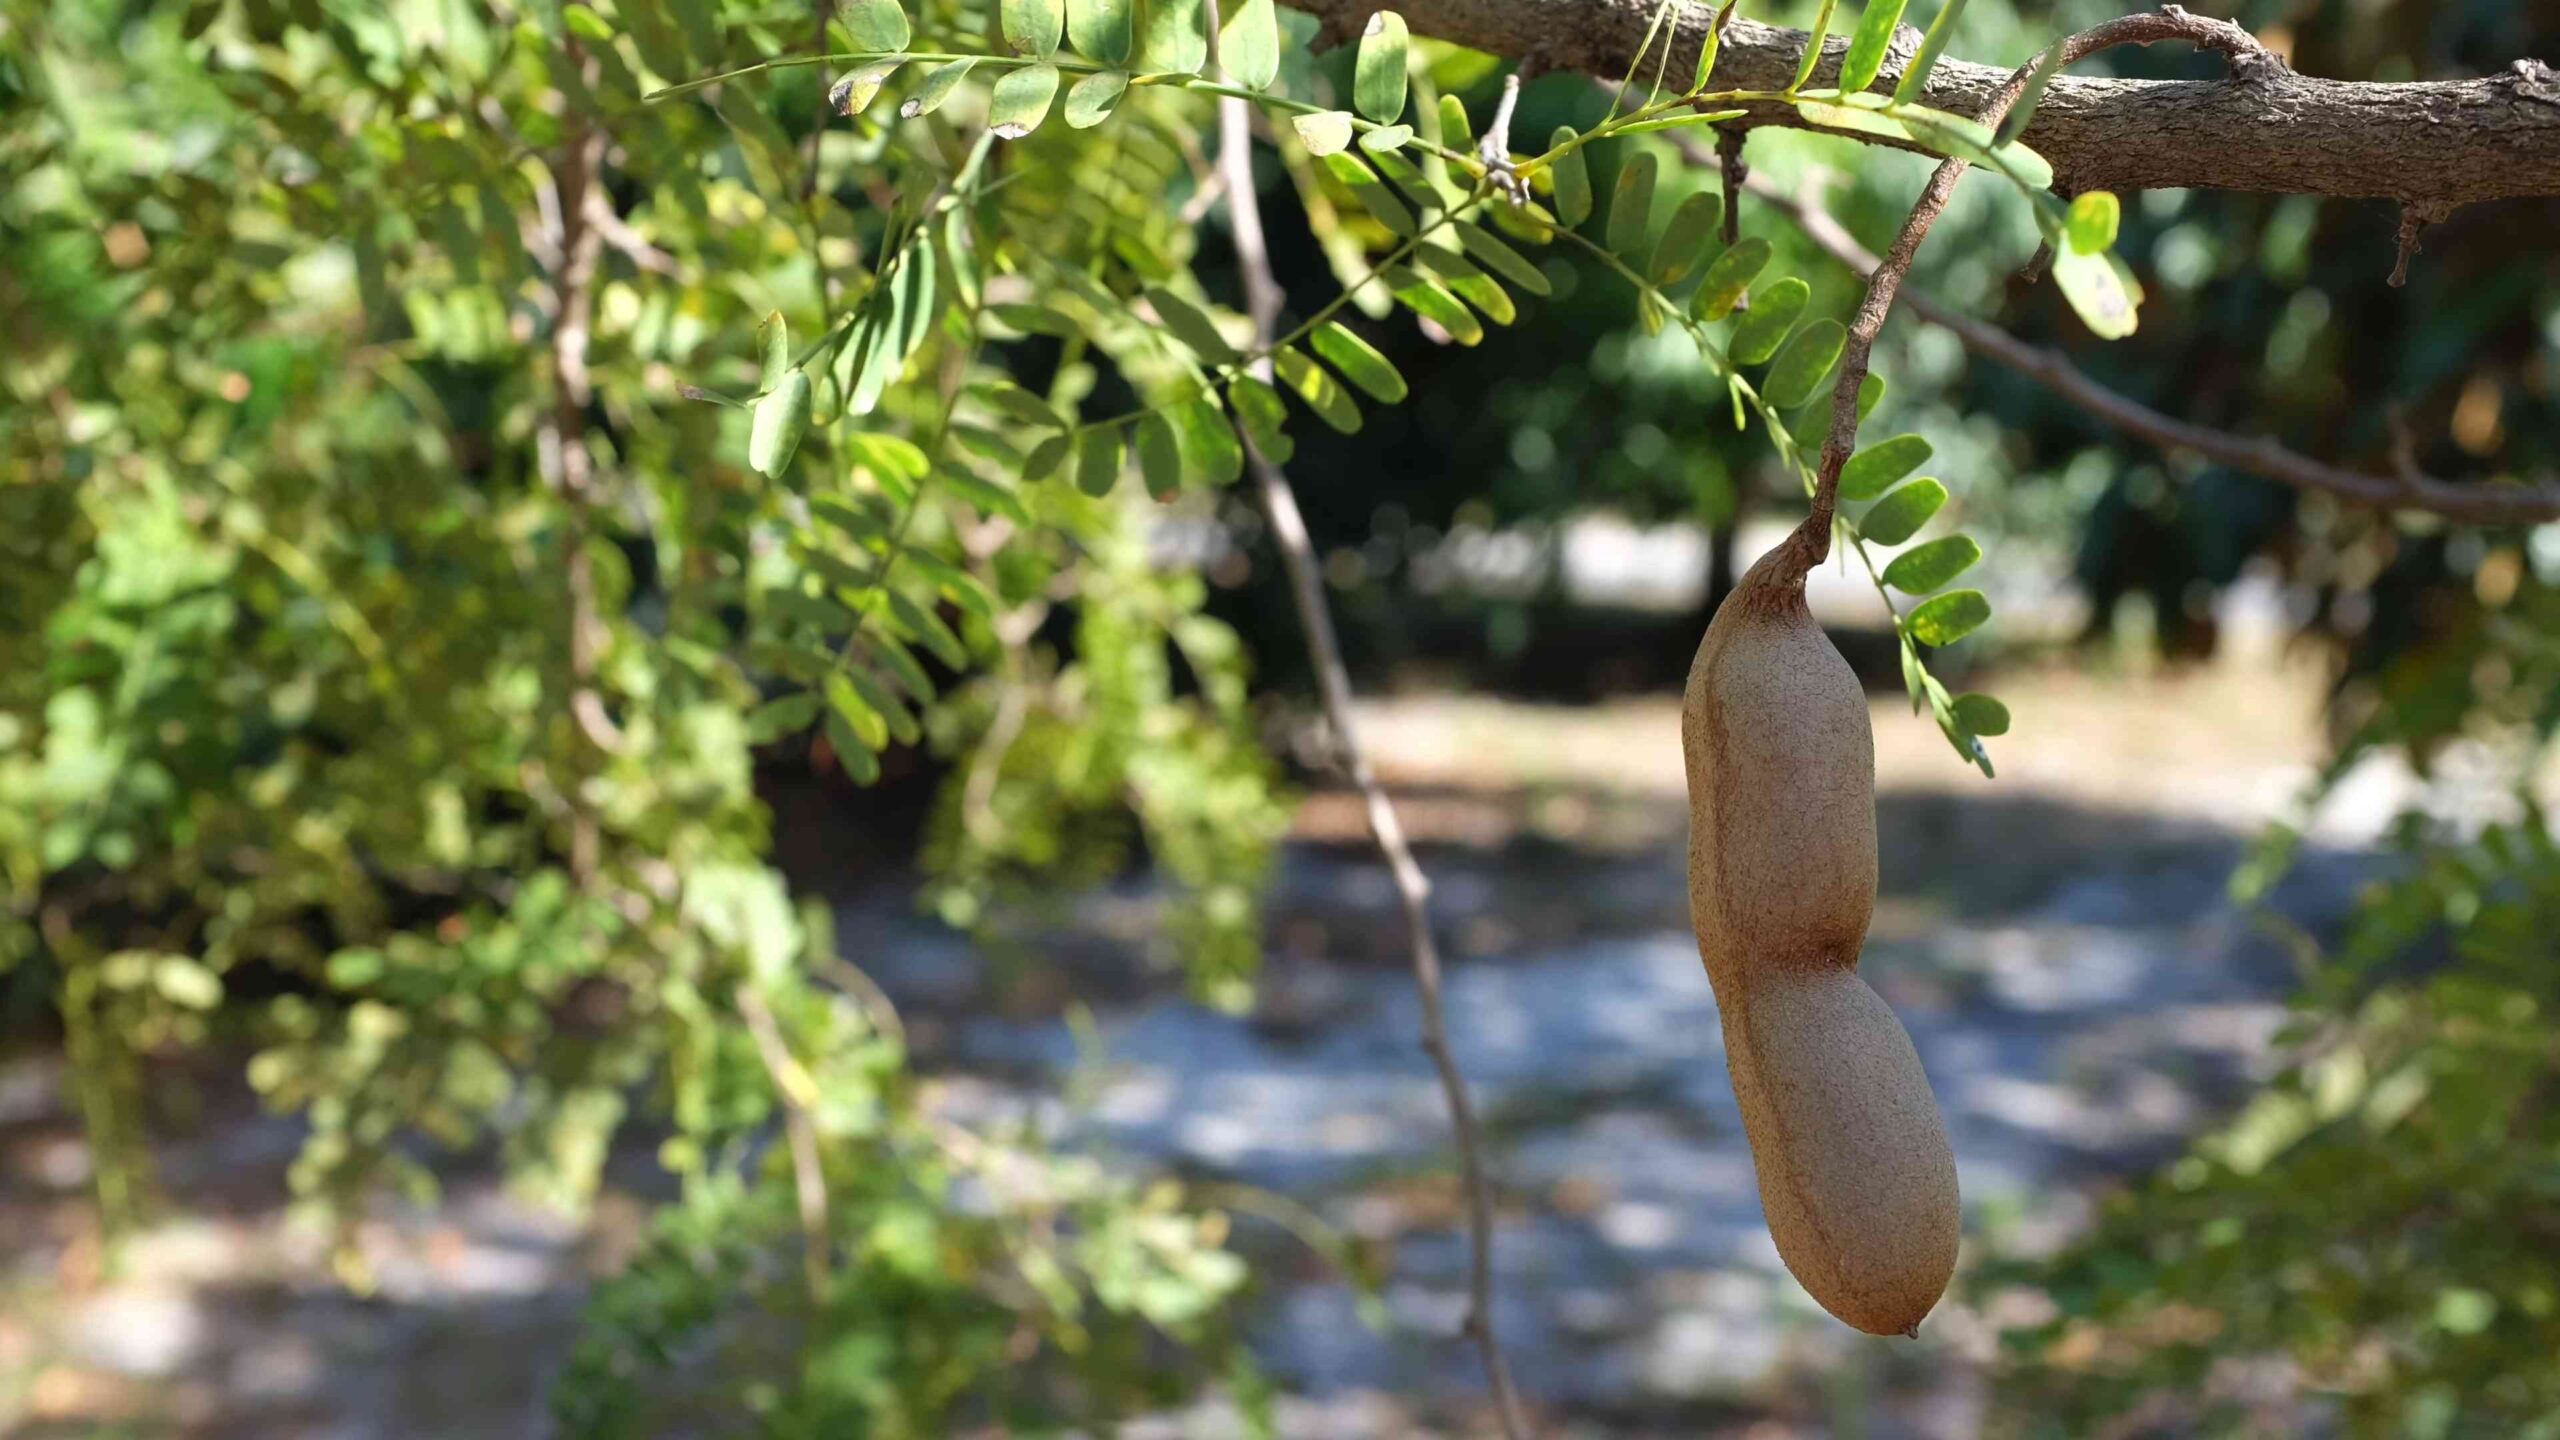
How do I harvest tamarind pods?
Tamarind pods are typically ready for harvest when they turn brown and become brittle. The pods should be easily snapped off the tree. Harvest the pods by hand, being careful not to damage the branches. Store the pods in a cool, dry place.
What are some uses for tamarind?
Tamarind is a versatile fruit with a wide range of culinary and medicinal uses. The pulp can be eaten raw or used to make sauces, chutneys, jams, and drinks. It is a key ingredient in many Asian and Latin American dishes. Tamarind is also used in traditional medicine for its digestive and anti-inflammatory properties.
Is growing a tamarind tree worth the effort?
Absolutely! While it requires patience and care, growing your own tamarind tree is a rewarding experience that will provide you with delicious and nutritious fruit for years to come. You’ll also gain a deeper appreciation for nature and the process of growing your own food. Plus, you’ll have a beautiful and unique tree in your garden that will be the envy of your neighbors. The joy of harvesting your own tamarind pods and using them in your favorite recipes is truly priceless.
Leave a Comment