

DIY Strawberry Keychain: Who doesn’t love a little burst of summer sweetness dangling from their keys or backpack? I know I do! And what if I told you that you could create your own adorable, handcrafted strawberry keychain that’s not only cute but also a fun and rewarding project?
From ancient times, fruit motifs have been used in art and jewelry, symbolizing abundance and good fortune. While we might not be invoking ancient deities with our strawberry keychain, we are tapping into that timeless appreciation for nature’s beauty. Think of it as a tiny, wearable piece of art!
Let’s be honest, in a world of mass-produced trinkets, having something unique and handmade is incredibly special. This DIY Strawberry Keychain project is perfect for adding a personal touch to your belongings, creating a thoughtful gift for a friend, or simply unwinding with a creative activity. Plus, it’s a fantastic way to use up those leftover craft supplies you’ve been hoarding (we all have them!). I’ll guide you through each step, ensuring that even beginners can create a charming strawberry keychain they’ll be proud to show off. So, grab your supplies, and let’s get crafting!
DIY Adorable Strawberry Keychain: A Sweet Project!
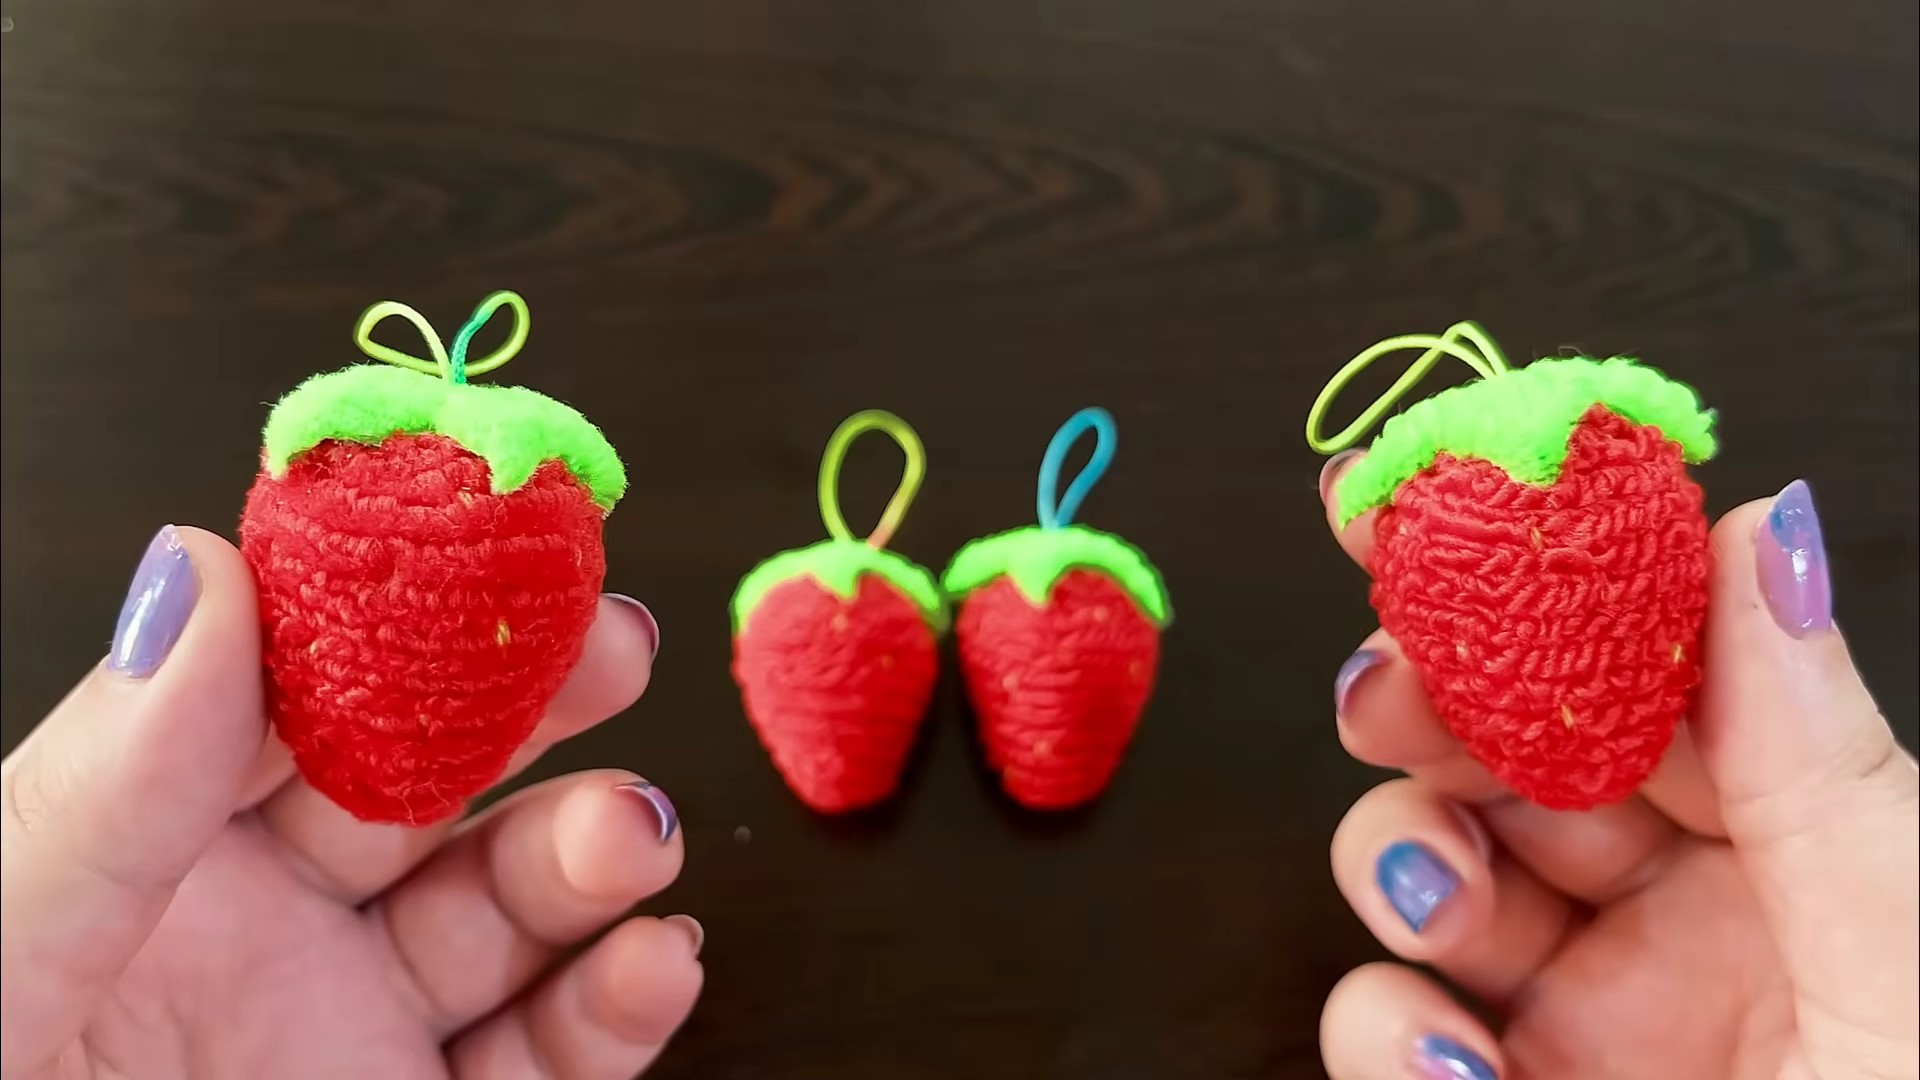
Hey there, fellow crafters! Today, I’m super excited to share a fun and easy DIY project with you: creating your own adorable strawberry keychain! This little charm is perfect for adding a touch of sweetness to your keys, backpack, or even as a cute gift for a friend. It’s a great project for beginners, and I promise you’ll be hooked once you see how simple and rewarding it is. Let’s get started!
What You’ll Need: Gathering Your Supplies
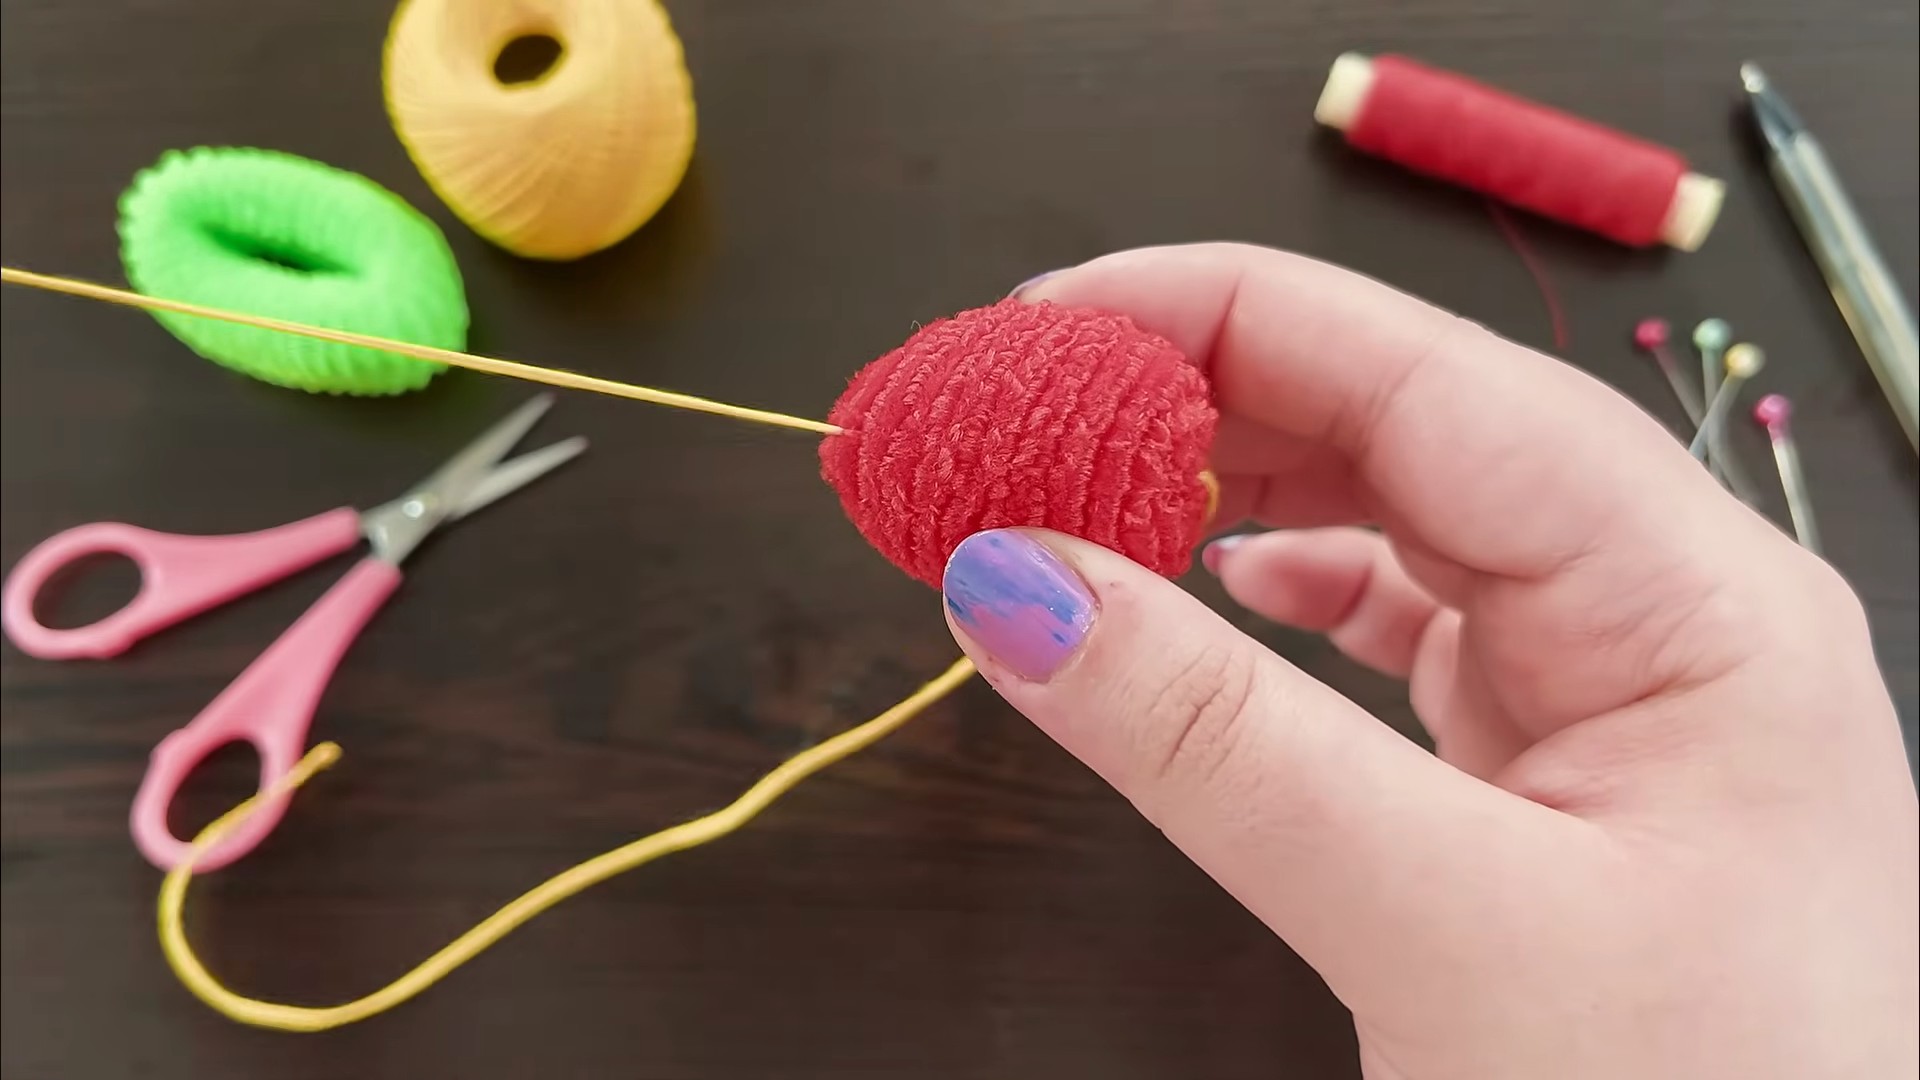
Before we dive in, let’s make sure we have everything we need. Here’s a list of the materials and tools you’ll need to create your strawberry keychain:
* **Felt:** Red, green, and white felt are essential for the strawberry body, leaves, and seeds. I recommend using wool felt for a higher quality finish, but acrylic felt works just fine too!
* **Embroidery Floss:** Matching colors of embroidery floss for sewing the felt pieces together and adding details. Red, green, and white are the main colors you’ll need.
* **Keychain Ring:** A standard keychain ring to attach your strawberry charm to your keys or bag.
* **Stuffing:** Polyester fiberfill to give your strawberry a plump and cuddly shape.
* **Scissors:** A sharp pair of scissors for cutting out the felt pieces.
* **Needle:** An embroidery needle with a large eye for threading the embroidery floss.
* **Pencil or Fabric Marker:** For tracing the strawberry pattern onto the felt.
* **Strawberry Pattern:** You can easily find a free strawberry pattern online, or you can draw your own! I’ll provide some tips on creating your own pattern later.
* **Optional:** Beads or sequins for extra embellishments.
Creating Your Strawberry Pattern
If you’re feeling creative, you can design your own strawberry pattern! Here’s how I usually do it:
1. **Draw a Basic Strawberry Shape:** Start by sketching a simple, rounded triangle shape on a piece of paper. This will be the main body of your strawberry.
2. **Add Curves and Details:** Round out the edges of the triangle to make it look more like a strawberry. You can add a slight indentation at the top to create a more realistic shape.
3. **Create Leaf Pattern:** Draw a small leaf shape. I usually make mine with three points, but you can experiment with different leaf designs.
4. **Size Considerations:** Think about the size you want your finished keychain to be. A good size is around 2-3 inches tall.
5. **Cut Out Your Patterns:** Once you’re happy with your patterns, carefully cut them out.
Cutting Out the Felt Pieces
Now that we have our pattern, it’s time to cut out the felt pieces.
1. **Trace the Pattern:** Place your strawberry pattern onto the red felt and trace around it with a pencil or fabric marker. Repeat this process to create two identical strawberry shapes.
2. **Cut Out the Strawberry Shapes:** Carefully cut out the two strawberry shapes along the traced lines.
3. **Trace and Cut the Leaves:** Place your leaf pattern onto the green felt and trace around it. Cut out the leaf shape. You can cut out one or two leaves, depending on how you want your keychain to look.
4. **Prepare White Felt for Seeds:** Cut out small pieces of white felt for the seeds. You can either cut out individual seed shapes or cut a long strip of white felt and then cut small pieces from it as you sew.
Sewing the Strawberry Body
This is where the magic happens! We’ll start by sewing the seeds onto the strawberry front, then sew the two halves together.
1. **Sewing the Seeds:** Thread your needle with white embroidery floss. Tie a knot at the end of the floss.
2. **Attaching the Seeds:** Sew small stitches onto one of the red felt strawberry pieces to create the seeds. I like to scatter them randomly across the strawberry, but you can arrange them in a more organized pattern if you prefer.
3. **Securing the Floss:** Once you’ve sewn all the seeds, tie a knot on the back of the felt to secure the floss and trim the excess.
4. **Joining the Strawberry Halves:** Place the two strawberry pieces together, with the seed-covered side facing out.
5. **Blanket Stitch (or Running Stitch):** Thread your needle with red embroidery floss. Tie a knot at the end of the floss. Use a blanket stitch (or a running stitch if you’re a beginner) to sew around the edges of the strawberry, leaving a small opening at the top for stuffing.
* **Blanket Stitch:** To do a blanket stitch, bring the needle up through the edge of the felt, then insert the needle back down through the same hole. Before pulling the floss tight, bring the needle up through the loop you’ve created. This will create a neat, decorative edge.
* **Running Stitch:** For a running stitch, simply weave the needle in and out of the felt along the edge.
6. **Stuffing the Strawberry:** Once you’ve sewn most of the way around, start stuffing the strawberry with polyester fiberfill. Use a small amount of stuffing at a time to avoid overstuffing.
7. **Finishing the Seam:** Continue sewing around the edges until the opening is closed. Tie a knot on the back of the felt to secure the floss and trim the excess.
Attaching the Leaves and Keychain Ring
Now, let’s add the finishing touches to our strawberry keychain!
1. **Attaching the Leaves:** Thread your needle with green embroidery floss. Tie a knot at the end of the floss.
2. **Sewing the Leaves:** Sew the leaf (or leaves) to the top of the strawberry, using a few small stitches. Make sure the leaves are securely attached.
3. **Adding the Keychain Ring:** Thread your needle with red embroidery floss.
4. **Creating a Loop:** Create a small loop at the top of the strawberry, near the leaves. This loop will be used to attach the keychain ring.
5. **Securing the Loop:** Sew the loop securely to the strawberry, using several stitches.
6. **Attaching the Ring:** Attach the keychain ring to the loop.
Adding Extra Embellishments (Optional)
If you want to add some extra flair to your strawberry keychain, here are a few ideas:
* **Beads:** Sew small beads onto the strawberry to add some sparkle.
* **Sequins:** Attach sequins to the strawberry for a glamorous look.
* **Embroidery Details:** Add more embroidery details, such as vines or flowers, to the strawberry.
Tips and Tricks for Success
Here are a few tips and tricks that I’ve learned along the way to help you create the perfect strawberry keychain:
* **Use Sharp Scissors:** Sharp scissors will make it easier to cut out the felt pieces cleanly.
* **Don’t Overstuff:** Overstuffing the strawberry can make it look lumpy and misshapen.
* **Take Your Time:** Don’t rush the sewing process. Take your time and enjoy the process.
* **Experiment with Colors:** Don’t be afraid to experiment with different colors of felt and embroidery floss.
* **Practice Your Stitches:** If you’re new to sewing, practice your stitches on a scrap piece of felt before starting the project.
Troubleshooting
Here are some common problems you might encounter and how to fix them:
* **Floss Keeps Knotting:** Use shorter lengths of floss to prevent knotting. You can also try using a thread conditioner.
* **Stitches Are Uneven:** Practice your stitches on a scrap piece of felt. Try to keep your stitches consistent in size and spacing.
* **Stuffing Is Lumpy:** Use small amounts of stuffing at a time and distribute it evenly throughout the strawberry.
* **Leaves Keep Falling Off:** Make sure the leaves are securely attached with several stitches.
And there you have it! Your very own adorable strawberry keychain! I hope you enjoyed this DIY project. Feel free to experiment with different colors, sizes, and embellishments to create a keychain that’s uniquely yours. Happy crafting!
Conclusion
So, there you have it! Crafting your own DIY strawberry keychain is more than just a fun afternoon project; it’s a gateway to personalized style, a sustainable alternative to mass-produced trinkets, and a fantastic way to unleash your inner artist. We’ve walked you through the steps, highlighted the benefits, and hopefully, inspired you to pick up your crafting supplies and get started.
But why is this DIY trick a must-try? Beyond the sheer enjoyment of creating something with your own hands, a handmade strawberry keychain offers a unique charm that store-bought items simply can’t replicate. It’s a conversation starter, a reflection of your personality, and a thoughtful gift for friends and family. Imagine the delight on someone’s face when they receive a keychain you lovingly crafted just for them!
Furthermore, embracing DIY projects like this one contributes to a more sustainable lifestyle. By repurposing materials or using eco-friendly alternatives, you’re reducing your environmental footprint and making a conscious choice to consume less. Plus, you’re avoiding the often questionable labor practices associated with mass-produced goods.
Now, let’s talk variations! The possibilities are truly endless. Feel free to experiment with different colors of felt or yarn to create unique strawberry hues. Consider adding tiny seed beads for a more realistic texture, or embroidering intricate details onto the strawberry’s surface. You could even try using different types of stuffing to achieve varying levels of firmness. For a truly personalized touch, add initials or a small charm that reflects the recipient’s interests. Think miniature ladybugs, tiny flowers, or even a miniature initial charm.
If you’re feeling adventurous, why not try creating other fruit-themed keychains to complement your strawberry? A bright yellow lemon, a juicy green watermelon, or a vibrant purple grape would make adorable additions to your collection. You could even create a whole fruit salad of keychains!
Don’t be afraid to experiment with different techniques as well. If you’re comfortable with sewing, you can use a sewing machine to create a more durable keychain. If you prefer a no-sew option, hot glue can be a great alternative, just be sure to use it carefully and sparingly.
The most important thing is to have fun and let your creativity shine! Don’t worry if your first attempt isn’t perfect. Every project is a learning experience, and with a little practice, you’ll be crafting beautiful strawberry keychains in no time.
We genuinely believe that this DIY strawberry keychain project is a rewarding and enjoyable experience for crafters of all skill levels. It’s a chance to disconnect from the digital world, engage your creativity, and create something truly special.
So, what are you waiting for? Gather your supplies, follow our instructions, and embark on your own DIY strawberry keychain adventure! We can’t wait to see what you create.
And most importantly, we want to hear about your experience! Share your photos and stories with us on social media using #DIYStrawberryKeychain. Let us know what variations you tried, what challenges you faced, and what you learned along the way. Your feedback is invaluable and helps us to improve our instructions and inspire other crafters. We’re building a community of creative individuals, and we want you to be a part of it!
Remember, crafting is about more than just the finished product; it’s about the process, the joy of creation, and the connection we share with others.
FAQ
What kind of felt should I use for my DIY strawberry keychain?
The best type of felt to use for your DIY strawberry keychain is wool felt or a wool blend felt. Wool felt is more durable, has a richer texture, and is less likely to pill compared to acrylic felt. However, acrylic felt is a more affordable option and works perfectly well, especially for beginners. If you’re using acrylic felt, consider using a double layer for added durability. You can also use eco-felt, which is made from recycled plastic bottles, for a more sustainable option. Ultimately, the choice depends on your budget, desired aesthetic, and commitment to sustainability.
How do I attach the keychain ring securely?
Attaching the keychain ring securely is crucial to prevent your strawberry from falling off. The best method depends on the type of keychain ring you’re using. For a standard split ring, you can use a jump ring to connect the strawberry to the split ring. Make sure the jump ring is strong and securely closed. For a swivel clasp keychain, you can sew a small loop of ribbon or felt to the top of the strawberry and attach the clasp to the loop. Reinforce the stitching multiple times to ensure it’s strong enough to hold the weight of the keychain. Another option is to use a metal eyelet or grommet at the top of the strawberry and attach the keychain ring to that. This provides a very secure and professional-looking finish. Regardless of the method you choose, always test the strength of the attachment before using the keychain.
Can I use a sewing machine instead of hand sewing?
Yes, absolutely! Using a sewing machine can speed up the process and create a more durable keychain. If you’re using a sewing machine, use a short stitch length and a needle appropriate for the type of felt you’re using. Sew slowly and carefully around the curves of the strawberry. Leave a small opening for stuffing and then sew the opening closed after stuffing. If you’re adding details like seeds or leaves, you can also use the sewing machine to attach them. Just be sure to use a zigzag stitch or a satin stitch to secure them in place.
What are some alternative stuffing options besides cotton balls?
While cotton balls are a readily available option for stuffing, there are several alternatives that you might prefer. Polyester fiberfill is a popular choice because it’s lightweight, washable, and doesn’t clump easily. You can also use scraps of fabric or yarn for stuffing, which is a great way to repurpose leftover materials. If you’re looking for a more eco-friendly option, consider using kapok fiber, which is a natural, sustainable fiber that’s lightweight and hypoallergenic. Another option is to use dried lavender or other herbs for stuffing, which will give your keychain a pleasant scent. Just be sure to wrap the herbs in a small piece of fabric before stuffing to prevent them from falling out.
How do I clean my DIY strawberry keychain?
The best way to clean your DIY strawberry keychain depends on the materials you used. If you used wool felt and polyester fiberfill, you can gently hand wash it with mild soap and water. Avoid soaking the keychain for too long and gently squeeze out the excess water. Lay it flat to dry on a clean towel. If you used acrylic felt, you can also hand wash it, but be careful not to scrub it too vigorously, as this can cause the felt to pill. If you used any embellishments like beads or sequins, be extra careful when washing the keychain to avoid damaging them. For minor stains, you can try spot cleaning with a damp cloth and a mild detergent. Avoid putting your keychain in the washing machine or dryer, as this can damage it.
My strawberry keychain looks lumpy. How can I fix it?
A lumpy strawberry keychain is usually caused by uneven stuffing. To fix it, try gently massaging the stuffing around inside the keychain to distribute it more evenly. You can also use a chopstick or a similar tool to push the stuffing into the corners and curves of the strawberry. If the stuffing is too dense in some areas, try removing some of it and redistributing it to other areas. Make sure the stuffing is firm enough to hold the shape of the strawberry, but not so firm that it’s difficult to sew the opening closed. Another tip is to use small pieces of stuffing instead of large clumps, as this will help to create a smoother and more even surface.
Can I sell the strawberry keychains I make using this tutorial?
Yes, you are welcome to sell the strawberry keychains you make using this tutorial. We encourage you to use your creativity and entrepreneurial spirit to create and sell your own unique designs. However, please do not reproduce or redistribute this tutorial itself without permission. We would love to see what you create, so feel free to share your creations with us on social media using #DIYStrawberryKeychain. We wish you all the best in your crafting endeavors!
Leave a Comment