

Sweet Potatoes in Soil Bags: Imagine harvesting a bounty of vibrant, earthy sweet potatoes right from your own backyard, without the need for a sprawling garden! It sounds like a dream, right? Well, it’s a dream that can easily become a reality with this simple and incredibly rewarding DIY project. For generations, resourceful gardeners have sought innovative ways to maximize their yields, even in limited spaces. From ancient terrace farming to modern container gardening, the spirit of ingenuity has always been at the heart of growing our own food.
But why should you consider growing sweet potatoes in soil bags? Let’s face it, not everyone has access to acres of fertile land. Apartment dwellers, urban gardeners, and even those with challenging soil conditions can now enjoy the satisfaction of cultivating their own sweet potatoes. This method is not only space-saving and cost-effective, but it also offers excellent drainage and temperature control, leading to healthier and more abundant harvests. Plus, the ease of moving the bags allows you to chase the sun and optimize growing conditions throughout the season. I’m excited to share this easy and fun method with you, so let’s get started and unlock the secrets to growing delicious sweet potatoes in soil bags!
Growing Sweet Potatoes in Soil Bags: A Gardener’s Guide
Hey there, fellow gardening enthusiasts! I’m so excited to share one of my favorite gardening hacks with you: growing sweet potatoes in soil bags! It’s a fantastic way to maximize space, control soil conditions, and even get a head start on the growing season. Plus, harvesting is a breeze! Let’s dive in!
Why Grow Sweet Potatoes in Soil Bags?
Before we get started, let’s talk about why this method is so awesome:
* Space Saving: Perfect for small gardens, patios, or even balconies. You don’t need a huge plot of land to enjoy a bountiful sweet potato harvest.
* Soil Control: You have complete control over the soil composition, ensuring your sweet potatoes get the nutrients they need.
* Easy Harvesting: No more digging around in the dirt! Simply cut open the bag and collect your sweet potato treasures.
* Portability: You can move the bags around to chase the sun or protect them from unexpected frost.
* Reduced Weeding: The enclosed environment minimizes weed growth, saving you time and effort.
Materials You’ll Need
Okay, let’s gather our supplies. Here’s what you’ll need to get started:
* Heavy-Duty Soil Bags: I recommend using woven polypropylene bags (like the kind used for animal feed or landscaping materials). They’re durable and allow for good drainage. Aim for bags that are at least 20 gallons in size. The bigger, the better, as sweet potatoes need room to grow.
* Sweet Potato Slips: These are sprouted sweet potato shoots. You can buy them online, from a local nursery, or even grow your own (more on that later!).
* Potting Mix: A well-draining potting mix is crucial. I like to use a mix of compost, peat moss (or coco coir), and perlite.
* Compost: This adds nutrients and improves soil structure.
* Slow-Release Fertilizer: A balanced fertilizer will provide your sweet potatoes with a steady supply of nutrients throughout the growing season. Look for one specifically formulated for root vegetables.
* Watering Can or Hose: For, well, watering!
* Scissors or Utility Knife: To cut drainage holes in the bags.
* Gloves: To protect your hands.
* Trowel or Small Shovel: For planting the slips.
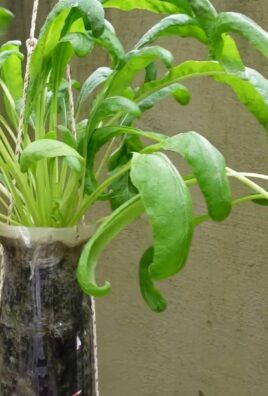
Growing Your Own Sweet Potato Slips (Optional)
If you’re feeling ambitious, you can grow your own sweet potato slips. It’s a fun project and saves you money! Here’s how:
1. Choose a Sweet Potato: Select a healthy, organic sweet potato from the grocery store or farmer’s market.
2. Prepare the Sweet Potato: Wash the sweet potato thoroughly. You can cut it in half or leave it whole.
3. Suspend the Sweet Potato: Use toothpicks to suspend the sweet potato over a jar or glass filled with water. The bottom half of the sweet potato should be submerged in water.
4. Place in a Sunny Location: Put the jar in a warm, sunny spot.
5. Wait and Watch: In a few weeks, you should see sprouts (slips) emerging from the sweet potato.
6. Harvest the Slips: Once the slips are about 6-8 inches long, gently twist them off the sweet potato.
7. Root the Slips: Place the slips in a glass of water until they develop roots (usually a few days).
8. Plant the Slips: Now you’re ready to plant your homegrown slips in the soil bags!
Preparing the Soil Bags
This is a crucial step to ensure proper drainage and a healthy growing environment for your sweet potatoes.
1. Cut Drainage Holes: Using your scissors or utility knife, cut several drainage holes in the bottom of each soil bag. Space them about 4-6 inches apart. This will prevent waterlogging, which can lead to root rot.
2. Roll Down the Edges (Optional): Rolling down the top edges of the bags can make them more stable and easier to work with.
3. Fill the Bags: Mix your potting mix, compost, and slow-release fertilizer in a large container or on a tarp. Fill each soil bag about two-thirds full with the mixture.
4. Water the Soil: Thoroughly water the soil in the bags until water drains out of the drainage holes. This will help settle the soil and prepare it for planting.
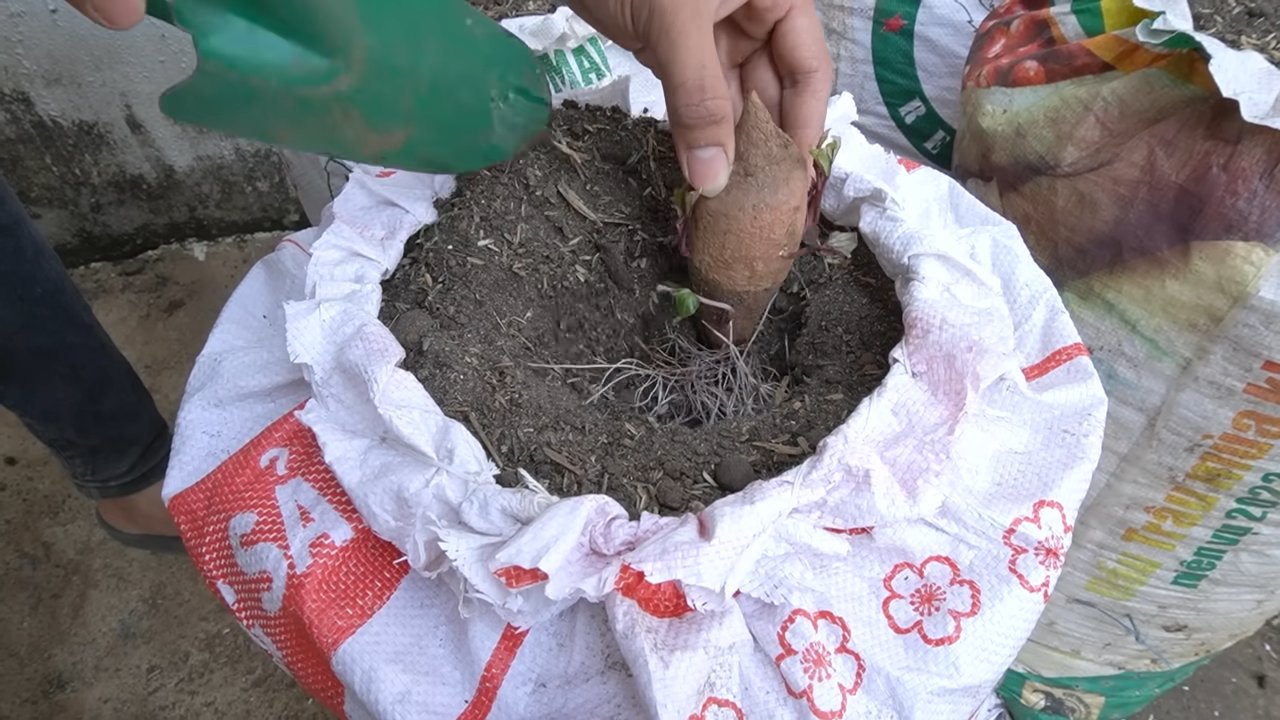
Planting the Sweet Potato Slips
Now for the fun part! Let’s get those slips in the ground (or, in this case, the bag!).
1. Create Planting Holes: Use your trowel or small shovel to create planting holes in the soil, spaced about 12-18 inches apart.
2. Plant the Slips: Gently remove the sweet potato slips from the water (if you grew your own) and plant them in the holes. Make sure the roots are covered with soil. If you purchased slips, handle them carefully to avoid damaging the delicate roots.
3. Water Thoroughly: Water the newly planted slips thoroughly.
4. Mulch (Optional): Adding a layer of mulch around the base of the plants can help retain moisture and suppress weeds. Straw or shredded bark work well.
Caring for Your Sweet Potato Plants
Sweet potatoes are relatively low-maintenance, but here are a few things to keep in mind:
1. Watering: Water regularly, especially during dry periods. Sweet potatoes need consistent moisture to thrive. Check the soil moisture by sticking your finger into the soil. If it feels dry an inch or two below the surface, it’s time to water.
2. Fertilizing: Sweet potatoes are heavy feeders. Side-dress with compost or a balanced fertilizer every few weeks to provide them with the nutrients they need.
3. Sunlight: Sweet potatoes need at least 6-8 hours of sunlight per day. Make sure your soil bags are placed in a sunny location.
4. Weeding: Keep the area around the plants free of weeds.
5. Pest Control: Keep an eye out for pests like aphids and sweet potato weevils. Treat infestations promptly with insecticidal soap or neem oil.
6. Vine Management: Sweet potato vines can get quite long and sprawling. You can prune them back to encourage tuber development. You can also train the vines to grow up a trellis or fence to save space.
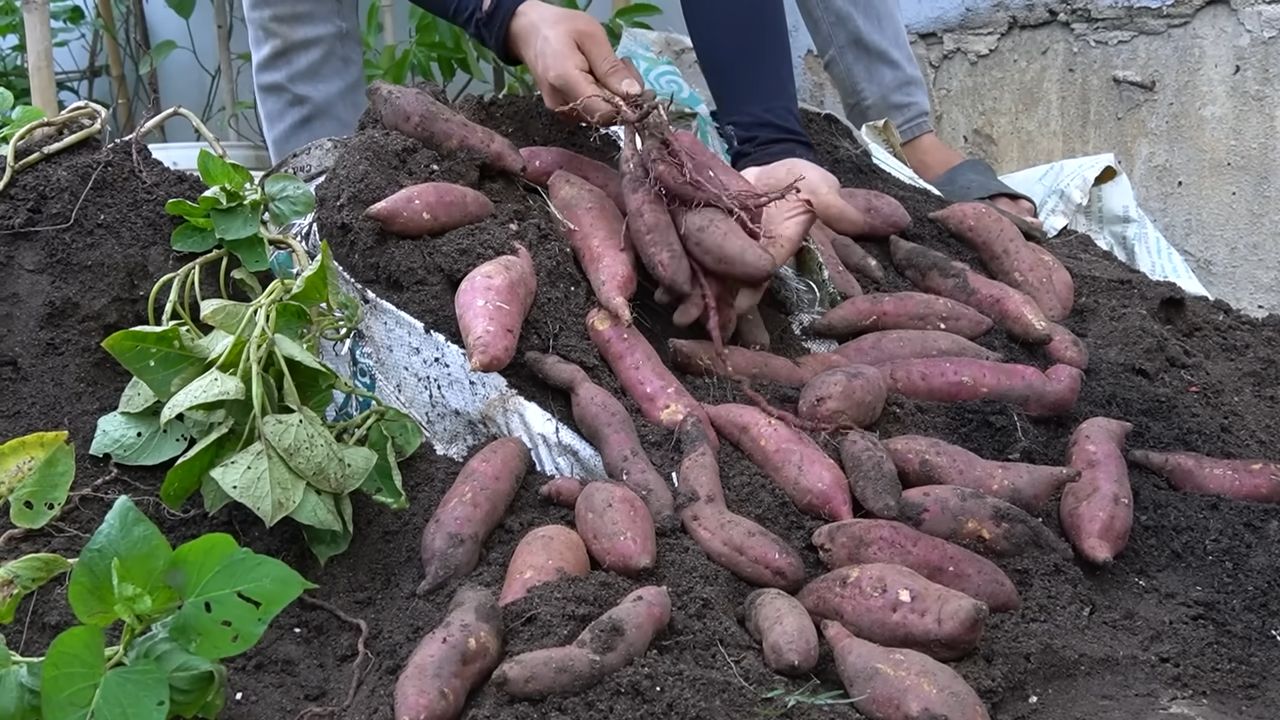
Harvesting Your Sweet Potatoes
The moment we’ve all been waiting for! Harvesting time!
1. Timing: Sweet potatoes are typically ready to harvest about 90-120 days after planting. The leaves will start to turn yellow and the vines will begin to die back.
2. Check for Maturity: You can dig up a test sweet potato to check for maturity. If the sweet potato is a good size and has a smooth skin, it’s likely time to harvest.
3. Harvesting: Carefully cut open the soil bag with your scissors or utility knife. Gently remove the sweet potatoes from the soil. Be careful not to damage them.
4. Curing: Curing sweet potatoes is essential for developing their sweetness and improving their storage life. Place the harvested sweet potatoes in a warm, humid place (80-85°F and 85-90% humidity) for about a week. This allows the skins to harden and any minor cuts or bruises to heal.
5. Storage: After curing, store the sweet potatoes in a cool, dry, and dark place (55-60°F). They should keep for several months.
Troubleshooting
Even with the best planning, things can sometimes go wrong. Here are a few common problems and how to fix them:
* Yellowing Leaves: This could be a sign of nutrient deficiency. Try side-dressing with compost or a balanced fertilizer.
* Slow Growth: Make sure your sweet potatoes are getting enough sunlight and water. Also, check the soil pH. Sweet potatoes prefer a slightly acidic soil (pH 6.0-6.5).
* Root Rot: This is usually caused by overwatering. Make sure your soil bags have good drainage and avoid watering too frequently.
* Pest Infestations: Treat pest infestations promptly with insecticidal soap or neem oil.
Tips for Success
Here are a few extra tips to help you grow the best sweet potatoes ever:
* Choose the Right Variety: Some sweet potato varieties are better suited for container growing than others. ‘Bush Porto Rico’ and ‘Georgia Jet’ are good choices.
* Start with Healthy Slips: Healthy slips are essential for a successful harvest. Choose slips that are strong and vigorous.
* Don’t Overwater: Overwatering can lead to root rot. Water only when the soil feels dry
Conclusion
So, there you have it! Growing sweet potatoes in soil bags is not just a gardening trend; it’s a game-changer for anyone looking to maximize their yield, minimize space, and enjoy the unparalleled satisfaction of harvesting their own homegrown goodness. This method offers a unique blend of convenience and control, allowing even those with limited space or less-than-ideal soil conditions to cultivate these delicious and nutritious tubers.
Why is this DIY trick a must-try? Because it simplifies the entire process! Forget about back-breaking digging and wrestling with heavy clay soil. Soil bags provide a contained, well-draining environment that sweet potatoes absolutely thrive in. You’re essentially creating the perfect little microclimate for them, leading to healthier plants and a more abundant harvest. Plus, the portability of the bags means you can chase the sun, move them indoors during unexpected frosts, and generally have more control over their growing conditions.
But the benefits don’t stop there. This method is incredibly versatile. Want to experiment with different varieties of sweet potatoes? Go for it! The bags make it easy to keep different cultivars separate and track their individual performance. Feeling adventurous? Try adding companion plants like basil or marigolds to the bags to deter pests and attract beneficial insects. The possibilities are endless!
Consider these variations to tailor the method to your specific needs and preferences:
* Vertical Gardening: Stack the soil bags to create a vertical sweet potato garden, maximizing space even further. Just be sure to reinforce the bags and provide adequate support.
* Organic Amendments: Enhance the soil mix with organic compost, worm castings, or bone meal to provide your sweet potatoes with an extra boost of nutrients.
* Watering Systems: Install a simple drip irrigation system to ensure consistent and efficient watering, especially during hot and dry periods.
* Container Size: Experiment with different bag sizes to find the sweet spot for your particular sweet potato variety and growing conditions. Larger bags generally allow for larger tubers, but smaller bags may be easier to manage.
Ultimately, growing sweet potatoes in soil bags is about more than just producing food; it’s about connecting with nature, learning new skills, and experiencing the joy of nurturing something from seed to harvest. It’s a rewarding and sustainable way to supplement your diet with fresh, healthy produce.
We wholeheartedly encourage you to give this DIY trick a try. It’s easier than you might think, and the results are well worth the effort. Don’t be afraid to experiment, adapt, and make it your own. And most importantly, we want to hear about your experience! Share your photos, tips, and stories with us in the comments below. Let’s build a community of sweet potato enthusiasts and learn from each other’s successes (and even failures!). Your insights could inspire others to embark on their own sweet potato growing journey. So, grab some soil bags, sweet potato slips, and get ready to experience the magic of homegrown sweet potatoes! Happy gardening!
Frequently Asked Questions (FAQ)
What type of soil should I use in the soil bags for growing sweet potatoes?
The ideal soil mix for growing sweet potatoes in soil bags is a well-draining, loamy soil that is rich in organic matter. A good starting point is a mix of equal parts garden soil, compost, and perlite or vermiculite. The compost provides essential nutrients, while the perlite or vermiculite improves drainage and aeration. Avoid using heavy clay soil, as it can become waterlogged and inhibit root growth. You can also purchase pre-mixed potting soil specifically formulated for vegetables, which often contains a balanced blend of nutrients and drainage materials. Remember to amend the soil with slow-release fertilizer or organic amendments like bone meal to provide a steady supply of nutrients throughout the growing season.
How often should I water sweet potatoes grown in soil bags?
Watering frequency depends on several factors, including the weather, the size of the soil bag, and the stage of growth. Generally, you should water your sweet potatoes whenever the top inch of soil feels dry to the touch. During hot and dry periods, you may need to water daily or even twice a day. Avoid overwatering, as this can lead to root rot. The best way to determine if your sweet potatoes need water is to check the soil moisture level regularly. You can use a moisture meter or simply stick your finger into the soil to assess its dryness. When watering, water deeply and thoroughly, ensuring that the entire root zone is moistened. Consider using a soaker hose or drip irrigation system to deliver water directly to the roots and minimize water loss through evaporation.
How much sunlight do sweet potatoes need when grown in soil bags?
Sweet potatoes are sun-loving plants and require at least 6-8 hours of direct sunlight per day to thrive. Choose a location for your soil bags that receives ample sunlight throughout the day. If you live in a particularly hot climate, you may want to provide some afternoon shade to prevent the plants from overheating. Insufficient sunlight can result in stunted growth, reduced yields, and pale, weak foliage. If you don’t have a sunny spot in your garden, you can supplement with grow lights, especially during the early stages of growth. Rotate the soil bags periodically to ensure that all sides of the plants receive adequate sunlight.
What size soil bag is best for growing sweet potatoes?
The ideal size soil bag for growing sweet potatoes depends on the variety you are growing and the desired size of the tubers. Generally, a bag that is at least 10-15 gallons in size is recommended. Larger bags will provide more room for the roots to develop and allow for larger tubers to form. However, smaller bags can also be used, especially for smaller varieties of sweet potatoes. Consider the space you have available and the weight of the bags when choosing a size. Remember that larger bags will be heavier and more difficult to move. You can also use multiple smaller bags instead of one large bag, which can make it easier to manage the plants.
How do I know when my sweet potatoes are ready to harvest from the soil bags?
Sweet potatoes are typically ready to harvest about 90-120 days after planting, depending on the variety and growing conditions. A good indicator of maturity is when the foliage starts to turn yellow and die back. You can also gently dig around the base of the plant to check the size of the tubers. If they are large enough for your liking, you can harvest the entire plant. To harvest, carefully cut the vines back to a few inches above the soil line. Then, gently tip the soil bag over and remove the sweet potatoes. Be careful not to damage the tubers during harvesting. Cure the sweet potatoes for 7-10 days in a warm, humid place to allow the skins to harden and the sugars to develop.
Can I reuse the soil from the soil bags after harvesting sweet potatoes?
Yes, you can reuse the soil from the soil bags after harvesting sweet potatoes, but it’s important to replenish the nutrients and improve the soil structure. Sweet potatoes are heavy feeders and can deplete the soil of essential nutrients. Before reusing the soil, remove any remaining plant debris and roots. Then, amend the soil with compost, aged manure, or other organic matter to replenish the nutrients. You can also add a slow-release fertilizer to provide a steady supply of nutrients for the next crop. Consider rotating crops in the soil bags to prevent the buildup of soilborne diseases and pests. If you suspect that the soil is contaminated with diseases or pests, you may want to sterilize it before reusing it. This can be done by baking the soil in the oven or solarizing it in the sun.


Leave a Comment