

Origami Diamond Divider Box DIY: Ever feel like your desk is a black hole, swallowing pens, paperclips, and all those tiny treasures you swear you need? I know I do! That’s why I’m so excited to share this incredibly simple, yet surprisingly elegant, DIY project with you: creating your own origami diamond divider box.
Origami, the ancient Japanese art of paper folding, has been around for centuries, transforming simple squares into intricate works of art. While often associated with cranes and flowers, origami’s practical applications are just as fascinating. Think about it – a single sheet of paper, folded strategically, can become a sturdy and beautiful organizer.
In today’s world, where decluttering and organization are practically a lifestyle, this origami diamond divider box DIY is more relevant than ever. Not only is it a fantastic way to repurpose scrap paper and reduce waste, but it also adds a touch of handmade charm to your workspace or home. Forget those boring plastic containers! This project is perfect for anyone looking to add a personal touch to their organization while keeping things tidy and accessible. Plus, it’s a fun and relaxing activity that anyone can enjoy, regardless of their crafting experience. So, grab some paper, and let’s get folding!
DIY Origami Diamond Divider Box: A Stunning Storage Solution
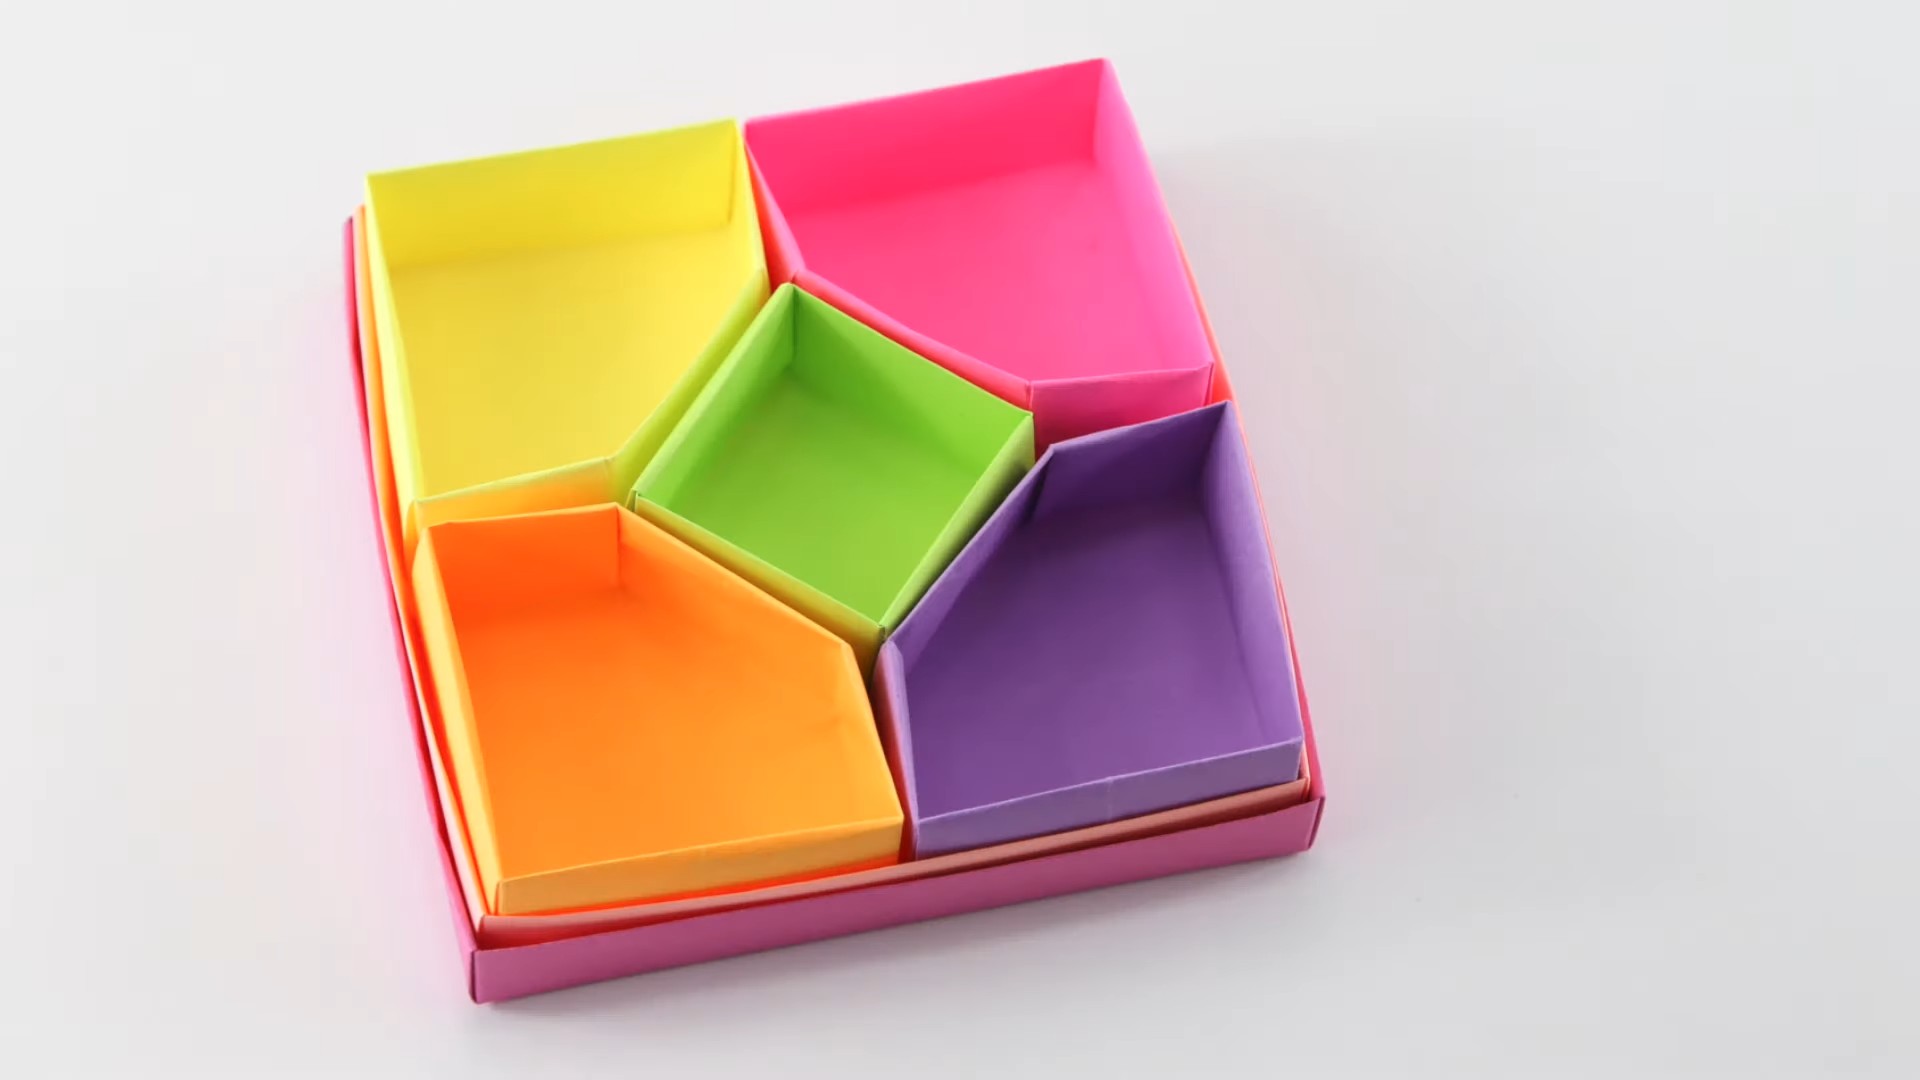
Hey there, fellow crafters! I’m so excited to share this project with you – a beautiful and functional origami diamond divider box. It’s perfect for organizing small items like jewelry, craft supplies, or even desk essentials. Plus, it adds a touch of elegance to any space. Don’t be intimidated by the “origami” part; I’ll guide you through each step with clear instructions and helpful tips. Let’s get folding!
Materials You’ll Need
Before we dive in, let’s gather our supplies. You’ll need:
* Paper: I recommend using sturdy paper, like cardstock or origami paper, for a more durable box. You’ll need two square sheets of paper. The size of the squares will determine the size of your finished box. I’m using 12×12 inch paper for a larger box, but 6×6 or 8×8 inch paper works great too for smaller items. Using different colors for the top and bottom adds a nice visual touch!
* Ruler: A ruler will help you make precise folds, which are crucial for origami.
* Pencil: For marking fold lines.
* Scissors (optional): You might need scissors to trim any excess paper or make adjustments.
* Bone Folder (optional): A bone folder helps create crisp, clean folds. If you don’t have one, you can use the edge of a ruler or a credit card.
* Glue or Double-Sided Tape (optional): For extra security, you can use a tiny bit of glue or double-sided tape to reinforce certain folds.
Creating the Box Base
This section focuses on folding the base of the diamond divider box. Take your time and follow the instructions carefully. Remember, practice makes perfect!
1. Start with a Square: Place one of your square sheets of paper on a flat surface. Make sure the colored side (if you’re using colored paper) is facing down.
2. Fold in Half Diagonally: Fold the paper in half diagonally, bringing one corner to the opposite corner. Crease sharply. Unfold.
3. Fold the Other Diagonal: Fold the paper in half diagonally again, this time bringing the other two corners together. Crease sharply. Unfold. You should now have two diagonal creases intersecting in the center of the square.
4. Fold in Half Horizontally: Fold the paper in half horizontally, bringing the top edge to the bottom edge. Crease sharply. Unfold.
5. Fold in Half Vertically: Fold the paper in half vertically, bringing the left edge to the right edge. Crease sharply. Unfold. Now you should have a grid of creases dividing your square into smaller squares.
6. Collapse into a Square: This is where the magic happens! Use the creases you’ve made to collapse the paper into a smaller square. To do this, bring the top and bottom edges towards the center crease, allowing the sides to fold inwards. You should end up with a smaller square that’s half the size of the original.
7. Fold the Top Layer to the Center Line: Take the top layer of the top flap of the square and fold it down to the center line. Crease sharply.
8. Repeat on the Other Side: Repeat the previous step on the other side of the top flap. You should now have a kite shape.
9. Flip and Repeat: Flip the entire piece over and repeat steps 7 and 8 on the other side. You should now have a kite shape on both sides of the square.
10. Fold the Top Points Down: Fold the top points of the kite shapes down to the bottom edge of the square. Crease sharply.
11. Unfold the Last Two Folds: Unfold the folds you just made in step 10.
12. Inside Reverse Fold: This is a slightly trickier fold. Open up one of the flaps you just unfolded. You’ll see a crease line running diagonally inside the flap. Push the point of the flap inwards along this crease line, creating a new fold that tucks the point inside the flap. This will create a small triangle pointing upwards.
13. Repeat on the Other Side: Repeat the inside reverse fold on the other side of the same flap.
14. Repeat on the Other Side of the Square: Flip the entire piece over and repeat steps 12 and 13 on the other side. You should now have two small triangles pointing upwards on each side of the square.
15. Fold the Side Flaps Inward: Fold the side flaps of the square inward, aligning the edges with the center line. Crease sharply.
16. Repeat on the Other Side: Flip the piece over and repeat step 15 on the other side.
17. Shape the Base: Now, gently open up the structure. You’ll see that the folds naturally create the shape of the box base. You might need to adjust the folds slightly to get the desired shape.
Creating the Box Lid
The lid is made using the same folding techniques as the base, but with a slight modification to make it slightly larger so it fits snugly over the base.
1. Start with a Square: Take your second square sheet of paper.
2. Repeat Steps 2-16 from the Box Base Instructions: Follow steps 2 through 16 exactly as you did for the box base. This will create a shape that is identical to the base at this stage.
3. Slightly Increase the Size (Important!): This is the key to making the lid fit properly. Before shaping the lid, gently stretch the side flaps outward slightly. This will make the lid just a tiny bit larger than the base. Be careful not to tear the paper. You only need to stretch it a millimeter or two on each side.
4. Shape the Lid: Now, gently open up the structure. You’ll see that the folds naturally create the shape of the box lid. Adjust the folds as needed to achieve the desired shape.
Creating the Dividers
This is where the “divider” part of the box comes in! We’ll create two dividers that interlock to create four compartments within the box.
1. Prepare the Paper: You’ll need two rectangular pieces of paper for the dividers. The exact size will depend on the size of your box, but a good starting point is to cut two rectangles that are approximately the same height as the box and about twice the width of one of the box’s sides. For my 12×12 inch paper box, I’m using rectangles that are about 4 inches tall and 8 inches wide.
2. Fold Each Rectangle in Half Lengthwise: Fold each rectangle in half lengthwise, bringing the long edges together. Crease sharply.
3. Fold in Half Again: Fold each rectangle in half again, bringing the short edges together. Crease sharply. You should now have two smaller rectangles that are one-quarter the size of the original rectangles.
4. Make a Cut Halfway: On one of the rectangles, make a cut from the folded edge halfway through the rectangle.
5. Make a Cut Halfway on the Other Rectangle: On the other rectangle, make a cut from the open edge halfway through the rectangle.
6. Interlock the Dividers: Slide the two dividers together, interlocking the cuts. This will create a cross shape.
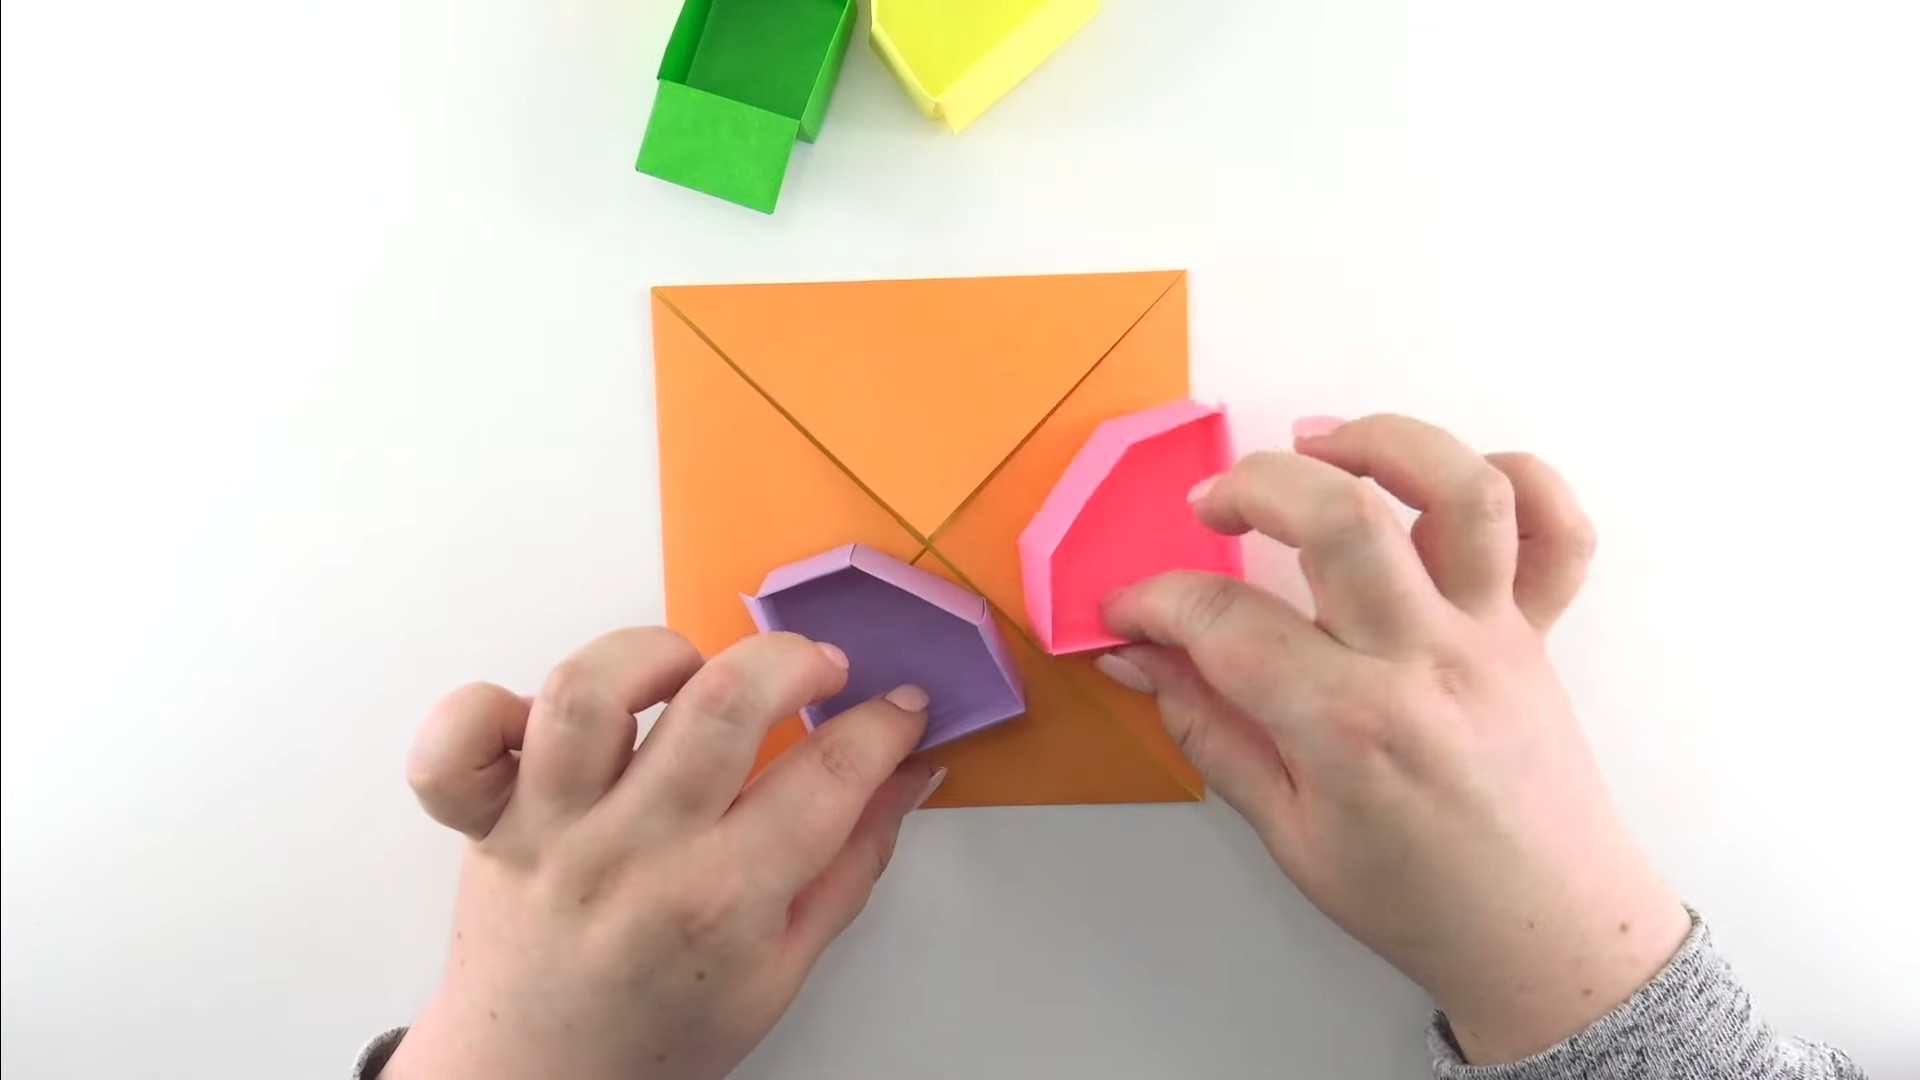
Assembling the Box
Now for the final step – putting everything together!
1. Place the Dividers in the Base: Carefully place the interlocked dividers inside the box base. The dividers should fit snugly, creating four separate compartments.
2. Place the Lid on Top: Place the lid on top of the base. The lid should fit snugly over the base, protecting the contents of the box.
Tips and Tricks
* Practice on Scrap Paper: If you’re new to origami, I highly recommend practicing the folds on scrap paper before using your good paper.
* Use a Bone Folder: A bone folder will help you create crisp, clean folds, which are essential for a well-made origami box.
* Be Patient: Origami can be a bit challenging at first, so be patient with yourself. Don’t get discouraged if you don’t get it right away. Just keep practicing, and you’ll eventually get the hang of it.
* Experiment with Different Papers: Try using different types of paper to see how they affect the look and feel of the box.
* Embellish Your Box: Once you’ve mastered the basic box, you can embellish it with ribbons, beads, or other decorations.
* Adjust Divider Size: If your dividers are too tall or too short, adjust the size of the rectangular paper you use to create them.
* Secure with Glue (Optional): For added durability, you can use
Conclusion
So, there you have it! This origami diamond divider box DIY isn’t just a craft project; it’s a game-changer for anyone struggling with drawer clutter or seeking a personalized storage solution. We’ve walked you through the steps to create a beautiful and functional organizer from simple paper, transforming ordinary materials into something extraordinary.
Why is this a must-try? Because it’s incredibly versatile, cost-effective, and surprisingly satisfying. Forget those flimsy, mass-produced plastic dividers that never quite fit right. With this method, you can tailor the size and number of compartments to perfectly suit your needs, whether you’re organizing jewelry, makeup, office supplies, or even small clothing items. The diamond shape adds a touch of elegance and visual interest that elevates your storage from purely functional to aesthetically pleasing.
But the beauty of this project lies in its adaptability. Feel free to experiment with different paper types. Sturdy cardstock will provide extra durability, while decorative origami paper can add a pop of color and personality. Consider using patterned paper to coordinate with your existing decor or create a themed organizer for a specific purpose. You could even try laminating the finished boxes for added water resistance, making them ideal for bathroom storage.
Beyond paper, think about embellishments. Add small labels to each compartment for easy identification of contents. Use ribbon or washi tape to decorate the edges and create a more polished look. For a truly unique touch, try incorporating small beads or charms into the design.
And don’t limit yourself to just one size. Create a variety of diamond divider boxes in different dimensions to accommodate a range of items. A larger box could be used for storing scarves or belts, while smaller boxes are perfect for earrings or rings.
The possibilities are truly endless! This origami diamond divider box DIY is more than just a project; it’s an invitation to unleash your creativity and transform your space. It’s a chance to declutter, organize, and add a personal touch to your home.
We strongly encourage you to give this DIY project a try. It’s a fun, rewarding, and practical way to improve your organization and add a touch of handmade charm to your life. Once you’ve created your own origami diamond divider boxes, we’d love to see your creations! Share your photos and experiences with us in the comments below or on social media using [Your Hashtag]. Let’s inspire each other with our creative storage solutions! We are confident that you will find this **origami diamond divider box DIY** to be a valuable addition to your organizational toolkit.
FAQ
What kind of paper is best for making origami diamond divider boxes?
The best paper for this project depends on your desired outcome. For a sturdy and durable box, we recommend using cardstock or heavy-weight paper. This will ensure that your dividers hold their shape and can withstand regular use. If you’re looking for a more decorative option, origami paper or patterned scrapbook paper can add a touch of personality. Just keep in mind that thinner papers may not be as strong and may require more careful handling. Experiment with different types of paper to find what works best for your needs and aesthetic preferences. Consider the weight and thickness of the paper; anything between 65lb and 100lb cardstock is generally a good starting point.
How do I determine the right size for my origami diamond divider boxes?
The size of your origami diamond divider boxes will depend on the items you plan to store. Before you start folding, measure the drawer or container where you intend to place the dividers. Then, consider the size of the items you’ll be organizing. For small items like jewelry or makeup, smaller boxes will suffice. For larger items like scarves or belts, you’ll need to create larger boxes. It’s always a good idea to make a test box out of scrap paper to ensure that the size is appropriate before committing to your final paper choice. You can also adjust the size of the paper you start with to create different sized boxes. Remember to account for the folds when determining the initial paper size.
Can I use glue or tape to reinforce my origami diamond divider boxes?
While the origami technique is designed to create a self-supporting structure, you can certainly use glue or tape to reinforce your boxes, especially if you’re using thinner paper or plan to store heavier items. A small amount of glue applied to the inside folds can add extra stability. Double-sided tape can also be used to secure the edges and prevent them from coming undone. However, be careful not to use too much glue or tape, as this can make the boxes bulky and less aesthetically pleasing. Experiment with different adhesives to find one that works well with your chosen paper type.
How do I clean my origami diamond divider boxes?
Cleaning your origami diamond divider boxes will depend on the type of paper you used and whether you’ve applied any protective coatings. For paper that is not water-resistant, avoid using water or harsh cleaning chemicals. Instead, gently dust the boxes with a soft cloth or brush. If you’ve laminated the boxes or used water-resistant paper, you can wipe them down with a damp cloth. Avoid submerging the boxes in water or using abrasive cleaners, as this can damage the paper. Regular dusting and gentle cleaning will help to keep your origami diamond divider boxes looking their best.
What if I make a mistake while folding?
Don’t worry, mistakes happen! Origami can be tricky, especially when you’re first starting out. If you make a mistake, try to carefully unfold the paper and correct the fold. If the paper is creased or torn, you may need to start over with a fresh sheet. The more you practice, the easier it will become to avoid mistakes. There are also many online tutorials and videos that can provide step-by-step guidance. Don’t be afraid to pause the video and rewind if you need to. Remember, the goal is to have fun and create something beautiful, so don’t get discouraged if you don’t get it perfect on the first try.
Can I use this technique to create other types of origami boxes?
Absolutely! The basic principles of origami can be applied to create a wide variety of boxes and containers. Once you’ve mastered the diamond divider box, you can explore other origami techniques to create square boxes, rectangular boxes, and even boxes with lids. There are countless origami tutorials available online and in books that can guide you through different projects. Experiment with different paper types, sizes, and embellishments to create your own unique origami creations. The possibilities are endless!
Where can I find inspiration for decorating my origami diamond divider boxes?
Inspiration for decorating your origami diamond divider boxes can be found everywhere! Browse online craft blogs, social media platforms like Pinterest and Instagram, and home decor magazines for ideas. Consider the overall style of your home and choose colors and patterns that complement your existing decor. You can also draw inspiration from nature, art, and fashion. Don’t be afraid to experiment with different materials and techniques to create a truly unique and personalized look. Remember, the goal is to create something that you love and that reflects your personal style.
Leave a Comment