

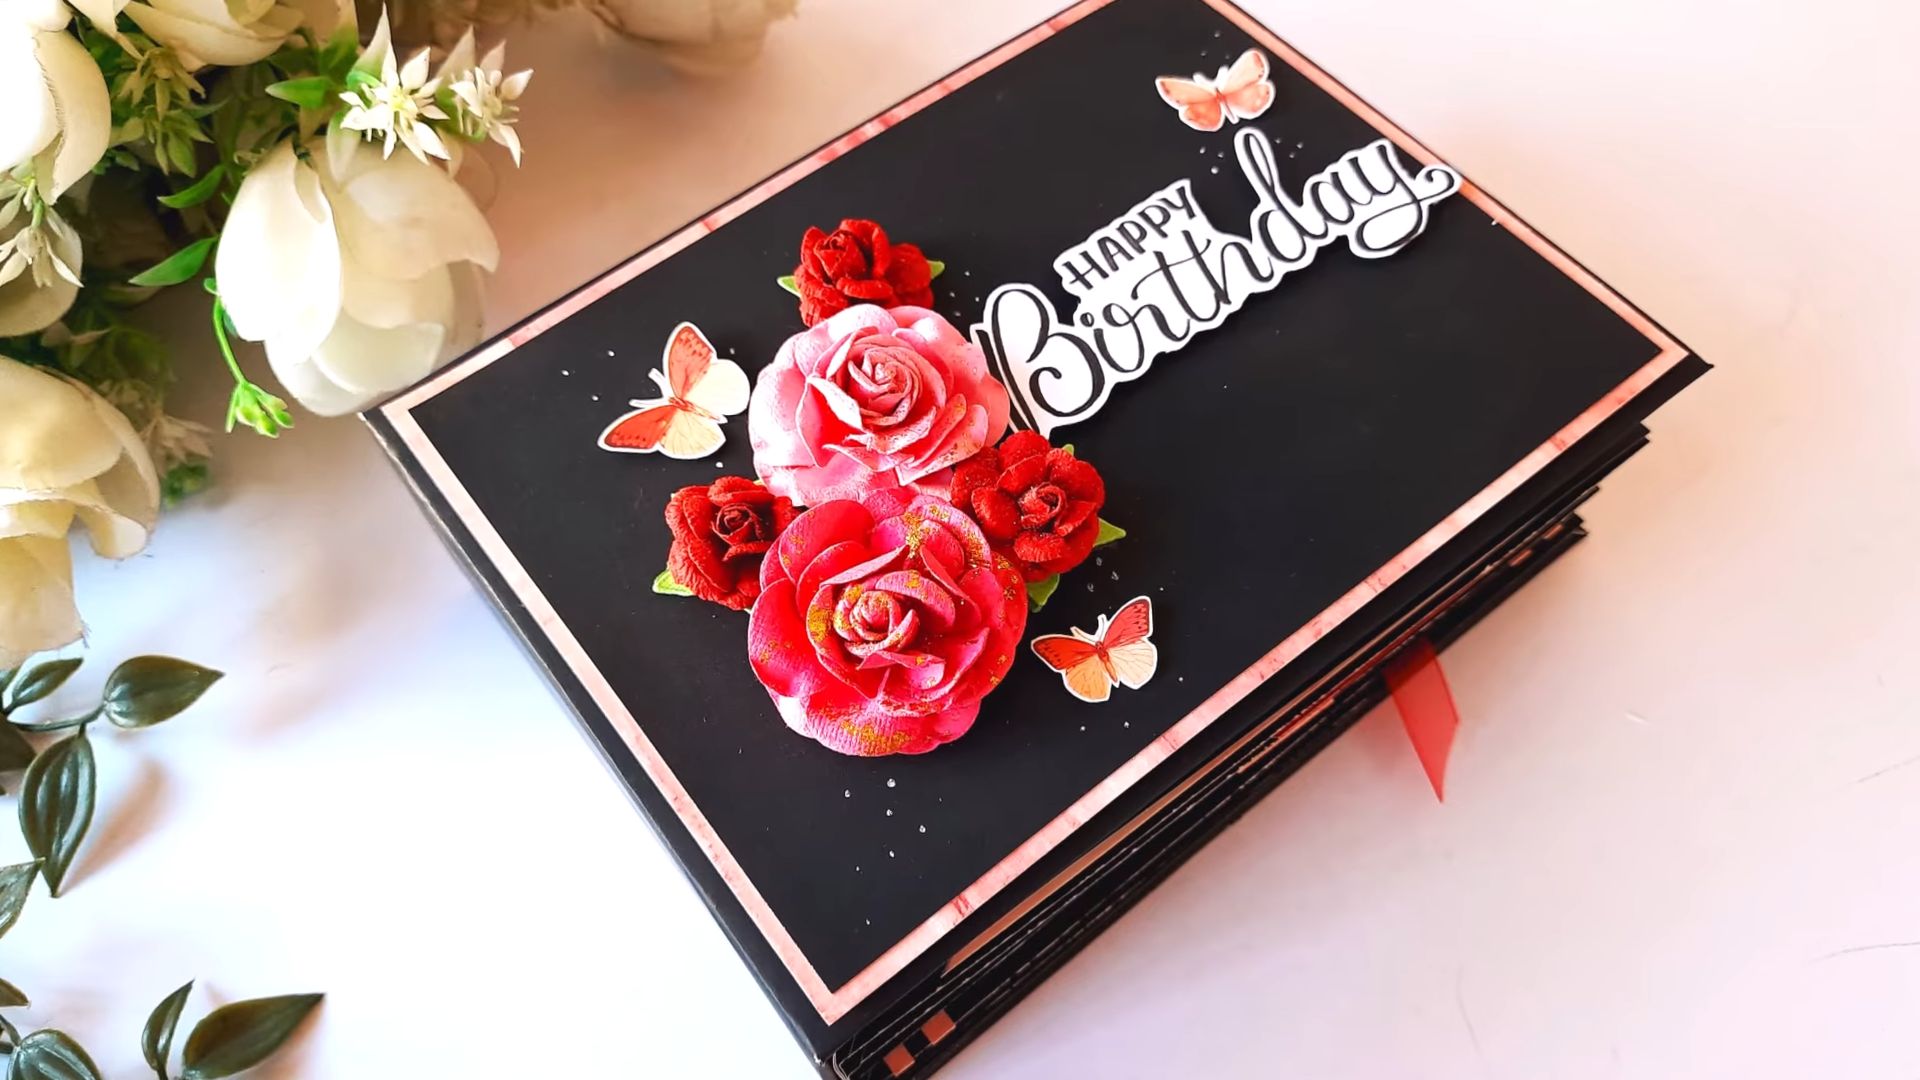
DIY Scrapbook Album: More than just a collection of photos, it’s a time capsule, a memory keeper, and a beautiful way to tell your story. Have you ever wished you could freeze a moment in time, not just with a picture, but with the tangible feel of the memories surrounding it? That’s the magic of a scrapbook album! For generations, people have been preserving their precious moments through scrapbooking, dating back to the 15th century when commonplace books were used to collect poems, letters, and other keepsakes.
Today, in our fast-paced digital world, the art of creating a DIY Scrapbook Album offers a unique opportunity to slow down, get creative, and reconnect with the moments that truly matter. I know I often feel overwhelmed by the sheer volume of photos on my phone, and they often get lost in the digital abyss. That’s why I’m so excited to share some amazing DIY tricks and hacks that will transform your photos and mementos into a cherished heirloom.
This isn’t just about gluing pictures onto paper; it’s about crafting a personalized narrative, adding depth and emotion to your memories, and creating a tangible piece of art that you and your loved ones can enjoy for years to come. So, grab your scissors, gather your photos, and let’s embark on a creative journey to build a stunning scrapbook album that tells your unique story!
Creating Your Own Personalized Scrapbook Album
Hey there, fellow crafters! I’m so excited to share one of my favorite DIY projects with you: creating a personalized scrapbook album. There’s nothing quite like flipping through a scrapbook filled with cherished memories, and making one yourself adds an extra layer of love and personalization. This guide will walk you through every step, from gathering your materials to adding those final, personal touches. Let’s get started!
Gathering Your Supplies
Before we dive into the creative process, let’s make sure we have everything we need. This is crucial for a smooth and enjoyable crafting experience. Here’s a list of essentials:
* Scrapbook Album: Choose one that suits your style and the size of your photos. I personally love the ones with post-bound or ring-bound pages, as they allow you to easily add or rearrange pages later. Look for acid-free and lignin-free pages to protect your photos in the long run.
* Photos: This is the heart of your scrapbook! Select your favorite photos, making sure to have a good mix of sizes and orientations.
* Patterned Paper: This is where you can really let your personality shine! Choose papers that complement your photos and the overall theme of your scrapbook.
* Cardstock: Solid-colored cardstock is perfect for creating backgrounds, mats, and embellishments.
* Adhesive: You’ll need a reliable adhesive to stick your photos and embellishments to the pages. I recommend using photo-safe adhesive, such as double-sided tape, glue dots, or a glue stick. Avoid liquid glue, as it can warp the paper.
* Scissors and Paper Trimmer: A good pair of scissors and a paper trimmer will help you cut your photos and papers to the perfect size.
* Embellishments: This is where you can get really creative! Think stickers, washi tape, ribbons, buttons, brads, die-cuts, and anything else that sparks your imagination.
* Pens and Markers: Use these to add journaling, captions, and decorative details to your pages. I prefer acid-free pens to prevent fading over time.
* Ruler and Pencil: These will come in handy for measuring and marking your pages.
* Photo Corners (Optional): These are a great way to attach photos without using adhesive directly on them.
* Corner Rounder Punch (Optional): This tool can add a professional touch to your photos and papers.
* Die-Cutting Machine (Optional): If you have one, a die-cutting machine can be used to create intricate embellishments.
Preparing Your Photos
Before you start gluing everything down, it’s important to prepare your photos. This will help you create a cohesive and visually appealing scrapbook.
1. Select Your Photos: Go through your photos and choose the ones you want to include in your scrapbook. Consider the story you want to tell and select photos that support that narrative.
2. Crop and Resize: Crop your photos to remove any unwanted elements and resize them to fit your scrapbook pages. You can use a photo editing software or simply trim them with scissors or a paper trimmer. I like to have a variety of photo sizes to add visual interest.
3. Print Extra Copies: If you have any photos that you’re particularly fond of, consider printing extra copies. This way, you can experiment with different layouts and embellishments without worrying about ruining your original photos.
4. Organize Your Photos: Arrange your photos in chronological order or by theme. This will help you create a cohesive and meaningful scrapbook.
5. Consider Black and White: Converting some photos to black and white can add a touch of elegance and sophistication to your scrapbook. It can also help to unify photos taken in different lighting conditions.
Designing Your Pages
Now comes the fun part: designing your scrapbook pages! This is where you can really let your creativity shine.
1. Choose a Theme: Before you start designing, it’s helpful to choose a theme for your scrapbook. This could be a specific event, a person, or a time period. Having a theme will help you narrow down your choices and create a cohesive scrapbook.
2. Select Your Papers: Choose patterned papers and cardstock that complement your photos and the overall theme of your scrapbook. I like to start with a few basic colors and patterns and then add more as I go.
3. Create a Background: Start by creating a background for your page. You can use a single sheet of patterned paper or layer multiple papers to create a more complex design.
4. Arrange Your Photos: Experiment with different layouts until you find one that you like. Consider the size and orientation of your photos and how they relate to each other.
5. Add Mats: Matting your photos with cardstock can help them stand out from the background and add a touch of elegance. Cut the mats slightly larger than your photos to create a border.
6. Embellish Your Pages: Now it’s time to add those personal touches! Use stickers, washi tape, ribbons, buttons, and other embellishments to decorate your pages. Don’t be afraid to experiment and have fun!
7. Journaling: Add journaling to your pages to tell the story behind your photos. You can write captions, anecdotes, or simply record your thoughts and feelings.
8. Balance is Key: Try to achieve a balance between photos, embellishments, and journaling. You don’t want your pages to be too cluttered or too sparse.
Assembling Your Scrapbook
Once you’ve designed your pages, it’s time to assemble your scrapbook.
1. Adhere Your Photos and Mats: Use photo-safe adhesive to attach your photos and mats to the pages. Make sure to apply the adhesive evenly to prevent the photos from peeling off over time.
2. Attach Your Embellishments: Use adhesive to attach your embellishments to the pages. For larger embellishments, you may need to use a stronger adhesive, such as glue dots or a hot glue gun.
3. Add Journaling: Write your journaling directly onto the pages or create journaling blocks on separate pieces of cardstock and attach them to the pages.
4. Protect Your Pages: If your scrapbook album doesn’t have page protectors, consider adding them to protect your pages from dust and fingerprints.
5. Arrange Your Pages: Arrange your pages in the order you want them to appear in your scrapbook.
6. Add a Title Page: Create a title page for your scrapbook that includes the title of your scrapbook and your name.
7. Review and Revise: Take a step back and review your scrapbook. Make any necessary revisions or adjustments.
Tips and Tricks for a Stunning Scrapbook
Here are a few extra tips and tricks to help you create a scrapbook that you’ll cherish for years to come:
* Use a Variety of Textures: Incorporate different textures into your scrapbook to add visual interest. Try using textured paper, fabric, or even natural elements like leaves or flowers.
* Create Layers: Layering different elements on your pages can add depth and dimension. Try layering photos, mats, embellishments, and journaling blocks.
* Use Negative Space: Don’t be afraid to leave some empty space on your pages. Negative space can help to balance your design and draw attention to the focal points.
* Tell a Story: Think of your scrapbook as a visual storybook. Use your photos, embellishments, and journaling to tell a compelling narrative.
* Don’t Be Afraid to Experiment: Scrapbooking is all about creativity and self-expression. Don’t be afraid to experiment with different techniques and styles until you find what works best for you.
* Personalize It: Add personal touches to your scrapbook to make it truly unique. Include handwritten notes, ticket stubs, or other mementos.
* Document the Process: Take photos of yourself working on your scrapbook and include them in the album. This will add another layer of personalization and create a lasting memory of the creative process.
* Get Inspired: Look for inspiration online or in scrapbooking magazines. There are tons of amazing scrapbook layouts and ideas out there.
* Join a Scrapbooking Community: Connect with other scrapbookers online or in person. Sharing ideas and inspiration with others can be a great way to improve your skills and stay motivated.
* Most Importantly: Have Fun! Scrapbooking should be a fun and relaxing activity. Don’t put too much pressure on yourself to create a perfect scrapbook. Just enjoy the process and let your creativity flow.
Adding Special Touches
To really elevate your scrapbook, consider adding some of these special touches:
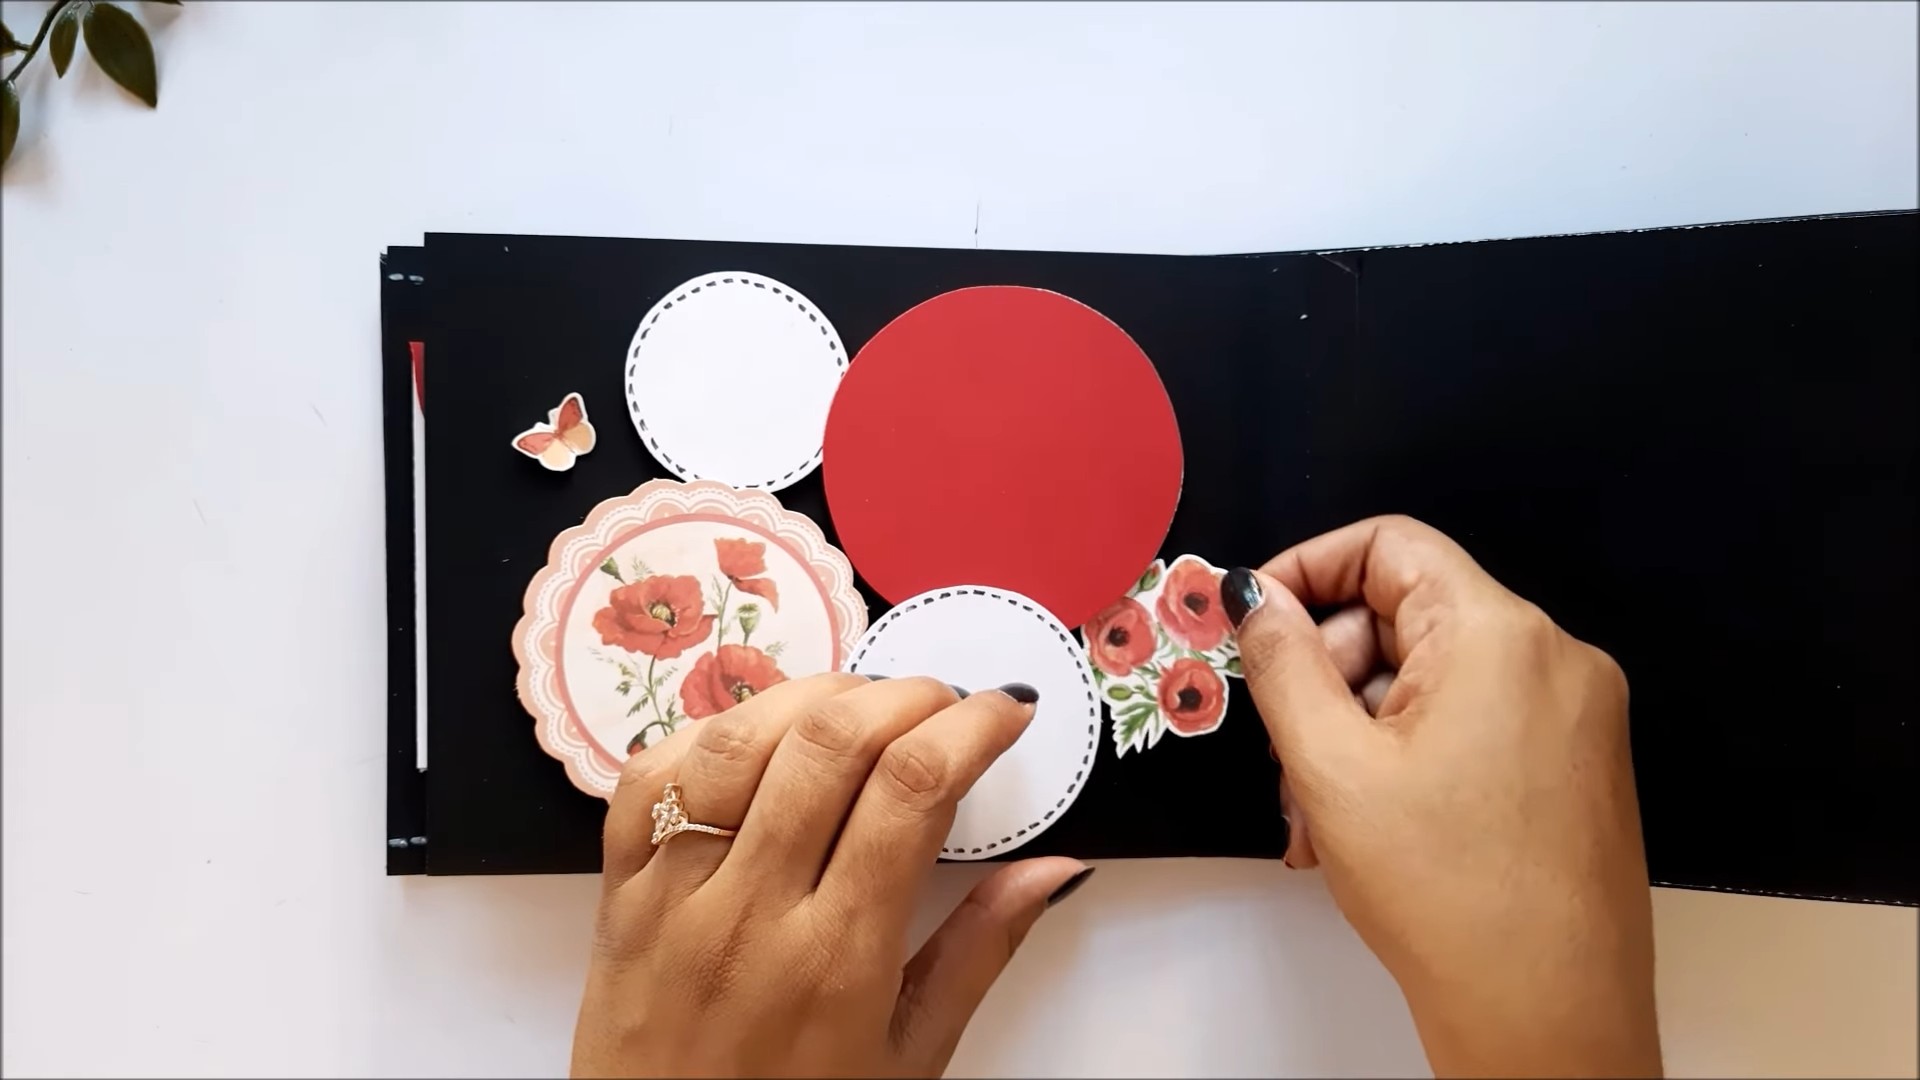
1. Hidden Pockets: Create hidden pockets on your pages to store extra photos, notes, or mementos. You can make pockets out of cardstock or patterned paper and attach them to the pages with adhesive.
2. Interactive Elements: Add interactive elements to your scrapbook to make it more engaging. Try adding
Conclusion
So, there you have it! Creating your own DIY scrapbook album isn’t just a fun craft project; it’s an investment in preserving your precious memories in a tangible, personalized way. In a world dominated by digital photos that often get lost in the cloud or forgotten on hard drives, a scrapbook offers a unique and cherished alternative. It’s a chance to slow down, reflect on the moments that matter most, and create a beautiful keepsake that can be passed down through generations.
Why is this DIY trick a must-try? Because it empowers you to be the curator of your own story. You’re not limited by pre-designed templates or generic layouts. You have complete creative control over every page, from the paper you choose to the embellishments you add. This allows you to truly capture the essence of your memories and express your personal style. Plus, it’s incredibly rewarding to see your vision come to life as you transform simple materials into a stunning and meaningful album.
But the benefits extend beyond the purely aesthetic. The act of creating a scrapbook is a therapeutic and mindful activity. It encourages you to revisit happy memories, relive special moments, and reconnect with the people you love. It’s a wonderful way to de-stress, unleash your creativity, and create something truly unique and lasting.
Looking for variations to spice things up? Consider these ideas:
* Themed Albums: Focus on a specific theme, such as a family vacation, a wedding, a baby’s first year, or a collection of holiday memories. This will help you narrow your focus and create a cohesive album.
* Interactive Elements: Incorporate interactive elements like pockets, flaps, and pull-out tags to add an element of surprise and engagement. These are great for hiding extra photos, journaling entries, or small mementos.
* Mixed Media Approach: Don’t be afraid to experiment with different materials and techniques. Combine photos with fabric scraps, ticket stubs, pressed flowers, and other ephemera to create a truly unique and textured album.
* Personalized Covers: Get creative with your album cover. Use fabric, paint, decoupage, or even a personalized photo collage to make it stand out.
* Gift-Worthy Creations: A handmade scrapbook album makes a thoughtful and heartfelt gift for birthdays, anniversaries, graduations, or any special occasion.
We wholeheartedly encourage you to try this DIY scrapbook album project. Gather your photos, gather your supplies, and let your creativity flow. Don’t be afraid to experiment, make mistakes, and have fun with the process. The most important thing is to create an album that reflects your unique story and brings you joy.
Once you’ve completed your masterpiece, we’d love to see it! Share your creations with us on social media using #DIYScrapbookAlbum and tell us about your experience. What were your favorite techniques? What challenges did you overcome? What memories did you capture? We can’t wait to see what you create! Happy crafting!
Frequently Asked Questions (FAQ)
What kind of album should I use for my DIY scrapbook?
The type of album you choose depends on your personal preference and the size of your project. There are several options available, each with its own advantages:
* Post-bound albums: These albums have pages that are held together by posts, allowing you to easily add or remove pages as needed. They are a good choice for larger projects or if you anticipate adding more photos and embellishments over time.
* Ring-bound albums: Similar to post-bound albums, ring-bound albums use rings to hold the pages together. They are also easy to customize and expand.
* Strap-hinge albums: These albums have pages that are attached to the spine with straps. They offer a clean and professional look and are a good choice for more formal scrapbooks.
* Adhesive albums: These albums have pages with a sticky adhesive surface that allows you to easily attach photos and embellishments. They are a convenient option for quick and easy scrapbooking, but they may not be as durable as other types of albums.
* DIY Bound Albums: For a truly custom experience, you can bind your own album using bookbinding techniques. This allows you to choose the exact size, paper, and binding style that you want.
Consider the size of your photos, the number of pages you anticipate needing, and your desired aesthetic when choosing an album.
What kind of paper should I use for my scrapbook pages?
Acid-free and lignin-free paper is essential for preserving your photos and memories. These types of paper will not yellow or deteriorate over time, ensuring that your scrapbook will last for years to come. Cardstock is a popular choice for scrapbook pages because it is sturdy and durable. You can also use patterned paper, vellum, or other specialty papers to add visual interest to your pages.
What are some essential tools for DIY scrapbooking?
Here are some essential tools that will make your scrapbooking experience easier and more enjoyable:
* Paper trimmer: A paper trimmer is essential for cutting paper to the desired size and shape.
* Scissors: A good pair of scissors is necessary for cutting out photos, embellishments, and other materials.
* Adhesive: Choose an acid-free adhesive that is designed for scrapbooking. Options include glue sticks, tape runners, and photo corners.
* Ruler: A ruler is helpful for measuring and aligning photos and embellishments.
* Pencil: A pencil is useful for sketching out layouts and marking where you want to place photos and embellishments.
* Eraser: An eraser is helpful for correcting mistakes.
* Embellishments: Gather a variety of embellishments, such as stickers, buttons, ribbons, and brads, to add visual interest to your pages.
* Journaling pens: Use journaling pens to write captions, stories, and memories on your scrapbook pages.
How do I protect my photos in a scrapbook?
To protect your photos in a scrapbook, use acid-free and lignin-free paper and adhesives. Avoid using rubber cement or other adhesives that may damage your photos over time. You can also use photo corners or photo sleeves to protect your photos from scratches and fingerprints. Store your scrapbook in a cool, dry place away from direct sunlight to prevent fading and damage.
How can I come up with creative scrapbook layouts?
There are many resources available to help you come up with creative scrapbook layouts. You can find inspiration in magazines, books, and online galleries. You can also experiment with different layouts and techniques to find what works best for you. Consider using a grid layout, a diagonal layout, or a layered layout to add visual interest to your pages. Don’t be afraid to break the rules and create your own unique layouts.
How do I add journaling to my scrapbook pages?
Journaling is an important part of scrapbooking because it allows you to capture the stories and memories behind your photos. You can add journaling to your scrapbook pages in a variety of ways. You can write directly on the page, create journaling tags or cards, or use a computer to print out your journaling. Be sure to use acid-free pens or markers to prevent fading and damage.
What if I make a mistake?
Don’t worry, everyone makes mistakes! If you make a mistake, don’t be afraid to cover it up with embellishments or journaling. You can also use a white-out pen or correction tape to fix small errors. Remember, scrapbooking is about having fun and creating something that you love. Don’t let mistakes discourage you.
Where can I find inspiration for my DIY scrapbook album?
Inspiration is everywhere! Look to Pinterest, Instagram, and scrapbooking blogs for layout ideas, color schemes, and embellishment techniques. Visit craft stores and browse through their scrapbook supplies to spark your creativity. Most importantly, draw inspiration from your own memories and experiences. Let your personal story guide your creative process.
How do I make my DIY scrapbook album more personalized?
Personalization is key to creating a truly special scrapbook. Incorporate handwritten notes, ticket stubs, maps, and other mementos that hold personal significance. Use photos that capture candid moments and tell a story. Choose colors and patterns that reflect your personality and style. The more personal touches you add, the more meaningful your scrapbook will become.
Leave a Comment