

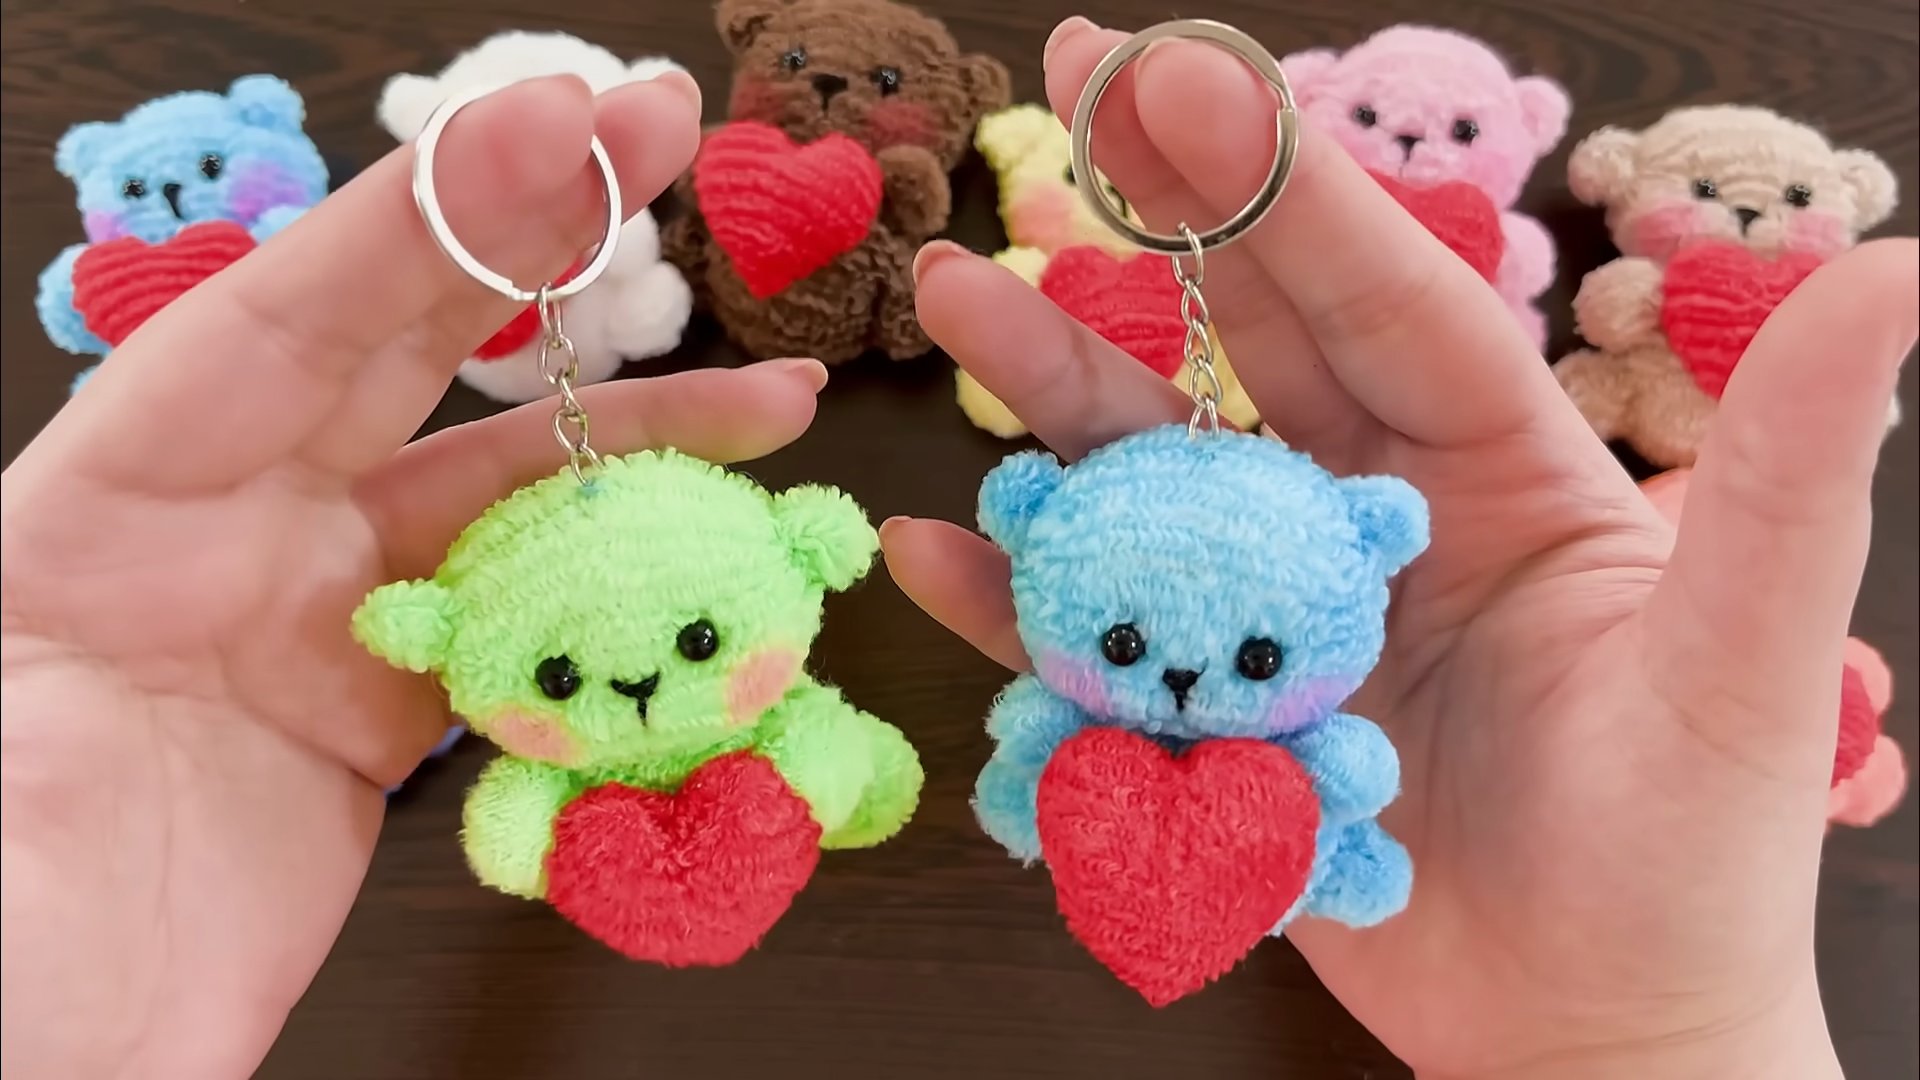
Teddy Bear Keychain DIY: Who doesn’t love a cute and cuddly teddy bear? Now, imagine carrying that adorable charm with you wherever you go! In this article, I’m going to show you how to create your very own personalized teddy bear keychain. Forget those mass-produced trinkets; we’re diving into a fun and easy DIY project that adds a touch of handmade love to your everyday life.
The history of teddy bears is actually quite heartwarming, dating back to the early 20th century and inspired by President Theodore “Teddy” Roosevelt. Since then, they’ve become a symbol of comfort, friendship, and nostalgia. What better way to honor that legacy than by crafting a miniature version you can take with you?
Why do you need this teddy bear keychain DIY in your life? Well, besides being utterly adorable, it’s a fantastic way to express your creativity, personalize your belongings, and even create thoughtful, handmade gifts for friends and family. Plus, in a world of digital distractions, taking the time to create something tangible with your own hands is incredibly rewarding. So, grab your supplies, and let’s get crafting! I promise, you’ll be hooked on making these little guys!
DIY Adorable Teddy Bear Keychain: A Step-by-Step Guide
Hey there, fellow crafters! Ever wanted a super cute, personalized keychain? Well, today I’m going to show you how to make your very own adorable teddy bear keychain. It’s a fun and relatively easy project, perfect for using up scraps of fabric and adding a touch of handmade charm to your keys, backpack, or even as a sweet little gift. Let’s get started!
What You’ll Need: The Essential Supplies
Before we dive in, let’s gather all the materials. Having everything ready will make the process much smoother.
* **Fabric Scraps:** Felt is fantastic because it doesn’t fray easily, but you can also use cotton, fleece, or even repurposed fabric from old clothes. Choose colors you love! I personally love using a soft brown for the main body and a contrasting color for the details.
* **Embroidery Floss:** This is for adding details like the eyes, nose, and mouth. Pick colors that complement your fabric choices. Black and brown are classic choices, but don’t be afraid to get creative!
* **Keychain Ring:** You can find these at most craft stores or online. Make sure it’s sturdy enough to hold your keys.
* **Stuffing:** Poly-fil stuffing is ideal, but you can also use cotton balls or even small fabric scraps.
* **Scissors:** A good pair of sharp scissors is essential for clean cuts.
* **Needle:** A hand-sewing needle with a large enough eye for your embroidery floss.
* **Pins:** These will help hold your fabric pieces together while you sew.
* **Pencil or Fabric Marker:** For tracing your pattern onto the fabric.
* **Teddy Bear Pattern:** You can find free printable patterns online (just search “free teddy bear keychain pattern”). Or, if you’re feeling creative, you can draw your own! I’ll provide some tips on creating your own pattern later.
* **Optional: Beads or Buttons:** For adding extra embellishments.
* **Optional: Pliers:** To help open and close the keychain ring.
Creating Your Teddy Bear Pattern (Optional)
If you’re feeling adventurous, designing your own teddy bear pattern is a great way to personalize your keychain. Here’s how I usually do it:
* **Sketch it Out:** Start by sketching the basic shape of your teddy bear on a piece of paper. Think about the overall size and proportions. I usually aim for a bear that’s about 3-4 inches tall.
* **Break it Down:** Divide your sketch into separate pattern pieces. You’ll need a piece for the body (front and back), and potentially separate pieces for the ears, muzzle, and any other details you want to add.
* **Add Seam Allowance:** Remember to add a seam allowance of about 1/4 inch around each pattern piece. This will give you room to sew the pieces together.
* **Cut it Out:** Carefully cut out each pattern piece.
* **Test it Out:** Before cutting into your good fabric, it’s always a good idea to make a test version using scrap fabric. This will allow you to make any necessary adjustments to the pattern.
Sewing Your Adorable Teddy Bear: Step-by-Step Instructions
Alright, let’s get to the fun part – sewing! Follow these steps carefully, and you’ll have your own teddy bear keychain in no time.
1. **Trace and Cut the Fabric:**
* Place your pattern pieces onto your chosen fabric.
* Use a pencil or fabric marker to trace around each piece.
* Carefully cut out the fabric pieces, making sure to cut along the traced lines. Remember to cut two pieces for the body (front and back).
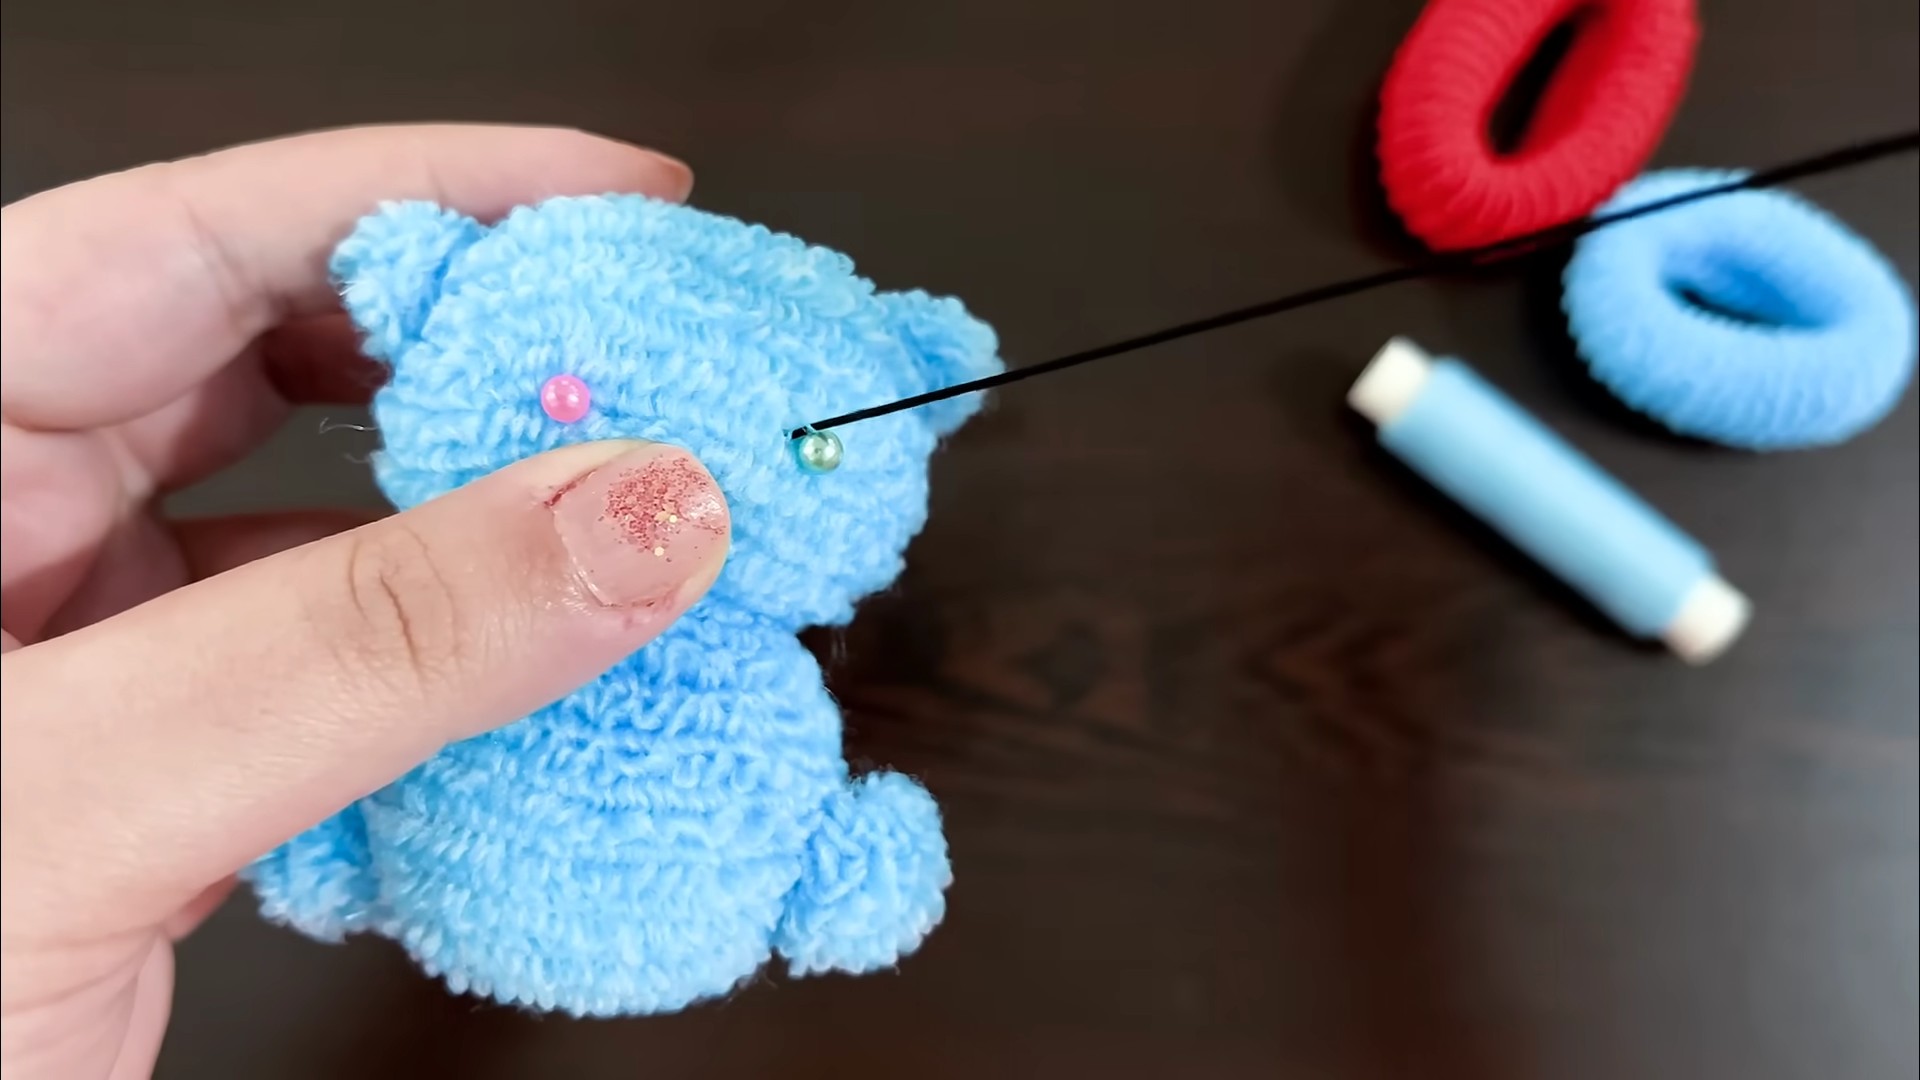
2. **Embroider the Face:**
* Before sewing the body pieces together, it’s much easier to embroider the face.
* Thread your needle with embroidery floss.
* Use a simple back stitch or satin stitch to create the eyes, nose, and mouth. I usually start with the nose, then add the eyes, and finally the mouth.
* For the eyes, you can use small French knots for a cute, textured look.
* For the nose, a simple triangle shape works well.
* For the mouth, you can use a curved line or a series of small stitches.
* Secure the ends of the floss with a knot on the back of the fabric.
3. **Attach the Ears (If Applicable):**
* If your pattern includes separate ear pieces, now’s the time to attach them to the front body piece.
* Pin the ears in place, making sure they’re positioned symmetrically.
* Use a small running stitch or blanket stitch to sew the ears securely to the body.
4. **Sew the Body Pieces Together:**
* Place the front and back body pieces together, with the right sides facing out (the side with the embroidery should be facing out).
* Pin the pieces together around the edges, leaving a small opening at the bottom for stuffing.
* Using a blanket stitch or running stitch, sew around the edges of the body, making sure to catch both layers of fabric.
* Be sure to reinforce the stitching around the ears (if applicable) to make them extra secure.
5. **Stuff the Teddy Bear:**
* Carefully stuff the teddy bear with poly-fil stuffing, cotton balls, or fabric scraps.
* Start with the head and work your way down to the body.
* Make sure to stuff the bear firmly, but not too tightly, so it retains its shape.
6. **Close the Opening:**
* Once the teddy bear is fully stuffed, use a ladder stitch or whip stitch to close the opening at the bottom.
* This will create a neat and invisible seam.
7. **Attach the Keychain Ring:**
* This is where you’ll attach the keychain ring. There are a few ways to do this:
* **Option 1: Fabric Loop:** Cut a small strip of fabric and fold it in half to create a loop. Sew the ends of the loop to the top of the teddy bear’s head, creating a secure attachment point. Then, attach the keychain ring to the loop.
* **Option 2: Ribbon Loop:** Use a small piece of ribbon to create a loop. Sew the ends of the ribbon to the top of the teddy bear’s head. Then, attach the keychain ring to the loop.
* **Option 3: Directly to the Head:** You can also sew the keychain ring directly to the top of the teddy bear’s head. This is the simplest method, but it may not be as secure as the other options. Use a strong thread and reinforce the stitching.
* If you’re using pliers to open and close the keychain ring, be careful not to scratch the metal.
8. **Add Embellishments (Optional):**
* Now’s the time to add any extra embellishments you want.
* You can sew on beads or buttons for eyes, add a tiny bow around the neck, or even create a little outfit for your teddy bear.
* Let your creativity shine!
Tips and Tricks for a Perfect Teddy Bear Keychain
Here are a few extra tips to help you create the best teddy bear keychain possible:
* **Use Quality Materials:** Investing in good quality fabric and embroidery floss will make a big difference in the finished product.
* **Take Your Time:** Don’t rush the process. Sewing takes practice, so be patient with yourself.
* **Practice Your Stitches:** Before starting on your teddy bear, practice your stitches on a scrap piece of fabric. This will help you get a feel for the technique and ensure that your stitches are neat and even.
* **Experiment with Colors and Fabrics:** Don’t be afraid to experiment with different colors and fabrics. This is a great way to personalize your keychain and make it truly unique.
* **Make it a Group Activity:** This is a fun project to do with friends or family. Gather your supplies and have a crafting party!
* **Personalize it!** Add initials, dates, or special symbols to make it even more meaningful.
And there you have it! Your very own adorable teddy bear keychain. I hope you enjoyed this tutorial. Happy crafting!
Conclusion
So, there you have it! Creating your own teddy bear keychain isn’t just a fun craft project; it’s a gateway to personalized gifts, adorable accessories, and a satisfying sense of accomplishment. Forget mass-produced trinkets – with a few simple materials and this easy-to-follow guide, you can craft a unique keepsake that reflects your personality or the personality of the person you’re gifting it to.
Why is this DIY teddy bear keychain a must-try? Because it’s incredibly versatile! Imagine crafting a miniature version of a child’s favorite teddy bear to attach to their backpack, providing a comforting reminder of home. Or picture creating a set of matching keychains for you and your best friend, each customized with different fabrics and embellishments to represent your individual styles. The possibilities are truly endless.
Feeling adventurous? Consider these variations to elevate your teddy bear keychain game:
* **Add a scent:** Before sealing up your teddy bear, tuck in a small sachet of lavender or other essential oils for a calming, aromatic touch.
* **Incorporate recycled materials:** Give old sweaters, t-shirts, or even scraps of denim a new life by using them as the fabric for your teddy bear. This is a fantastic way to be eco-conscious and create a truly one-of-a-kind piece.
* **Personalize with embroidery:** Add initials, dates, or small designs using embroidery floss to make your teddy bear keychain even more special.
* **Experiment with different sizes:** While this guide focuses on a standard keychain size, don’t be afraid to experiment with larger or smaller versions. A tiny teddy bear charm could be perfect for a necklace, while a larger one could be used as a bag decoration.
* **Use different embellishments:** Instead of buttons for eyes, try using beads, felt shapes, or even small safety eyes for a more realistic look. Get creative with ribbons, lace, and other trims to add personality and flair.
* **Make it a family affair:** This is a fantastic craft project to do with children. Let them choose the fabrics, embellishments, and even help with the sewing (with supervision, of course). It’s a great way to bond and create lasting memories.
Ultimately, the beauty of this DIY project lies in its adaptability. It’s a blank canvas for your creativity, allowing you to express yourself and create something truly special.
We wholeheartedly encourage you to give this DIY teddy bear keychain project a try. It’s a rewarding experience that will leave you with a charming and personalized accessory. And most importantly, don’t forget to share your creations with us! We’d love to see your unique teddy bear keychains and hear about your experiences. Tag us on social media using #TeddyBearKeychainDIY and let us know what variations you tried and what you learned along the way. Happy crafting!
Frequently Asked Questions (FAQ)
What kind of fabric is best for making a teddy bear keychain?
The best fabric for making a teddy bear keychain depends on the look and feel you’re going for. Felt is a popular choice because it’s inexpensive, easy to work with, and comes in a wide variety of colors. Fleece is another great option, as it’s soft, cuddly, and durable. Cotton fabrics are also suitable, especially if you want to use patterned or printed materials. For a more luxurious feel, consider using velvet or faux fur. Ultimately, the best fabric is one that you enjoy working with and that suits the overall aesthetic you’re aiming for.
How do I stuff the teddy bear keychain without making it lumpy?
Achieving a smooth, even stuffing is key to a professional-looking teddy bear keychain. The trick is to use small amounts of stuffing at a time and to distribute it evenly throughout the body. Start by stuffing the limbs and head first, using a chopstick or similar tool to push the stuffing into the corners and crevices. Avoid overstuffing, as this can make the teddy bear look distorted. As you stuff, gently massage the fabric to smooth out any lumps or bumps. Polyester fiberfill is the most common stuffing material, but you can also use cotton batting or even scraps of fabric.
Can I sew the teddy bear keychain by hand if I don’t have a sewing machine?
Absolutely! While a sewing machine can speed up the process, hand-sewing is perfectly acceptable for making a teddy bear keychain. In fact, many crafters prefer hand-sewing because it allows for more control and precision. Use a backstitch or a running stitch to sew the pieces together, ensuring that the stitches are close together to prevent the stuffing from escaping. Be patient and take your time, and you’ll be rewarded with a beautifully hand-sewn teddy bear keychain.
How do I attach the keychain ring to the teddy bear?
There are several ways to attach the keychain ring to your teddy bear. One option is to sew a small loop of ribbon or fabric to the top of the teddy bear’s head and then attach the keychain ring to the loop. Another option is to use a jump ring to connect the keychain ring directly to the fabric. For a more secure attachment, you can use a metal eyelet or grommet. Simply punch a hole in the fabric, insert the eyelet, and then attach the keychain ring. Whichever method you choose, make sure the attachment is strong and durable to prevent the keychain from breaking.
What if I don’t have all the materials listed in the instructions?
Don’t worry if you don’t have all the exact materials listed in the instructions. The beauty of DIY projects is that you can often substitute materials based on what you have on hand. For example, if you don’t have felt, you can use another type of fabric. If you don’t have buttons for eyes, you can use beads or felt shapes. Get creative and improvise! The most important thing is to have fun and experiment with different materials to create a unique teddy bear keychain that reflects your personal style.
How do I clean my teddy bear keychain?
To clean your teddy bear keychain, spot clean it with a damp cloth and mild detergent. Avoid submerging the entire keychain in water, as this can damage the stuffing and fabric. If the keychain is heavily soiled, you can try hand-washing it gently in a sink with cool water and mild detergent. Rinse thoroughly and then gently squeeze out the excess water. Allow the keychain to air dry completely before using it again. To prevent your teddy bear keychain from getting dirty in the first place, store it in a clean, dry place when not in use.

Leave a Comment