

DIY Bioplastic Bowl: Ever wished you could create something truly unique and eco-friendly right in your own kitchen? I know I have! Forget those mass-produced plastic containers; we’re diving into the fascinating world of bioplastics and crafting our very own bowls.
The concept of bioplastics isn’t new. In fact, early forms of bioplastics, often derived from milk protein, were experimented with as far back as the late 19th century. While petroleum-based plastics took center stage for much of the 20th century, the growing awareness of environmental issues has sparked a resurgence in bioplastic research and application. Now, we can harness this knowledge to create something practical and beautiful at home.
Why would you want to make a DIY bioplastic bowl? Well, for starters, it’s a fantastic way to reduce your reliance on traditional plastics, contributing to a more sustainable lifestyle. Plus, it’s a fun and educational project that’s perfect for getting kids involved. Imagine the satisfaction of serving snacks in a bowl you made yourself, knowing it’s biodegradable and made from natural ingredients! This DIY project is not only environmentally conscious but also a creative outlet, allowing you to customize the size, shape, and even color of your bowl. So, let’s get started and transform simple ingredients into a functional and eco-friendly piece of art!
Making Your Own Bioplastic Bowl: A Fun and Eco-Friendly Project!
Hey everyone! I’m super excited to share this awesome DIY project with you: making your own bioplastic bowl! It’s a fantastic way to reduce your reliance on traditional plastics and create something beautiful and functional from readily available ingredients. Plus, it’s a really cool science experiment!
This guide will walk you through every step, from gathering your materials to molding and drying your very own bioplastic bowl. Let’s get started!
What is Bioplastic, Anyway?
Before we dive in, let’s quickly talk about what bioplastic actually is. Unlike traditional plastics derived from petroleum, bioplastics are made from renewable biomass sources, like cornstarch, potato starch, or even algae! They’re often biodegradable or compostable, making them a much more sustainable alternative. The bioplastic we’ll be making today uses cornstarch as its base.
Materials You’ll Need
Okay, let’s gather our supplies. You probably have most of these in your kitchen already!
* **Cornstarch:** This is the key ingredient! You’ll need about 1/2 cup.
* **Water:** Regular tap water works just fine. We’ll need about 1/4 cup.
* **Glycerin:** This acts as a plasticizer, making the bioplastic more flexible and less brittle. You can find it at most pharmacies or online. You’ll need about 1 tablespoon.
* **White Vinegar:** This helps to break down the cornstarch and create a smoother mixture. You’ll need about 1 tablespoon.
* **Food Coloring (Optional):** If you want to add some color to your bowl, grab your favorite food coloring. Gel food coloring tends to work best.
* **Mixing Bowl:** A heat-resistant glass or ceramic bowl is ideal.
* **Spoon or Whisk:** For mixing everything together.
* **Saucepan:** For heating the mixture.
* **Bowl for Molding:** This is the bowl you’ll use as a mold for your bioplastic bowl. Choose a size and shape you like. Make sure it’s heat-resistant!
* **Non-Stick Cooking Spray or Oil:** To prevent the bioplastic from sticking to the mold.
* **Parchment Paper:** To line your work surface and prevent sticking.
* **Oven (Optional):** For speeding up the drying process.
* **Gloves (Optional):** To protect your hands from the heat and potential staining from food coloring.
Step-by-Step Instructions: Making the Bioplastic Mixture
This is where the magic happens! Follow these steps carefully to create the perfect bioplastic mixture.
1. **Combine the Ingredients:** In your mixing bowl, combine the cornstarch, water, glycerin, and white vinegar. If you’re using food coloring, add a few drops now.
2. **Mix Thoroughly:** Use your spoon or whisk to mix all the ingredients together until you have a smooth, lump-free slurry. This is important for a consistent bioplastic.
3. **Heat the Mixture:** Pour the mixture into your saucepan. Place the saucepan over medium heat on your stovetop.
4. **Stir Constantly:** This is crucial! Stir the mixture constantly with your spoon or whisk. As it heats up, it will start to thicken.
5. **Watch for the Transformation:** Keep stirring until the mixture becomes translucent and has the consistency of a thick gel or pudding. This usually takes about 5-10 minutes. It will go from milky white to clear. Don’t overcook it, or it will become too brittle!
6. **Remove from Heat:** Once the mixture is translucent and thick, remove the saucepan from the heat.
Molding Your Bioplastic Bowl
Now for the fun part: shaping your bioplastic into a bowl!
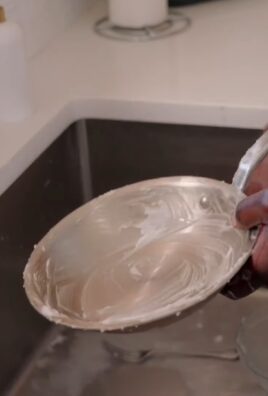
1. **Prepare Your Mold:** Lightly spray or oil the inside of your chosen bowl with non-stick cooking spray or oil. This will prevent the bioplastic from sticking.
2. **Pour the Bioplastic Mixture:** Carefully pour the hot bioplastic mixture into the prepared bowl.
3. **Spread Evenly:** Use a spoon or spatula to spread the mixture evenly around the inside of the bowl, creating a layer of the desired thickness. The thicker the layer, the sturdier your bowl will be. I usually aim for about 1/4 to 1/2 inch thickness.
4. **Smooth the Edges:** Smooth out the edges of the bioplastic mixture where it meets the rim of the bowl. This will give your finished bowl a cleaner look.
5. **Let it Set (Optional Design):** At this stage, you can add some texture or design to your bowl. You could press leaves, seeds, or other small objects into the surface of the bioplastic. Be careful, as the mixture is still hot!
Drying Your Bioplastic Bowl
Drying is the most time-consuming part of the process, but it’s essential for a strong and durable bowl.
1. **Air Drying:** The simplest method is to let the bowl air dry. Place the bowl in a well-ventilated area, away from direct sunlight. This can take several days, even up to a week, depending on the humidity and thickness of the bioplastic. You’ll know it’s dry when it feels firm and no longer sticky.
2. **Oven Drying (Optional):** If you want to speed up the drying process, you can use your oven. Preheat your oven to the lowest possible temperature (usually around 170-200°F or 75-95°C). Place the bowl on a baking sheet lined with parchment paper and bake for several hours, checking it periodically. Be careful not to overheat it, as this can cause the bioplastic to crack or warp. I usually bake it for 2-4 hours, depending on the thickness.
3. **Checking for Dryness:** Throughout the drying process, gently press on the bioplastic to check for dryness. It should feel firm and not sticky. If it’s still soft or sticky, it needs more drying time.
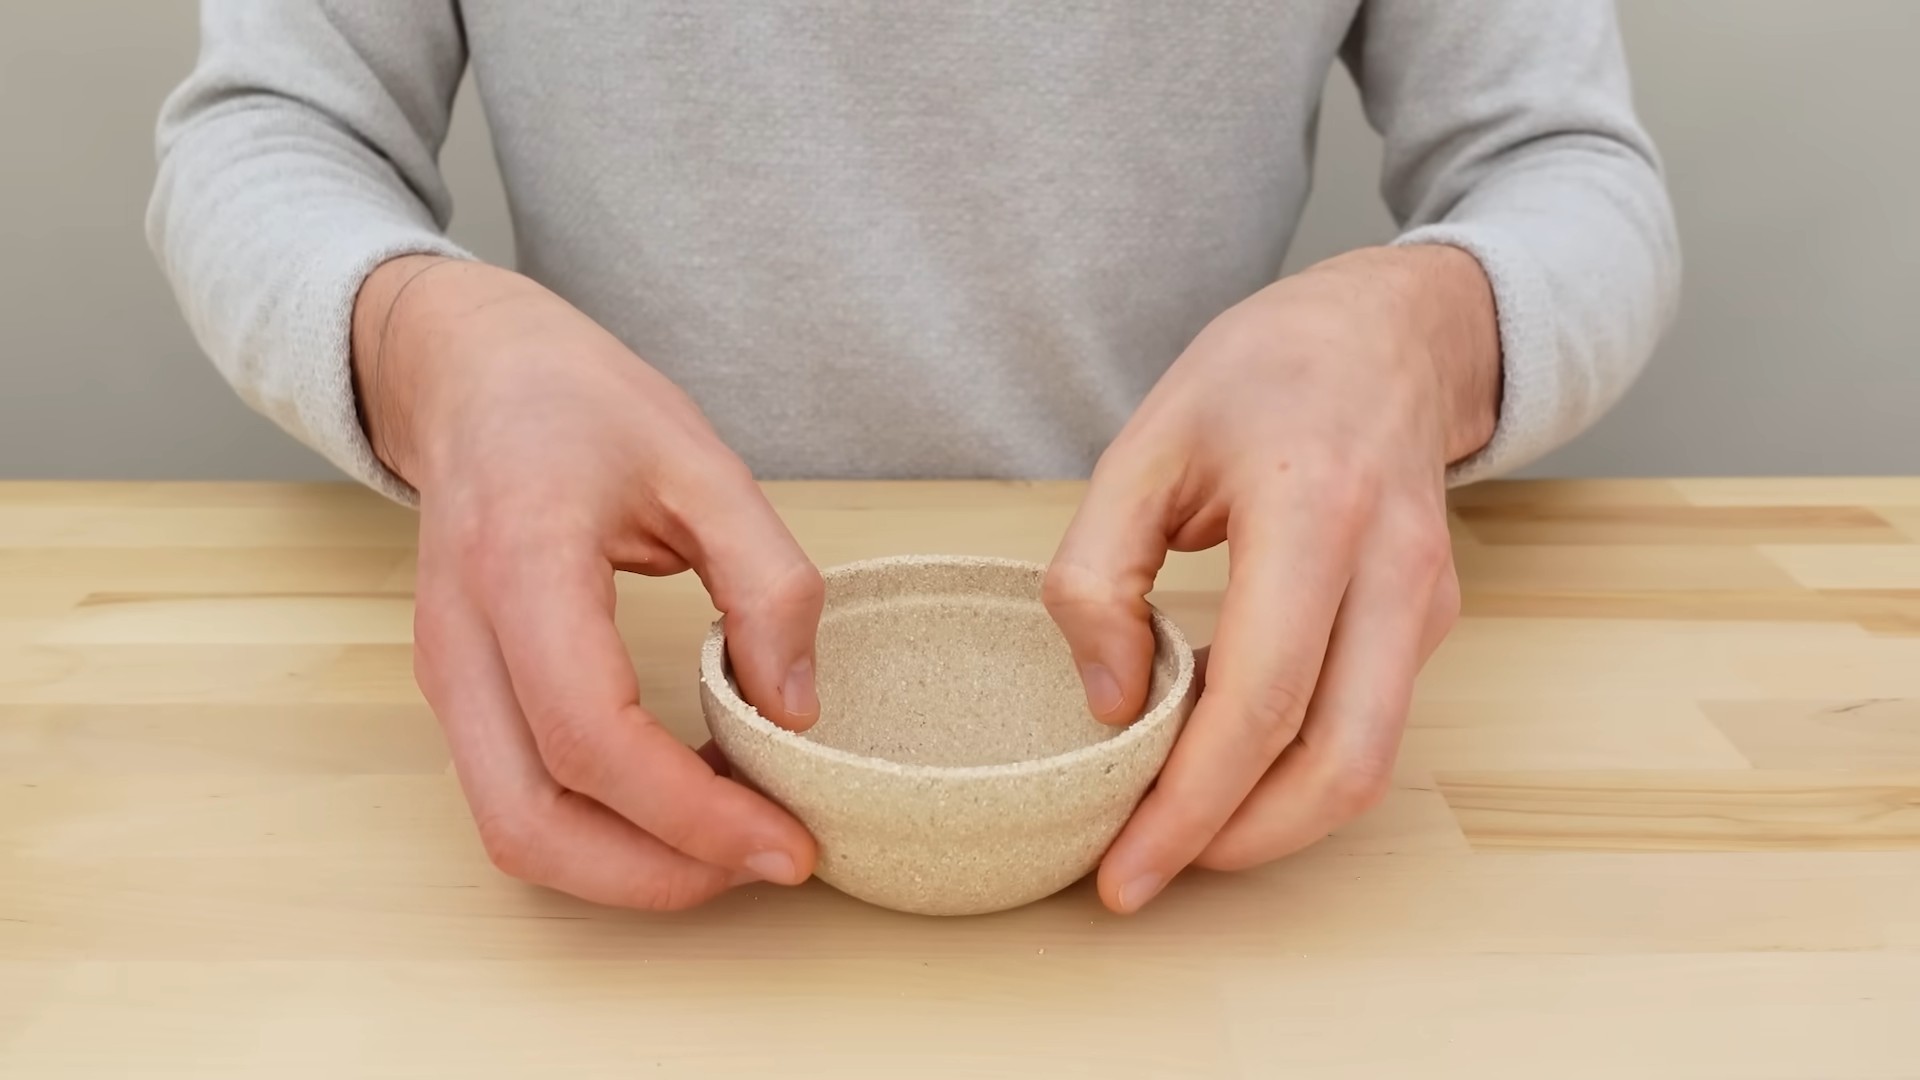
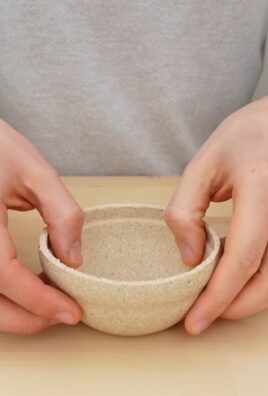
4. **Removing from the Mold:** Once the bioplastic is completely dry, carefully remove it from the mold. You may need to gently pry it loose with a spatula or knife.
Finishing Touches
Almost there! Here are a few final steps to make your bioplastic bowl even better.
1. **Sanding (Optional):** If there are any rough edges or imperfections, you can gently sand them down with fine-grit sandpaper.
2. **Sealing (Optional):** To make your bowl more water-resistant, you can seal it with a food-safe sealant. However, keep in mind that bioplastic is not completely waterproof and is best suited for dry goods.
3. **Enjoy Your Creation!** Now you can proudly display and use your homemade bioplastic bowl! Remember that it’s best suited for dry goods like fruit, nuts, or snacks.
Important Considerations and Tips
* Thickness Matters: The thicker the bioplastic layer, the stronger and more durable your bowl will be.
* Drying Time: Be patient! Drying time is crucial for a successful outcome. Don’t rush the process.
* Heat Sensitivity: Bioplastic is heat-sensitive, so avoid using your bowl for hot foods or liquids.
* Water Resistance: Bioplastic is not completely waterproof. Avoid prolonged exposure to water.
* Biodegradability: While our bioplastic is made from renewable resources, its biodegradability depends on the specific conditions. It may not break down in a typical landfill. Composting is a better option, but it may take a long time.
* Experiment! Don’t be afraid to experiment with different colors, textures, and shapes. This is a fun and creative project!
* Glycerin Alternatives: If you can’t find glycerin, you can try using corn syrup or honey as a substitute, but the results may vary.
* Troubleshooting: If your bioplastic is too brittle, try adding more glycerin to the mixture next time. If it’s too sticky, try cooking it for a slightly longer time.
* Safety First: Always supervise children when working with hot materials.
Cleaning Your Bioplastic Bowl
To keep your bioplastic bowl in good condition, follow these cleaning tips:
* **Hand Wash Only:** Do not put your bioplastic bowl in the dishwasher. The high heat and harsh detergents can damage it.
* **Gentle Soap:** Use a mild dish soap and warm water to gently wash the bowl.
* **Avoid Abrasives:** Do not use abrasive cleaners or scrub brushes, as they can scratch the surface.
* **Dry Thoroughly:** After washing, dry the bowl thoroughly with a soft cloth.
Beyond Bowls: Other Bioplastic Projects
Once you’ve mastered the bioplastic bowl, you can explore other fun projects! Here are a few ideas:
* **Bioplastic Ornaments:** Use cookie cutters to create festive ornaments.
* **Bioplastic Jewelry:** Mold small pieces of bioplastic into beads or pendants
Conclusion
So, there you have it! Crafting your own DIY bioplastic bowl is not just a fun afternoon project; it’s a step towards a more sustainable lifestyle. We’ve walked you through the process, highlighting how simple it is to transform readily available ingredients into a functional and eco-friendly alternative to traditional plastic.
But why is this DIY trick a must-try? Beyond the satisfaction of creating something with your own hands, you’re actively reducing your reliance on petroleum-based plastics, which contribute significantly to pollution and environmental degradation. You’re also gaining control over the materials used in your home, ensuring they are food-safe and free from harmful chemicals often found in mass-produced plastics. Plus, let’s be honest, a homemade bioplastic bowl has a certain charm and uniqueness that you just can’t buy in a store.
The beauty of this project lies in its adaptability. Feel free to experiment with different natural starches. Potato starch might yield a slightly different texture than cornstarch, and tapioca starch could offer increased flexibility. You can also explore adding natural dyes like beetroot juice for a vibrant pink hue, turmeric for a sunny yellow, or spinach juice for a subtle green. Just remember to add these dyes sparingly to avoid compromising the structural integrity of the bioplastic.
Consider incorporating natural fibers like shredded paper, coffee grounds, or even dried flower petals into the mixture for added texture and visual appeal. These additions can also enhance the bowl’s strength and durability. For a more robust bowl, you could try layering the bioplastic mixture over a mold, allowing each layer to dry slightly before adding the next. This technique will create a thicker, more resilient final product.
Don’t be afraid to get creative with the shape and size of your bowl. Use different molds to create bowls of varying depths and diameters. You can even experiment with creating smaller dishes or decorative items using the same bioplastic recipe. The possibilities are truly endless!
We understand that embarking on a new DIY project can sometimes feel daunting, but we encourage you to take the plunge and give this DIY bioplastic bowl a try. It’s a rewarding experience that will not only provide you with a functional and eco-friendly item but also empower you to make a positive impact on the environment.
Once you’ve created your masterpiece, we’d love to hear about your experience! Share your photos, tips, and variations with us in the comments section below. Let’s build a community of eco-conscious crafters and inspire others to embrace sustainable living. Your feedback is invaluable and will help us refine and improve this recipe for future generations of DIY enthusiasts. So, grab your ingredients, get creative, and let’s make a difference, one bioplastic bowl at a time!
Frequently Asked Questions (FAQ)
What exactly is bioplastic, and is it really biodegradable?
Bioplastic is a type of plastic derived from renewable biomass sources, such as vegetable fats and oils, corn starch, straw, woodchips, sawdust, recycled food waste, etc. Some, but not all, bioplastics are biodegradable. The biodegradability of a bioplastic depends on its chemical structure and the environmental conditions it’s exposed to. Our DIY bioplastic bowl recipe creates a bioplastic that is biodegradable under specific composting conditions, meaning it will break down over time in a compost pile with the right temperature, moisture, and microbial activity. It’s important to note that it may not readily decompose in a typical landfill environment.
What ingredients do I need to make this DIY bioplastic bowl?
The basic ingredients for this DIY bioplastic bowl are:
* A natural starch (cornstarch, potato starch, or tapioca starch work well)
* Water
* Glycerin (available at most pharmacies or online)
* Vinegar (white vinegar is recommended)
The specific ratios of these ingredients will be detailed in the recipe instructions.
What tools and equipment will I need?
You’ll need the following tools and equipment:
* A saucepan
* A stirring utensil (wooden spoon or spatula)
* A measuring cup and spoons
* A mold (a bowl, plate, or any heat-safe container to shape the bioplastic)
* Parchment paper or a silicone mat (to prevent sticking)
* An oven (optional, for faster drying)
How long does it take to make a bioplastic bowl?
The active preparation time is relatively short, around 15-20 minutes. However, the drying time can vary depending on the thickness of the bioplastic and the ambient temperature. Air drying can take several hours or even overnight. Using an oven at a low temperature can significantly reduce the drying time, but it’s crucial to monitor the bowl closely to prevent burning or warping.
How durable is the DIY bioplastic bowl?
The durability of the DIY bioplastic bowl depends on several factors, including the type of starch used, the thickness of the bowl, and the drying process. Generally, it’s not as durable as traditional plastic and is best suited for dry goods or light use. It’s not recommended for holding hot liquids or heavy items.
How should I clean and care for my bioplastic bowl?
Hand washing with mild soap and cool water is recommended. Avoid using harsh detergents or abrasive cleaners, as they can damage the bioplastic. Do not put the bowl in the dishwasher. Allow the bowl to air dry completely after washing.
Can I add color or other ingredients to the bioplastic mixture?
Yes, you can add natural dyes like beetroot juice, turmeric, or spinach juice to color the bioplastic. You can also incorporate natural fibers like shredded paper, coffee grounds, or dried flower petals for added texture and visual appeal. However, be mindful of the quantity of added ingredients, as they can affect the structural integrity of the bioplastic.
Is the DIY bioplastic bowl food-safe?
The ingredients used in this recipe are generally considered food-safe. However, it’s essential to ensure that all ingredients are of food-grade quality. Also, be aware that the bowl may absorb moisture over time, so it’s best to use it for dry goods or items that won’t be stored for extended periods.
What if my bioplastic bowl cracks or warps during drying?
Cracking or warping can occur if the bioplastic dries too quickly or unevenly. To prevent this, ensure the bowl dries slowly and evenly. If using an oven, keep the temperature low and monitor the bowl closely. If cracks do appear, you can try patching them with a small amount of fresh bioplastic mixture.
How do I dispose of my bioplastic bowl when I’m finished with it?
The best way to dispose of your DIY bioplastic bowl is to compost it in a well-maintained compost pile. Ensure the compost pile has adequate moisture, temperature, and microbial activity to facilitate decomposition. It may take several months for the bioplastic to fully break down. Avoid disposing of it in a landfill, as it may not decompose properly in that environment.
Leave a Comment