

Grow Watermelon in Your Backyard – sounds like a dream, right? Imagine biting into a juicy, sweet, homegrown watermelon on a hot summer day. Forget the grocery store – you can cultivate your own slice of paradise, and I’m here to show you how! For centuries, watermelons have been symbols of summer abundance and refreshing sweetness, enjoyed in cultures around the globe. From ancient Egypt, where they were buried with pharaohs, to modern-day picnics, watermelons hold a special place in our hearts (and stomachs!).
But let’s be honest, the thought of growing such a large fruit at home can seem daunting. Many people believe you need acres of land and a green thumb blessed by the gardening gods. That’s where these DIY tricks and hacks come in! I’m going to break down the process, making it accessible even if you have limited space or gardening experience.
Why do you need these tips? Because store-bought watermelons often lack the flavor and freshness of homegrown ones. Plus, you’ll know exactly what went into growing your fruit, avoiding harmful pesticides and ensuring a truly organic treat. Grow Watermelon in Your Backyard and experience the satisfaction of nurturing a plant from seed to delicious harvest. Let’s get started and turn your backyard into a watermelon wonderland!
Growing Watermelons: A Backyard Adventure!
Okay, so you want to grow watermelons in your backyard? Awesome! It’s totally doable, and there’s nothing quite like biting into a juicy, homegrown watermelon on a hot summer day. It might seem intimidating, but trust me, with a little planning and effort, you’ll be harvesting your own sweet treats in no time. Let’s dive in!
Choosing the Right Watermelon Variety
First things first, you need to pick the right watermelon variety for your climate and space. Some watermelons need a *lot* of room, while others are more compact.
* Consider your climate: Different watermelon varieties thrive in different climates. Look for varieties that are known to do well in your region. Your local garden center is a great resource for this!
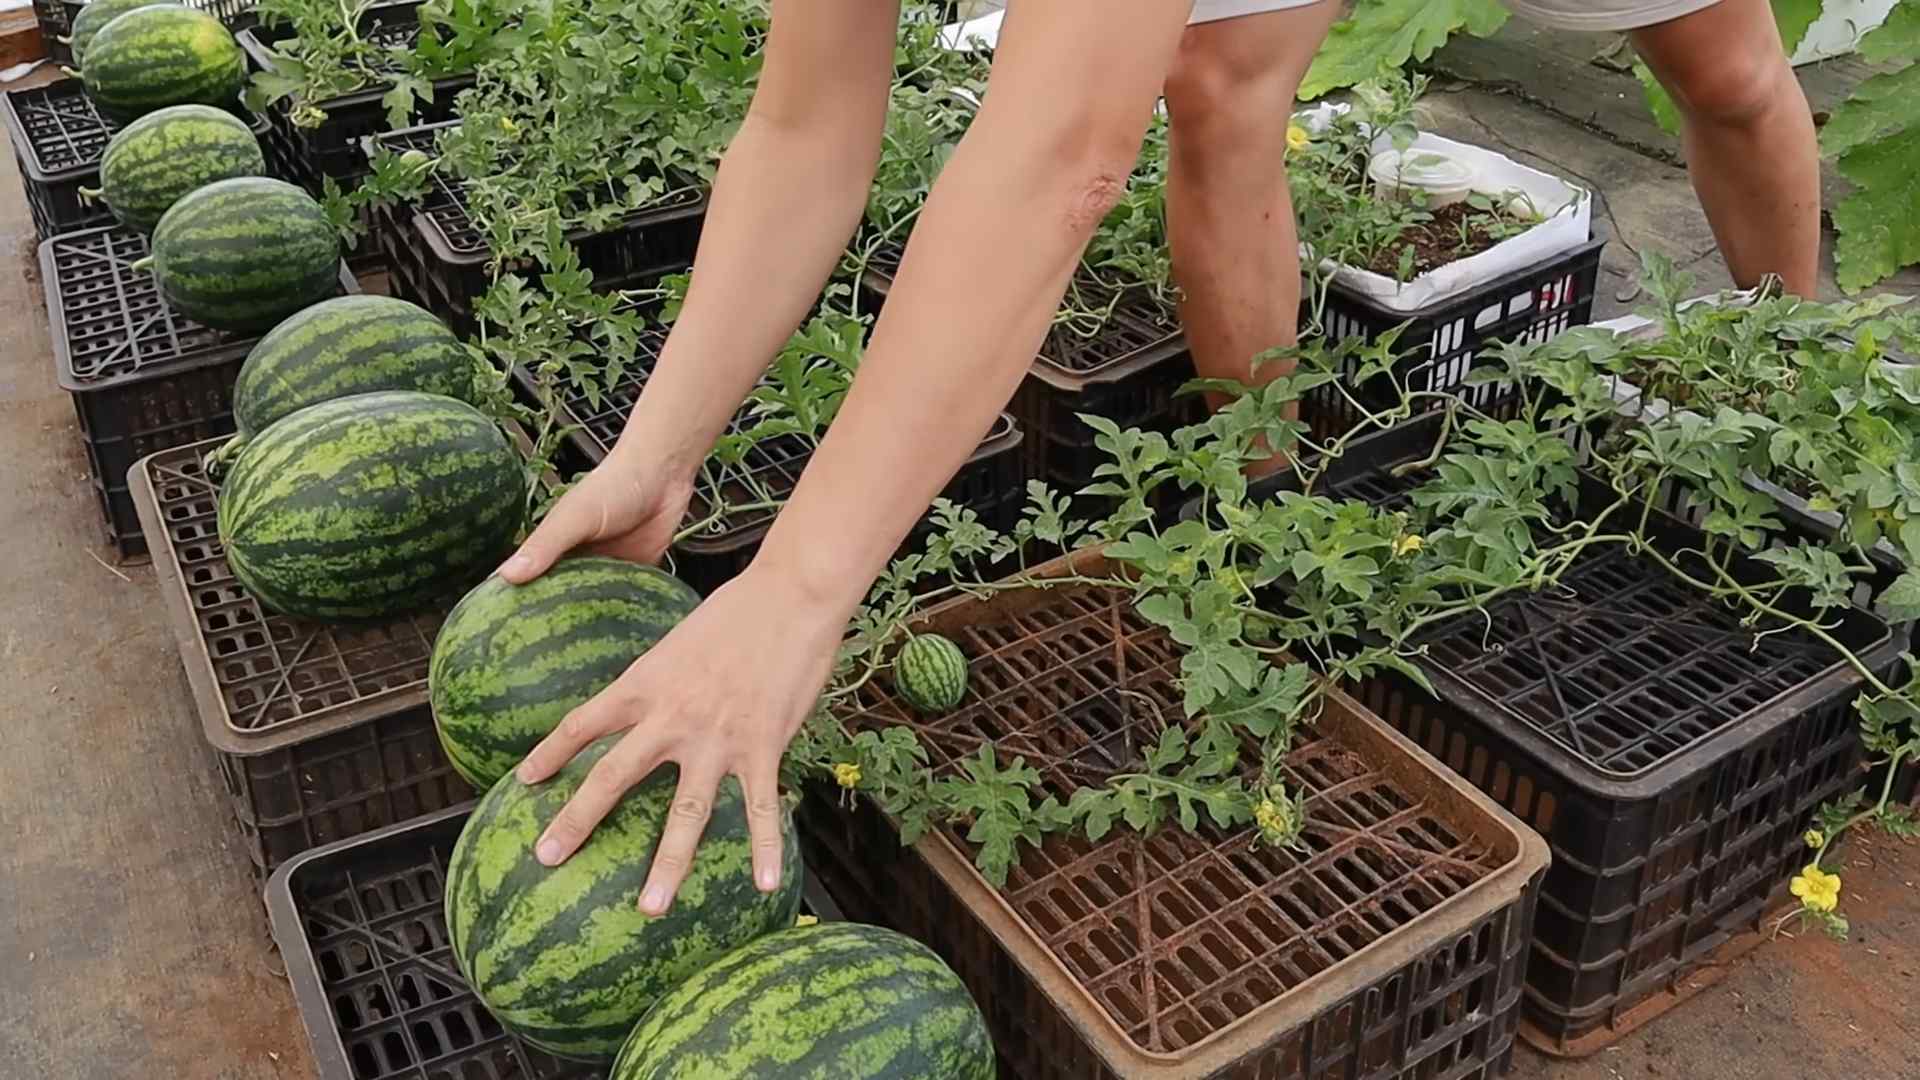
* Think about space: Watermelons need space to sprawl. If you have a small garden, consider bush or dwarf varieties. These are bred to be more compact.
* Days to maturity: This is how long it takes from planting to harvest. Choose a variety that will mature within your growing season. Check your local frost dates to figure this out.
* Popular varieties: Some popular and reliable varieties include:
* Sugar Baby: A classic, small, and sweet watermelon. Great for smaller gardens.
* Crimson Sweet: A larger, oblong watermelon with a bright red flesh.
* Jubilee: A large, oblong watermelon with a thick rind, good for shipping and storage.
* Bush Sugar Baby: A compact version of Sugar Baby, perfect for containers.
* Yellow Crimson: A unique watermelon with yellow flesh and a sweet, honey-like flavor.
Preparing the Soil
Watermelons are heavy feeders, meaning they need a lot of nutrients to grow. So, soil preparation is key!
* Sunlight: Watermelons need at least 6-8 hours of direct sunlight per day. Choose a sunny spot in your yard.
* Soil type: Watermelons prefer well-drained, sandy loam soil. If your soil is heavy clay, you’ll need to amend it.
* Soil pH: The ideal soil pH for watermelons is between 6.0 and 6.8. You can test your soil pH with a kit from your local garden center.
* Amendments: Amend your soil with plenty of organic matter, such as compost, aged manure, or peat moss. This will improve drainage, fertility, and water retention.
* Fertilizer: Incorporate a slow-release fertilizer into the soil before planting. Look for a fertilizer that is high in phosphorus and potassium, which are important for fruit development.
Starting Watermelon Seeds (Optional)
You can either start watermelon seeds indoors or direct sow them in your garden. Starting them indoors gives you a head start, especially in cooler climates.
* When to start seeds: Start seeds indoors about 4-6 weeks before the last expected frost.
* Seed starting mix: Use a seed starting mix, which is a sterile and well-draining medium.
* Containers: Use individual pots or seed starting trays. Watermelon seedlings don’t like to be transplanted, so individual pots are ideal.
* Planting depth: Plant seeds about 1 inch deep.
* Watering: Keep the soil consistently moist, but not soggy.
* Warmth: Watermelon seeds need warmth to germinate. Use a heat mat or place the containers in a warm location.
* Light: Once the seedlings emerge, provide them with plenty of light. A sunny windowsill or grow lights will work.
* Hardening off: Before transplanting the seedlings outdoors, you’ll need to harden them off. This means gradually exposing them to outdoor conditions over a period of 1-2 weeks. Start by placing them in a sheltered location for a few hours each day, gradually increasing the amount of time they spend outdoors.
Planting Watermelon Seedlings or Seeds
Okay, now for the fun part – getting those watermelons in the ground!
* Timing: Wait until the soil has warmed up to at least 70°F (21°C) before planting. This is usually a few weeks after the last expected frost.
* Spacing: Space watermelon plants according to the variety. Bush varieties can be planted closer together than vining varieties. Check the seed packet for specific spacing recommendations. Generally, allow 2-3 feet between bush varieties and 4-6 feet between vining varieties.
* Planting depth: Plant seedlings at the same depth they were growing in their containers. If direct sowing seeds, plant them about 1 inch deep.
* Watering: Water the plants thoroughly after planting.
* Mulching: Mulch around the plants with straw, hay, or black plastic. Mulch helps to retain moisture, suppress weeds, and warm the soil. Black plastic mulch can be especially helpful in cooler climates.
Caring for Your Watermelon Plants
Now that your watermelons are planted, it’s time to give them some TLC.
* Watering: Water watermelons deeply and regularly, especially during hot, dry weather. Aim for about 1-2 inches of water per week. Avoid overhead watering, which can promote fungal diseases. Drip irrigation is a great option.
* Fertilizing: Fertilize watermelons every 2-3 weeks with a balanced fertilizer. You can also side-dress them with compost or aged manure.
* Weeding: Keep the area around your watermelon plants free of weeds. Weeds compete with watermelons for nutrients and water.
* Pruning: Pruning is optional, but it can help to improve air circulation and fruit production. Remove any suckers (small shoots that grow from the base of the plant) and any dead or diseased leaves.
* Pollination: Watermelons need to be pollinated in order to produce fruit. Bees are the primary pollinators. If you don’t see many bees in your garden, you can hand-pollinate the flowers. To hand-pollinate, use a small paintbrush to transfer pollen from the male flowers to the female flowers. Male flowers have a long, thin stem, while female flowers have a small, immature watermelon at the base.
* Pest and disease control: Keep an eye out for pests and diseases. Common watermelon pests include aphids, squash bugs, and cucumber beetles. Common watermelon diseases include powdery mildew, downy mildew, and fusarium wilt. Treat pests and diseases promptly with appropriate organic or chemical controls.
Protecting Your Watermelons
As your watermelons grow, you may need to protect them from pests and diseases.
* Pest control: Use row covers to protect young plants from pests. Handpick pests off of plants. Use insecticidal soap or neem oil to control pests.
* Disease control: Choose disease-resistant varieties. Provide good air circulation. Avoid overhead watering. Use fungicides to control diseases.
* Sunscald: Watermelons can be susceptible to sunscald, especially in hot climates. Protect the fruits from direct sunlight by covering them with shade cloth or straw.
* Ground contact: To prevent rot, place a piece of cardboard or straw under each watermelon as it grows. This will keep the fruit from sitting directly on the soil.
Harvesting Your Watermelons
This is the moment you’ve been waiting for! Knowing when to harvest a watermelon can be tricky, but here are a few tips:
* Days to maturity: Check the seed packet for the days to maturity. This is a good starting point, but it’s not always accurate.
* Thump test: Thump the watermelon. A ripe watermelon will sound hollow.
* Ground spot: The ground spot (the spot where the watermelon rests on the ground) should be yellow or cream-colored.
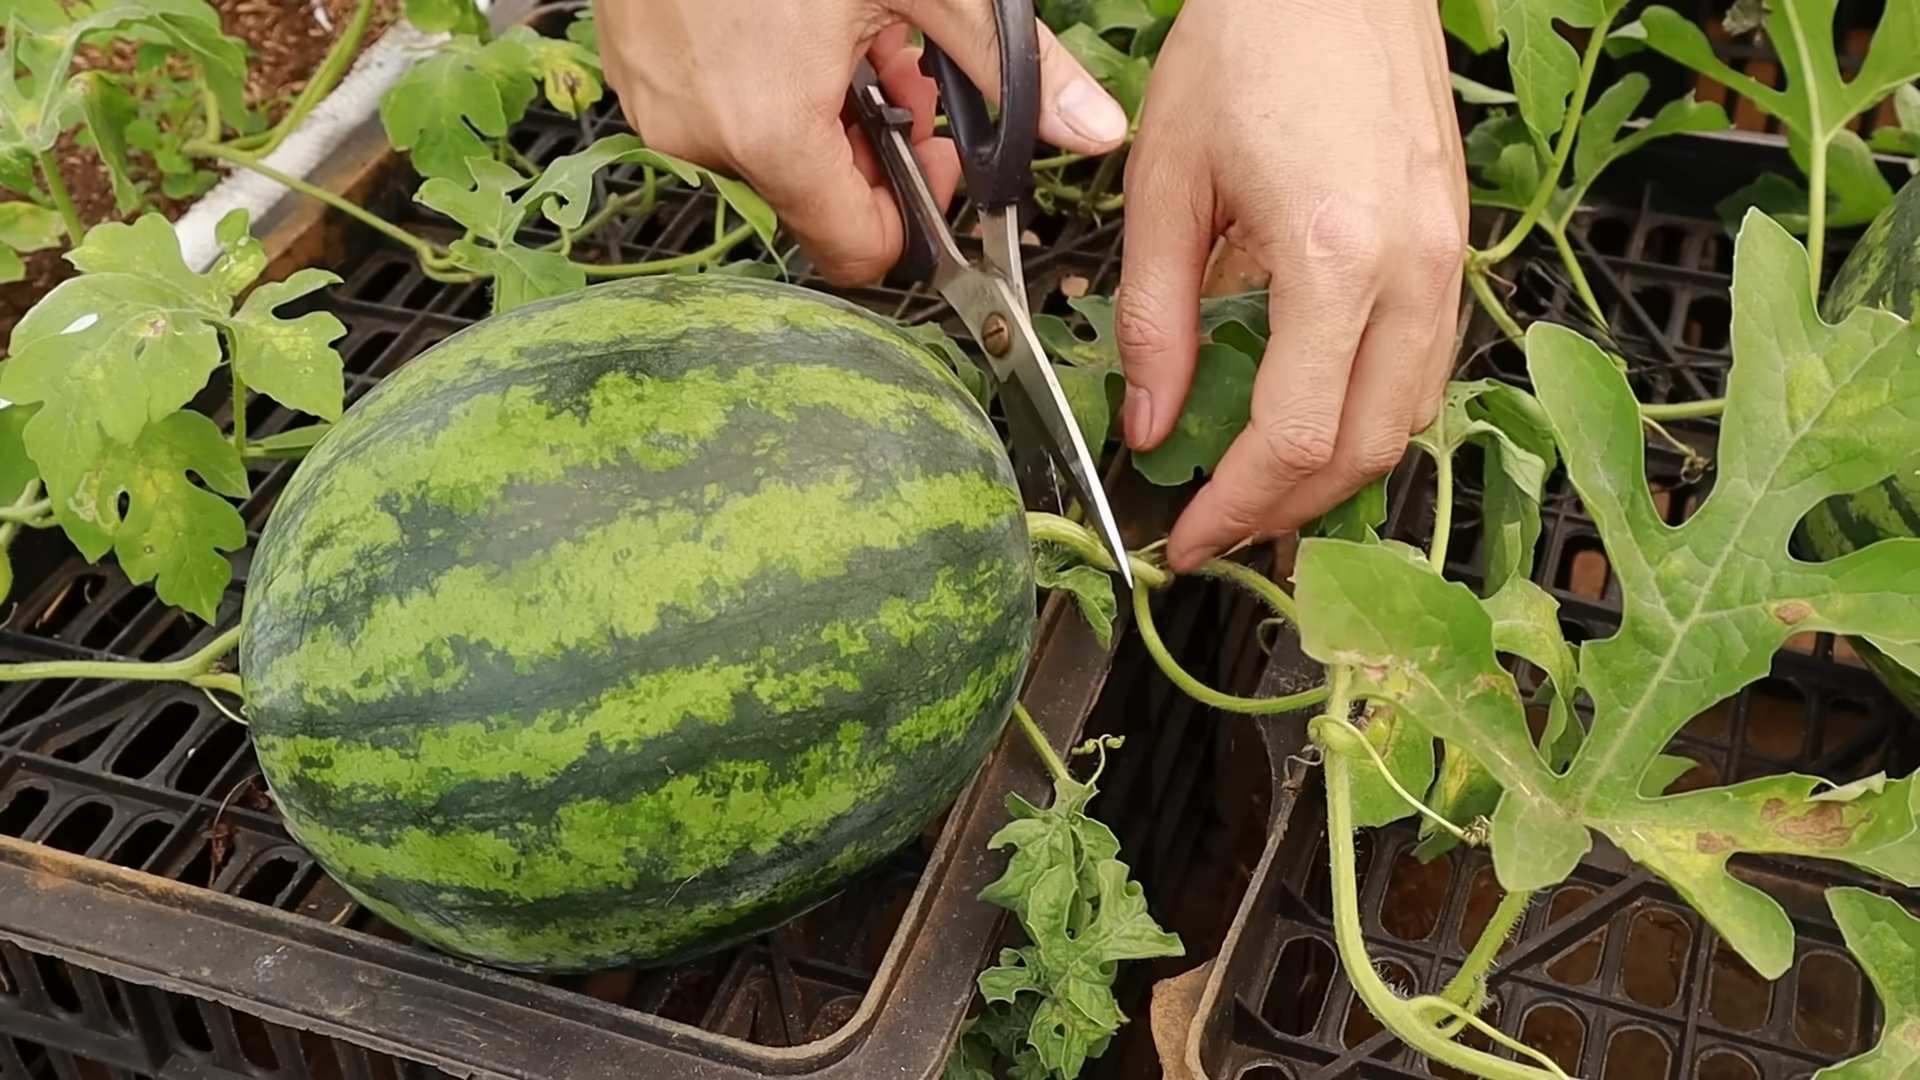
* Tendril: The tendril closest to the watermelon should be brown and dry.
* Rind: The rind should be dull and waxy, not shiny.
* Stem: The stem should be dry and starting to shrivel.
Once you’ve determined that your watermelon is ripe, use a sharp knife to cut it from the vine, leaving a few inches of stem attached.
Storing Your Watermelons
* Whole watermelons: Whole watermelons can be stored at room temperature for about a week. For longer storage, refrigerate them.
* Cut watermelons: Cut watermelons should be stored in the refrigerator in an airtight container. They will last for about 3-5 days.
Troubleshooting
Even with the best planning, things can sometimes go wrong. Here are a few common watermelon problems and how to fix them:
* Poor germination: Make sure the soil is warm enough. Use fresh seeds. Don’t overwater.
* Seedlings die
Conclusion
So, there you have it! Growing watermelons in your backyard might seem daunting at first, but with a little planning, preparation, and the right techniques, you can be harvesting your own juicy, sweet watermelons before you know it. This DIY approach isn’t just about saving money; it’s about connecting with nature, understanding where your food comes from, and experiencing the immense satisfaction of nurturing a plant from seed to fruit.
Why is this a must-try? Because store-bought watermelons, while convenient, often lack the intense flavor and freshness of homegrown varieties. Plus, you have complete control over the growing process, ensuring your watermelons are free from harmful pesticides and chemicals. Imagine biting into a perfectly ripe watermelon, bursting with flavor, knowing you grew it yourself – that’s an experience worth pursuing.
But the fun doesn’t stop there! Feel free to experiment with different watermelon varieties. Try growing smaller, personal-sized watermelons like Sugar Baby, or opt for a unique heirloom variety with a different color flesh, such as Yellow Crimson. You can also explore different trellising methods to maximize space and improve air circulation around the plants. Consider companion planting with herbs like basil or marigolds to deter pests and attract pollinators.
Don’t be afraid to get your hands dirty and learn along the way. Gardening is a journey, and every season brings new challenges and rewards. Remember to document your progress, take pictures, and share your experiences with fellow gardeners. Your insights and tips could inspire others to embark on their own watermelon-growing adventures.
We encourage you to give this DIY watermelon growing trick a try. It’s a rewarding experience that will not only provide you with delicious, homegrown watermelons but also deepen your appreciation for the natural world. Share your successes (and even your failures!) in the comments below. We’d love to hear about your journey and learn from your experiences. Let’s create a community of watermelon enthusiasts, sharing tips and tricks to help everyone grow the best watermelons possible! Remember, the key to success is patience, persistence, and a little bit of love for your plants. Happy growing!
Frequently Asked Questions (FAQs)
Q: What is the best time to start growing watermelons?
A: The ideal time to start growing watermelons depends on your climate. Watermelons are warm-season crops and require a long growing season of at least 70-90 days. In general, you should start seeds indoors about 6-8 weeks before the last expected frost. If you live in a warmer climate with a longer growing season, you can direct sow seeds into the ground after the soil has warmed up to at least 70°F (21°C). Check your local frost dates and adjust your planting schedule accordingly.
Q: What kind of soil is best for growing watermelons?
A: Watermelons thrive in well-drained, sandy loam soil that is rich in organic matter. The soil should have a pH between 6.0 and 6.8. Before planting, amend the soil with compost, aged manure, or other organic materials to improve drainage and fertility. Avoid heavy clay soils, as they can retain too much moisture and lead to root rot. If you have clay soil, consider growing watermelons in raised beds or containers.
Q: How much sunlight do watermelons need?
A: Watermelons require at least 6-8 hours of direct sunlight per day to produce healthy vines and sweet fruits. Choose a planting location that receives full sun throughout the day. If you live in a particularly hot climate, some afternoon shade may be beneficial to prevent the plants from overheating.
Q: How often should I water my watermelon plants?
A: Watermelons need consistent moisture, especially during fruit development. Water deeply and regularly, aiming to keep the soil consistently moist but not waterlogged. Water at the base of the plants to avoid wetting the foliage, which can increase the risk of fungal diseases. During hot, dry weather, you may need to water daily. As the fruits ripen, you can reduce watering slightly to concentrate the sugars and improve the flavor.
Q: How do I know when my watermelons are ripe?
A: Determining when a watermelon is ripe can be tricky, but there are several indicators to look for. First, check the tendril closest to the fruit stem. When this tendril turns brown and dries out, it’s a good sign that the watermelon is nearing ripeness. Second, examine the underside of the watermelon where it rests on the ground. This spot, known as the ground spot, should turn from white to a creamy yellow color. Finally, give the watermelon a gentle thump. A ripe watermelon will sound hollow and deep.
Q: What are some common pests and diseases that affect watermelons?
A: Watermelons can be susceptible to various pests and diseases, including aphids, squash bugs, vine borers, powdery mildew, and fusarium wilt. Regularly inspect your plants for signs of infestation or disease. Use organic pest control methods, such as insecticidal soap or neem oil, to control pests. To prevent diseases, ensure good air circulation around the plants, avoid overhead watering, and practice crop rotation. Choose disease-resistant watermelon varieties whenever possible.
Q: Can I grow watermelons in containers?
A: Yes, you can grow watermelons in containers, but you’ll need to choose a large container (at least 20 gallons) and select a compact or bush-type watermelon variety. Ensure the container has good drainage and use a high-quality potting mix. Water container-grown watermelons more frequently than those grown in the ground, as the soil in containers tends to dry out faster. You may also need to provide support for the vines as they grow.
Q: How do I pollinate watermelons?
A: Watermelons require pollination to set fruit. Bees are the primary pollinators, so attract them to your garden by planting flowering herbs and vegetables nearby. If you notice a lack of bee activity, you can hand-pollinate the flowers. To hand-pollinate, use a small paintbrush to transfer pollen from the male flowers (which have a long, thin stem) to the female flowers (which have a small, immature watermelon at the base).
Q: How do I store harvested watermelons?
A: Store harvested watermelons in a cool, dry place, such as a basement or garage. Whole watermelons can last for several weeks if stored properly. Once cut, wrap the watermelon tightly in plastic wrap and store it in the refrigerator for up to a week.
Q: What are some good companion plants for watermelons?
A: Companion planting can help improve the health and productivity of your watermelon plants. Good companion plants for watermelons include basil, marigolds, nasturtiums, oregano, and rosemary. These plants can help deter pests, attract pollinators, and improve soil health. Avoid planting watermelons near potatoes, as they can compete for nutrients.
Q: Can I save seeds from my homegrown watermelons?
A: Yes, you can save seeds from your homegrown watermelons, but keep in mind that hybrid varieties may not produce true-to-type offspring. To save seeds, scoop out the seeds from a ripe watermelon and rinse them thoroughly to remove any pulp. Spread the seeds out on a paper towel to dry completely. Once dry, store the seeds in an airtight container in a cool, dark place.

Leave a Comment