

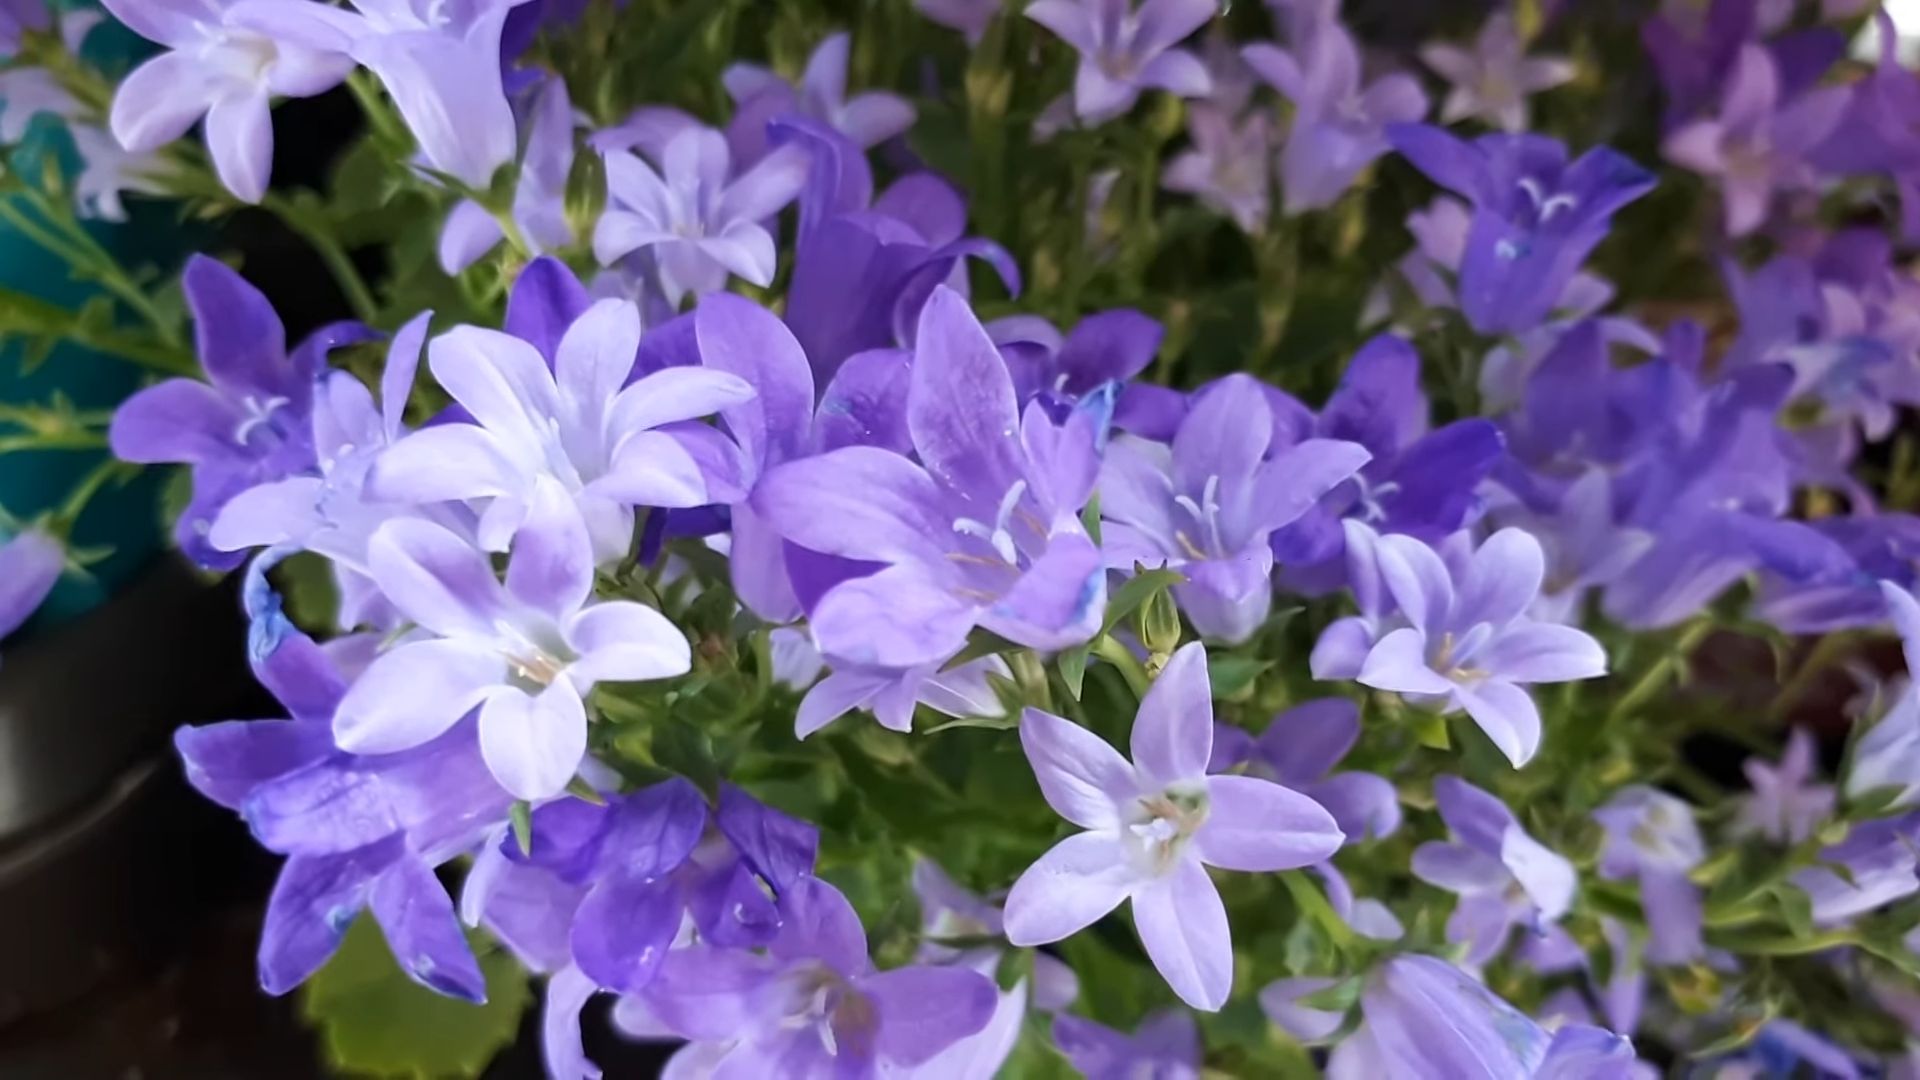
Bellflower Growing Tips: Unlock the secrets to a breathtaking garden bursting with vibrant blue and purple hues! Have you ever dreamt of a garden that looks like it’s been plucked straight from a fairytale? I know I have! And the bellflower, with its delicate, bell-shaped blooms, is the perfect way to bring that dream to life. These charming flowers have been captivating gardeners for centuries, gracing cottage gardens and adding a touch of whimsy to landscapes around the world.
But let’s be honest, sometimes even the most beautiful plants can be a little… temperamental. That’s where these DIY tricks and hacks come in! I’m going to share my tried-and-true methods for ensuring your bellflowers thrive, even if you don’t have a “green thumb.” From choosing the perfect location to mastering the art of watering and pruning, I’ll guide you through every step of the process.
Why do you need these bellflower growing tips? Because a thriving bellflower isn’t just a pretty flower; it’s a boost to your well-being! Gardening is a fantastic stress reliever, and the satisfaction of nurturing a plant from seed to bloom is incredibly rewarding. Plus, who wouldn’t want to impress their neighbors with a stunning display of bellflowers? So, let’s get our hands dirty and transform your garden into a bellflower paradise!
Growing Bellflowers: A DIY Guide to Blooming Success
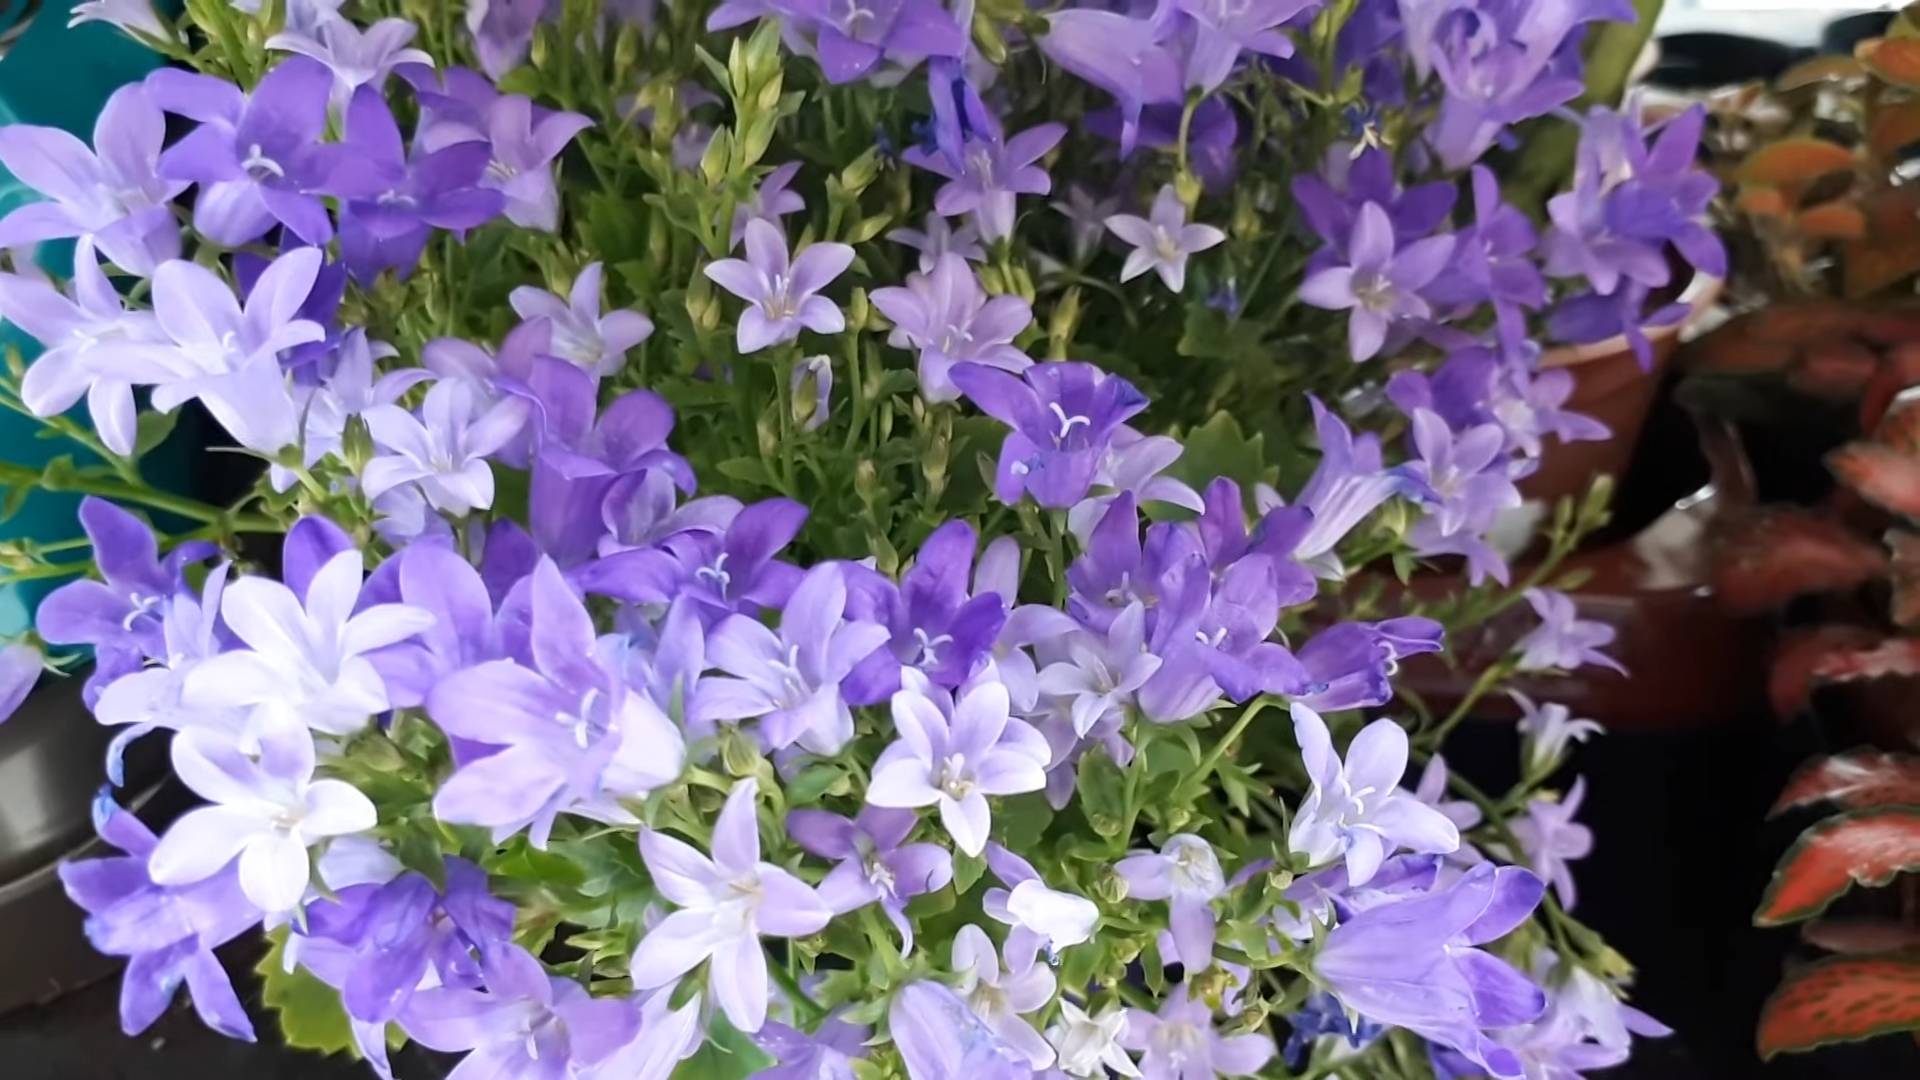
Alright, fellow garden enthusiasts! Let’s dive into the wonderful world of bellflowers. These charming, bell-shaped blooms are a fantastic addition to any garden, adding a touch of whimsical beauty and attracting pollinators like bees and butterflies. I’m going to walk you through everything you need to know to successfully grow bellflowers, from choosing the right variety to troubleshooting common problems. Get ready to have your garden bursting with these delightful flowers!
Choosing Your Bellflower Variety
Bellflowers, or Campanula, come in a wide range of shapes, sizes, and colors. Selecting the right variety is crucial for success, as some are better suited for specific climates and garden conditions. Here’s a breakdown of some popular choices:
* **Canterbury Bells (Campanula medium):** These are the classic bellflowers, known for their tall, stately spires covered in large, bell-shaped flowers. They’re biennials, meaning they grow foliage the first year and bloom the second.
* **Peach-leaved Bellflower (Campanula persicifolia):** This variety features delicate, peach-like leaves and upright stems adorned with bell-shaped flowers. They’re perennials, so they’ll come back year after year.
* **Creeping Bellflower (Campanula rapunculoides):** Be warned, this one can be quite aggressive! It spreads rapidly via underground rhizomes. If you choose this variety, be prepared to contain it. However, it does produce beautiful, violet-blue flowers.
* **Fairy Thimbles (Campanula cochleariifolia):** These are tiny, charming bellflowers that are perfect for rock gardens or edging. They form a low-growing mat of foliage and produce masses of small, nodding flowers.
* **Dalmatian Bellflower (Campanula portenschlagiana):** Another great choice for rock gardens or retaining walls, this variety forms a dense mat of foliage and produces an abundance of star-shaped, violet-blue flowers.
Consider your garden’s size, climate, and soil conditions when making your selection. Some varieties prefer full sun, while others thrive in partial shade. Also, think about the overall aesthetic you’re trying to achieve.
Preparing the Soil
Bellflowers generally prefer well-drained soil that is rich in organic matter. Before planting, it’s essential to prepare the soil properly to ensure healthy growth.
* Soil Testing: Ideally, you should test your soil’s pH level. Bellflowers prefer a slightly acidic to neutral pH (around 6.0 to 7.0). You can purchase a soil testing kit at most garden centers.
* Amending the Soil: If your soil is heavy clay or sandy, you’ll need to amend it with organic matter. Compost, well-rotted manure, or peat moss are all excellent choices. Work the organic matter into the soil to a depth of at least 12 inches.
* Drainage: Good drainage is crucial for bellflowers. If your soil tends to retain water, consider adding perlite or coarse sand to improve drainage. You can also plant bellflowers in raised beds or containers.
Planting Bellflowers
Now for the fun part – planting! Whether you’re starting from seeds or transplanting seedlings, here’s what you need to know:
* Starting from Seeds: Bellflower seeds can be started indoors 6-8 weeks before the last expected frost. Sow the seeds thinly on the surface of a seed-starting mix and gently press them into the soil. Keep the soil moist but not soggy. Germination typically takes 10-14 days.
* Transplanting Seedlings: Once the seedlings have developed a few sets of true leaves, they can be transplanted into individual pots. Harden them off gradually by exposing them to outdoor conditions for a few hours each day before planting them in the garden.
* Planting in the Garden: Choose a location that receives the appropriate amount of sunlight for your chosen variety. Dig a hole that is slightly larger than the root ball of the plant. Gently remove the plant from its container and loosen the roots. Place the plant in the hole and backfill with soil, gently firming it around the base of the plant. Water thoroughly after planting.
* Spacing: Space bellflowers according to their mature size. Generally, taller varieties should be spaced 12-18 inches apart, while smaller varieties can be spaced closer together.
Remember to water your newly planted bellflowers regularly until they are established.
Caring for Your Bellflowers
Once your bellflowers are planted, they’ll need regular care to thrive. Here’s a rundown of the essential tasks:
* Watering: Water bellflowers regularly, especially during dry periods. Avoid overwatering, as this can lead to root rot. Allow the soil to dry slightly between waterings.
* Fertilizing: Bellflowers benefit from regular fertilization. Apply a balanced fertilizer (e.g., 10-10-10) every 4-6 weeks during the growing season. You can also use a slow-release fertilizer.
* Deadheading: Deadheading, or removing spent flowers, encourages the plant to produce more blooms. Simply snip off the faded flowers just below the flower head.
* Staking: Taller varieties of bellflowers may need staking to prevent them from flopping over. Use bamboo stakes or other supports to keep the plants upright.
* Mulching: Apply a layer of mulch around the base of the plants to help retain moisture, suppress weeds, and regulate soil temperature. Organic mulches like shredded bark or compost are excellent choices.
* Pest and Disease Control: Bellflowers are generally relatively pest-free, but they can be susceptible to aphids, slugs, and snails. Inspect your plants regularly for signs of infestation and take appropriate action. Slugs and snails can be handpicked or trapped. Aphids can be controlled with insecticidal soap or neem oil. Bellflowers can also be susceptible to fungal diseases like powdery mildew. Ensure good air circulation around the plants and avoid overhead watering to prevent these diseases.
Overwintering Bellflowers
The overwintering process depends on whether you have annual, biennial, or perennial bellflowers.
* Annual Bellflowers: These complete their life cycle in one year and will not return the following year. You can collect seeds from the flowers to sow the following spring.
* Biennial Bellflowers: These grow foliage the first year and bloom the second year. After they bloom, they will die. You can allow them to self-seed or collect seeds to sow the following spring.
* Perennial Bellflowers: These will come back year after year. In colder climates, you may need to protect them from frost. Apply a thick layer of mulch around the base of the plants to insulate the roots. You can also cover the plants with burlap or a frost blanket.
Troubleshooting Common Problems
Even with the best care, you may encounter some problems when growing bellflowers. Here are some common issues and how to address them:
* Yellowing Leaves: This can be caused by overwatering, underwatering, nutrient deficiencies, or pests. Check the soil moisture and adjust your watering accordingly. Fertilize the plants if necessary. Inspect the plants for pests and take appropriate action.
* Lack of Blooms: This can be caused by insufficient sunlight, poor soil, or lack of fertilization. Ensure that the plants are receiving the appropriate amount of sunlight. Amend the soil with organic matter and fertilize regularly.
* Leggy Growth: This can be caused by insufficient sunlight or overcrowding. Thin out the plants to improve air circulation and ensure that they are receiving enough sunlight.
* Powdery Mildew: This fungal disease appears as a white, powdery coating on the leaves. Ensure good air circulation around the plants and avoid overhead watering. You can also treat the plants with a fungicide.
* Slugs and Snails: These pests can damage the leaves and flowers of bellflowers. Handpick them or trap them. You can also use slug and snail bait.
Propagating Bellflowers
If you want to expand your bellflower collection, you can propagate them in a few different ways:
* Division: This is the easiest way to propagate perennial bellflowers. In the spring or fall, carefully dig up the plant and divide the root ball into several sections. Replant the sections in separate locations.
* Cuttings: You can also propagate bellflowers from stem cuttings. Take cuttings in the spring or summer and root them in water or a rooting medium.
* Seeds: As mentioned earlier, you can collect seeds from the flowers and sow them the following spring.
Bellflowers in Containers
Bellflowers can also be grown successfully in containers. Choose a pot that is large enough to accommodate the plant’s mature size. Use a well-draining potting mix and water regularly. Fertilize the plants every 4-6 weeks. Place the container in a location that receives the appropriate amount of sunlight for your chosen variety.
Growing bellflowers in containers is a great option if you have limited garden space or if you want to move the plants around to different
Conclusion
So, there you have it! Mastering bellflower growing isn’t some arcane art reserved for seasoned gardeners. With these simple, yet effective, DIY tricks, you can unlock the full potential of your bellflowers and transform your garden into a vibrant tapestry of blue, purple, and white. The beauty of these techniques lies in their accessibility and adaptability. You don’t need fancy equipment or specialized knowledge; just a little bit of ingenuity and a willingness to experiment.
Why is this a must-try? Because it empowers you to take control of your garden’s destiny. Instead of relying solely on commercial products or generic advice, you’re crafting a personalized approach that caters specifically to the needs of your bellflowers and the unique conditions of your growing environment. This leads to healthier, more robust plants, a more abundant bloom, and a deeper connection with the natural world.
Consider these variations to further personalize your bellflower growing experience:
* Compost Tea Boost: Instead of plain water, try watering your bellflowers with diluted compost tea. This provides a gentle, yet potent, dose of nutrients that can stimulate growth and enhance flowering.
* Eggshell Calcium Supplement: Crush dried eggshells and sprinkle them around the base of your bellflowers. This provides a slow-release source of calcium, which is essential for strong stems and vibrant blooms.
* Coffee Ground Acidifier: If your soil is particularly alkaline, gently incorporate used coffee grounds into the soil around your bellflowers. This will help to lower the pH and create a more favorable growing environment. Remember to use them sparingly, as too much can be detrimental.
* Companion Planting Power: Explore companion planting strategies. Marigolds, for example, can deter pests, while basil can improve the overall health of your bellflowers. Research which plants thrive alongside bellflowers in your specific climate.
* DIY Seed Starting Mix: Create your own seed starting mix using a blend of peat moss, perlite, and vermiculite. This gives you complete control over the ingredients and ensures that your seedlings get the best possible start.
Don’t be afraid to experiment and adapt these techniques to suit your specific needs and preferences. Gardening is a journey of discovery, and the more you engage with the process, the more rewarding it becomes.
We wholeheartedly encourage you to try these DIY tricks for bellflower growing. Witness the transformation in your garden as your bellflowers flourish and bloom like never before. And most importantly, share your experience with us! We’d love to hear about your successes, your challenges, and any variations you’ve discovered along the way. Let’s create a community of bellflower enthusiasts who are passionate about sharing their knowledge and inspiring others to cultivate their own beautiful gardens. Share your photos and stories on social media using #DIYBellflower or leave a comment below. Let’s grow together!
Frequently Asked Questions (FAQ)
What kind of soil is best for bellflowers?
Bellflowers generally prefer well-drained soil that is rich in organic matter. A slightly acidic to neutral pH (around 6.0 to 7.0) is ideal. If your soil is heavy clay, amend it with compost, peat moss, or other organic materials to improve drainage. If your soil is sandy, add organic matter to help retain moisture. A soil test can provide valuable insights into your soil’s pH and nutrient levels, allowing you to make informed amendments.
How often should I water my bellflowers?
Water bellflowers regularly, especially during dry periods. Aim to keep the soil consistently moist, but not waterlogged. Overwatering can lead to root rot, so it’s important to allow the top inch or two of soil to dry out between waterings. The frequency of watering will depend on factors such as the weather, soil type, and the size of your plants. Check the soil moisture regularly and adjust your watering schedule accordingly. Mulching around the base of your plants can help to retain moisture and reduce the need for frequent watering.
What are some common pests and diseases that affect bellflowers?
Bellflowers can be susceptible to a few common pests and diseases, including:
* Slugs and Snails: These pests can damage leaves and flowers. Use slug and snail bait, traps, or handpick them off the plants.
* Aphids: These small insects suck sap from the plants, causing stunted growth and distorted leaves. Spray with insecticidal soap or neem oil.
* Powdery Mildew: This fungal disease appears as a white, powdery coating on the leaves. Improve air circulation and treat with a fungicide if necessary.
* Root Rot: This disease is caused by overwatering and poor drainage. Ensure that your soil is well-draining and avoid overwatering.
Regularly inspect your plants for signs of pests and diseases and take action promptly to prevent them from spreading.
How much sunlight do bellflowers need?
Most bellflowers prefer full sun to partial shade. They typically need at least six hours of sunlight per day to thrive. However, in hot climates, they may benefit from some afternoon shade to protect them from scorching. The specific sunlight requirements will vary depending on the variety of bellflower. Check the plant label or consult a gardening guide for specific recommendations.
When is the best time to plant bellflowers?
The best time to plant bellflowers is in the spring or fall. This allows the plants to establish their roots before the onset of extreme temperatures. In warmer climates, fall planting is often preferred, as it gives the plants more time to acclimate before the heat of summer. In colder climates, spring planting is generally recommended to avoid winter damage.
How do I propagate bellflowers?
Bellflowers can be propagated by seed, division, or cuttings.
* Seed: Sow seeds indoors 6-8 weeks before the last frost or directly outdoors after the last frost.
* Division: Divide established plants in the spring or fall.
* Cuttings: Take stem cuttings in the spring or summer and root them in a moist rooting medium.
Do bellflowers need to be deadheaded?
Yes, deadheading bellflowers will encourage them to produce more blooms. Remove spent flowers regularly to prevent them from going to seed and redirect the plant’s energy towards producing new flowers.
Are bellflowers deer resistant?
Bellflowers are generally considered to be deer resistant, but deer may still browse on them if other food sources are scarce. Using deer repellent or fencing can help to protect your plants.
Can I grow bellflowers in containers?
Yes, bellflowers can be grown in containers. Choose a pot that is large enough to accommodate the plant’s root system and use a well-draining potting mix. Water regularly and fertilize as needed.
What are some good companion plants for bellflowers?
Good companion plants for bellflowers include:
* Marigolds (deter pests)
* Basil (improves overall health)
* Roses (create a beautiful contrast)
* Lavender (attracts pollinators)
* Coneflowers (provide a long season of bloom)
How do I encourage more blooms on my bellflowers?
To encourage more blooms on your bellflowers:
* Provide them with plenty of sunlight.
* Water them regularly.
* Fertilize them with a balanced fertilizer.
* Deadhead spent flowers.
* Ensure that the soil is well-draining.
By following these tips, you can enjoy a profusion of beautiful bellflower blooms in your garden.

Leave a Comment