

DIY Basket Weaving Bucket: Ever dreamt of crafting your own charming, rustic storage solutions? I know I have! There’s something incredibly satisfying about creating something beautiful and functional with your own two hands. Forget those mass-produced plastic containers – we’re diving into the world of DIY basket weaving, and trust me, it’s easier than you think!
Basket weaving boasts a rich history, stretching back millennia. From ancient Egyptians using reeds to create containers to indigenous cultures crafting intricate baskets for carrying and storage, this art form has been a staple across civilizations. It’s more than just a craft; it’s a connection to our ancestors and a way to honor traditional skills.
But why should you learn to weave your own bucket? Well, for starters, it’s a fantastic way to personalize your home décor. Imagine a unique, handwoven bucket holding your favorite magazines, displaying potted plants, or even organizing your craft supplies. Plus, it’s incredibly eco-friendly! By using natural materials and repurposing old fabrics, you’re reducing waste and creating a sustainable storage solution. In this article, I’ll guide you through the process of creating your very own DIY Basket Weaving Bucket, step-by-step. Get ready to unleash your inner artisan and create something truly special!
DIY Basket Weaving Bucket: A Rustic Storage Solution
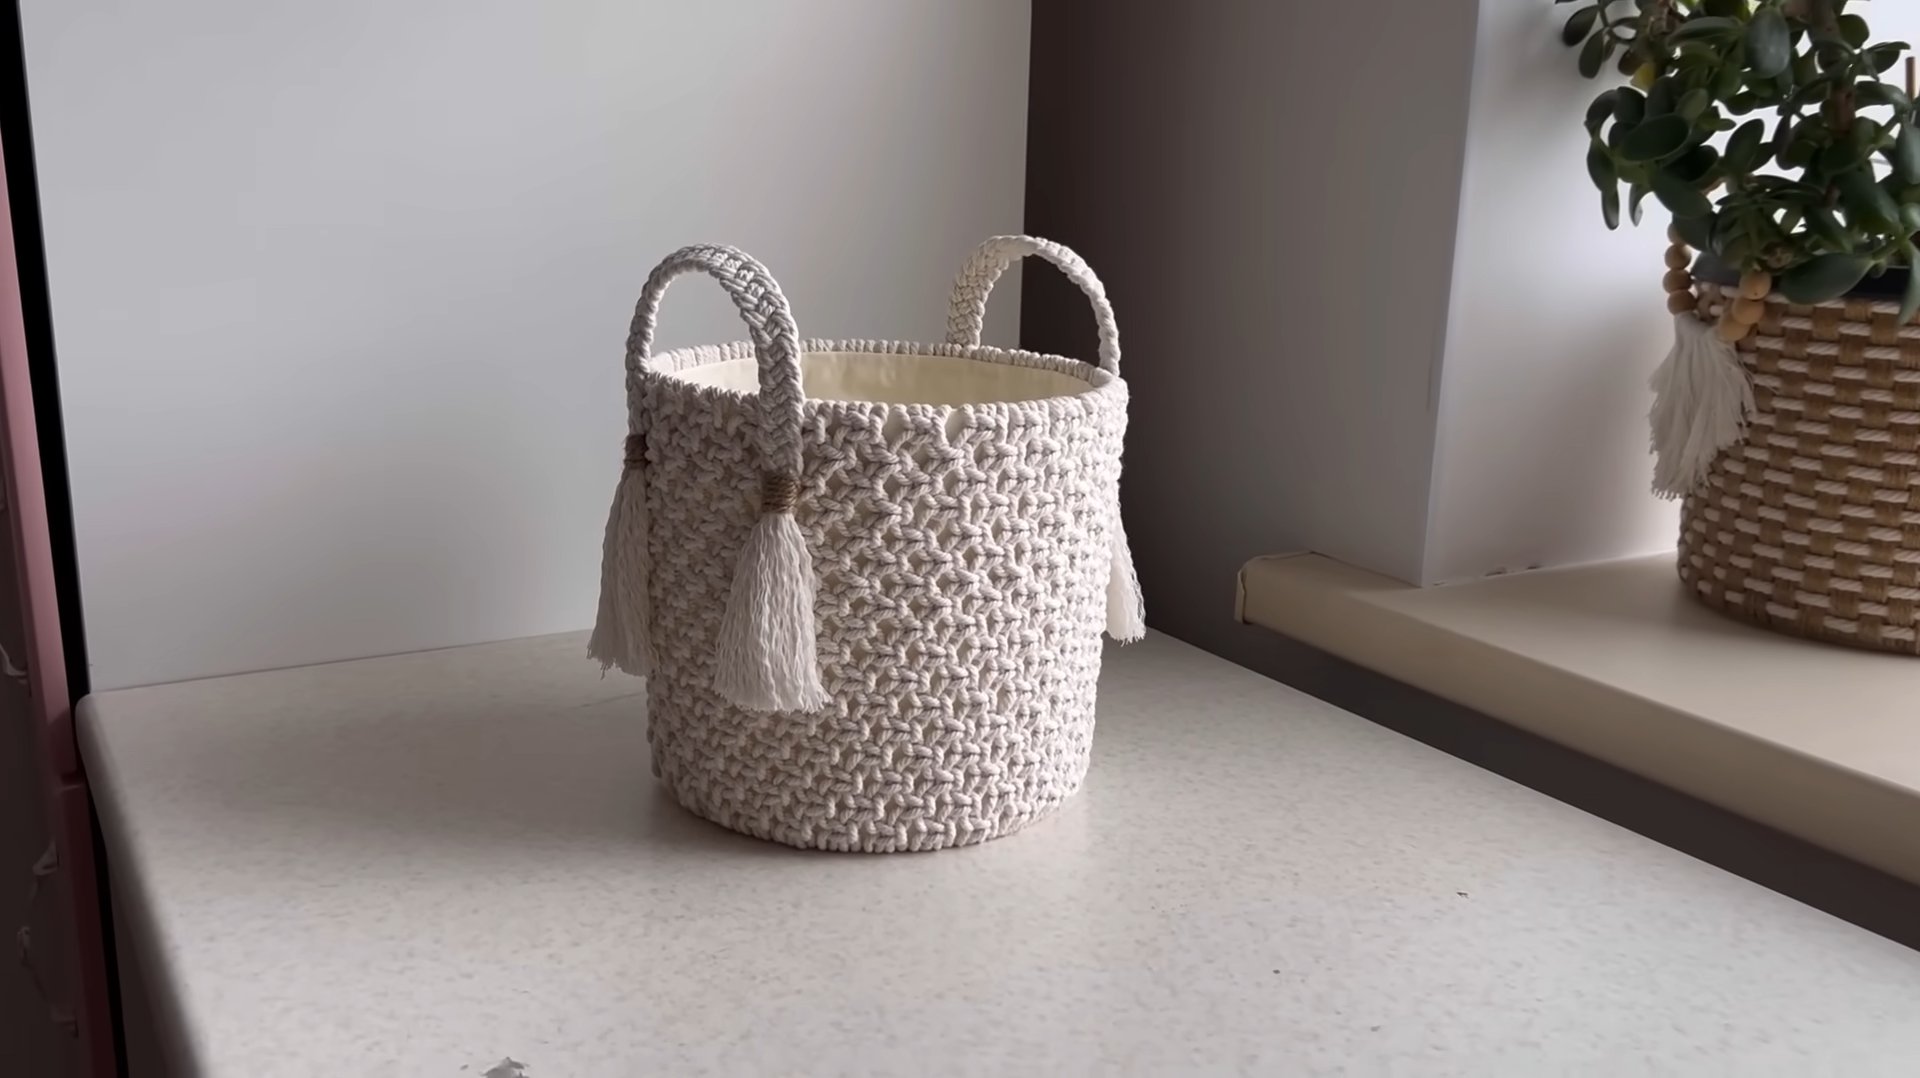
Hey there, fellow DIY enthusiasts! Today, I’m super excited to share a project that combines practicality with a touch of rustic charm: a basket-woven bucket! This isn’t just any bucket; it’s a beautiful and functional storage solution you can create yourself. We’ll be transforming a plain, ordinary bucket into a stunning piece that adds warmth and texture to any room. Get ready to roll up your sleeves and get weaving!
Materials You’ll Need
Before we dive in, let’s gather all the necessary materials. Trust me, having everything organized beforehand will make the process so much smoother.
* A sturdy bucket: Choose a bucket made of plastic or metal. The size is entirely up to you, depending on what you plan to store in it. I’m using a 5-gallon plastic bucket for this project.
* Natural weaving material: You can use willow branches, reed, rattan, or even thick yarn. I’m opting for reed because it’s readily available and easy to work with. You’ll need a good amount, so estimate based on the size of your bucket.
* Scissors or pruning shears: For cutting the weaving material.
* Measuring tape or ruler: To ensure consistent spacing.
* Hot glue gun and glue sticks: To secure the initial base and potentially reinforce the weaving.
* Clamps (optional): These can be helpful for holding the reed in place while the glue dries.
* Gloves (optional): To protect your hands from splinters or glue.
* Sandpaper (optional): If your bucket has any rough edges, a little sanding can smooth them out.
* Wood stain or paint (optional): To customize the color of your reed before weaving.
* Varnish or sealant (optional): To protect the finished basket from moisture and wear.
Preparing the Bucket and Weaving Material
This step is crucial for a successful outcome. Proper preparation ensures that the weaving process is easier and the finished product looks polished.
1. Clean the bucket: Thoroughly wash the bucket with soap and water to remove any dirt or debris. Make sure it’s completely dry before proceeding.
2. Sand rough edges (optional): If your bucket has any sharp or uneven edges, use sandpaper to smooth them out. This will prevent the weaving material from snagging.
3. Prepare the reed: If you’re using reed, soak it in warm water for about 30 minutes to make it more pliable. This will prevent it from cracking or breaking during the weaving process. If you’re using willow or rattan, follow the manufacturer’s instructions for preparing the material.
4. Stain or paint the reed (optional): If you want to customize the color of your basket, now’s the time to stain or paint the reed. Apply the stain or paint evenly and let it dry completely before proceeding. I’m going to leave mine natural for a rustic look.
5. Cut the reed into appropriate lengths: Decide on the height of your basket and cut the reed into pieces that are long enough to cover the bucket’s height plus a few extra inches for securing at the top and bottom. I’m cutting mine to be about 3 inches longer than the bucket’s height.
Creating the Base
The base is the foundation of our basket-woven bucket. A solid base ensures that the weaving is secure and the bucket is sturdy.
1. Attach the first reed pieces vertically: Apply a small amount of hot glue to the bottom of the bucket, spacing them evenly around the circumference. Attach the reed pieces vertically, pressing them firmly into the glue. These will act as the “stakes” for our weaving. I’m using 12 stakes for my 5-gallon bucket, but you can adjust the number depending on the size of your bucket and the thickness of your reed.
2. Secure the base with hot glue: Add more hot glue around the base of each reed piece to ensure they are securely attached to the bucket. You can use clamps to hold the reed in place while the glue dries.
3. Let the glue dry completely: Allow the glue to dry completely before proceeding to the next step. This will ensure that the base is strong and stable.
Weaving the Basket
Now for the fun part – the actual weaving! This is where your creativity comes into play.
1. Start weaving: Take one of your longer pieces of reed and begin weaving it around the vertical stakes. Start at the base of the bucket, weaving over one stake and under the next, and continue around the entire circumference.
2. Maintain tension: As you weave, make sure to maintain consistent tension. This will prevent the weaving from becoming loose or uneven.
3. Overlap the ends: When you reach the end of a reed piece, overlap it with the beginning of the next piece. This will create a seamless and continuous weave. Secure the overlap with a small amount of hot glue if needed.
4. Continue weaving: Continue weaving around the bucket, working your way up towards the top. Maintain the over-under pattern, ensuring that each row is snug against the previous row.
5. Adjust as needed: As you weave, you may need to adjust the spacing between the stakes or the tension of the reed. Don’t be afraid to experiment and make adjustments as needed to achieve the desired look.
6. Consider different weaving patterns: Once you’re comfortable with the basic over-under weave, you can experiment with different patterns. For example, you could try a twill weave (over two, under one) or a herringbone weave.
Finishing the Top Edge
The top edge is what gives the basket a finished and professional look. There are several ways to finish the top edge, so choose the one that you like best.
1. Fold and glue: Once you reach the top of the bucket, fold the ends of the vertical stakes over the top edge and glue them to the inside of the bucket. This will create a clean and finished edge.
2. Braid the ends: Alternatively, you can braid the ends of the vertical stakes together to create a decorative edge. Secure the braid with hot glue.
3. Add a rim: You can also add a separate rim to the top of the bucket. This can be made from wood, metal, or even more reed. Attach the rim with glue or screws.
4. My preferred method: I like to fold the reed over the top edge of the bucket and then weave another piece of reed around the top to secure it. This creates a nice, rounded edge that is both durable and attractive.
Securing and Reinforcing
To ensure that your basket-woven bucket is strong and durable, it’s important to secure and reinforce the weaving.
1. Add extra glue: Apply extra hot glue to any areas that seem loose or weak. Pay particular attention to the base and the top edge.
2. Wrap with twine or yarn: You can also wrap the base and top edge with twine or yarn to add extra strength and visual appeal.
3. Apply a sealant: If you plan to use your basket-woven bucket outdoors or in a damp environment, apply a sealant to protect it from moisture.
Final Touches
Now that the weaving is complete, it’s time to add the final touches that will make your basket-woven bucket truly unique.
1. Trim any loose ends: Use scissors or pruning shears to trim any loose ends of reed or glue strings.
2. Add decorative elements: You can add decorative elements such as beads, buttons, or ribbons to personalize your basket.
3. Apply a varnish or sealant (optional): To protect the finished basket from moisture and wear, apply a varnish or sealant. This will also enhance the color and texture of the reed.
4. Enjoy your creation! Step back and admire your handiwork. You’ve just transformed a plain bucket into a beautiful and functional piece of art.
Tips and Tricks
Here are a few extra tips and tricks to help you create the perfect basket-woven bucket:
* Soak the reed for longer: If you’re having trouble bending the reed, soak it in warm water for a longer period of time.
* Use clamps: Clamps can be incredibly helpful for holding the reed in place while the glue dries.
* Don’t be afraid to experiment: There are no hard and fast rules when it comes to basket weaving. Don’t be afraid to experiment with different patterns and techniques to create your own unique design.
* Take breaks: Basket weaving can be tiring, so take breaks as needed to avoid fatigue.
* Have fun! The most important thing is to have fun and enjoy the process.
Alternative Materials
While I used reed for this project, you can definitely experiment with other materials. Here are a few ideas:
* Willow branches: Willow branches are a classic basket-weaving material that adds a
Conclusion
So, there you have it! Transforming an ordinary bucket into a beautifully woven basket is not only achievable but also incredibly rewarding. This DIY basket weaving bucket project is more than just a craft; it’s a chance to unleash your creativity, add a personal touch to your home décor, and repurpose something that might otherwise end up in a landfill.
Why is this a must-try? Because it’s accessible to all skill levels. Whether you’re a seasoned crafter or a complete beginner, the step-by-step instructions and readily available materials make this project surprisingly easy to tackle. Plus, the satisfaction of creating something beautiful and functional with your own hands is unparalleled. Imagine the compliments you’ll receive when guests admire your unique, handcrafted basket!
But the beauty of this project lies in its versatility. Feel free to experiment with different materials. Instead of traditional willow or reed, consider using fabric strips, yarn, or even recycled plastic bags for a truly eco-friendly creation. Play with colors and patterns to match your existing décor or create a bold statement piece. You could even add embellishments like beads, buttons, or shells for a personalized touch.
Consider these variations to elevate your DIY basket weaving bucket project:
* Two-Tone Weaving: Use two different colors of your chosen material to create a striking visual effect. Alternate rows or create a more intricate pattern.
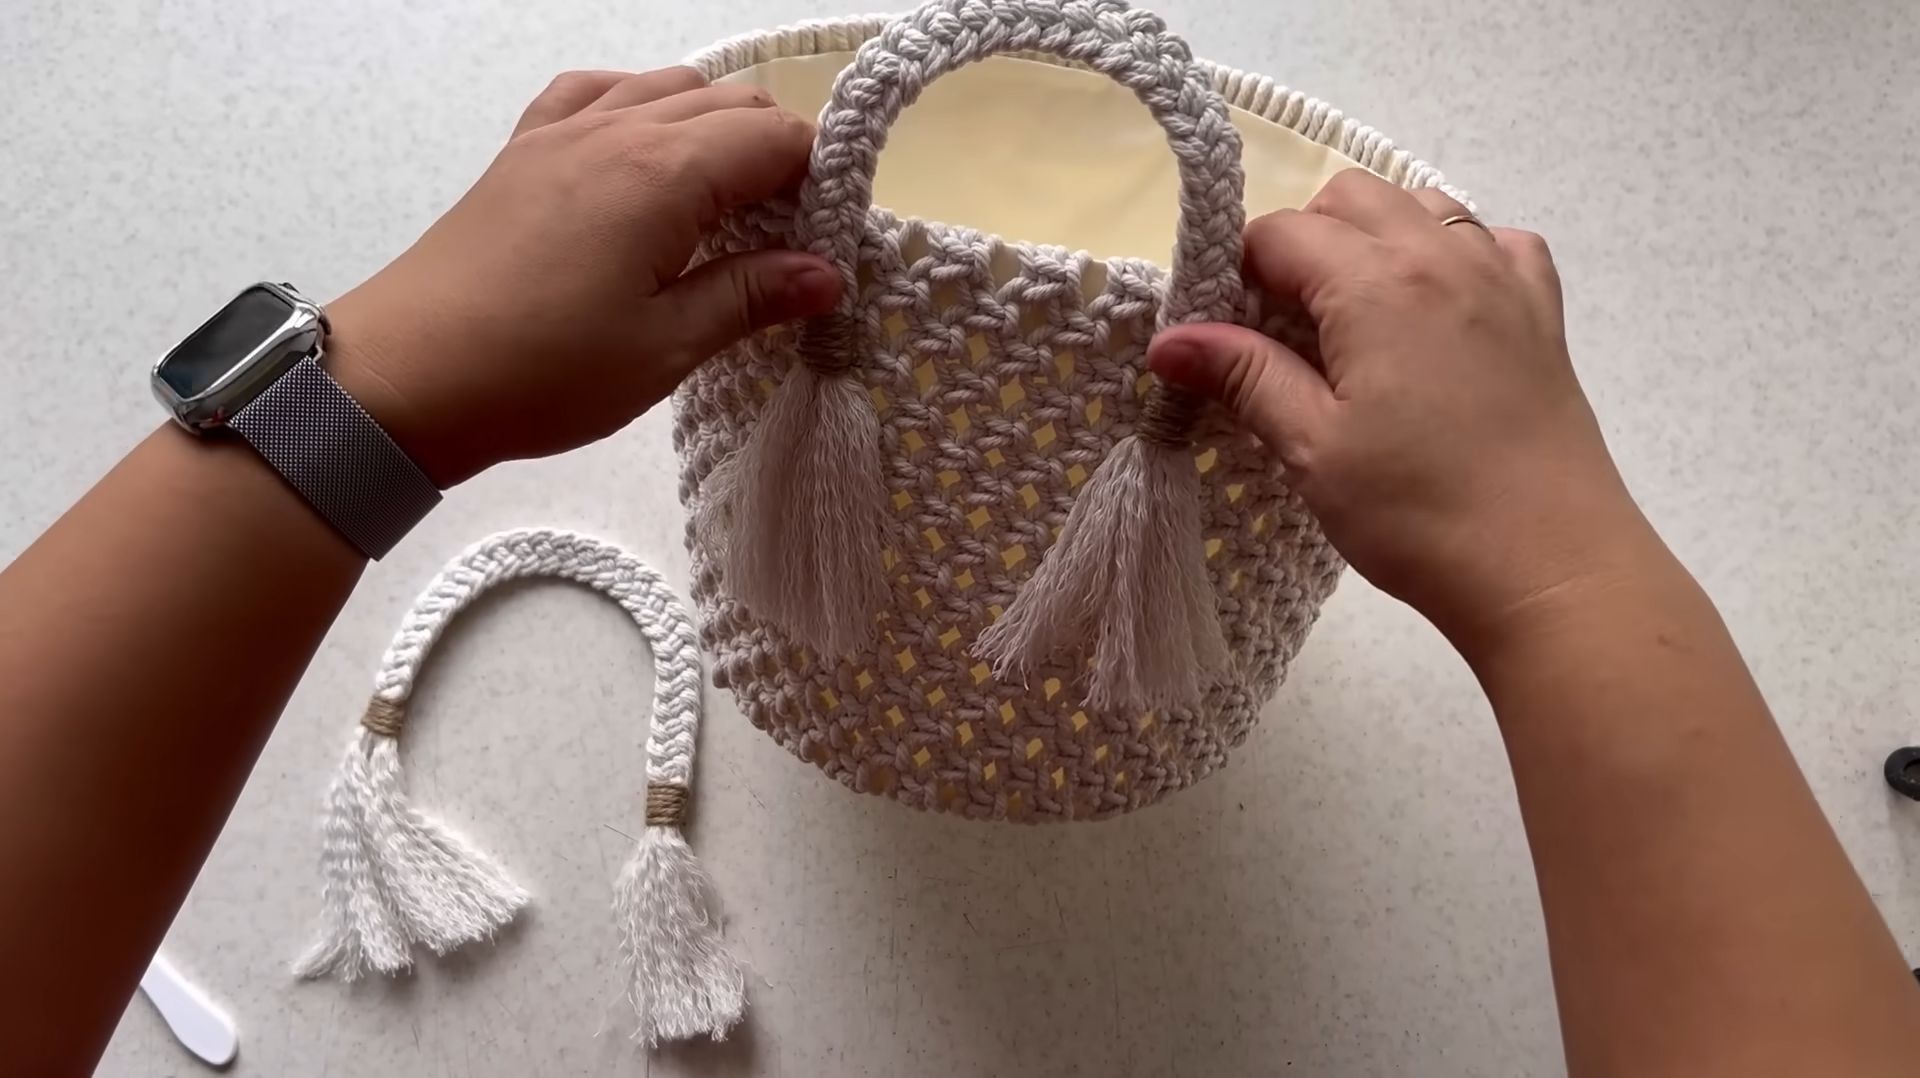
* Handle Variations: Experiment with different handle styles. A simple rope handle adds a rustic touch, while a leather strap provides a more sophisticated look. You could even weave the handle directly into the basket for a seamless design.
* Lining Options: Add a fabric lining to your basket to protect delicate items or create a more polished finish. Choose a fabric that complements your weaving material and secure it with fabric glue or hand stitching.
* Size Adjustments: While this guide focuses on using a standard-sized bucket, you can easily adapt the technique to smaller or larger containers. Just adjust the length of your weaving material accordingly.
* Decorative Accents: Once your basket is complete, consider adding decorative accents like tassels, charms, or painted designs to further personalize your creation.
This project isn’t just about creating a basket; it’s about embracing the joy of making and adding a touch of handmade charm to your life. It’s about transforming the mundane into the magnificent. It’s about taking pride in your creations and sharing them with the world.
So, what are you waiting for? Gather your materials, clear your workspace, and prepare to embark on a creative adventure. We encourage you to try this DIY basket weaving bucket project and discover the satisfaction of crafting something beautiful and functional with your own two hands.
And most importantly, don’t forget to share your creations with us! We’d love to see your unique interpretations and variations. Post photos of your finished baskets on social media using [Your Hashtag Here] and inspire others to join the DIY movement. Let’s celebrate the art of handmade and the joy of creating together!
Frequently Asked Questions (FAQ)
What kind of bucket is best for this project?
The ideal bucket is a sturdy plastic or metal bucket with a smooth, even surface. Avoid buckets with significant dents or damage, as these can make weaving more difficult. The size of the bucket is entirely up to you and will determine the final size of your basket. A standard 5-gallon bucket is a good starting point for beginners. Make sure the bucket is clean and dry before you begin weaving.
What materials can I use for weaving?
The possibilities are endless! Traditional materials like willow, reed, and rattan are excellent choices for a classic basket look. However, you can also experiment with more unconventional materials like fabric strips (old t-shirts work great!), yarn, rope, twine, or even recycled plastic bags cut into strips. Consider the durability and texture of the material when making your selection. Thicker materials will create a more robust basket, while thinner materials will result in a more delicate weave.
How do I prepare my weaving material?
The preparation depends on the material you choose. Natural materials like willow and reed may need to be soaked in water to make them more pliable and easier to weave. Fabric strips should be cut into uniform widths (around 1-2 inches is a good starting point). Yarn and rope can be used as is. If you’re using recycled plastic bags, cut them into strips and join them together to create a continuous strand.
How do I secure the weaving material to the bucket?
There are several ways to secure the weaving material to the bucket. One common method is to use hot glue to attach the first row of weaving to the bottom of the bucket. Alternatively, you can use strong tape or even drill small holes around the bottom of the bucket and thread the weaving material through them. Choose the method that works best for you and your chosen materials.
What if my weaving material keeps slipping?
Slipping can be a common issue, especially when working with smooth materials. To prevent slipping, try using a stronger adhesive or adding more anchor points. You can also use clothespins or binder clips to hold the weaving material in place while the adhesive dries. Another tip is to work in small sections, securing each section before moving on to the next.
How do I create a handle for my basket?
There are many ways to create a handle for your basket. A simple option is to use a length of rope or twine and attach it to the sides of the bucket with knots or glue. You can also create a more elaborate handle by weaving the handle directly into the basket. Another option is to use a pre-made handle made of wood, leather, or metal.
Can I paint or decorate my finished basket?
Absolutely! Once your basket is complete, you can paint it, stain it, or decorate it with embellishments like beads, buttons, or shells. Use acrylic paints or stains specifically designed for the material of your basket. Seal the finished product with a clear coat to protect the paint and add durability.
How do I clean and maintain my woven basket?
The cleaning and maintenance of your basket will depend on the materials used. For baskets made with natural materials, avoid getting them too wet, as this can cause them to warp or mildew. Dust them regularly with a soft brush or cloth. For baskets made with fabric or plastic, you can wipe them down with a damp cloth. Avoid using harsh chemicals or abrasive cleaners, as these can damage the weaving material.
What are some uses for my DIY basket weaving bucket?
The possibilities are endless! Use your basket for storage, organization, or as a decorative accent. It’s perfect for holding toys, blankets, magazines, plants, or even as a stylish laundry basket. The versatility of this project makes it a valuable addition to any home.
Where can I find inspiration for my DIY basket weaving bucket project?
Look online! Pinterest, Instagram, and other social media platforms are filled with inspiration for DIY basket weaving projects. Search for keywords like “DIY basket weaving,” “bucket basket,” or “recycled basket” to find a wealth of ideas and tutorials. Don’t be afraid to experiment and put your own unique spin on the project.


Leave a Comment