

DIY Gem Vanity Tray: Ever feel like your makeup and jewelry are just scattered across your vanity, creating a chaotic mess? I know I have! It’s frustrating to spend precious minutes searching for that one earring or the perfect shade of lipstick. But what if I told you there’s a simple, elegant, and totally customizable solution that you can create yourself?
Vanity trays have a rich history, dating back to ancient civilizations where they were used to display precious perfumes and grooming tools. Think of the ornate trays used in royal courts! While we might not be royalty, we can certainly add a touch of luxury to our everyday lives with a beautiful, handcrafted tray.
That’s where this DIY Gem Vanity Tray project comes in. Not only will it help you organize your essentials, but it’ll also add a personal touch to your space. Imagine a stunning tray, sparkling with gems that reflect your unique style, holding your favorite perfumes and makeup brushes. It’s a fantastic way to elevate your daily routine and make your vanity a true reflection of you. Plus, it’s a super fun and rewarding project that anyone can tackle, regardless of their crafting experience. So, let’s dive in and create a dazzling DIY Gem Vanity Tray that will transform your vanity from cluttered to captivating!
DIY Gem Vanity Tray: Add Sparkle to Your Space!
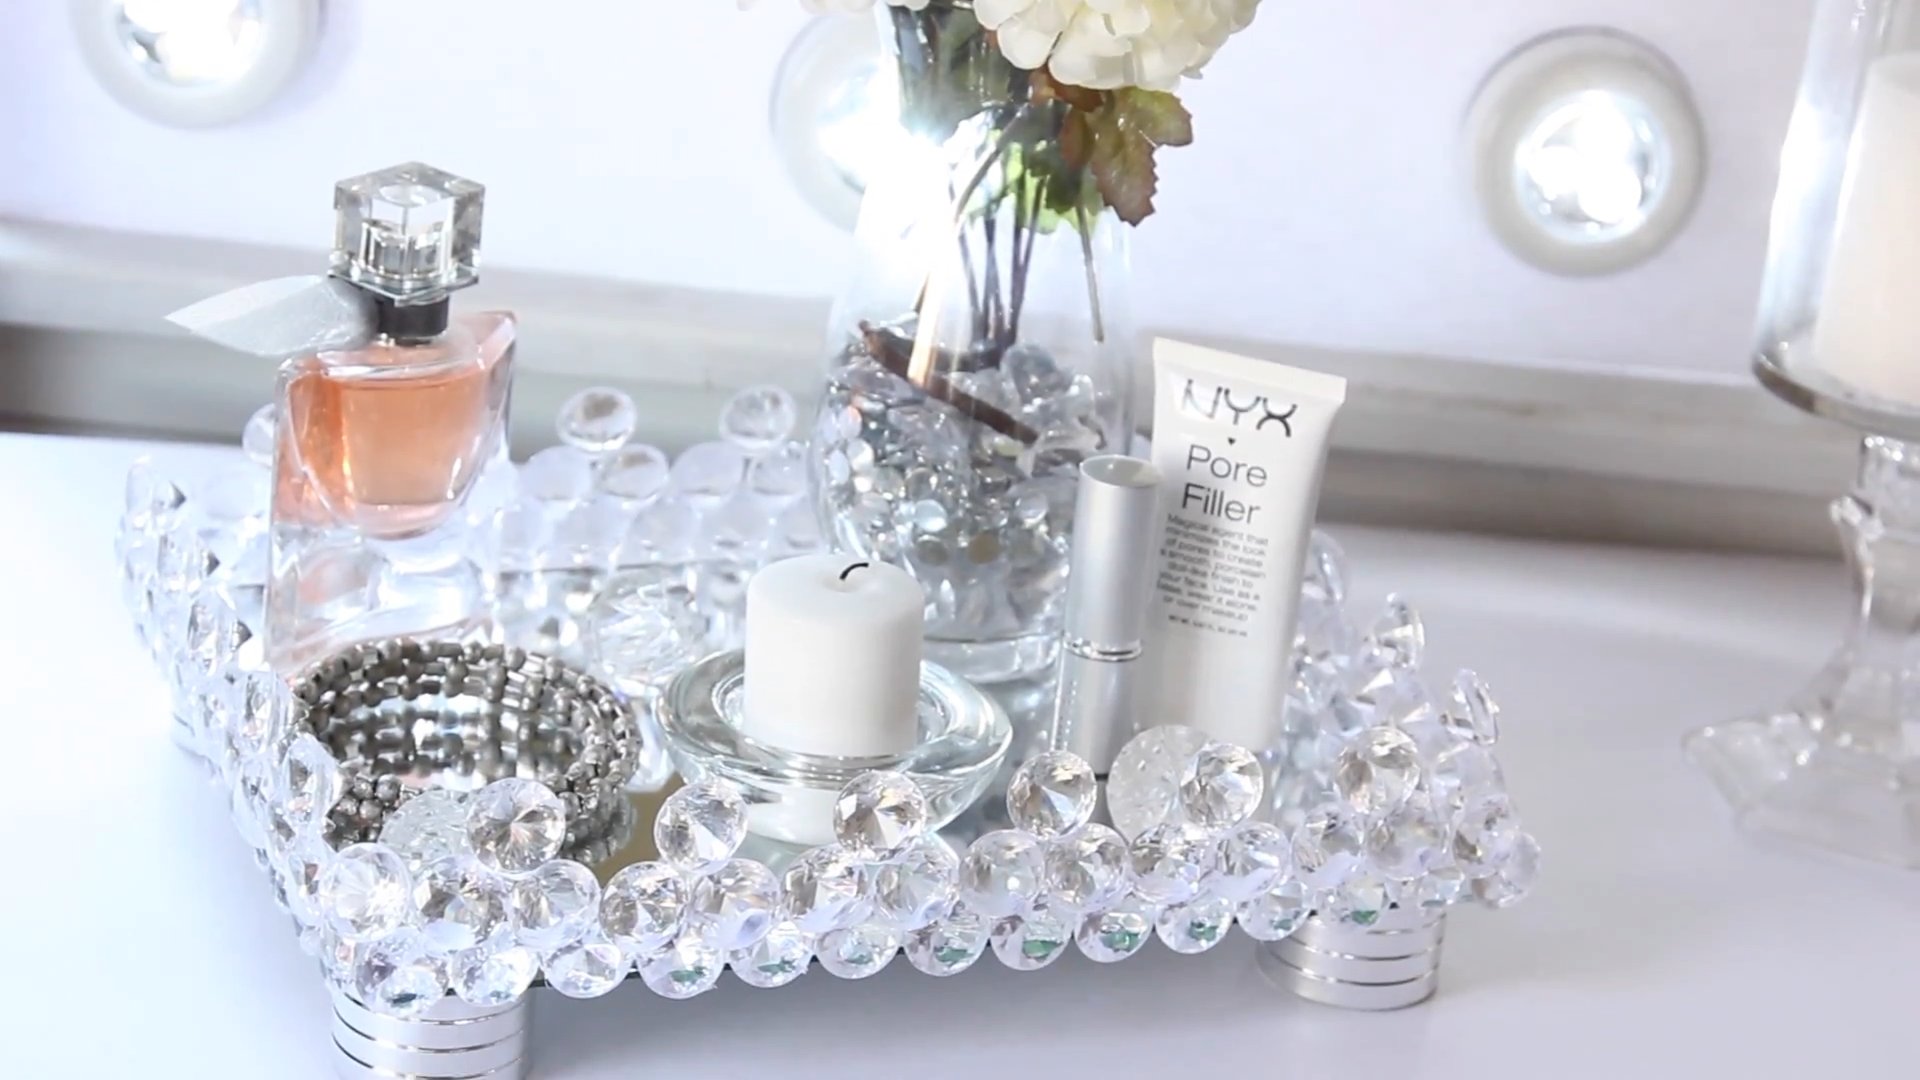
Hey there, fellow DIY enthusiasts! I’m so excited to share this project with you – a gorgeous gem vanity tray that’s surprisingly easy to make and adds a touch of glam to any room. I’ve always loved the look of those fancy, bejeweled trays you see in boutiques, but the price tag? Not so much! So, I decided to create my own, and I’m thrilled with how it turned out. This tray is perfect for organizing your makeup, displaying perfumes, or even serving drinks in style. Let’s get started!
What You’ll Need: The Supply List
Before we dive in, let’s gather all the necessary materials. Trust me, having everything on hand will make the process so much smoother.
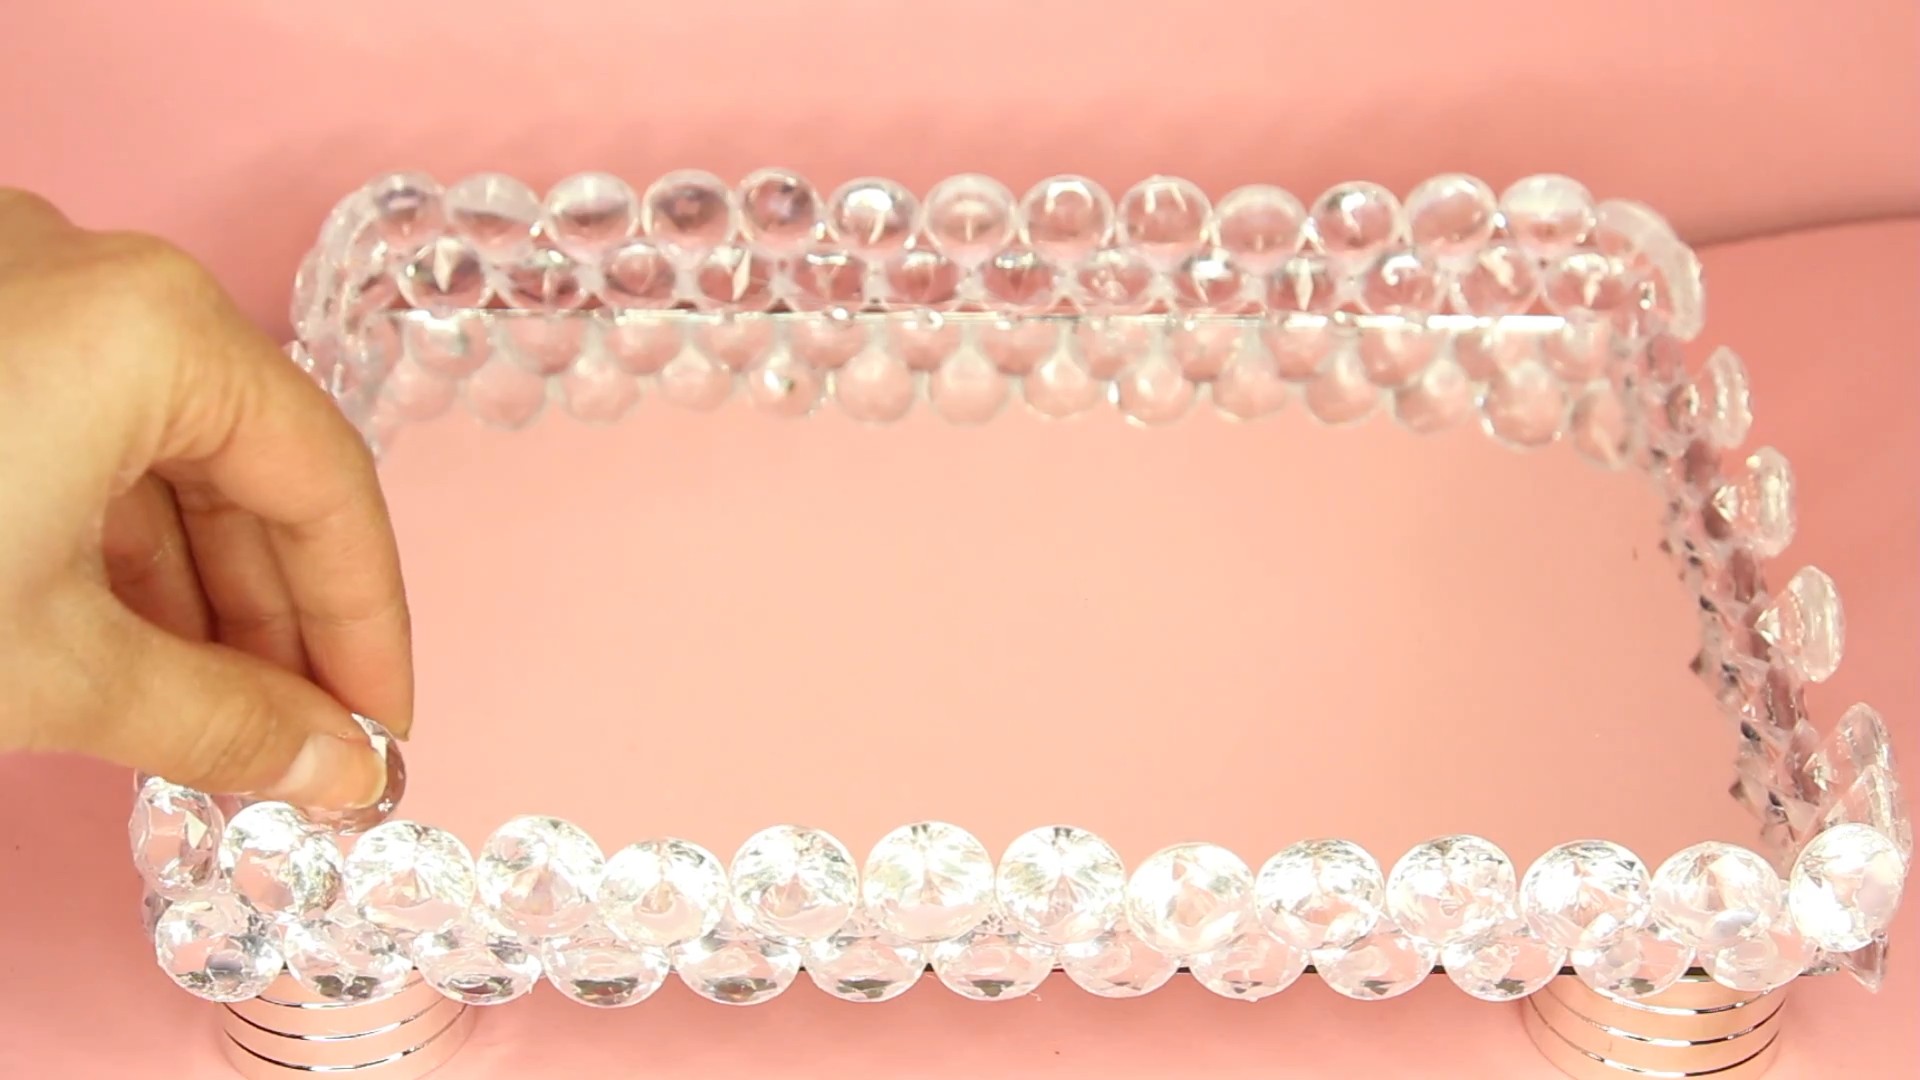
* **A Tray:** This is your base! You can use a wooden tray, a metal tray, a plastic tray – whatever floats your boat! I opted for a simple, rectangular wooden tray from a craft store. The size is totally up to you, depending on what you plan to use the tray for.
* **Gems, Rhinestones, and Beads:** This is where the fun begins! Head to your local craft store or browse online for a dazzling array of gems, rhinestones, beads, and other embellishments. Consider different sizes, shapes, and colors to create a truly unique design. I personally love using a mix of clear crystals, iridescent beads, and some colorful gems for a pop of personality.
* **Strong Adhesive:** This is crucial! You need a strong adhesive that will securely hold your gems in place. I highly recommend E6000 glue. It’s a bit stinky, so make sure you’re working in a well-ventilated area, but it’s incredibly strong and dries clear. Hot glue can work in a pinch, but it’s not as durable and the glue lines can be visible.
* **Pencil or Marker:** For sketching out your design (optional, but helpful!).
* **Ruler or Measuring Tape:** To ensure your design is symmetrical and evenly spaced (also optional, but recommended!).
* **Toothpicks or Tweezers:** These are lifesavers for picking up and placing small gems. Trust me, your fingers will thank you!
* **Protective Gloves:** To protect your hands from the adhesive.
* **Newspaper or Craft Paper:** To protect your work surface.
* **Clear Sealer (Optional):** To add an extra layer of protection and prevent the gems from coming loose over time. I like using a spray-on acrylic sealer.
* **Paint (Optional):** If you want to paint your tray before adding the gems, go for it! Acrylic paint works well.
Planning Your Design: Unleash Your Creativity!
This is where you get to let your creativity shine! Before you start gluing, take some time to plan out your design.
* **Consider the Tray’s Shape and Size:** Think about how the shape and size of your tray will influence your design. A rectangular tray might lend itself to a more geometric pattern, while a round tray might be perfect for a floral or swirling design.
* **Sketch it Out (Optional):** If you’re feeling a bit unsure, sketch out your design on a piece of paper or directly onto the tray with a pencil. This will give you a visual guide to follow.
* **Experiment with Gem Placement:** Play around with different gem arrangements before committing to anything. Try different color combinations, patterns, and spacing.
* **Think About Symmetry:** Do you want a symmetrical design, or something more abstract and free-flowing? Symmetrical designs can be very elegant, while asymmetrical designs can be more playful and modern.
* **Leave Space (Optional):** Consider leaving some space between the gems to allow the tray’s surface to show through. This can create a more airy and sophisticated look.
* **Take a Photo:** Once you’re happy with your planned design, take a photo of it. This will be a helpful reference as you start gluing.
Let’s Get Gluing: Step-by-Step Instructions
Okay, now for the fun part! Let’s transform that plain tray into a dazzling masterpiece.
1. **Prepare Your Work Area:** Cover your work surface with newspaper or craft paper to protect it from glue spills. Put on your protective gloves.
2. **Clean the Tray:** Make sure your tray is clean and free of any dust or debris. Wipe it down with a damp cloth and let it dry completely.
3. **Paint the Tray (Optional):** If you’re painting your tray, now’s the time to do it. Apply a thin, even coat of acrylic paint and let it dry completely before moving on. You might need to apply a second coat for full coverage.
4. **Start Gluing!** This is where the magic happens.
* **Apply a Small Amount of Adhesive:** Squeeze a small amount of E6000 glue onto the back of a gem. Remember, a little goes a long way!
* **Place the Gem:** Use your tweezers or toothpick to carefully place the gem onto the tray, following your planned design.
* **Press Gently:** Press the gem gently into place for a few seconds to ensure it adheres properly.
* **Repeat:** Repeat this process for each gem, working your way across the tray.
5. **Work in Sections:** To prevent the glue from drying out too quickly, work in small sections. Apply glue to a few gems at a time, place them on the tray, and then move on to the next section.
6. **Be Patient:** This process can be a bit time-consuming, so be patient and take your time. Don’t rush it!
7. **Clean Up Excess Glue:** If any glue seeps out from under the gems, use a toothpick or cotton swab to carefully wipe it away before it dries.
8. **Let it Dry Completely:** Once you’ve finished gluing all the gems, let the tray dry completely for at least 24 hours. This will ensure that the glue is fully cured and the gems are securely attached.
Adding the Finishing Touches: Sealing and Displaying
Almost there! Just a few more steps to complete your gorgeous gem vanity tray.
1. **Apply a Clear Sealer (Optional):** To add an extra layer of protection and prevent the gems from coming loose over time, apply a clear sealer. I recommend using a spray-on acrylic sealer.
* **Work in a Well-Ventilated Area:** Make sure you’re working in a well-ventilated area when applying the sealer.
* **Apply Thin Coats:** Apply several thin coats of sealer, allowing each coat to dry completely before applying the next.
* **Follow the Instructions:** Follow the instructions on the sealer can for best results.
2. **Inspect Your Tray:** Once the sealer is dry, inspect your tray for any loose gems. If you find any, re-glue them and let them dry completely.
3. **Display and Enjoy!** Now for the best part – displaying your beautiful gem vanity tray! Place it on your vanity to organize your makeup, use it to display your perfumes, or even use it as a serving tray for drinks. The possibilities are endless!
Tips and Tricks for Success
Here are a few extra tips and tricks to help you create the perfect gem vanity tray:
* **Use a Variety of Gem Sizes and Shapes:** This will add visual interest and dimension to your design.
* **Consider the Color Palette:** Choose a color palette that complements your décor.
* **Don’t Be Afraid to Experiment:** This is your project, so don’t be afraid to try new things and experiment with different designs.
* **Take Breaks:** If you’re feeling overwhelmed, take a break and come back to it later.
* **Have Fun!** Most importantly, have fun and enjoy the process!
I hope you enjoyed this DIY tutorial! I can’t wait to see what you create. Happy crafting!
Conclusion
So, there you have it! Transforming an ordinary tray into a dazzling, personalized gem vanity tray is not just a craft project; it’s an investment in your daily joy. It’s about elevating the mundane and surrounding yourself with beauty, even in the smallest of details. This DIY project is a must-try because it offers a unique blend of creativity, affordability, and practicality. You get to unleash your inner artist, creating a bespoke piece that perfectly reflects your style and complements your existing décor, all without breaking the bank.
But the real magic lies in the personalization. Forget mass-produced, cookie-cutter trays. With this DIY gem vanity tray, you’re in complete control. Choose gems that resonate with you – perhaps your birthstone, colors that evoke a sense of calm, or even gems that hold sentimental value. Experiment with different patterns and arrangements. Go for a minimalist, scattered look, a bold, geometric design, or a completely opulent, gem-encrusted masterpiece. The possibilities are truly endless.
Beyond the aesthetic appeal, this project is incredibly therapeutic. The act of carefully placing each gem, watching your vision come to life, is a mindful and relaxing experience. It’s a chance to disconnect from the digital world and reconnect with your creativity. And the best part? You end up with a stunning and functional piece that you can proudly display and use every day.
Consider these variations to further personalize your gem vanity tray:
* **Mosaic Magic:** Instead of individual gems, use broken pieces of tile or glass to create a mosaic effect. This adds a rustic and artistic touch.
* **Resin River:** Incorporate a resin river effect by pouring tinted resin around the gems. This creates a stunning, three-dimensional look.
* **Themed Trays:** Create themed trays for different occasions or seasons. Think pastel gems for spring, earthy tones for autumn, or shimmering metallics for the holidays.
* **Functional Additions:** Add small compartments or dividers to your tray to further organize your jewelry or makeup.
* Upcycled Charm: Use an old, unwanted tray as the base for your project. This is a great way to give new life to something that would otherwise be discarded.
We wholeheartedly encourage you to embark on this creative adventure. Gather your supplies, unleash your imagination, and create a gem vanity tray that is uniquely you. Don’t be afraid to experiment, make mistakes, and learn along the way. The process is just as rewarding as the finished product.
And once you’ve created your masterpiece, we’d love to see it! Share your photos and stories with us on social media using [Your Hashtag]. We can’t wait to be inspired by your creativity and see how you’ve personalized your own gem vanity tray. Let’s build a community of DIY enthusiasts who celebrate the beauty of handmade creations. So go ahead, get crafting, and let your inner artist shine!
Frequently Asked Questions
What kind of glue should I use for attaching the gems?
The best type of glue for attaching gems to your vanity tray depends on the material of the tray and the gems themselves. For most surfaces, including wood, plastic, and metal, a strong craft glue like E6000 or a similar multi-purpose adhesive is recommended. These glues provide a durable bond and are resistant to water and heat, ensuring that your gems stay securely in place. Hot glue can also be used, but it may not be as durable in the long run, especially if the tray is exposed to temperature changes. If you’re using glass gems on a glass tray, consider using a clear epoxy resin for a seamless and professional finish. Always test the glue on a small, inconspicuous area of the tray first to ensure that it doesn’t damage the surface. Also, make sure to work in a well-ventilated area when using strong adhesives.
How do I clean my gem vanity tray without damaging the gems?
Cleaning your gem vanity tray requires a gentle approach to avoid scratching or dislodging the gems. The best method is to use a soft, damp cloth to wipe the surface of the tray. Avoid using harsh chemicals, abrasive cleaners, or scouring pads, as these can damage the gems and the tray’s finish. For stubborn dirt or grime, you can add a small amount of mild dish soap to the water. Gently wipe the affected area and then rinse with a clean, damp cloth. Dry the tray thoroughly with a soft, lint-free cloth to prevent water spots. For gems that are particularly delicate or prone to tarnishing, you can use a specialized jewelry cleaner designed for those specific materials. Always follow the manufacturer’s instructions when using any cleaning product.
What if some of the gems fall off after a while?
Even with the strongest glue, it’s possible that some gems may come loose over time due to wear and tear. The good news is that it’s easy to fix! Simply reapply glue to the back of the gem and carefully place it back in its original position. Make sure to use the same type of glue that you used initially for the best results. Before reattaching the gem, clean both the gem and the area on the tray where it will be placed to remove any dirt or debris. Apply a small amount of glue to the back of the gem and press it firmly onto the tray. Hold it in place for a few seconds until the glue starts to set. Allow the glue to dry completely before using the tray again. It’s a good idea to keep a small container of extra gems and glue on hand for quick repairs.
Can I use different sizes and shapes of gems for my tray?
Absolutely! Using different sizes and shapes of gems is a fantastic way to add visual interest and texture to your gem vanity tray. Experiment with a variety of gems, including round, square, oval, and teardrop shapes. You can also incorporate different sizes of the same shape to create a more dynamic design. Consider using larger gems as focal points and smaller gems to fill in the gaps. Play around with different arrangements and patterns until you find a look that you love. Don’t be afraid to mix and match different types of gems, such as glass beads, acrylic rhinestones, and natural gemstones. The key is to create a balanced and cohesive design that reflects your personal style.
How do I prevent the gems from looking too cluttered or overwhelming?
To prevent your gem vanity tray from looking too cluttered or overwhelming, it’s important to plan your design carefully and consider the overall aesthetic you’re trying to achieve. Start by sketching out your design on paper before you start gluing the gems. This will help you visualize the final product and make adjustments as needed. Use a consistent color palette or theme to create a sense of harmony. Avoid using too many different colors or shapes, as this can make the tray look chaotic. Leave some empty space between the gems to allow the eye to rest. Consider using a minimalist approach, focusing on a few key gems or patterns rather than covering the entire tray with embellishments. Remember, less is often more. You can always add more gems later if you feel like the tray needs more sparkle.
Leave a Comment