

DIY Cucumber Soap Recipe: Imagine stepping into your shower and being greeted by the refreshing scent of a crisp cucumber, leaving your skin feeling clean, hydrated, and revitalized. Sounds dreamy, right? Well, you can make that dream a reality with this easy and fun DIY project! For centuries, cucumbers have been celebrated for their soothing and hydrating properties, dating back to ancient civilizations where they were used in beauty rituals and medicinal practices.
In today’s world, where we’re constantly bombarded with harsh chemicals and artificial ingredients, creating your own DIY cucumber soap recipe is not just a fun hobby, it’s a conscious choice to nourish your skin with natural goodness. I know what you’re thinking: “Soap making? That sounds complicated!” But trust me, this recipe is surprisingly simple and requires minimal ingredients. Plus, you’ll have the satisfaction of knowing exactly what’s going on your skin.
This DIY trick is essential because it allows you to customize your skincare, avoid harmful additives, and save money in the long run. Who wouldn’t want a luxurious, all-natural soap that’s gentle on your skin and easy on your wallet? So, let’s dive in and discover how to create your own refreshing cucumber soap that will leave you feeling pampered and rejuvenated!
DIY Refreshing Cucumber Soap: A Step-by-Step Guide
Hey there, fellow DIY enthusiasts! Today, I’m super excited to share one of my favorite homemade soap recipes: a refreshing cucumber soap. This soap is incredibly gentle, moisturizing, and perfect for soothing irritated skin. Plus, the fresh cucumber scent is just divine! Let’s dive in and create this amazing soap together.
What You’ll Need: Gathering Your Supplies
Before we get started, let’s make sure we have everything we need. This is crucial for a smooth and enjoyable soap-making experience.
* **Melt and Pour Soap Base:** I prefer using a clear glycerin soap base for this recipe because it allows the beautiful green color of the cucumber to shine through. You’ll need about 1 pound (16 ounces). You can also use a white or shea butter base if you prefer a creamier soap.
* **Fresh Cucumber:** One medium-sized cucumber will do the trick. Organic is always best if you can find it!
* **Glycerin:** This is optional, but adding a tablespoon of glycerin will boost the soap’s moisturizing properties.
* **Vitamin E Oil:** Another optional ingredient, but a teaspoon of Vitamin E oil will act as an antioxidant and help preserve the soap.
* **Soap Mold:** You can use any soap mold you like! Silicone molds are my personal favorite because they make it super easy to remove the soap.
* **Double Boiler or Microwave-Safe Bowl:** For melting the soap base.
* **Sharp Knife and Cutting Board:** For preparing the cucumber.
* **Blender or Food Processor:** To puree the cucumber.
* **Spoon or Spatula:** For stirring.
* **Measuring Cups and Spoons:** For accurate measurements.
* **Rubbing Alcohol in a Spray Bottle:** To eliminate bubbles on the soap’s surface.
* **Optional Additives:**
* **Green Soap Colorant:** If you want a more vibrant green color.
* **Cucumber Fragrance Oil or Essential Oil:** To enhance the cucumber scent.
* **Dried Cucumber Slices:** For decoration on top of the soap.
Preparing the Cucumber: The Key to Freshness
The cucumber is the star of this soap, so let’s prepare it properly to maximize its benefits.
1. **Wash the Cucumber:** Thoroughly wash the cucumber under cool running water to remove any dirt or pesticides.
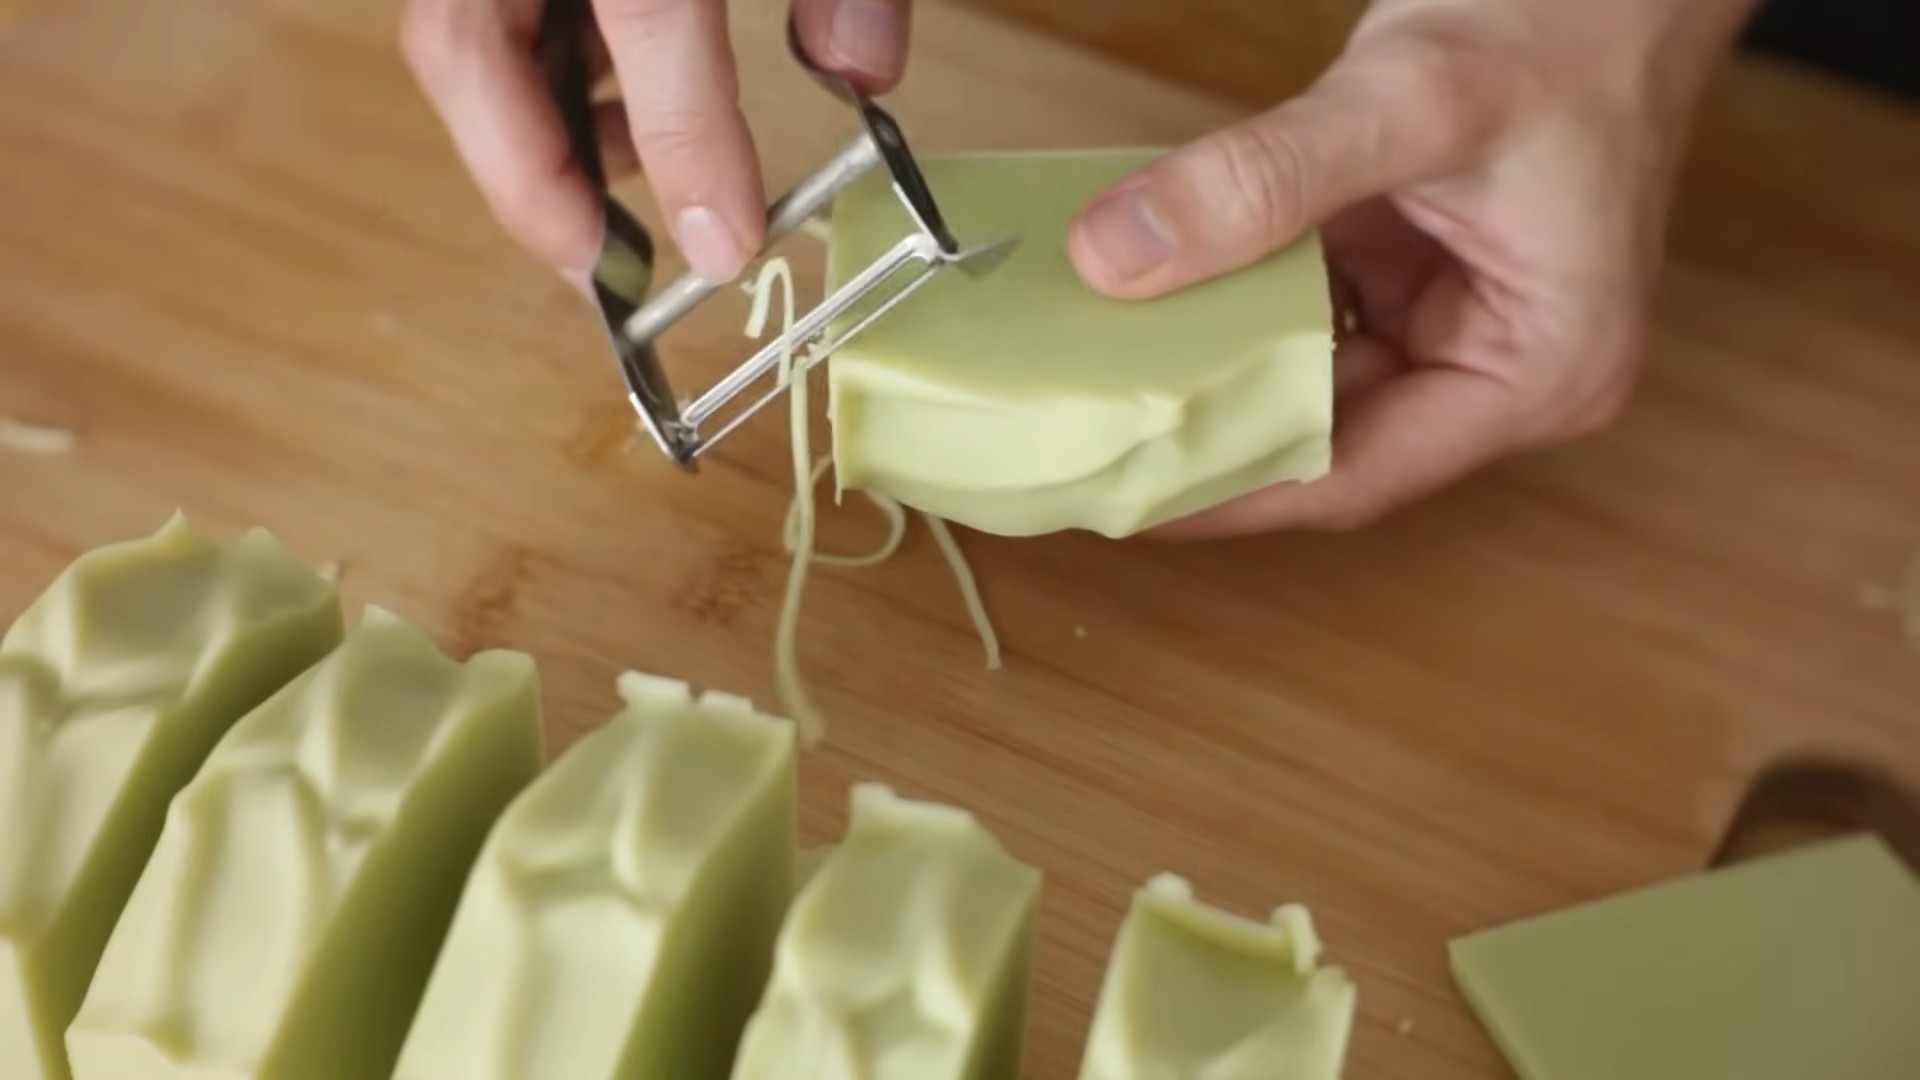
2. **Peel the Cucumber (Optional):** You can peel the cucumber if you prefer a smoother soap. However, leaving the peel on will add extra nutrients and a slightly more textured feel. I usually leave the peel on for added benefits.
3. **Chop the Cucumber:** Chop the cucumber into small pieces. This will make it easier to puree.
4. **Puree the Cucumber:** Place the chopped cucumber into a blender or food processor and puree until smooth. You should have a nice, green cucumber puree.
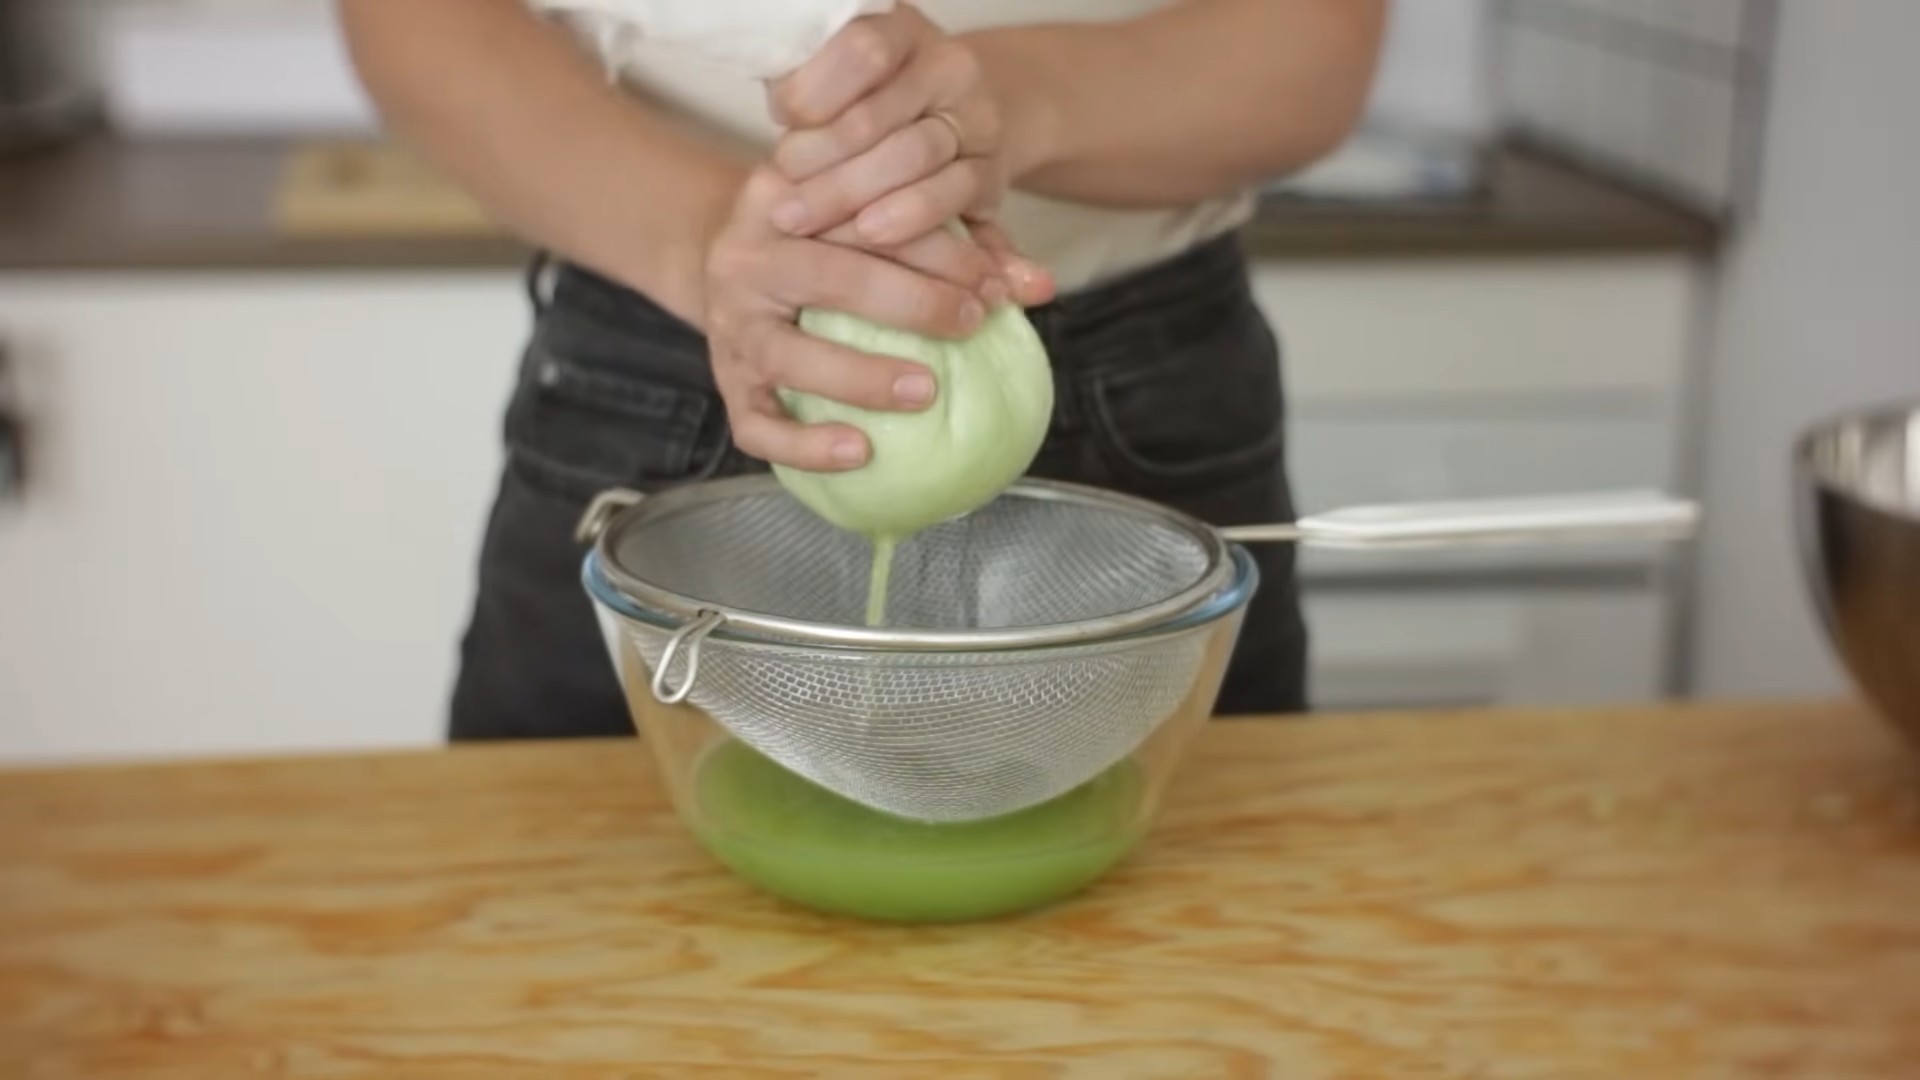
5. **Strain the Cucumber Puree (Optional):** If you want a very smooth soap, you can strain the cucumber puree through a fine-mesh sieve to remove any pulp. However, I usually skip this step because I like the added texture.
Melting the Soap Base: Gentle and Even
Melting the soap base correctly is crucial for a smooth and even soap.
1. **Cut the Soap Base:** Cut the soap base into small, uniform cubes. This will help it melt evenly.
2. **Melt the Soap Base:** You can melt the soap base using a double boiler or in the microwave.
* **Double Boiler Method:** Fill the bottom pot of the double boiler with water and bring it to a simmer. Place the top pot on top and add the cubed soap base. Stir occasionally until the soap base is completely melted.
* **Microwave Method:** Place the cubed soap base in a microwave-safe bowl. Microwave in 30-second intervals, stirring in between, until the soap base is completely melted. Be careful not to overheat the soap, as this can cause it to burn.
3. Make sure the soap base is completely melted and smooth before moving on to the next step.
Combining the Ingredients: The Magic Happens
Now for the fun part – combining all the ingredients to create our cucumber soap!
1. **Add the Cucumber Puree:** Once the soap base is melted, remove it from the heat and add the cucumber puree. Start with about 2-3 tablespoons and adjust to your liking. Remember that adding too much liquid can make the soap soft.
2. **Add Glycerin and Vitamin E Oil (Optional):** If you’re using glycerin and Vitamin E oil, add them to the melted soap base now.
3. **Add Soap Colorant and Fragrance Oil (Optional):** If you want a more vibrant green color or a stronger cucumber scent, add a few drops of soap colorant and fragrance oil. Be careful not to add too much, as this can irritate the skin.
4. **Stir Gently:** Stir all the ingredients together gently until they are well combined. Avoid stirring too vigorously, as this can create bubbles.
Pouring and Setting: Patience is Key
Pouring the soap into the mold and allowing it to set properly is essential for a beautiful and long-lasting soap.
1. **Pour the Soap into the Mold:** Carefully pour the melted soap mixture into your soap mold.
2. **Spray with Rubbing Alcohol:** Spray the surface of the soap with rubbing alcohol to eliminate any bubbles. This will give your soap a smooth and professional finish.
3. **Add Dried Cucumber Slices (Optional):** If you’re using dried cucumber slices for decoration, gently press them into the top of the soap.
4. **Let the Soap Set:** Allow the soap to set completely. This usually takes about 2-3 hours at room temperature, or you can speed up the process by placing the mold in the refrigerator for about an hour.
5. Don’t rush this step! The soap needs to be completely solid before you try to remove it from the mold.
Removing and Storing: The Final Touches
Removing the soap from the mold and storing it properly will ensure its longevity and freshness.
1. **Remove the Soap from the Mold:** Once the soap is completely set, gently remove it from the mold. If you’re using a silicone mold, you can simply push the soap out from the bottom. If you’re using a different type of mold, you may need to loosen the edges with a knife.
2. **Cut the Soap (If Necessary):** If you used a loaf mold, cut the soap into individual bars using a sharp knife.
3. **Store the Soap:** Store the soap in a cool, dry place, wrapped in plastic wrap or in an airtight container. This will help prevent it from sweating or losing its scent.
4. Enjoy your homemade cucumber soap!
Troubleshooting Tips: Addressing Common Issues
Even with the best instructions, sometimes things don’t go exactly as planned. Here are some common issues you might encounter and how to fix them:
* **Soap is too soft:** This is usually caused by adding too much liquid (cucumber puree). Next time, use less puree or strain it before adding it to the soap base.
* **Soap is sweating:** This is common with glycerin soap, especially in humid environments. Store the soap in an airtight container to prevent sweating.
* **Soap has bubbles:** Spraying the surface of the soap with rubbing alcohol will usually eliminate bubbles. Make sure to spray immediately after pouring the soap into the mold.
* **Soap is not green enough:** Add a few drops of green soap colorant to achieve your desired shade of green.
* **Soap doesn’t smell like cucumber:** Use a high-quality cucumber fragrance oil or essential oil to enhance the scent.
Variations and Customizations: Make it Your Own!
The beauty of DIY is that you can customize the recipe to your liking! Here are some ideas for variations and customizations:
* **Add other beneficial ingredients:** Consider adding other skin-loving ingredients like aloe vera gel, honey, or oatmeal.
* **Create a layered soap:** Pour different colored layers of soap into the mold for a visually appealing effect.
* **Add exfoliating ingredients:** Add ground oatmeal, poppy seeds, or coffee grounds for a gentle exfoliating soap.
* **Use different essential oils:** Experiment with different essential oils to create a unique scent blend. Lavender, tea tree, and chamomile are all great options for soothing and calming the skin.
* **Make a cucumber mint soap:** Add a few drops of peppermint essential oil for a refreshing and invigorating soap.
I hope you enjoyed this DIY cucumber soap recipe! It’s a fun and rewarding project that will leave you with a beautiful and beneficial soap. Happy soap making!
Conclusion
So, there you have it! Crafting your own DIY cucumber soap isn’t just a fun project; it’s a gateway to a more personalized and natural skincare routine. We’ve walked you through the process, highlighting the simplicity and the incredible benefits of incorporating fresh cucumber into your daily cleansing ritual.
Why is this a must-try? Because store-bought soaps, even those marketed as “natural,” often contain harsh chemicals, synthetic fragrances, and unnecessary additives that can strip your skin of its natural oils. This homemade cucumber soap, on the other hand, is packed with vitamins, antioxidants, and hydrating properties that leave your skin feeling refreshed, revitalized, and genuinely healthy. The gentle cleansing action is perfect for all skin types, even sensitive skin prone to irritation. Plus, the subtle, refreshing scent of cucumber is a welcome departure from overpowering artificial fragrances.
But the beauty of DIY lies in its adaptability! Feel free to experiment with variations to tailor the soap to your specific needs and preferences.
* For extra moisturizing power: Add a tablespoon of shea butter or cocoa butter to the melted soap base. These rich emollients will create an even more luxurious and hydrating lather.
* For exfoliation: Incorporate a tablespoon of finely ground oatmeal or poppy seeds into the mixture before pouring it into the mold. This will gently slough away dead skin cells, leaving your skin smoother and brighter.
* For added fragrance: While the cucumber scent is lovely on its own, you can enhance it with a few drops of essential oils. Lavender, chamomile, or tea tree oil are excellent choices, depending on your desired effect. Remember to use essential oils sparingly, as they can be potent.
* For visual appeal: Add a few drops of natural food coloring to create a beautiful green hue. You can also swirl in a small amount of a different colored soap base for a marbled effect.
Beyond the customization options, making your own soap is simply a rewarding experience. There’s a certain satisfaction that comes from creating something useful and beautiful with your own hands. It’s a chance to connect with the ingredients, appreciate the process, and ultimately, nourish your skin with a product you know and trust.
We wholeheartedly encourage you to give this DIY cucumber soap recipe a try. It’s easier than you might think, and the results are well worth the effort. Once you’ve made your first batch, we’re confident you’ll be hooked!
Don’t forget to share your experience with us! We’d love to hear about your variations, your successes, and any challenges you encountered along the way. Post photos of your finished soaps on social media using #DIYCucumberSoap and tag us so we can see your creations. Let’s build a community of soap-making enthusiasts and share the joy of natural skincare! Your feedback will not only inspire others but also help us refine and improve the recipe for future soap makers. So, grab your ingredients, get creative, and let’s get soapy!
Frequently Asked Questions (FAQ)
Q: What kind of soap base should I use for this recipe?
A: We recommend using a melt-and-pour soap base for this recipe, particularly a clear or white glycerin soap base. Glycerin soap is gentle, moisturizing, and readily available at craft stores or online. A clear base will allow the green color from the cucumber to shine through, while a white base will create a softer, more opaque soap. Avoid using soap bases with harsh detergents or sulfates, as these can negate the benefits of the cucumber. Look for a soap base that is labeled “natural” or “hypoallergenic” for the best results. You can also experiment with other melt-and-pour bases like shea butter or olive oil soap base for added moisturizing properties.
Q: How do I properly prepare the cucumber for the soap?
A: The key is to create a smooth, pulp-free cucumber puree. Start by thoroughly washing and peeling the cucumber. Then, roughly chop it and place it in a blender or food processor. Blend until completely smooth. To remove any remaining pulp or seeds, strain the puree through a fine-mesh sieve or cheesecloth. This will ensure a smooth texture in your final soap. The strained cucumber juice is what you’ll add to the melted soap base. Using fresh, organic cucumbers is always preferable to avoid any unwanted pesticides or chemicals.
Q: Can I use cucumber essential oil instead of fresh cucumber?
A: While cucumber essential oil might seem like a convenient alternative, it doesn’t offer the same benefits as fresh cucumber. Fresh cucumber provides not only a subtle scent but also valuable vitamins, minerals, and hydrating properties that are beneficial for the skin. Cucumber essential oil primarily provides fragrance and may not contain the same therapeutic compounds. If you choose to use cucumber essential oil, be sure to purchase a high-quality, pure oil from a reputable source and use it sparingly, following the manufacturer’s instructions. We still recommend incorporating a small amount of fresh cucumber puree for the added skincare benefits.
Q: How long does the DIY cucumber soap last?
A: Homemade soap, including this DIY cucumber soap, generally lasts for several months if stored properly. To prolong its shelf life, keep the soap in a cool, dry place away from direct sunlight and humidity. A soap dish with good drainage is essential to prevent the soap from becoming soggy and dissolving quickly. You can also wrap individual bars of soap in wax paper or store them in an airtight container. The cucumber in the soap may cause it to spoil faster than commercially produced soaps, so it’s best to use it within 6-12 months. If you notice any changes in color, texture, or odor, it’s best to discard the soap.
Q: My soap is too soft. What did I do wrong?
A: Several factors can contribute to soft soap. One common cause is adding too much liquid (cucumber puree) to the soap base. Stick to the recommended amount in the recipe. Another possibility is that the soap base wasn’t heated to a high enough temperature to properly melt and combine with the cucumber. Ensure that the soap base is completely melted before adding the cucumber puree. Finally, the soap may not have been allowed to cool and harden completely before unmolding. Let the soap sit in the mold for at least 24 hours, or even longer in a cool environment, to ensure it’s fully solidified. If the soap is still too soft, you can try re-melting it and adding a small amount of grated soap to help it harden.
Q: Can I add other ingredients to this soap recipe?
A: Absolutely! One of the best things about making your own soap is the ability to customize it to your liking. As mentioned in the conclusion, you can add shea butter or cocoa butter for extra moisturizing, oatmeal or poppy seeds for exfoliation, or essential oils for added fragrance. You can also incorporate other beneficial ingredients like honey, aloe vera gel, or dried herbs. Just be sure to research the properties of any new ingredients and use them in moderation to avoid altering the soap’s texture or performance. Always test a small batch first to ensure you’re happy with the results.
Q: Is this DIY cucumber soap safe for sensitive skin?
A: Generally, yes, this DIY cucumber soap is gentle enough for sensitive skin, especially if you use a hypoallergenic soap base and avoid adding any harsh fragrances or additives. However, everyone’s skin is different, so it’s always a good idea to do a patch test before using the soap all over your body. Apply a small amount of the soap to a discreet area of skin, such as your inner arm, and wait 24 hours to see if any irritation occurs. If you experience any redness, itching, or burning, discontinue use. If you have particularly sensitive skin or any skin conditions, consult with a dermatologist before trying this or any new skincare product.


Leave a Comment