

DIY Carpet Stain Remover: Let’s face it, accidents happen! You’re enjoying a cozy evening, maybe a glass of red wine is involved, and suddenly – disaster strikes! A spill on your beautiful carpet can feel like a mini-heart attack. But don’t panic! Before you reach for those expensive, chemical-laden commercial cleaners, I’m here to share a game-changing secret: you can create a powerful and effective DIY carpet stain remover right in your own kitchen.
For generations, resourceful homeowners have relied on simple, natural ingredients to tackle household messes. Think about it – before the age of mass-produced cleaning products, our grandmothers were masters of stain removal, using ingredients like vinegar, baking soda, and lemon juice. These time-tested remedies are not only effective but also gentler on your carpets and the environment.
Why is this DIY trick so essential? Well, store-bought stain removers can be harsh, leaving behind chemical residues that can irritate skin and even damage your carpet fibers over time. Plus, they can be surprisingly expensive! This DIY solution offers a cost-effective, eco-friendly, and equally potent alternative. I’m going to show you how to whip up a powerful stain remover that will banish those unsightly spots and keep your carpets looking fresh and clean. Get ready to say goodbye to carpet stains and hello to a healthier, happier home!
DIY Carpet Stain Remover: Banish Stains with Household Ingredients!
Okay, let’s face it: carpets are magnets for spills and stains. Whether it’s a rogue coffee cup, muddy paws, or a kid’s artistic expression gone awry, stains happen. But before you resign yourself to living with a blotchy carpet or shelling out for professional cleaning, let me share my go-to DIY carpet stain remover recipe. It’s incredibly effective, uses ingredients you probably already have, and is way cheaper than store-bought solutions. Trust me, this is a game-changer!
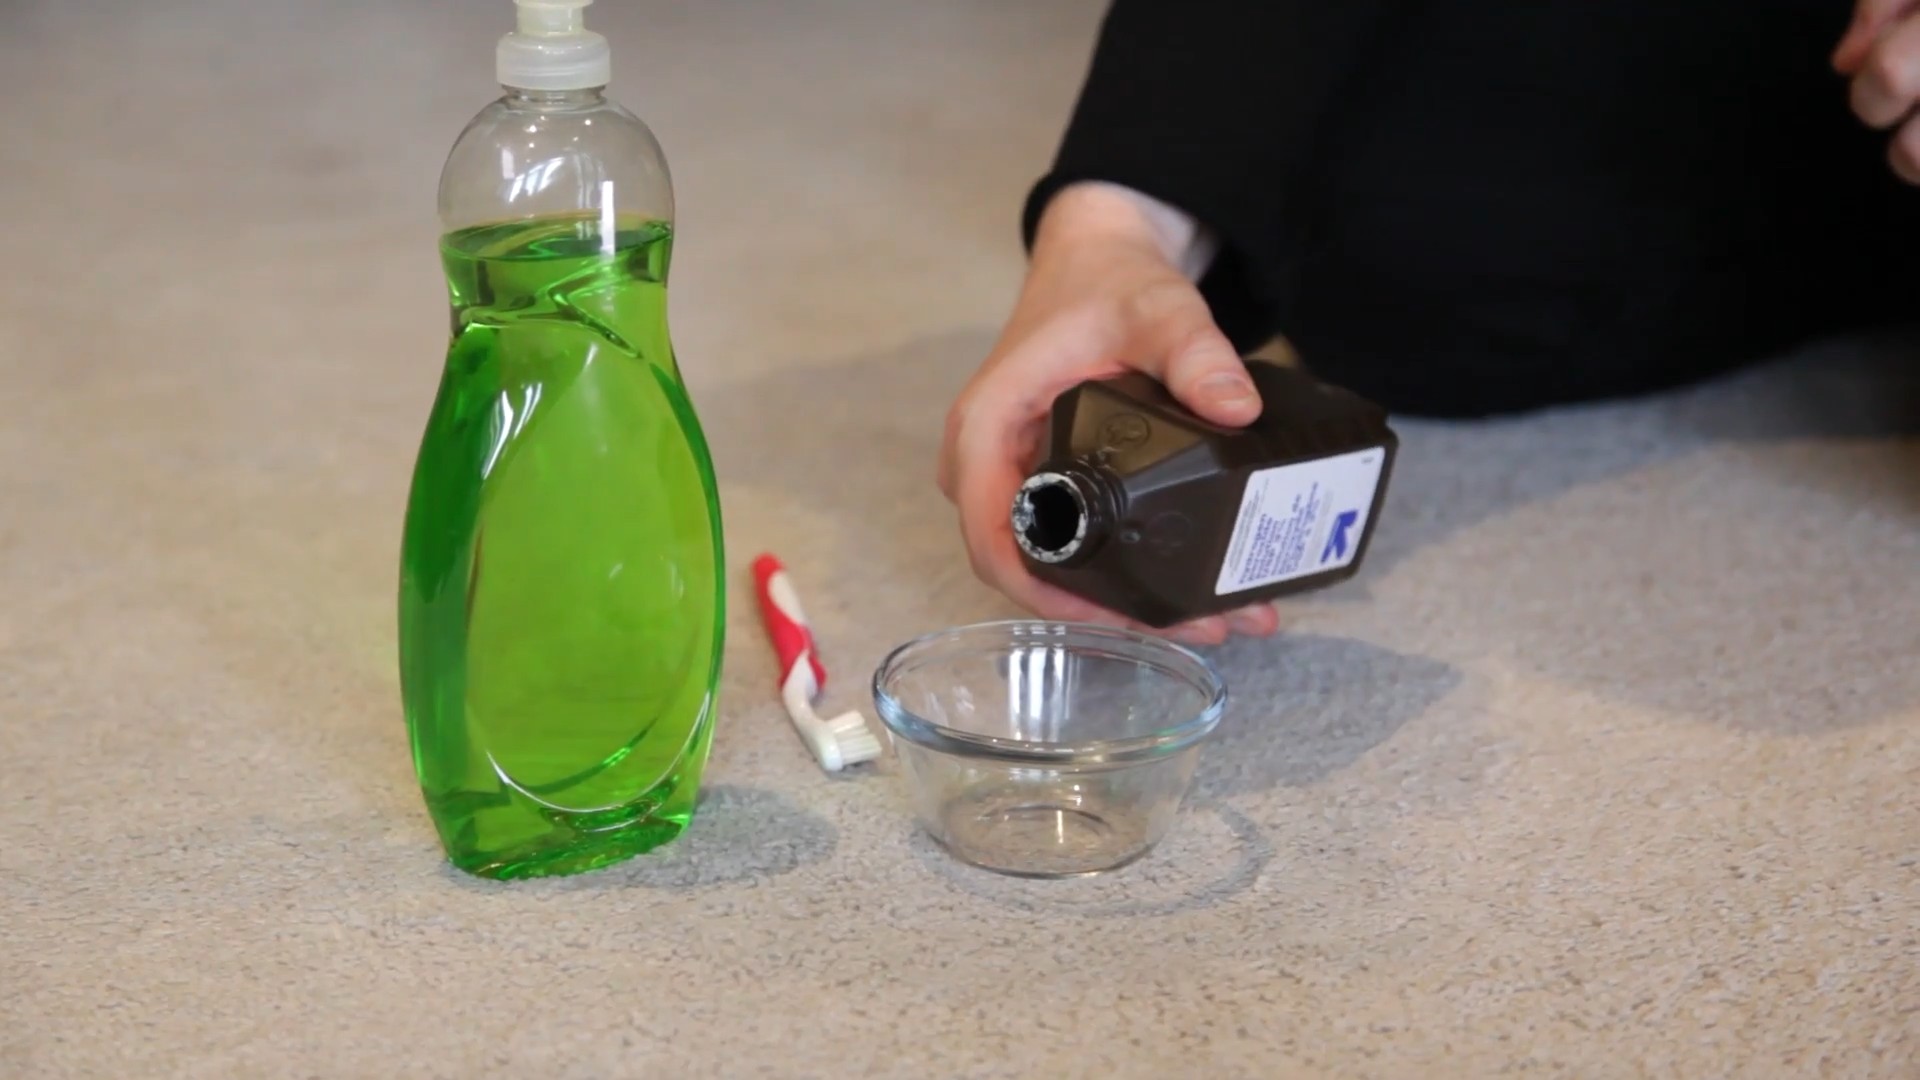
What You’ll Need: Your Stain-Fighting Arsenal
Before we dive in, let’s gather our supplies. This recipe is all about simplicity, so you won’t need anything fancy.
* **White Vinegar:** This is our main stain-fighting ingredient. Vinegar’s acidity helps break down many common stains.
* **Baking Soda:** The dynamic duo! Baking soda helps absorb odors and further lift stains.
* **Dish Soap (Clear, Non-Bleach):** A gentle surfactant to help loosen the stain. Make sure it’s clear to avoid adding color to your carpet.
* **Warm Water:** Essential for diluting the ingredients and activating their cleaning power.
* **Spray Bottle:** For easy application of the stain remover.
* **Clean White Cloths or Paper Towels:** Crucial for blotting and absorbing the stain. Avoid colored cloths, as the dye could transfer to your carpet.
* **Vacuum Cleaner:** To finish the job and remove any residue.
* **Spoon or Soft Brush:** For gently agitating the stain (optional, but helpful for stubborn spots).
* **Rubber Gloves (Optional):** To protect your hands, especially if you have sensitive skin.
The Magic Formula: Mixing the Stain Remover
Now for the fun part – creating our stain-busting potion! I’ve experimented with different ratios, and this is the one that consistently delivers the best results.
1. **Combine Ingredients:** In your spray bottle, mix the following:
* 1/2 cup white vinegar
* 1/4 cup baking soda
* 1 teaspoon clear dish soap
* 1 cup warm water
2. **Mix Gently:** Close the spray bottle tightly and gently swirl the mixture to combine. Be careful, as the baking soda and vinegar will react and create some fizzing. Don’t shake it vigorously, or you might end up with a bubbly mess!
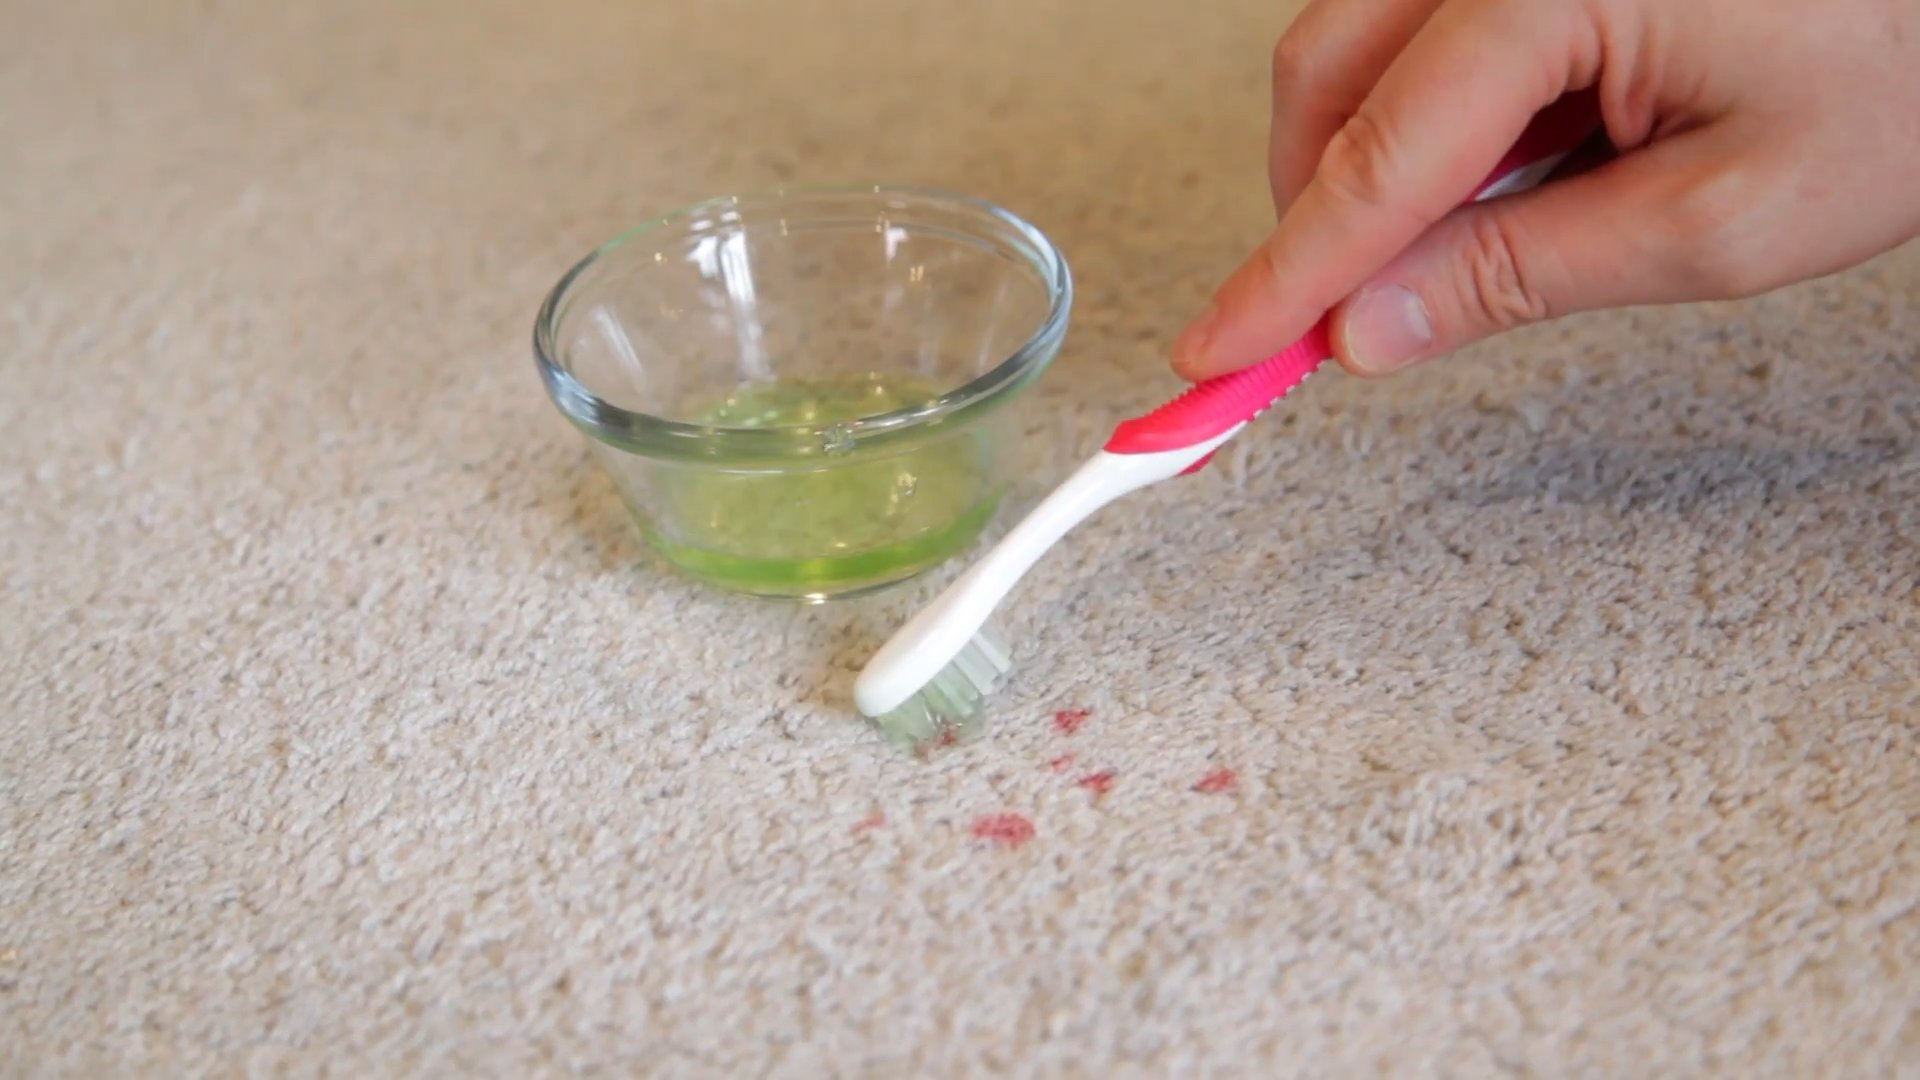
Tackling the Stain: Step-by-Step Instructions
Alright, we’ve got our stain remover ready. Now, let’s get down to business and banish that unsightly mark from your carpet.
1. **Act Fast!** The sooner you treat a stain, the easier it will be to remove. Fresh stains are much more responsive to cleaning than old, set-in ones.
2. **Blot, Don’t Rub:** Using a clean white cloth or paper towel, blot the stain to absorb as much of the liquid as possible. Rubbing can spread the stain and damage the carpet fibers. Work from the outside of the stain inward to prevent it from spreading further.
3. **Test in an Inconspicuous Area:** Before applying the stain remover to the entire stain, test it in a hidden area of your carpet (like under a piece of furniture or in a closet) to ensure it doesn’t discolor or damage the fibers. Apply a small amount of the solution, let it sit for a few minutes, and then blot it with a clean cloth. Check for any adverse reactions.
4. **Apply the Stain Remover:** Once you’ve confirmed that the stain remover is safe for your carpet, spray it generously onto the stained area. Make sure the stain is thoroughly saturated.
5. **Let it Sit:** Allow the stain remover to sit on the stain for 5-10 minutes. This gives the ingredients time to break down the stain and lift it from the carpet fibers. For particularly stubborn stains, you can let it sit for up to 30 minutes, but keep an eye on it to make sure it doesn’t dry out completely.
6. **Gently Agitate (Optional):** If the stain is particularly stubborn, you can gently agitate it with a spoon or soft brush. Use a circular motion and avoid scrubbing too hard, as this can damage the carpet fibers.
7. **Blot Again:** After the stain remover has had time to work, blot the area again with a clean white cloth or paper towel. Continue blotting until you’ve absorbed as much of the stain and cleaning solution as possible.
8. **Rinse (Optional):** If you’re concerned about residue from the cleaning solution, you can rinse the area with a small amount of clean, warm water. Blot the area thoroughly with a clean cloth to remove the water.
9. **Dry the Area:** To help the carpet dry quickly and prevent mildew growth, you can use a fan to circulate air over the area. You can also place a clean, dry towel over the area and weigh it down with a heavy object to absorb any remaining moisture.
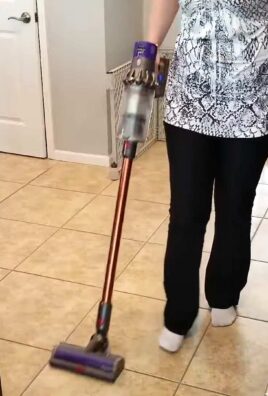
10. **Vacuum:** Once the area is completely dry, vacuum it thoroughly to restore the carpet fibers and remove any remaining residue.
Dealing with Specific Stains: A Quick Guide
While this DIY stain remover is effective on a wide range of stains, here are a few tips for tackling specific types of messes:
* **Coffee/Tea:** Follow the general instructions above. For older stains, you may need to repeat the process several times.
* **Red Wine:** Blot immediately! Then, sprinkle baking soda generously over the stain to absorb the remaining wine. Let it sit for several hours or overnight, then vacuum. If the stain persists, use the DIY stain remover.
* **Pet Stains:** Clean up any solid waste first. Then, use the DIY stain remover, making sure to saturate the area thoroughly. You may need to repeat the process several times to eliminate the odor completely. An enzymatic cleaner can also be helpful for pet stains.
* **Grease/Oil:** Sprinkle cornstarch or baking soda over the stain to absorb the grease. Let it sit for at least 30 minutes, then vacuum. Follow with the DIY stain remover.
* **Mud:** Let the mud dry completely before attempting to clean it. Then, vacuum up as much of the dried mud as possible. Follow with the DIY stain remover.
Important Considerations: Safety First!
While this DIY stain remover is generally safe, here are a few precautions to keep in mind:
* **Always test in an inconspicuous area first.** This is crucial to ensure that the solution doesn’t damage or discolor your carpet.
* **Avoid using too much cleaning solution.** Over-saturating the carpet can lead to mildew growth.
* **Don’t mix this solution with other cleaning products.** Mixing chemicals can create dangerous fumes.
* **Keep out of reach of children and pets.** Although the ingredients are generally safe, it’s best to keep them out of reach to prevent accidental ingestion.
* **If you have sensitive skin, wear rubber gloves when handling the cleaning solution.**
When to Call in the Pros: Knowing Your Limits
While this DIY stain remover is effective for many common stains, there are times when it’s best to call in a professional carpet cleaner. If you’re dealing with a large, stubborn stain, or if you’re unsure about the type of stain or the best way to treat it, it’s always a good idea to consult with a professional. They have the expertise and equipment to safely and effectively remove even the most challenging stains. Also, if you have a delicate or antique carpet, it’s best to leave the cleaning to the professionals to avoid damaging the fibers.
Storing Your Stain Remover: Ready for the Next Spill
You can store any leftover stain remover in the spray bottle for future use. However, keep in mind that the baking soda and vinegar will continue to react over time, so the solution may lose some of its effectiveness after a few days. It’s best to use it within a week or two for optimal results. Make sure to label the bottle clearly so you don’t accidentally use it for something else!
So there you have it! My tried-and-true DIY carpet stain remover recipe. I hope this helps you keep your carpets looking their best and saves you some money in the process. Happy cleaning!
Conclusion
So, there you have it – a powerful, cost-effective, and eco-friendly DIY carpet stain remover that rivals even the most expensive store-bought solutions. We’ve walked you through the simple steps, highlighted the key ingredients, and armed you with the knowledge to tackle those unsightly blemishes that can plague even the most meticulously maintained carpets. But why is this DIY trick a must-try?
First and foremost, it’s about control. You know exactly what’s going into your cleaning solution. No harsh chemicals, no mystery ingredients, just simple, readily available components that are safe for your family and pets. This is especially crucial for households with young children or allergy sufferers. The peace of mind that comes with knowing you’re not introducing harmful substances into your home is invaluable.
Second, it’s about effectiveness. This isn’t some weak, watered-down concoction. The combination of baking soda, vinegar, and dish soap creates a powerful cleaning synergy that lifts stains, neutralizes odors, and leaves your carpet looking and smelling fresh. From stubborn coffee spills to muddy paw prints, this DIY carpet stain remover is up to the challenge.
Third, it’s about savings. Let’s face it, carpet stain removers can be expensive. Over time, those costs add up, especially if you’re dealing with frequent spills and accidents. This DIY solution costs pennies per application, making it a budget-friendly alternative that doesn’t compromise on performance.
But the beauty of DIY lies in its adaptability. Feel free to experiment with variations to suit your specific needs. For particularly stubborn stains, consider adding a few drops of essential oil, such as lemon or tea tree oil, for their added cleaning and disinfecting properties. For lighter-colored carpets, you might want to test the solution in an inconspicuous area first to ensure there’s no discoloration. And for pet stains, adding a small amount of enzymatic cleaner can help break down the organic matter and eliminate odors more effectively.
Don’t be afraid to customize the recipe to fit your unique situation. The key is to start with the basic formula and then adjust as needed.
We’re confident that this DIY carpet stain remover will become your go-to solution for keeping your carpets clean and fresh. It’s easy to make, effective, and environmentally friendly. But don’t just take our word for it. We encourage you to try it out for yourself and see the amazing results firsthand.
Once you’ve given it a try, we’d love to hear about your experience. Share your before-and-after photos, your tips and tricks, and any variations you’ve discovered in the comments below. Let’s create a community of DIY enthusiasts who are passionate about keeping their homes clean and healthy. Your feedback will not only help us improve the recipe but also inspire others to embrace the power of DIY. So go ahead, give it a try, and let us know what you think!
Frequently Asked Questions (FAQ)
What types of stains does this DIY carpet stain remover work best on?
This DIY carpet stain remover is effective on a wide range of common household stains, including coffee, tea, wine, juice, pet stains (urine, vomit, feces), food spills, mud, dirt, and even some grease stains. However, the effectiveness may vary depending on the age and severity of the stain, as well as the type of carpet fiber. For older, deeply embedded stains, you may need to repeat the application or use a more concentrated solution. It’s always a good idea to test the solution on an inconspicuous area of the carpet first to ensure it doesn’t cause any discoloration. For particularly challenging stains like ink or permanent marker, you may need to consult a professional carpet cleaner.
Is this DIY carpet stain remover safe for all types of carpets?
While this DIY carpet stain remover is generally safe for most carpets, it’s crucial to test it on an inconspicuous area first, especially if you have delicate or natural fiber carpets like wool or silk. These types of carpets are more susceptible to damage from acidic solutions like vinegar. If you’re unsure about the suitability of the solution for your carpet, consult the manufacturer’s recommendations or seek professional advice. For wool carpets, consider using a gentler alternative like a mixture of mild dish soap and water. Always blot the stain gently rather than rubbing vigorously, as this can damage the carpet fibers.
How long should I leave the solution on the stain before blotting it up?
The amount of time you leave the solution on the stain will depend on the severity of the stain. For fresh, light stains, a few minutes may be sufficient. For older, more stubborn stains, you may need to leave the solution on for up to 15-20 minutes. However, it’s important to monitor the stain closely and prevent the solution from drying completely on the carpet. Once the solution has had time to work, blot it up with a clean, dry cloth, working from the outside of the stain towards the center. Repeat the process as needed until the stain is completely removed.
Can I use this DIY carpet stain remover on upholstery?
Yes, this DIY carpet stain remover can also be used on upholstery, but with caution. As with carpets, it’s essential to test the solution on an inconspicuous area first to ensure it doesn’t cause any discoloration or damage. Upholstery fabrics can be more delicate than carpets, so it’s important to use a gentle touch and avoid over-wetting the fabric. Blot the stain gently with a clean, dry cloth, and avoid rubbing vigorously. If you’re unsure about the suitability of the solution for your upholstery, consult the manufacturer’s recommendations or seek professional advice.
What if the stain is still visible after using the DIY carpet stain remover?
If the stain is still visible after using the DIY carpet stain remover, don’t give up! There are a few things you can try. First, repeat the application of the solution, allowing it to sit on the stain for a longer period of time. You can also try using a more concentrated solution by increasing the amount of vinegar or dish soap. For particularly stubborn stains, consider using a stain-removing brush or a carpet cleaning machine. If all else fails, you may need to consult a professional carpet cleaner. Remember, patience is key when dealing with stubborn stains.
How do I prevent future carpet stains?
Prevention is always better than cure! To prevent future carpet stains, consider using a carpet protector spray, which creates a barrier that repels liquids and prevents stains from setting in. Clean up spills immediately, before they have a chance to soak into the carpet fibers. Use doormats at all entrances to trap dirt and debris before they can be tracked onto your carpets. Regularly vacuum your carpets to remove loose dirt and dust. And finally, avoid eating and drinking in carpeted areas, especially if you’re prone to spills.
What are the best ratios for mixing the DIY carpet stain remover?
The recommended ratio is generally 1 part white vinegar, 1 part water, and a small squirt of dish soap (approximately 1/4 teaspoon). However, you can adjust the ratio depending on the severity of the stain. For lighter stains, you can use a more diluted solution. For tougher stains, you can increase the amount of vinegar. Always start with a small amount of solution and gradually increase it as needed. Remember to test the solution on an inconspicuous area first to ensure it doesn’t cause any discoloration.
How do I get rid of the vinegar smell after using the DIY carpet stain remover?
The vinegar smell will dissipate on its own within a few hours. To speed up the process, you can open windows and doors to ventilate the room. You can also sprinkle baking soda over the affected area and let it sit for a few hours before vacuuming it up. The baking soda will absorb any remaining odors. Alternatively, you can use a fabric refresher spray to mask the vinegar smell.


Leave a Comment