

Plant Pointed Cabbage at Home? Absolutely! Imagine stepping into your backyard and harvesting fresh, crisp pointed cabbage, ready to be transformed into a delicious slaw or a hearty stir-fry. Sounds dreamy, right? Well, it doesn’t have to be just a dream! This DIY guide is your passport to growing your own pointed cabbage, even if you think you have a “brown thumb.”
Cabbage, in general, has a rich history, dating back thousands of years. From ancient Rome, where it was considered a medicinal plant, to its prominent role in European cuisine, cabbage has nourished generations. Pointed cabbage, with its sweeter flavor and tender leaves, is a delightful variation that deserves a spot in your garden. But why should you bother growing it yourself?
In today’s world, knowing where your food comes from is more important than ever. Growing your own pointed cabbage allows you to control what goes into it – no harmful pesticides or questionable fertilizers. Plus, the taste of homegrown vegetables is simply unmatched! This DIY guide will provide you with simple, easy-to-follow steps to successfully plant pointed cabbage at home, regardless of your gardening experience. I’m here to help you unlock the secrets to a thriving cabbage patch, so let’s get started!
Growing Pointed Cabbage at Home: A DIY Guide
Hey there, fellow gardening enthusiasts! I’m so excited to share my experience with growing pointed cabbage right in my own backyard. It’s surprisingly easy and incredibly rewarding. This guide will walk you through every step, from seed to harvest, ensuring you have a bountiful supply of this delicious and versatile vegetable.
Choosing the Right Variety and Starting Seeds
Before we get our hands dirty, let’s talk about selecting the perfect pointed cabbage variety and getting those seeds started.
* Variety Selection: Look for varieties specifically labeled as “pointed cabbage” or “conehead cabbage.” Some popular choices include ‘Hispi’, ‘Caraflex’, and ‘Sweet Point’. These varieties are known for their sweet flavor and tender texture. I personally love ‘Hispi’ for its early maturity and reliable yields.
* Seed Starting Time: Pointed cabbage thrives in cooler weather, so timing is crucial. For a spring harvest, start your seeds indoors 6-8 weeks before the last expected frost. For a fall harvest, start seeds in mid-summer. I usually start my spring cabbage seeds in late February or early March.
* Seed Starting Supplies: You’ll need seed starting trays or small pots, seed starting mix (a light and airy soil blend), a spray bottle, and a heat mat (optional, but helpful).
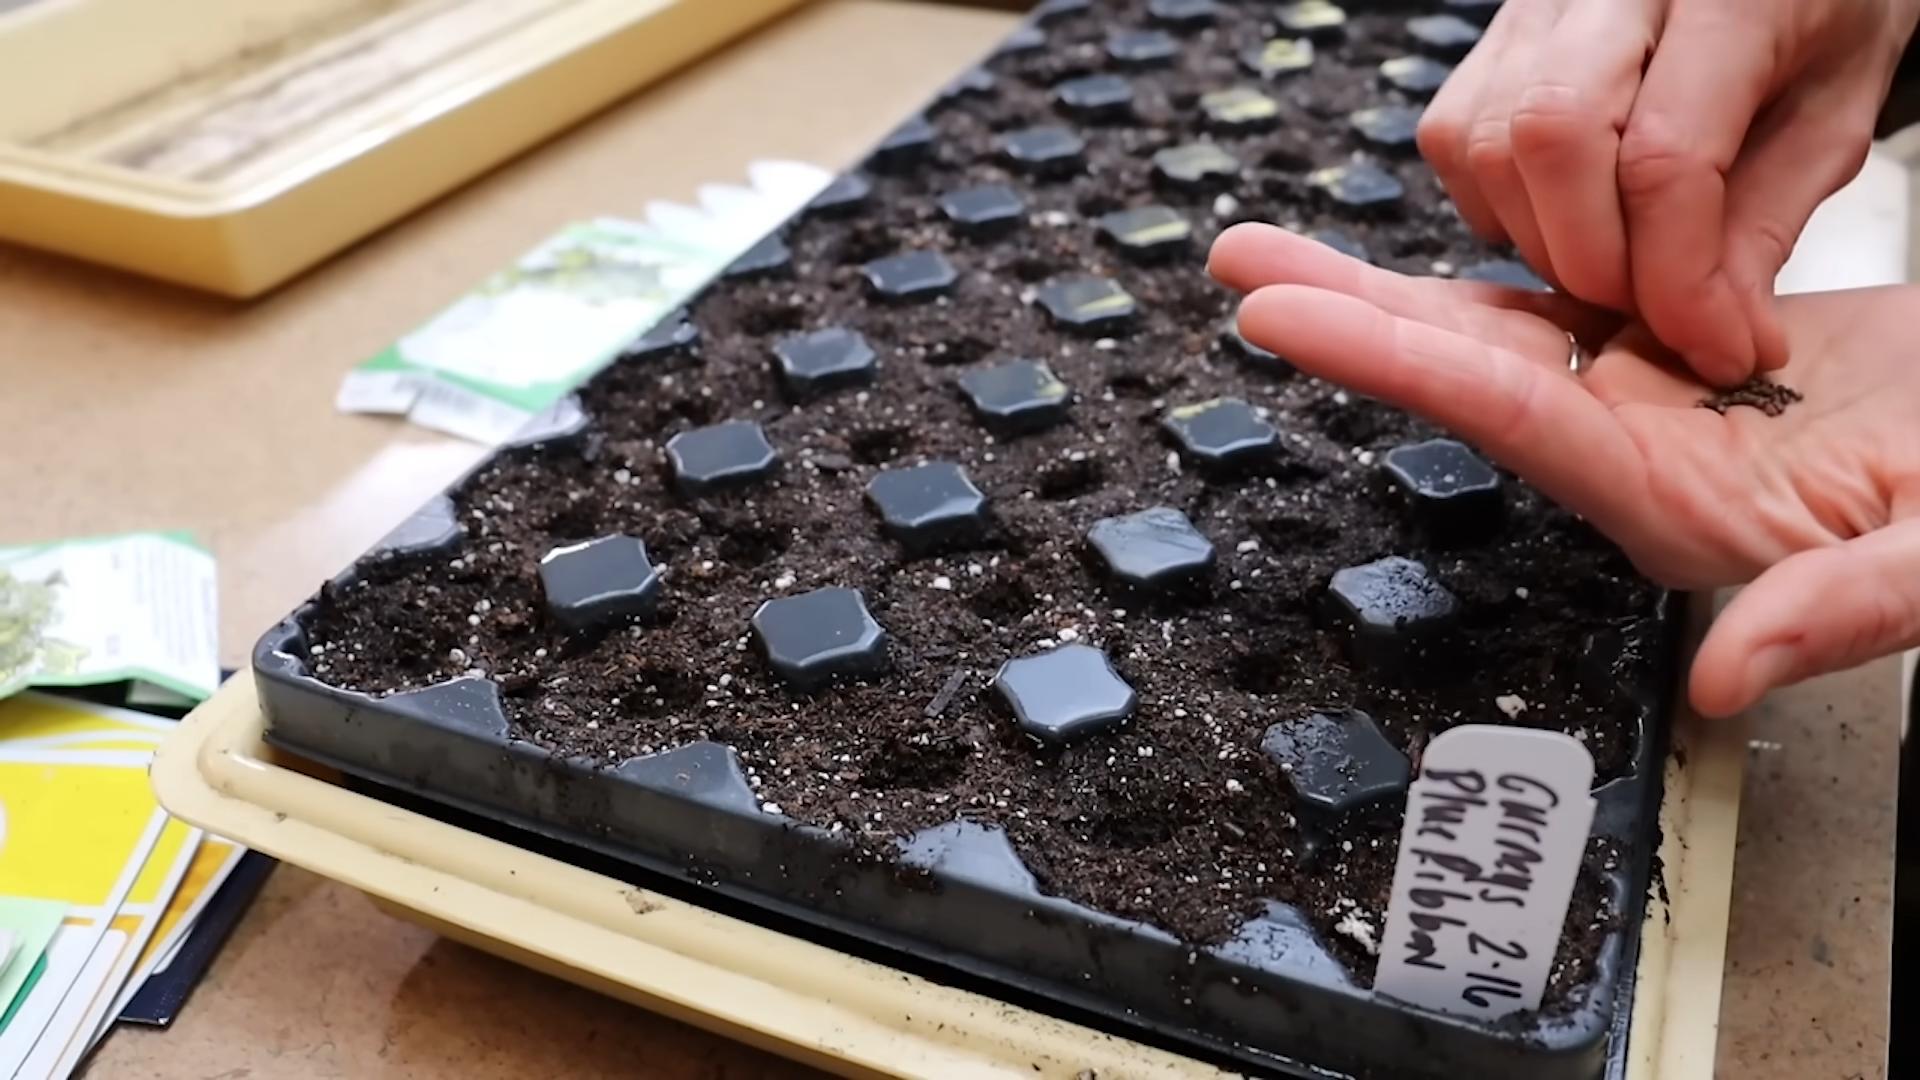
Step-by-Step Seed Starting:
1. Prepare the Seed Starting Trays: Fill your seed starting trays or pots with seed starting mix. Gently press down the soil to eliminate air pockets.
2. Sow the Seeds: Make a small indentation (about ¼ inch deep) in the center of each cell or pot. Place 2-3 seeds in each indentation. This increases the chances of at least one seed germinating.
3. Cover the Seeds: Lightly cover the seeds with more seed starting mix.
4. Water Gently: Use a spray bottle to gently moisten the soil. Avoid overwatering, which can lead to damping-off disease.
5. Provide Warmth and Light: Place the trays on a heat mat (if using) and under grow lights or in a sunny windowsill. The ideal temperature for germination is around 70-75°F (21-24°C).
6. Maintain Moisture: Keep the soil consistently moist, but not soggy. Check the soil daily and mist with water as needed.
7. Thin the Seedlings: Once the seedlings emerge (usually within 5-10 days) and have their first true leaves (the second set of leaves), thin them to one seedling per cell or pot. Choose the strongest, healthiest-looking seedling and snip off the others at the soil line.
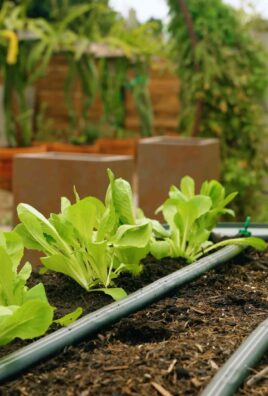
Preparing the Garden Bed
While your seedlings are growing indoors, it’s time to prepare the garden bed where they’ll eventually be transplanted.
* Sunlight: Pointed cabbage needs at least 6 hours of sunlight per day. Choose a location in your garden that receives ample sunlight.
* Soil: Cabbage prefers well-drained, fertile soil with a pH between 6.0 and 7.0. Amend the soil with compost or well-rotted manure to improve drainage and fertility. I always add a generous amount of compost to my cabbage bed – it makes a huge difference!
* Weed Removal: Clear the garden bed of any weeds and debris. Weeds compete with cabbage for nutrients and water.
* Soil Preparation: Loosen the soil to a depth of at least 12 inches. This allows the roots to penetrate easily and access nutrients.
* Fertilizing: Incorporate a balanced fertilizer into the soil before planting. Follow the instructions on the fertilizer package. I like to use an organic fertilizer specifically formulated for vegetables.
Step-by-Step Garden Bed Preparation:
1. Clear the Area: Remove all weeds, rocks, and debris from the garden bed.
2. Amend the Soil: Spread a 2-3 inch layer of compost or well-rotted manure over the soil surface.
3. Incorporate Amendments: Use a garden fork or tiller to incorporate the compost or manure into the soil to a depth of at least 12 inches.
4. Test the Soil pH: Use a soil testing kit to check the pH of the soil. If the pH is too low (acidic), add lime to raise it. If the pH is too high (alkaline), add sulfur to lower it.
5. Fertilize: Apply a balanced fertilizer according to the package instructions.
6. Rake Smooth: Rake the soil smooth to create a level planting surface.
Transplanting Seedlings
Once your seedlings have developed several sets of true leaves and the weather has warmed up (or cooled down, depending on whether you’re planting for a spring or fall harvest), it’s time to transplant them into the garden.
* Hardening Off: Before transplanting, you need to “harden off” the seedlings. This process gradually acclimates them to outdoor conditions. Start by placing the seedlings outdoors in a sheltered location for a few hours each day, gradually increasing the amount of time they spend outside over the course of a week.
* Planting Time: Transplant the seedlings on a cloudy day or in the late afternoon to minimize stress.
* Spacing: Space the seedlings 18-24 inches apart in rows that are 24-36 inches apart. This allows them enough room to grow and develop.
* Planting Depth: Plant the seedlings at the same depth they were growing in the seed starting trays.
Step-by-Step Transplanting:
1. Water the Seedlings: Water the seedlings thoroughly before transplanting. This helps to loosen the roots and makes them easier to remove from the trays.
2. Dig the Holes: Dig holes in the prepared garden bed that are slightly larger than the root balls of the seedlings.
3. Remove the Seedlings: Gently remove the seedlings from the seed starting trays or pots. Be careful not to damage the roots.
4. Place the Seedlings: Place the seedlings in the holes, ensuring that the top of the root ball is level with the soil surface.
5. Fill the Holes: Fill the holes with soil and gently firm the soil around the base of the seedlings.
6. Water Thoroughly: Water the seedlings thoroughly after transplanting.
7. Mulch: Apply a layer of mulch around the plants to help retain moisture, suppress weeds, and regulate soil temperature. I like to use straw or shredded leaves.
Caring for Your Pointed Cabbage
Now that your cabbage is in the ground, it’s important to provide it with the care it needs to thrive.
* Watering: Water regularly, especially during dry periods. Cabbage needs consistent moisture to develop properly. Aim for about 1 inch of water per week.
* Fertilizing: Side-dress the plants with a balanced fertilizer every 4-6 weeks. This provides them with the nutrients they need to grow.
* Weed Control: Keep the garden bed free of weeds. Weeds compete with cabbage for nutrients and water.
* Pest Control: Cabbage is susceptible to several pests, including cabbage worms, aphids, and flea beetles. Monitor your plants regularly and take action if you see any signs of infestation. I prefer to use organic pest control methods, such as insecticidal soap or Bacillus thuringiensis (Bt).
* Disease Control: Cabbage can also be affected by diseases, such as black rot and clubroot. Choose disease-resistant varieties and practice good sanitation to prevent disease problems.
Step-by-Step Care:
1. Water Regularly: Water deeply and regularly, especially during hot, dry weather. Check the soil moisture regularly and water when the top inch of soil feels dry.
2. Fertilize: Side-dress with a balanced fertilizer every 4-6 weeks. Sprinkle the fertilizer around the base of the plants and water it in.
3. Weed Regularly: Remove weeds by hand or with a hoe. Be careful not to damage the cabbage roots.
4. Monitor for Pests: Inspect the plants regularly for signs of pests. Look for holes in the leaves, aphids on the stems, or flea beetles jumping around.
5. Treat Pests: If you find pests, treat them with an appropriate insecticide. I recommend using organic options whenever possible.
6. Monitor for Diseases: Watch for signs of disease, such as yellowing leaves, stunted growth, or lesions on the leaves or stems.
7. Treat Diseases: If you suspect a disease, consult with your local extension office or garden center for advice on treatment options.
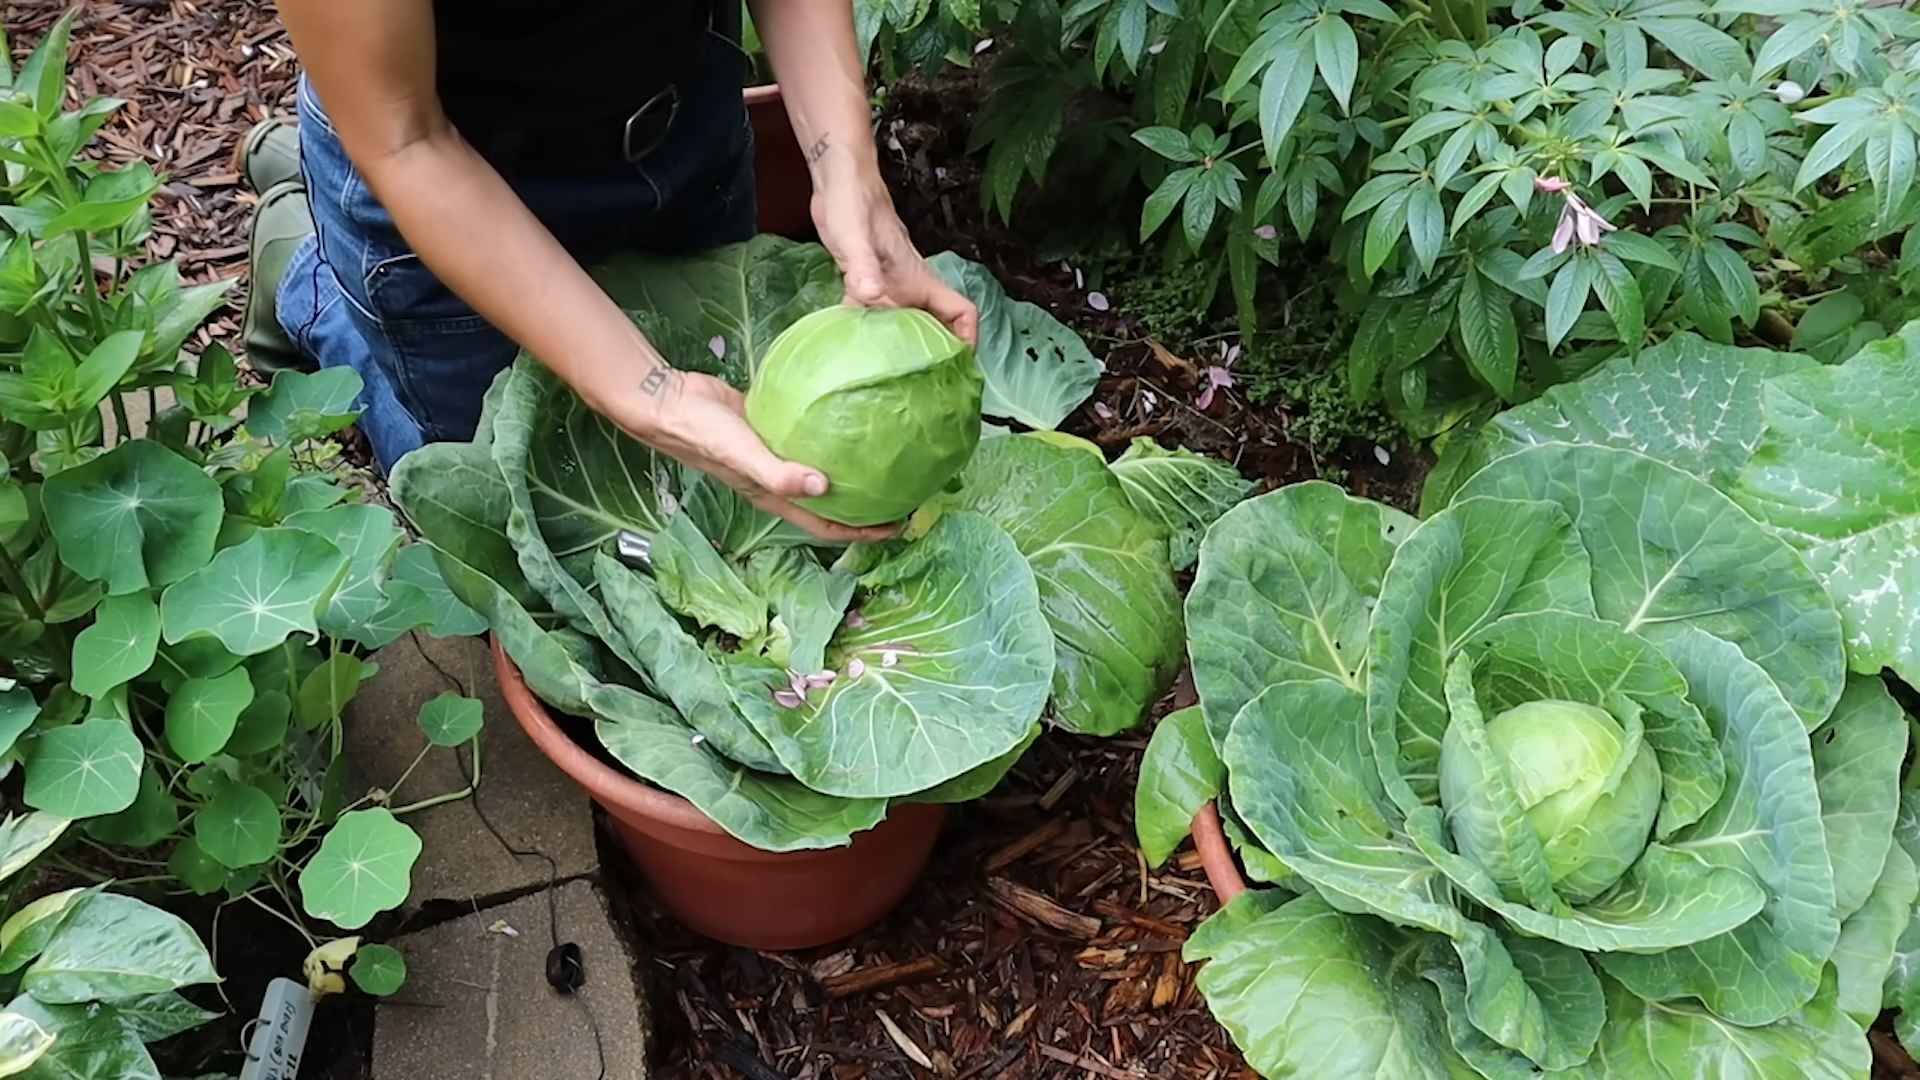
Harvesting Your Pointed Cabbage
The moment you’ve been waiting for! Harvesting your own homegrown pointed cabbage is incredibly satisfying.
* Harvest Time: Pointed cabbage is typically ready to harvest 60-80
Conclusion
So, there you have it! Cultivating your own pointed cabbage at home is not only achievable but also incredibly rewarding. We’ve walked you through the process, from selecting the right seeds to nurturing your seedlings and finally, harvesting your very own homegrown pointed cabbage. This DIY approach offers a multitude of benefits, from ensuring the freshness and quality of your produce to saving money and reducing your environmental impact.
But why is this DIY trick a must-try? Simply put, the taste of freshly harvested pointed cabbage is unparalleled. The subtle sweetness and crisp texture are a world away from the often-tired specimens you find in supermarkets. Plus, you have complete control over the growing process, ensuring that your cabbage is free from harmful pesticides and chemicals. You know exactly what went into growing it, giving you peace of mind and a healthier meal.
Beyond the basic method we’ve outlined, there are plenty of ways to personalize your pointed cabbage growing experience. Consider experimenting with different varieties of pointed cabbage, such as the ‘Hispi’ or ‘Caraflex’, each offering a slightly different flavor profile and texture. You can also try companion planting, surrounding your cabbage with herbs like rosemary or thyme to deter pests naturally. For those with limited space, container gardening is a fantastic option. Choose a large pot with good drainage and follow the same planting and care instructions as you would for growing in the ground.
Furthermore, think about the culinary possibilities! Freshly harvested pointed cabbage is incredibly versatile. It can be shredded into salads, stir-fried with garlic and ginger, added to soups and stews, or even fermented into sauerkraut. The possibilities are endless!
Don’t be intimidated by the prospect of growing your own vegetables. Pointed cabbage is a relatively easy crop to cultivate, even for beginners. With a little patience and attention, you’ll be enjoying the fruits (or rather, vegetables) of your labor in no time.
We wholeheartedly encourage you to give this DIY trick a try. Imagine the satisfaction of serving a meal featuring pointed cabbage that you grew yourself. It’s a truly rewarding experience that connects you to nature and provides you with delicious, healthy food.
So, grab your seeds, prepare your soil, and get ready to embark on your pointed cabbage growing adventure. We’re confident that you’ll be amazed by the results. And most importantly, don’t forget to share your experiences with us! We’d love to hear about your successes, challenges, and any variations you’ve tried. Share your photos and stories on our social media channels using #HomegrownPointedCabbage. Let’s build a community of passionate gardeners and inspire others to embrace the joy of growing their own food. Happy gardening!
Frequently Asked Questions (FAQ)
What is the best time of year to plant pointed cabbage?
The best time to plant pointed cabbage depends on your climate. In general, pointed cabbage is a cool-season crop, so it thrives in spring and fall. For a spring harvest, start seeds indoors 6-8 weeks before the last expected frost. Transplant seedlings outdoors once the soil has warmed up and the risk of frost has passed. For a fall harvest, sow seeds directly into the garden in mid-summer, about 10-12 weeks before the first expected frost. Check your local climate data for specific planting dates.
How much sunlight does pointed cabbage need?
Pointed cabbage requires at least 6 hours of direct sunlight per day to thrive. Choose a planting location that receives ample sunlight throughout the day. If you’re growing in containers, you may need to move them around to ensure they get enough sun. Insufficient sunlight can result in leggy growth and smaller heads.
What type of soil is best for growing pointed cabbage?
Pointed cabbage prefers well-drained, fertile soil with a pH between 6.0 and 7.0. Amend your soil with compost or other organic matter to improve drainage and fertility. Avoid heavy clay soils, as they can become waterlogged and inhibit root growth. A soil test can help you determine the pH and nutrient levels of your soil and make necessary adjustments.
How often should I water my pointed cabbage plants?
Water your pointed cabbage plants regularly, especially during dry periods. Aim to keep the soil consistently moist but not waterlogged. Water deeply at the base of the plants, avoiding wetting the foliage, which can increase the risk of fungal diseases. Mulching around the plants can help retain moisture and suppress weeds.
What are some common pests and diseases that affect pointed cabbage?
Pointed cabbage can be susceptible to various pests and diseases, including cabbage worms, aphids, flea beetles, clubroot, and black rot. Regularly inspect your plants for signs of infestation or disease. Use organic pest control methods, such as handpicking pests, using insecticidal soap, or introducing beneficial insects. To prevent diseases, practice crop rotation, ensure good air circulation, and avoid overhead watering.
How do I know when my pointed cabbage is ready to harvest?
Pointed cabbage is typically ready to harvest when the head is firm and compact. The exact size will depend on the variety, but generally, the head should be about 6-8 inches long. Gently squeeze the head to check for firmness. If it feels solid, it’s ready to harvest. Use a sharp knife to cut the head from the stem, leaving a few outer leaves intact.
Can I grow pointed cabbage in containers?
Yes, pointed cabbage can be successfully grown in containers. Choose a large container with good drainage, at least 12 inches in diameter. Use a high-quality potting mix and follow the same planting and care instructions as you would for growing in the ground. Container-grown cabbage may require more frequent watering and fertilization.
How can I prevent my pointed cabbage from splitting?
Splitting can occur when pointed cabbage heads grow too quickly due to excessive watering or fertilization. To prevent splitting, water consistently but avoid overwatering. Avoid fertilizing with high-nitrogen fertilizers, which can promote rapid growth. If you anticipate heavy rain, consider harvesting your cabbage slightly early to prevent splitting.
Can I save seeds from my pointed cabbage?
Saving seeds from pointed cabbage can be challenging because it is a biennial plant, meaning it takes two years to produce seeds. Furthermore, pointed cabbage is often cross-pollinated, so the seeds may not produce plants that are true to type. If you want to save seeds, you’ll need to isolate your plants to prevent cross-pollination and allow them to overwinter for seed production in the second year. It’s generally easier to purchase seeds from a reputable source.
What are some good companion plants for pointed cabbage?
Companion planting can help deter pests, attract beneficial insects, and improve the overall health of your pointed cabbage plants. Good companion plants for pointed cabbage include:
* **Aromatic herbs:** Rosemary, thyme, sage, and mint can help repel cabbage moths and other pests.
* **Marigolds:** These flowers attract beneficial insects and deter nematodes.
* **Nasturtiums:** These flowers attract aphids away from your cabbage plants.
* **Garlic and onions:** These alliums can help deter pests and prevent fungal diseases.
* **Legumes:** Beans and peas can fix nitrogen in the soil, benefiting your cabbage plants.
Avoid planting pointed cabbage near other members of the brassica family, such as broccoli, cauliflower, and kale, as they can attract the same pests and diseases.


Leave a Comment