

Vertical squash gardening: Ever dreamed of a bountiful squash harvest but thought you didn’t have the space? I get it! We’ve all seen those sprawling squash vines taking over entire gardens, leaving little room for anything else. But what if I told you there’s a way to grow delicious, healthy squash even in the smallest of spaces?
For centuries, gardeners have been innovating to maximize their yields. From the ancient hanging gardens of Babylon to the modern-day urban farmer, the desire to cultivate food in limited areas has driven creativity. While not exactly ancient, the concept of vertical gardening has gained immense popularity in recent years, allowing us to bring the beauty and bounty of nature to balconies, patios, and even indoor spaces.
This DIY guide is your ticket to unlocking the secrets of vertical squash gardening. Imagine harvesting plump, juicy squash from a trellis or hanging container, all while saving precious ground space. Whether you’re dealing with a tiny apartment balcony or simply want to add a unique and visually stunning element to your existing garden, this article will provide you with the tips, tricks, and step-by-step instructions you need to succeed. We’ll cover everything from choosing the right squash varieties to building your own vertical support structures. So, grab your gardening gloves, and let’s get started on this exciting journey to a vertical squash paradise!
DIY Vertical Squash Gardening: Grow Up, Not Out!
Hey there, fellow gardeners! Are you dreaming of a bountiful squash harvest but short on space? Well, I’ve got the perfect solution for you: vertical squash gardening! It’s a fantastic way to maximize your yield, keep those sprawling vines under control, and even add a touch of visual interest to your garden. Trust me, once you try it, you’ll be hooked!
This guide will walk you through everything you need to know to create your own thriving vertical squash garden. Let’s get started!
Choosing the Right Squash Variety
Before we dive into the construction, it’s crucial to pick the right squash variety. Not all squash are created equal when it comes to vertical gardening. You’ll want to focus on bush or semi-vining varieties that are naturally more compact.
Here are a few of my favorites:
* Zucchini: These are generally well-behaved and produce prolifically. Look for bush varieties like ‘Black Beauty’ or ‘Early Prolific Straightneck’.
* Yellow Squash: Similar to zucchini, yellow squash bush varieties are a great choice. ‘Early Crookneck’ is a classic option.
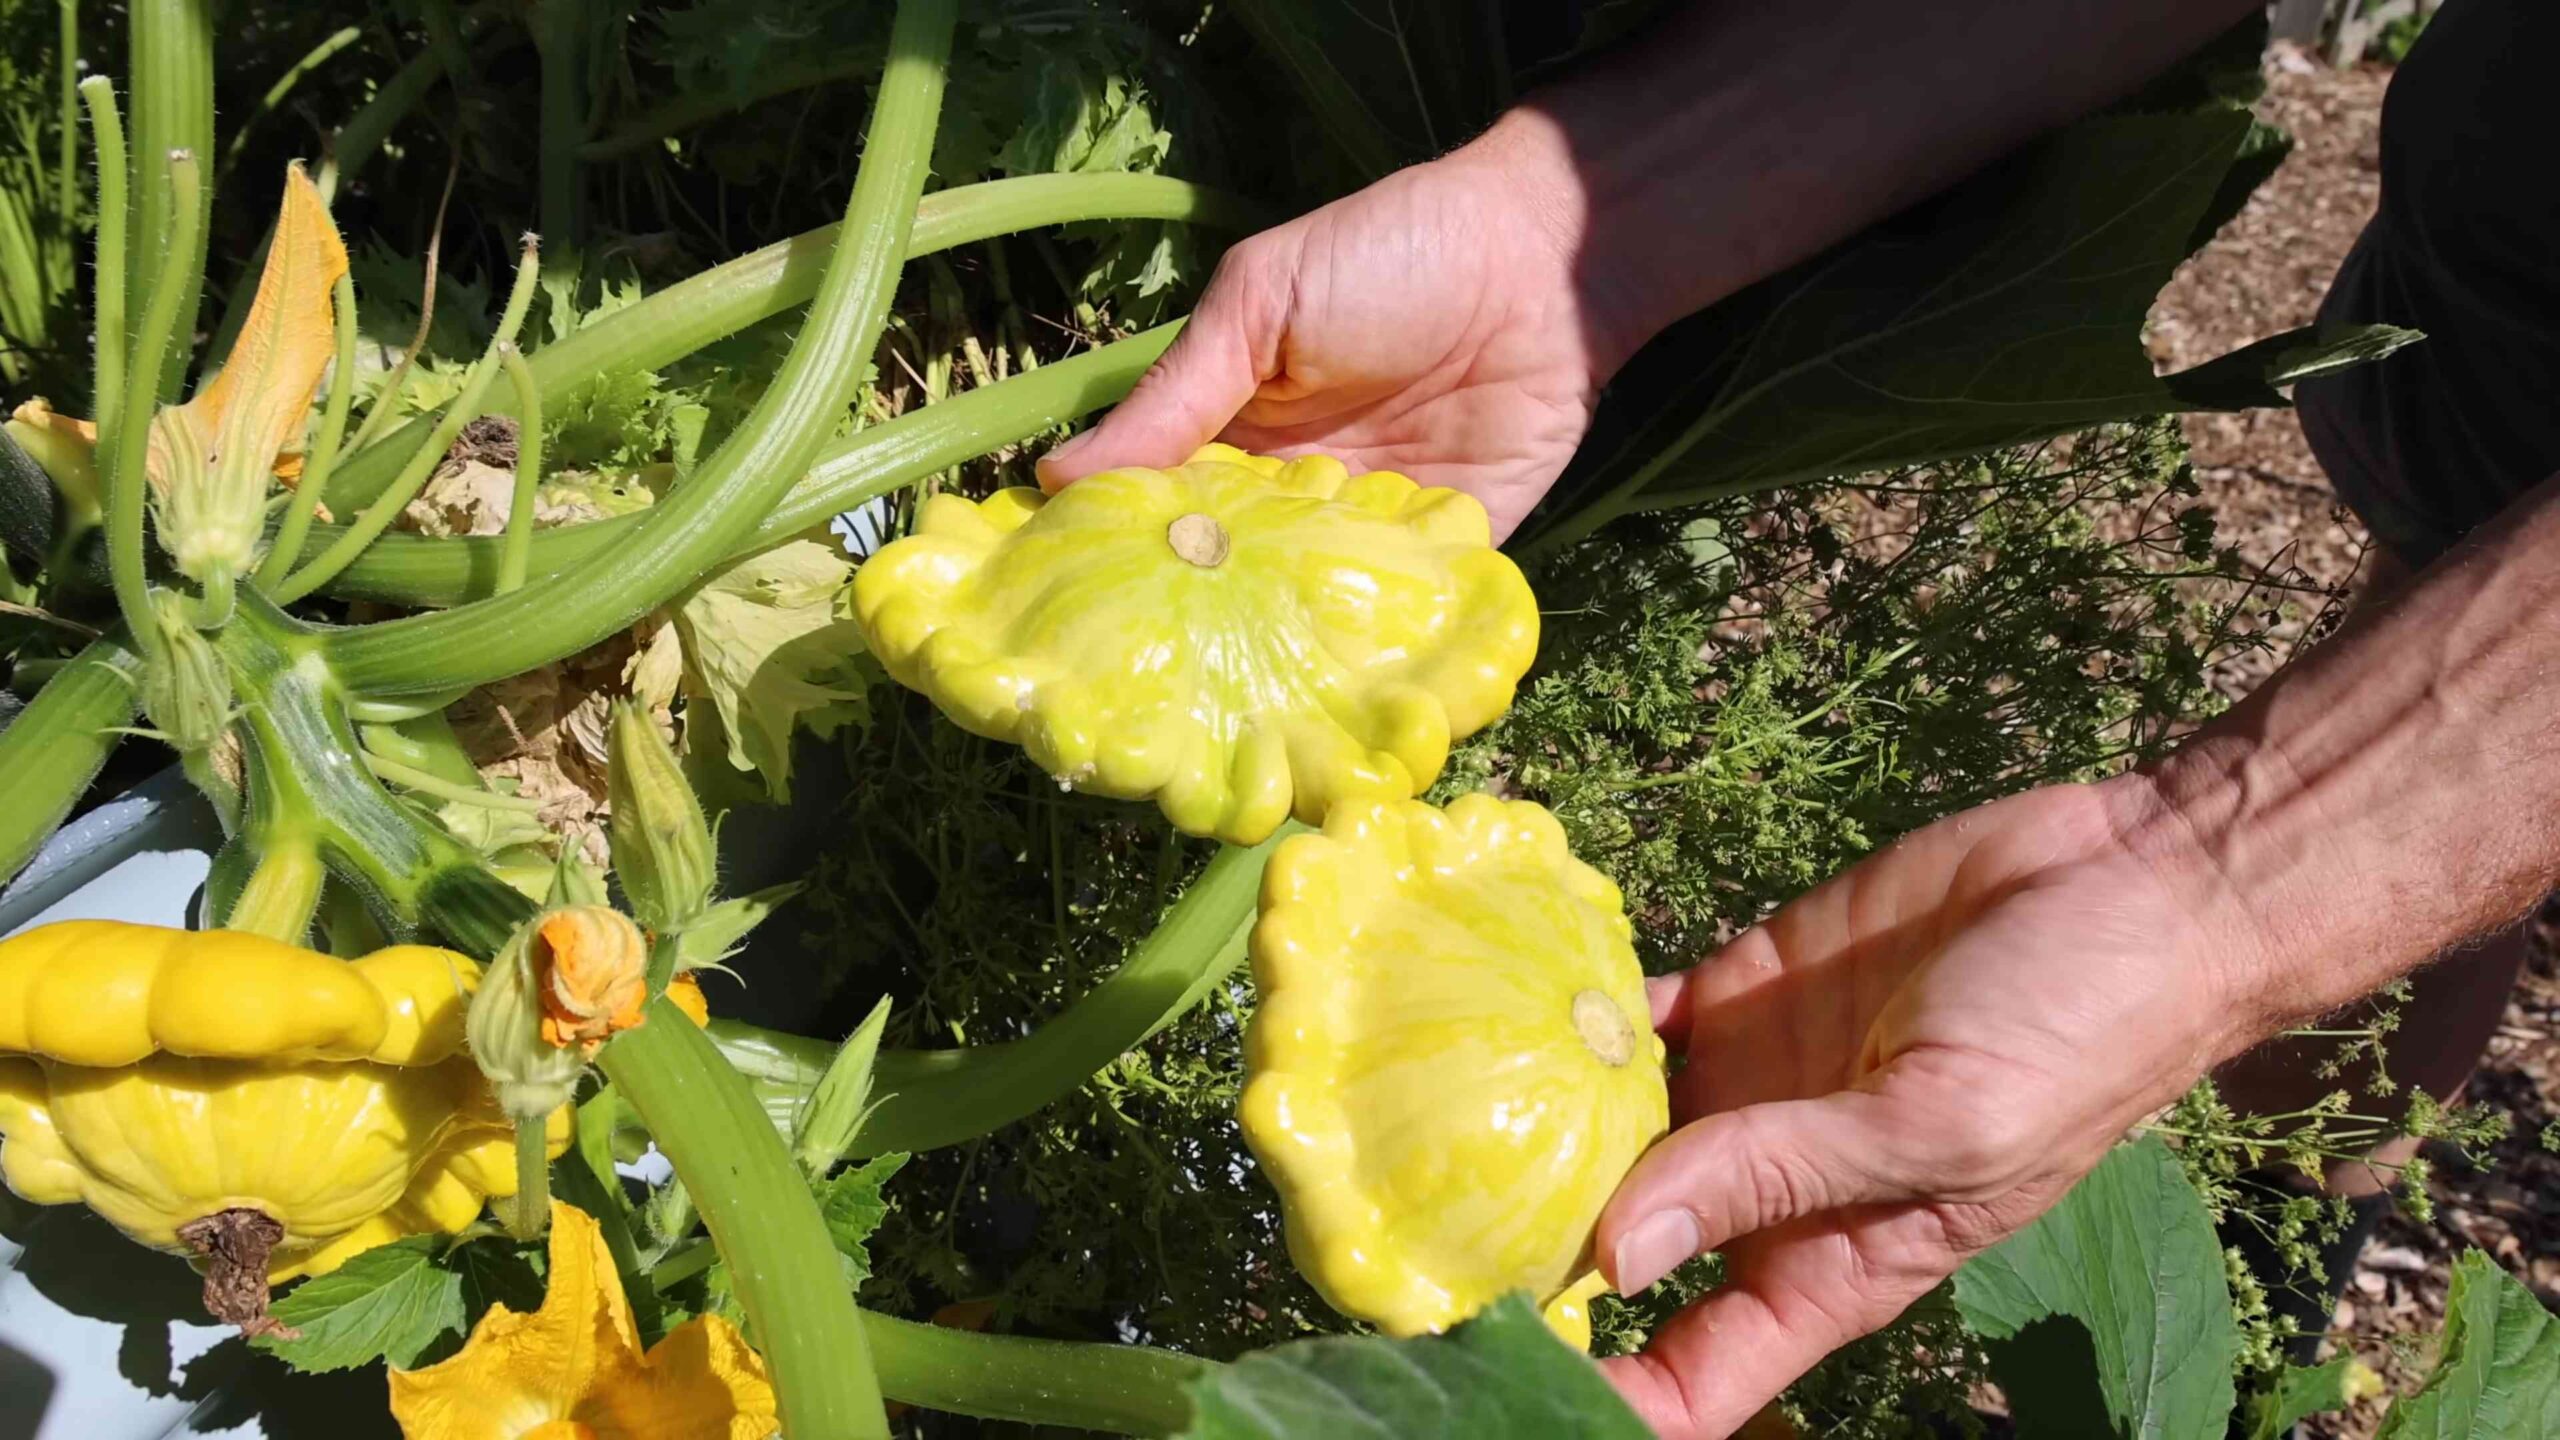
* Patty Pan Squash: These adorable, saucer-shaped squash are relatively compact and easy to manage.
* Delicata Squash: While technically a winter squash, Delicata vines are less aggressive than some other winter squash varieties, making them suitable for vertical growing with proper support.
* Smaller Butternut Squash: Some newer, more compact butternut varieties are available. Check the seed packet for information on vine length.
Important Note: Avoid large, sprawling winter squash varieties like pumpkins or Hubbard squash. Their massive size and weight will be difficult to support vertically.
Materials You’ll Need
Okay, now let’s gather our supplies. The exact materials will depend on the type of vertical structure you choose, but here’s a general list:
* Squash Seedlings or Seeds: Choose your desired variety as discussed above.
* Large Containers: At least 15-20 gallons per plant. Fabric pots, plastic tubs, or even repurposed containers work well. Make sure they have drainage holes!
* High-Quality Potting Mix: A well-draining mix is essential. I like to use a blend of compost, peat moss (or coco coir), and perlite.
* Vertical Support Structure: This is where you have options! Here are a few ideas:
* Trellis: A sturdy wooden or metal trellis is a classic choice.
* Arbor: An arbor provides a beautiful and functional support structure.
* Cattle Panel Arch: Bend a cattle panel into an arch and secure it to the ground.
* DIY A-Frame: Build a simple A-frame structure using wood or bamboo.
* Tomato Cages (Reinforced): For smaller squash varieties, you can use reinforced tomato cages.
* Twine or Plant Ties: To help train the vines to climb.
* Fertilizer: A balanced fertilizer or compost tea to feed your plants.
* Watering Can or Hose: For regular watering.
* Gloves: To protect your hands.
* Hand Trowel: For planting.
* Pruning Shears: For trimming and shaping the vines.
* Optional: Mulch (straw, wood chips, etc.) to help retain moisture and suppress weeds.
Building Your Vertical Support Structure
This is where things get a little more hands-on. I’ll outline the general steps for a few popular support structures. Remember to adjust the dimensions to fit your space and the size of your squash plants.
Trellis
1. Choose Your Trellis: You can buy a pre-made trellis or build your own. If building, use sturdy wood or metal.
2. Position the Trellis: Place the trellis behind your container, ensuring it’s securely anchored in the ground or attached to the container. It needs to be strong enough to support the weight of the mature squash vines and fruit.
3. Reinforce if Needed: For heavier squash varieties, you might need to reinforce the trellis with additional supports.
Cattle Panel Arch
1. Bend the Panel: Carefully bend the cattle panel into an arch shape. You might need a helper for this.
2. Secure the Ends: Drive sturdy stakes into the ground on either side of your container. Attach the ends of the cattle panel to the stakes using zip ties or wire.
3. Add Support: For extra stability, you can add crossbars along the arch.
DIY A-Frame
1. Cut the Wood: Cut four pieces of wood to the desired length for your A-frame. I recommend at least 6 feet tall.
2. Assemble the Frame: Join the pieces of wood at the top to form an A-shape. Use screws or nails to secure them.
3. Add Crossbars: Add horizontal crossbars between the legs of the A-frame for added stability and climbing support.
4. Secure the Frame: Anchor the A-frame in the ground or attach it to your container.
Planting Your Squash
Now for the fun part – planting!
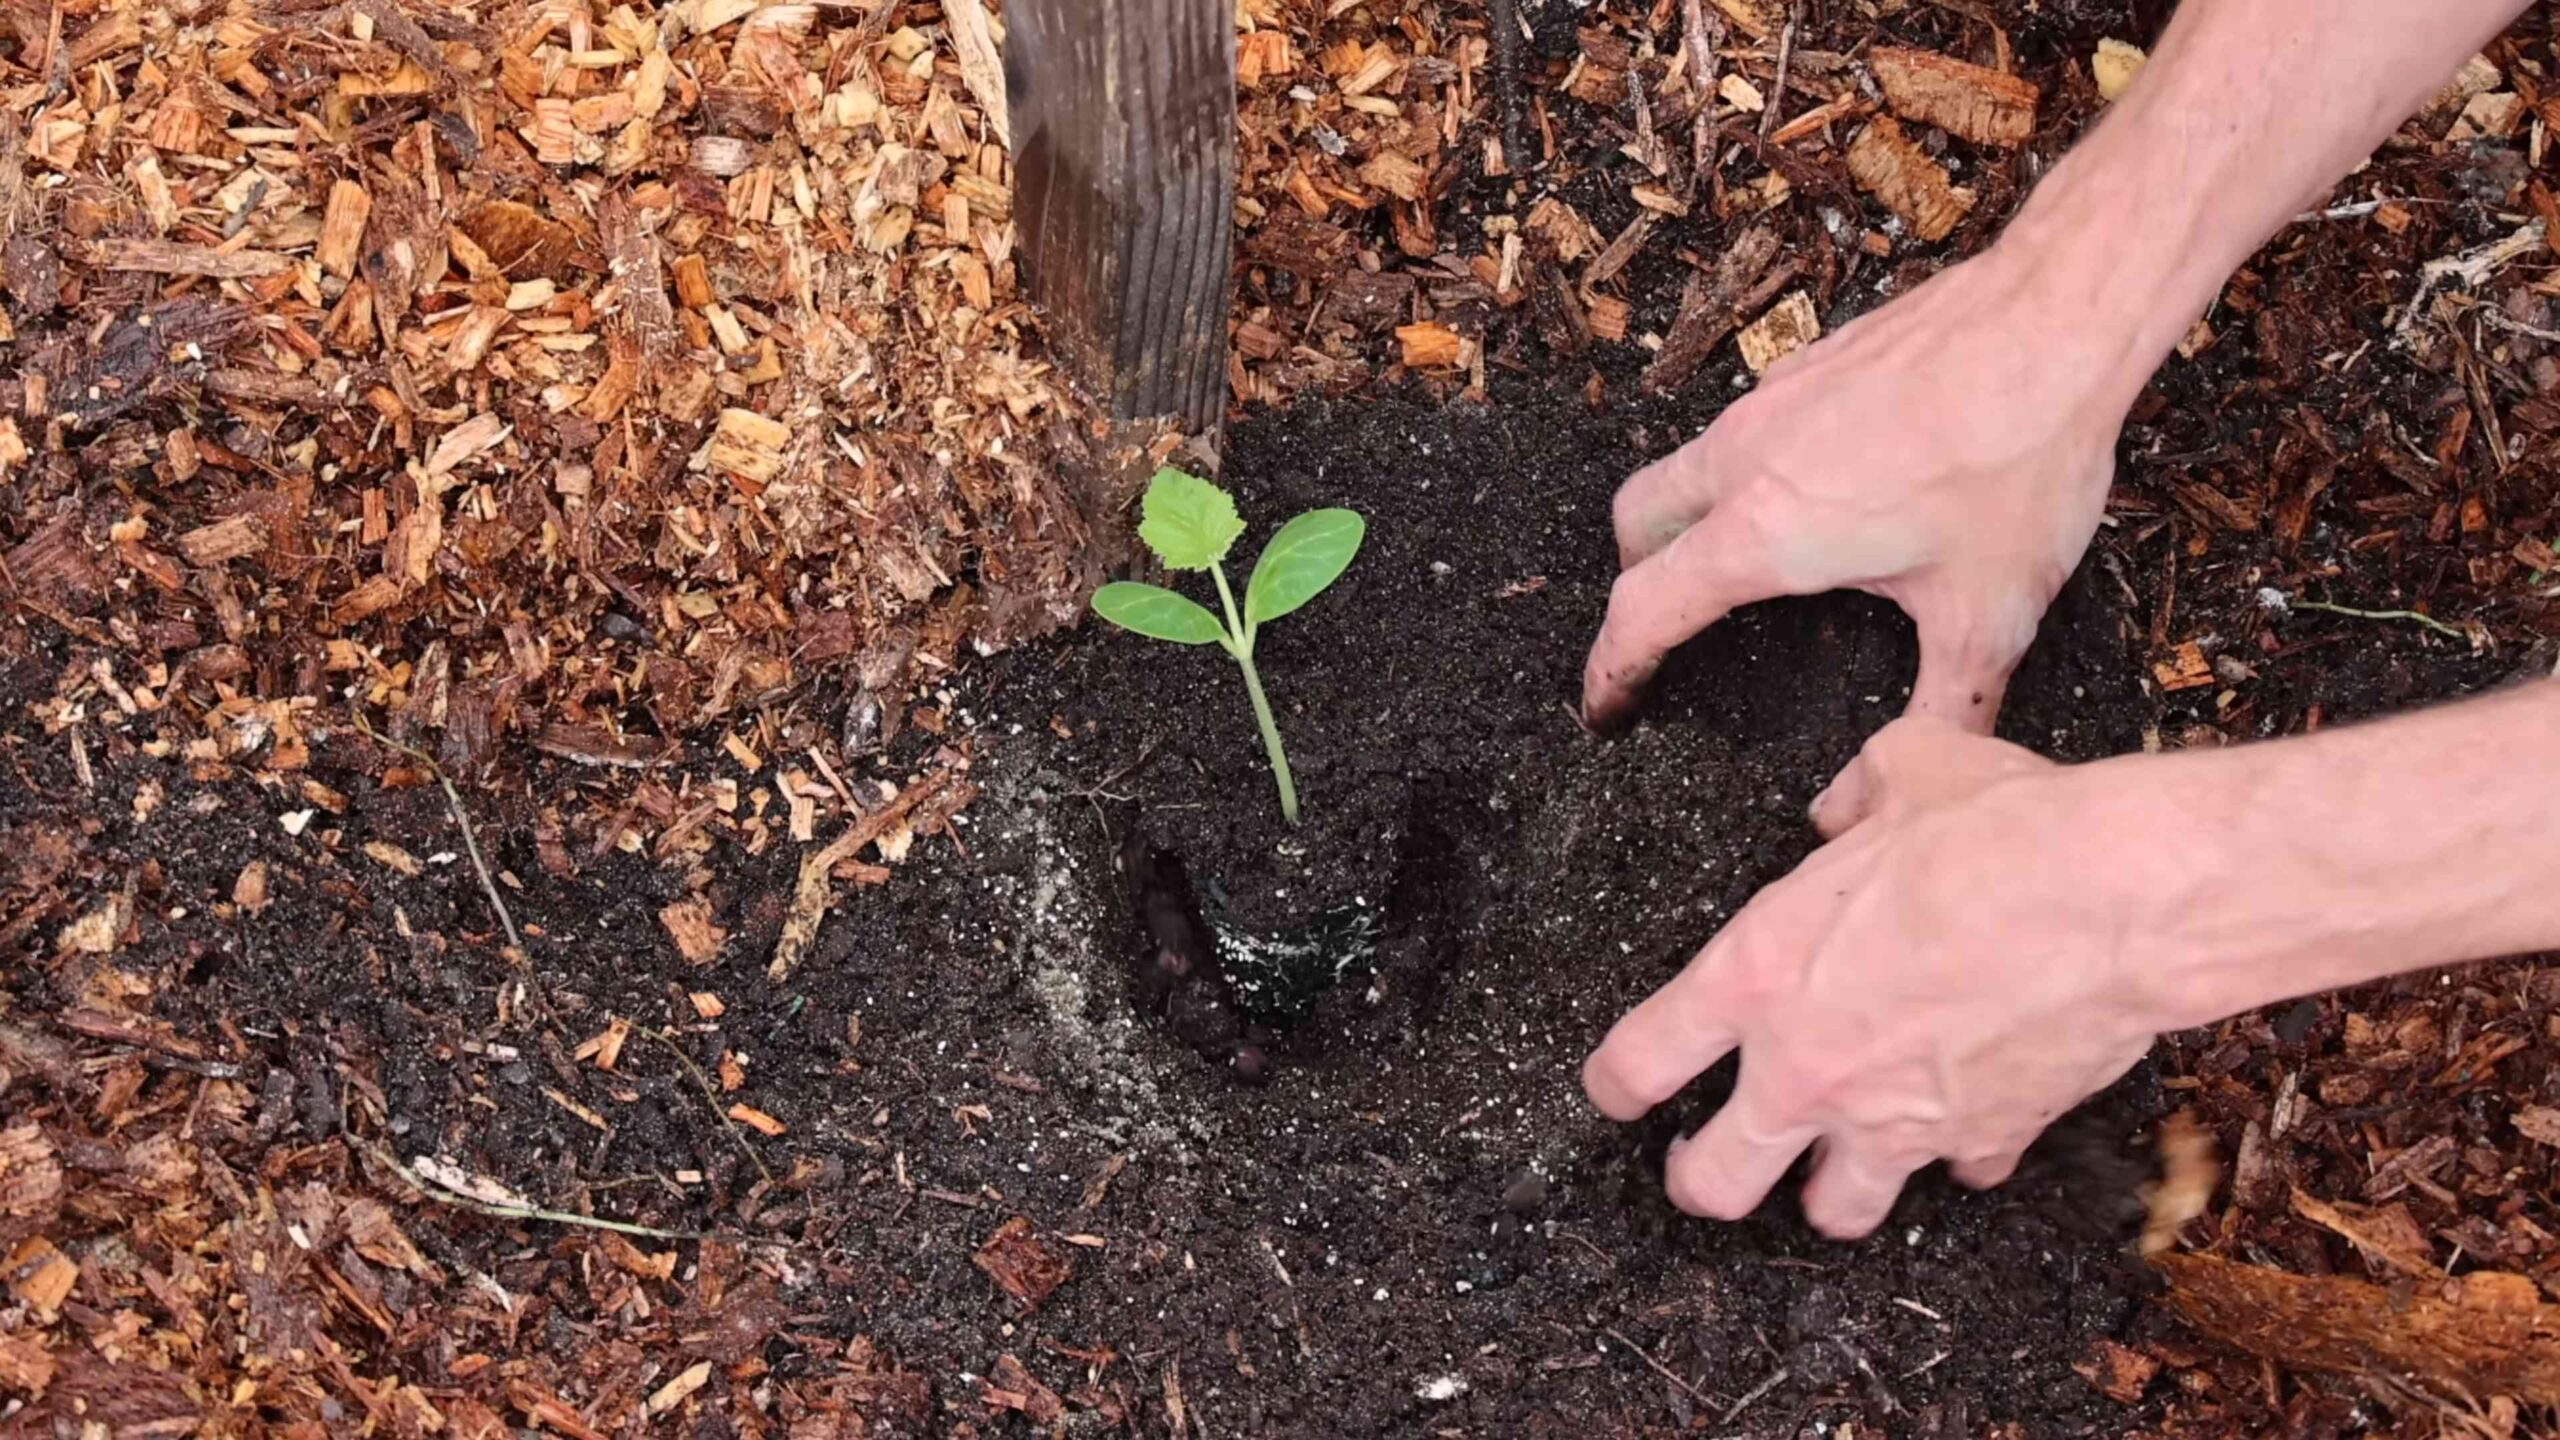
1. Prepare the Container: Fill your container with the high-quality potting mix, leaving a few inches of space at the top.
2. Plant the Seedlings or Seeds: If using seedlings, gently remove them from their containers and plant them in the center of the container. If using seeds, follow the instructions on the seed packet for planting depth and spacing. I usually plant 2-3 seeds per container and thin them to the strongest seedling later.
3. Water Thoroughly: Water the soil well after planting.
4. Add Mulch (Optional): Apply a layer of mulch around the base of the plant to help retain moisture and suppress weeds.
Training and Pruning Your Squash Vines
This is where the “vertical” part really comes into play. You’ll need to actively train your squash vines to climb the support structure.
1. Guide the Vines: As the vines grow, gently guide them towards the trellis or support structure.
2. Use Twine or Plant Ties: Use twine or plant ties to secure the vines to the support. Be careful not to tie them too tightly, as this can damage the stems.
3. Prune as Needed: Prune away any excessive foliage or side shoots to encourage airflow and prevent overcrowding. This is especially important in humid climates. I usually remove any leaves that are touching the ground to prevent fungal diseases.
4. Support the Fruit: As the squash fruits develop, they may need extra support, especially if they are large. You can use slings made from fabric or netting to support the fruit and prevent them from breaking off the vine.
Watering and Fertilizing
Proper watering and fertilization are crucial for a healthy and productive vertical squash garden.
1. Water Regularly: Squash plants need consistent moisture, especially during hot weather. Water deeply whenever the top inch of soil feels dry to the touch. Avoid overhead watering, as this can promote fungal diseases.
2. Fertilize Regularly: Feed your squash plants with a balanced fertilizer or compost tea every 2-3 weeks. This will provide them with the nutrients they need to grow and produce fruit. I like to use a fertilizer that’s higher in phosphorus and potassium to encourage flowering and fruiting.
Dealing with Pests and Diseases
Like all gardens, vertical squash gardens can be susceptible to pests and diseases. Here are a few common problems and how to deal with them:
* Squash Vine Borers: These pests can be devastating to squash plants. Look for signs of wilting vines and small holes near the base of the plant. You can try injecting Bacillus thuringiensis (Bt) into the stems to kill the larvae. Prevention is key – cover your plants with row covers early in the season to prevent the moths from laying eggs.
* Powdery Mildew: This fungal disease appears as a white, powdery coating on the leaves. Improve airflow by pruning away excessive foliage. You can also spray with a fungicide or a homemade solution of baking soda and water.
* Aphids: These small, sap-sucking insects can weaken your plants. Spray them off with a strong stream of water or use insecticidal soap.
* Squash Bugs: These pests can cause significant damage to squash plants. Handpick them off the plants or use insecticidal soap.
Harvesting Your Squash
The moment you’ve been waiting for! The timing of your harvest will depend on the specific squash variety you’re growing.
* Zucchini and Yellow Squash: Harvest when they are young and tender, usually about 6-8 inches long.
* Patty Pan Squash: Harvest when they are about 3-4 inches in diameter.
* Delicata
Conclusion
So, there you have it! Transforming your squash patch into a thriving vertical garden isn’t just a whimsical idea; it’s a practical, space-saving, and yield-boosting solution that any gardener can implement. We’ve explored the benefits, the methods, and the considerations, and hopefully, you’re now brimming with inspiration to try this yourself.
Why is this DIY trick a must-try? Because it addresses several common gardening challenges simultaneously. Limited space? Vertical gardening maximizes your growing area. Prone to pests and diseases? Increased airflow and sunlight exposure significantly reduce these risks. Tired of back-breaking work? Harvesting becomes easier and more enjoyable when your squash are hanging at eye level. Plus, let’s be honest, a vertical squash garden is a stunning visual addition to any outdoor space, a conversation starter, and a testament to your gardening ingenuity.
But don’t feel limited to the methods we’ve outlined. The beauty of DIY is the freedom to adapt and experiment. Consider these variations:
* Trellis Material: While we discussed using cattle panels and sturdy netting, explore other options like repurposed ladders, pallet structures, or even creatively arranged branches. Just ensure the material is strong enough to support the weight of mature squash.
* Squash Varieties: While smaller varieties like zucchini and yellow squash are ideal, don’t shy away from trying butternut squash or even smaller pumpkins with extra support. Experiment with different types to see what thrives best in your vertical setup.
* Companion Planting: Enhance your vertical garden by incorporating companion plants at the base of your squash. Marigolds deter pests, while nasturtiums attract beneficial insects. Consider planting herbs like basil or oregano to further protect your squash from unwanted visitors.
* Watering System: For larger vertical gardens, consider installing a simple drip irrigation system to ensure consistent and efficient watering. This will save you time and effort while keeping your squash plants healthy and hydrated.
Ultimately, the success of your vertical squash garden hinges on your willingness to experiment and adapt. Don’t be afraid to try new things, learn from your mistakes, and tailor the techniques to suit your specific environment and preferences.
We wholeheartedly encourage you to embark on this rewarding gardening adventure. Imagine the satisfaction of harvesting plump, healthy squash from your own vertical oasis. The increased yield, the reduced maintenance, and the sheer beauty of your garden will make it all worthwhile.
And most importantly, we want to hear about your experiences! Share your photos, tips, and challenges in the comments below. Let’s build a community of vertical squash gardening enthusiasts and learn from each other’s successes and failures. Your insights could inspire others to transform their gardens and reap the rewards of this innovative technique. So, grab your tools, choose your squash varieties, and get ready to elevate your gardening game with vertical squash gardening!
Frequently Asked Questions (FAQ)
What types of squash are best suited for vertical gardening?
Generally, smaller and more compact squash varieties are ideal for vertical gardening. Zucchini, yellow squash, and smaller gourds are excellent choices because their weight is manageable for trellises and support structures. Larger varieties like pumpkins can be grown vertically, but they require significantly stronger support and may need individual slings or hammocks to prevent them from breaking off the vine. Consider the mature size and weight of the squash when selecting your varieties. Bush varieties are generally better than vining ones.
How do I provide adequate support for the squash as they grow?
Providing adequate support is crucial for successful vertical squash gardening. Use sturdy trellises made of materials like cattle panels, strong netting, or even repurposed ladders. As the squash develop, you may need to provide additional support, especially for larger varieties. This can be done by creating slings or hammocks using fabric scraps, pantyhose, or netting. Secure the slings to the trellis to distribute the weight of the squash and prevent them from pulling on the vine. Regularly inspect the support structures and adjust them as needed to accommodate the growing squash.
How often should I water my vertical squash garden?
Watering frequency depends on several factors, including the climate, soil type, and the size of your plants. Generally, squash plants need consistent moisture, especially during hot and dry periods. Check the soil moisture regularly by inserting your finger about an inch deep. If the soil feels dry, it’s time to water. Water deeply and thoroughly, ensuring that the water reaches the roots. Avoid overhead watering, as this can promote fungal diseases. Consider using a drip irrigation system to provide consistent and efficient watering, especially for larger vertical gardens.
What kind of soil is best for vertical squash gardening?
Squash plants thrive in well-draining, fertile soil that is rich in organic matter. Amend your soil with compost, aged manure, or other organic materials to improve its structure, drainage, and nutrient content. A slightly acidic to neutral pH (around 6.0 to 7.0) is ideal. If you’re growing squash in containers, use a high-quality potting mix that is specifically formulated for vegetables. Avoid using garden soil in containers, as it can become compacted and poorly drained.
How do I prevent pests and diseases in my vertical squash garden?
Vertical gardening naturally reduces the risk of pests and diseases by improving airflow and sunlight exposure. However, it’s still important to take preventative measures. Regularly inspect your plants for signs of pests or diseases. Remove any affected leaves or plants promptly. Use organic pest control methods, such as insecticidal soap or neem oil, to control common pests like squash bugs and vine borers. Ensure proper spacing between plants to promote airflow and prevent the spread of diseases. Consider companion planting with herbs like basil or marigolds to deter pests.
Can I grow squash vertically in containers?
Yes, you can absolutely grow squash vertically in containers. Choose large containers (at least 15-20 gallons) to provide adequate space for the roots to grow. Use a high-quality potting mix and ensure that the containers have good drainage. Provide a sturdy trellis or support structure for the squash vines to climb. Water regularly and fertilize as needed. Container-grown squash may require more frequent watering and fertilization than those grown in the ground.
How do I harvest squash from a vertical garden?
Harvesting squash from a vertical garden is generally easier than harvesting from a traditional garden. The squash are typically more accessible and easier to reach. Use a sharp knife or pruning shears to cut the squash from the vine, leaving a short stem attached. Handle the squash carefully to avoid bruising or damaging the skin. Harvest squash when they are mature and have reached their desired size and color.
What are some common problems I might encounter with vertical squash gardening?
Some common problems include pests (squash bugs, vine borers), diseases (powdery mildew, fungal infections), inadequate support, and insufficient watering or fertilization. Regularly inspect your plants, take preventative measures, and address any problems promptly to ensure a successful vertical squash garden.
How much sunlight do vertical squash plants need?
Squash plants need at least 6-8 hours of direct sunlight per day to thrive. Choose a location for your vertical garden that receives ample sunlight. If you’re growing squash in containers, you may need to move them around to ensure they get enough sunlight throughout the day.
What kind of fertilizer should I use for vertical squash plants?
Use a balanced fertilizer that is specifically formulated for vegetables. Look for a fertilizer with a ratio of N-P-K (nitrogen, phosphorus, potassium) that is appropriate for squash plants. Follow the instructions on the fertilizer label for application rates and frequency. You can also amend your soil with compost or aged manure to provide a slow-release source of nutrients.

Leave a Comment