

Expert cleaning hacks – who doesn’t crave them? Let’s be honest, cleaning isn’t usually anyone’s favorite pastime. But what if I told you that tackling those stubborn stains and grimy corners could be easier, faster, and even…dare I say…enjoyable? This isn’t just about scrubbing harder; it’s about working smarter, not harder!
For centuries, people have sought out clever ways to maintain their homes. From ancient Roman bathhouses meticulously cleaned with natural oils to the Victorian era’s obsession with spotless parlors, the desire for a clean and healthy living space is deeply ingrained in our history. While the tools and techniques have evolved, the fundamental need remains the same.
In today’s busy world, time is precious. We’re all juggling work, family, and personal commitments, leaving little room for hours spent scrubbing. That’s where these expert cleaning hacks come in. They’re designed to save you time, money, and energy, allowing you to reclaim your weekends and enjoy a cleaner, more comfortable home without the overwhelming effort. I’m excited to share these simple yet effective tricks that will transform your cleaning routine from a chore into a breeze. Get ready to discover the secrets to a sparkling home, effortlessly!
DIY Expert Cleaning Hacks: Transform Your Home with These Simple Tricks!
Hey there, fellow cleaning enthusiasts! I’m always on the lookout for ways to make cleaning easier, faster, and more effective. Over the years, I’ve stumbled upon some truly game-changing hacks that I’m excited to share with you. Get ready to ditch those harsh chemicals and embrace these clever, budget-friendly solutions!
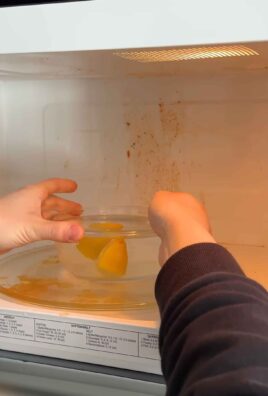
Cleaning Your Microwave Like a Pro
Microwaves can get incredibly grimy, incredibly fast. Splatters, spills, and baked-on food can make them a real eyesore. But fear not! This simple steam cleaning method will have your microwave sparkling in minutes.
What you’ll need:
* 1 cup of water
* 1/4 cup of white vinegar (or lemon juice)
* Microwave-safe bowl
* Sponge or cloth
Step-by-step instructions:
1. Prepare the cleaning solution: In your microwave-safe bowl, combine the water and vinegar (or lemon juice). The vinegar helps to loosen the grime, while the lemon juice adds a fresh scent.
2. Microwave the solution: Place the bowl in the microwave and heat it on high for 5-7 minutes. You want the solution to boil and create steam inside the microwave.
3. Let it sit: Once the timer goes off, don’t open the microwave door immediately! Let the steam work its magic for another 3-5 minutes. This will further loosen the stubborn food particles.
4. Wipe it clean: Carefully remove the bowl (it will be hot!). Use a sponge or cloth to wipe down the interior of the microwave. You’ll be amazed at how easily the grime comes off. For particularly stubborn spots, you might need to scrub a little harder.
5. Clean the turntable: Remove the turntable and wash it with warm, soapy water. Rinse thoroughly and dry before placing it back in the microwave.
Reviving Your Grout: Say Goodbye to Grime!
Dirty grout can make even the cleanest tiles look dingy. This simple paste will brighten your grout lines and restore them to their former glory.
What you’ll need:
* Baking soda
* Hydrogen peroxide
* Old toothbrush or grout brush
* Water (optional, for rinsing)
Step-by-step instructions:
1. Make the paste: In a small bowl, mix baking soda and hydrogen peroxide until you form a thick paste. The consistency should be similar to toothpaste.
2. Apply the paste: Using your fingers or a small spatula, apply the paste generously to the grout lines. Make sure to cover all the dirty areas.
3. Let it sit: Allow the paste to sit on the grout for at least 5-10 minutes. For heavily soiled grout, you can let it sit for up to 30 minutes.
4. Scrub the grout: Using an old toothbrush or grout brush, scrub the grout lines vigorously. You’ll see the grime start to lift away.
5. Rinse (optional): If desired, rinse the grout with water to remove any remaining paste. You can use a damp sponge or cloth to wipe away the residue.
6. Repeat if necessary: For particularly stubborn stains, you may need to repeat the process.
Unclogging Drains Naturally
Chemical drain cleaners can be harsh and harmful to the environment. This natural solution is just as effective and much safer.
What you’ll need:
* 1 cup of baking soda
* 1 cup of white vinegar
* Boiling water
Step-by-step instructions:
1. Pour in the baking soda: Pour one cup of baking soda down the drain.
2. Add the vinegar: Follow the baking soda with one cup of white vinegar.
3. Let it fizz: The mixture will start to fizz and bubble. Let it sit for 30 minutes. This chemical reaction helps to break down the clog.
4. Flush with boiling water: After 30 minutes, carefully pour a pot of boiling water down the drain. This will flush away the loosened debris.
5. Repeat if necessary: If the drain is still clogged, repeat the process. For particularly stubborn clogs, you may need to use a plunger after flushing with boiling water.
Cleaning Your Showerhead for Optimal Water Flow
Mineral buildup can clog your showerhead, reducing water pressure and making your showers less enjoyable. This simple soaking method will dissolve the buildup and restore your showerhead to its former glory.
What you’ll need:
* White vinegar
* Plastic bag
* Rubber band or twist tie
Step-by-step instructions:
1. Fill the bag with vinegar: Pour enough white vinegar into the plastic bag to completely submerge the showerhead.
2. Secure the bag: Place the bag over the showerhead, ensuring that the showerhead is fully immersed in the vinegar. Use a rubber band or twist tie to secure the bag to the shower arm.
3. Let it soak: Let the showerhead soak in the vinegar for at least 30 minutes, or preferably overnight. This will allow the vinegar to dissolve the mineral buildup.
4. Remove the bag: Carefully remove the bag and discard the vinegar.
5. Rinse the showerhead: Turn on the shower and let the water run for a few minutes to flush out any remaining vinegar and loosened debris.
6. Wipe clean: Use a cloth to wipe down the showerhead and remove any remaining residue.
Freshening Up Your Mattress
Mattresses can harbor dust mites, allergens, and odors. This simple cleaning method will freshen up your mattress and improve your sleep.
What you’ll need:
* Baking soda
* Essential oil (optional, for scent)
* Vacuum cleaner with upholstery attachment
* Sieve or shaker
Step-by-step instructions:
1. Strip the bed: Remove all bedding, including sheets, blankets, and pillows.
2. Sprinkle with baking soda: In a bowl, mix baking soda with a few drops of your favorite essential oil (optional). The baking soda will absorb odors and moisture, while the essential oil will add a fresh scent.
3. Apply the baking soda: Using a sieve or shaker, sprinkle a generous layer of baking soda over the entire surface of the mattress.
4. Let it sit: Allow the baking soda to sit on the mattress for at least 30 minutes, or preferably several hours. The longer it sits, the more effective it will be at absorbing odors and moisture.
5. Vacuum the mattress: Using a vacuum cleaner with an upholstery attachment, thoroughly vacuum the entire surface of the mattress. Make sure to get into all the nooks and crannies.
6. Flip the mattress: Flip the mattress over and repeat the process on the other side.
7. Put the bedding back on: Once you’ve vacuumed both sides of the mattress, put your clean bedding back on.
Cleaning Burnt Pots and Pans
Burnt food stuck to the bottom of pots and pans can be a nightmare to clean. This simple trick will loosen the burnt food and make it easy to scrub away.
What you’ll need:
* Water
* Baking soda
* Dish soap
* Scrubbing sponge or pad
Step-by-step instructions:
1. Fill the pot with water: Fill the burnt pot or pan with enough water to cover the burnt food.
2. Add baking soda: Add a generous amount of baking soda to the water (about 1-2 tablespoons).
3. Boil the mixture: Bring the water and baking soda mixture to a boil on the stovetop.
4. Simmer for 10-15 minutes: Let the mixture simmer for 10-15 minutes, stirring occasionally. This will help to loosen the burnt food.
5. Let it cool: Remove the pot from the heat and let it cool slightly.
6. Scrub the pot: Pour out the water and baking soda mixture. Add a squirt of dish soap to the pot and scrub the burnt food with a scrubbing sponge or pad. The burnt food should come off easily.
7. Rinse and dry: Rinse the pot thoroughly with water and dry it with a clean towel.
Removing Hard Water Stains from Faucets and Showerheads
Hard water stains can leave unsightly deposits on your faucets and showerheads. This simple vinegar soak will dissolve the mineral deposits and restore the shine.
What you’ll need:
* White vinegar
* Paper towels or cloth
* Spray bottle (optional)
Step-by-step instructions:
1. Soak paper towels in vinegar: Soak paper towels or a cloth in white vinegar.
2.
Conclusion
So, there you have it! This expert cleaning hack isn’t just another chore on your to-do list; it’s a game-changer that will revolutionize how you approach cleaning. We’ve walked you through the simple steps, highlighted the benefits, and hopefully, inspired you to ditch those harsh chemicals and embrace a more natural and effective cleaning solution.
Why is this DIY trick a must-try? Because it’s economical, eco-friendly, and incredibly effective. You’re saving money by using ingredients you likely already have in your pantry, reducing your environmental impact by avoiding harsh chemicals, and achieving sparkling clean results that rival, and often surpass, those of commercial cleaners. Think about it: no more battling stubborn stains with questionable ingredients, no more lingering chemical odors, and no more worrying about the impact on your family’s health or the planet. This is a win-win-win situation!
But the beauty of this expert cleaning hack lies in its versatility. Feel free to experiment and adapt it to your specific needs. For instance, if you’re dealing with particularly stubborn grime, consider adding a tablespoon of borax to the mixture for an extra cleaning boost. Or, if you prefer a different scent, swap out the lemon essential oil for lavender, tea tree, or eucalyptus – each offering its own unique cleaning and aromatic properties. You can even infuse vinegar with citrus peels for a more potent and fragrant cleaning solution. The possibilities are endless!
Don’t be afraid to get creative and tailor this cleaning solution to your preferences. The key is to find what works best for you and your home.
We’re confident that once you try this expert cleaning hack, you’ll be amazed by the results. It’s a simple, effective, and sustainable way to keep your home clean and healthy. So, gather your ingredients, follow the steps, and prepare to be amazed.
But don’t just take our word for it. We encourage you to try this DIY cleaning solution and share your experience with us. Let us know what variations you tried, what surfaces you cleaned, and what results you achieved. Your feedback is invaluable and will help us refine and improve this cleaning hack even further.
Share your before-and-after photos, your tips and tricks, and your overall impressions. Let’s create a community of clean-living enthusiasts who are passionate about finding natural and effective ways to keep our homes sparkling.
So, what are you waiting for? Embrace the power of this expert cleaning hack and transform your cleaning routine today! We can’t wait to hear about your success stories.
Frequently Asked Questions
What surfaces can I safely use this cleaning solution on?
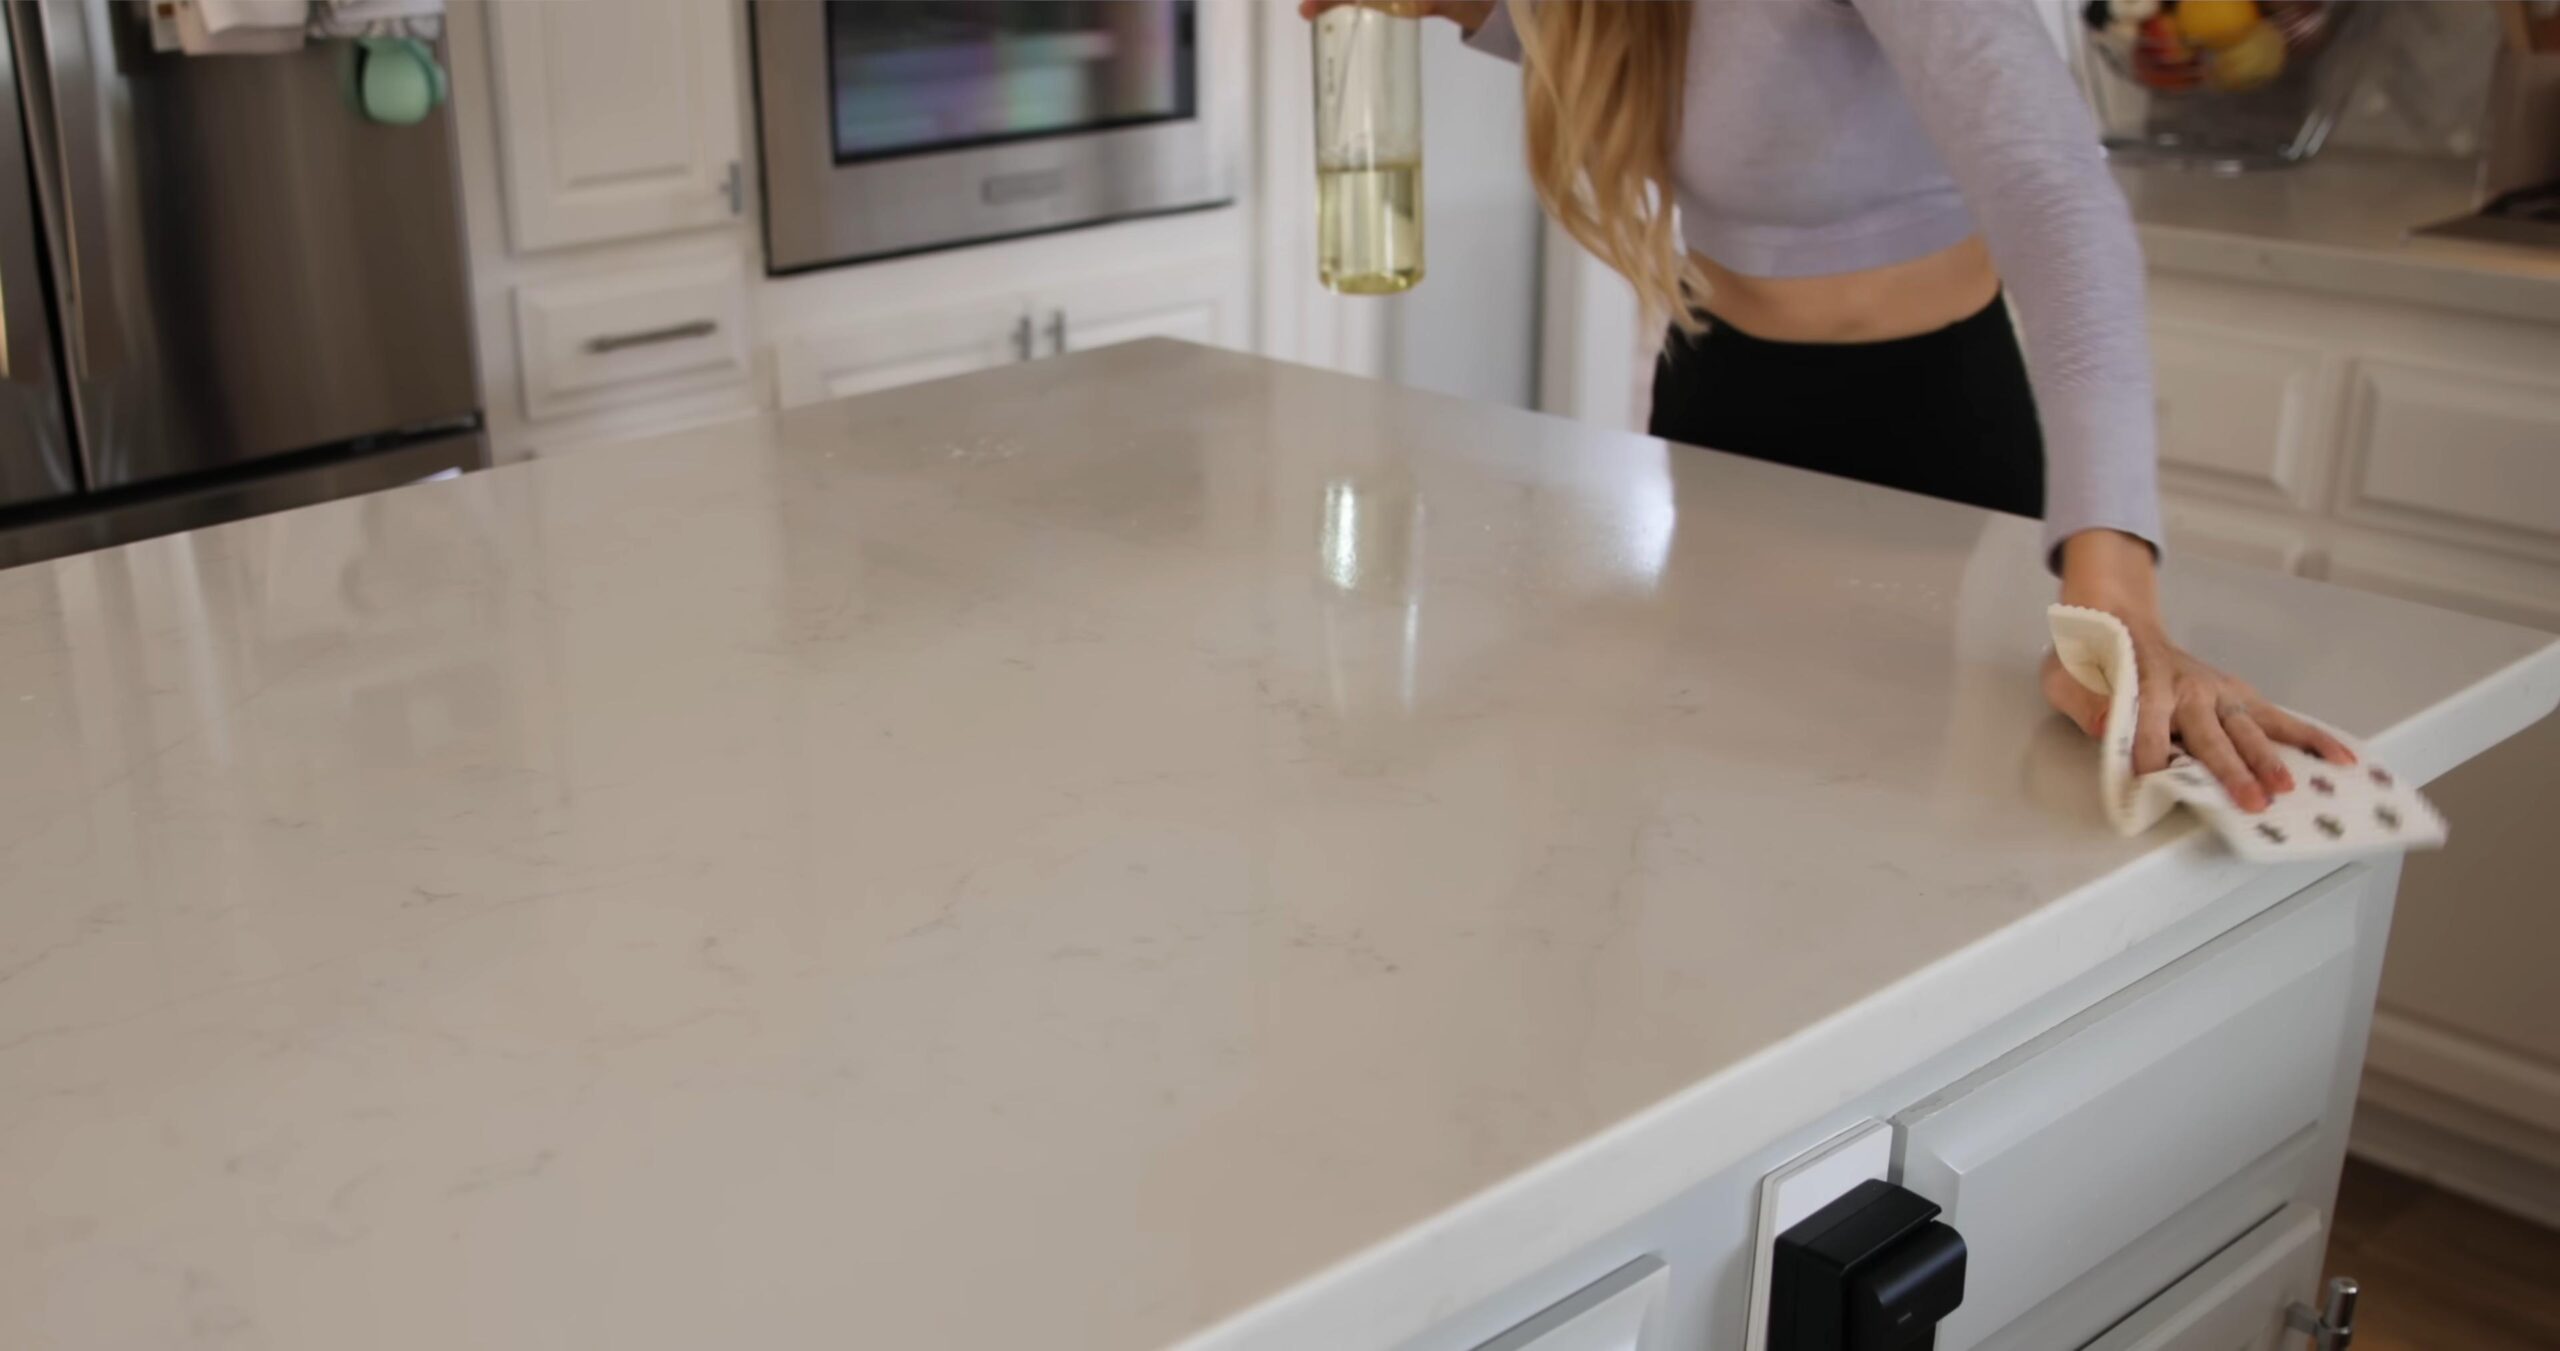
This DIY cleaning solution is generally safe for most non-porous surfaces, including countertops (granite, quartz, tile), sinks, bathtubs, toilets, floors (tile, linoleum, sealed hardwood), appliances, and windows. However, it’s always a good idea to test a small, inconspicuous area first, especially on delicate or antique surfaces. Avoid using it on marble, unsealed granite, or waxed wood, as the acidity of the vinegar can damage these materials. For wooden surfaces, ensure they are properly sealed and use a diluted solution.
Can I use this cleaning solution to clean my oven?
While this solution can be used to clean the interior of your oven, it’s best suited for light cleaning and maintenance. For heavily soiled ovens, you may need a stronger cleaning agent or a dedicated oven cleaner. To use this solution in your oven, first, remove any loose debris. Then, spray the interior surfaces with the cleaning solution and let it sit for 15-20 minutes. Finally, scrub with a sponge or brush and wipe clean with a damp cloth. Be sure to rinse thoroughly to remove any residue.
How long does this cleaning solution last?
This DIY cleaning solution is best used within a few weeks of making it. The essential oils can degrade over time, and the vinegar may lose some of its potency. To maximize its shelf life, store the solution in a cool, dark place in an airtight container. You can also add a small amount of vodka (about a tablespoon) to help preserve the solution and prevent bacterial growth. If the solution starts to smell off or becomes cloudy, it’s best to discard it and make a fresh batch.
Can I use different essential oils in this cleaning solution?
Absolutely! The beauty of this DIY cleaning solution is that you can customize it to your liking. While lemon essential oil is a popular choice for its cleaning and deodorizing properties, you can experiment with other essential oils to create different scents and benefits. Lavender essential oil is known for its calming and antibacterial properties, tea tree essential oil is a powerful disinfectant, and eucalyptus essential oil is great for clearing congestion and freshening the air. Just be sure to use pure, therapeutic-grade essential oils for the best results.
Is this cleaning solution safe for pets and children?
This DIY cleaning solution is generally considered safe for pets and children, as it’s made with natural ingredients. However, it’s still important to exercise caution and keep the solution out of reach of children and pets. Vinegar can be irritating if ingested, and some essential oils can be toxic to pets. If you have pets that are particularly sensitive to smells, you may want to use a diluted solution or choose essential oils that are known to be safe for animals, such as lavender or chamomile. Always supervise children when they are helping with cleaning and ensure they understand the importance of not ingesting the solution.
What if I don’t have essential oils? Can I still make this cleaning solution?
Yes, you can still make this cleaning solution without essential oils. The vinegar and water mixture alone is a powerful cleaning agent. The essential oils are primarily added for their scent and additional cleaning properties, but they are not essential for the solution to be effective. If you don’t have essential oils, simply omit them from the recipe. You can also add a few drops of lemon juice or other citrus juice for a natural scent.
How do I get rid of the vinegar smell?
The vinegar smell is a common concern when using vinegar-based cleaning solutions. However, the smell typically dissipates quickly after the surface dries. To minimize the vinegar smell, you can use a diluted solution, add essential oils, or open windows to ventilate the area. You can also wipe the surface with a damp cloth after cleaning to remove any lingering vinegar residue.
Can I use this cleaning solution on my car’s interior?
Yes, you can use this cleaning solution on your car’s interior, but with caution. Test a small, inconspicuous area first to ensure it doesn’t damage the material. Avoid using it on leather seats, as the vinegar can dry out the leather. For fabric seats, spray the solution lightly and wipe with a clean cloth. For hard surfaces like the dashboard and console, spray the solution onto a cloth and then wipe the surface. Avoid spraying directly onto electronic components.
What is the best way to store this cleaning solution?
The best way to store this cleaning solution is in a dark glass spray bottle. Glass is non-reactive and won’t leach chemicals into the solution, and the dark color helps protect the essential oils from light degradation. You can also use a plastic spray bottle, but make sure it’s made of a durable, food-grade plastic. Store the bottle in a cool, dark place away from direct sunlight and heat. Be sure to label the bottle clearly to avoid confusion.

Leave a Comment