

Grow Sweet Corn in Containers? Absolutely! Imagine stepping out onto your patio and harvesting fresh, juicy sweet corn – all grown in pots you nurtured yourself. It sounds like a dream, right? But trust me, it’s a dream within reach, even if you don’t have acres of land. For centuries, humans have cultivated corn, or maize, a staple crop deeply woven into the fabric of many cultures, particularly in the Americas. From ancient civilizations to modern-day gardens, corn has provided sustenance and cultural significance.
But what if you’re short on space? That’s where this DIY guide comes in! Many people believe growing corn requires vast fields, but I’m here to tell you that’s simply not true. With a few clever tricks and the right setup, you can successfully grow sweet corn in containers, bringing the taste of summer right to your doorstep. This article will provide you with all the essential tips and hacks to make your container corn-growing adventure a resounding success. Say goodbye to store-bought corn and hello to the satisfaction of harvesting your own homegrown sweetness!
Grow Your Own Sweet Corn in Containers: A Beginner’s Guide
Hey there, fellow gardening enthusiasts! Ever dreamed of biting into a juicy, homegrown ear of sweet corn, but thought you didn’t have the space? Well, I’m here to tell you that you absolutely can grow sweet corn, even if you only have a balcony or patio! Container gardening is the answer, and I’m going to walk you through every step of the process. It’s easier than you think, and the reward is incredibly delicious.
Choosing the Right Corn Variety
First things first, not all corn varieties are created equal when it comes to container gardening. You’ll want to choose a shorter, more compact variety. Here’s what to look for:
* Dwarf or Short-Stature Varieties: These are specifically bred to be smaller and more manageable in containers. Look for names like ‘On Deck’, ‘Golden Midget’, ‘Trinity’, or ‘Baby Corn’. These typically grow to be 4-5 feet tall, which is much more manageable than the 8-10 foot giants you might find in a field.
* Days to Maturity: Choose a variety with a shorter “days to maturity” (the time it takes from planting to harvest). This is especially important if you live in an area with a shorter growing season. Aim for varieties that mature in 60-80 days.
* Consider Disease Resistance: Look for varieties that are resistant to common corn diseases in your area. This will save you a lot of headaches down the road.
Gathering Your Supplies
Okay, now that we’ve picked our corn variety, let’s gather everything we need. Here’s a checklist:
* Large Containers: This is crucial! Corn needs plenty of space for its roots to grow. I recommend using containers that are at least 12-18 inches in diameter and 12 inches deep. The bigger, the better, really. Think large buckets, half-barrels, or even grow bags.
* High-Quality Potting Mix: Don’t use garden soil! It’s too heavy and compacts easily, which will suffocate the roots. Instead, opt for a well-draining potting mix specifically formulated for containers. I like to use a mix that contains peat moss, perlite, and vermiculite.
* Slow-Release Fertilizer: Corn is a heavy feeder, meaning it needs a lot of nutrients to grow properly. A slow-release fertilizer will provide a steady supply of nutrients over time. Look for a balanced fertilizer with an NPK ratio (nitrogen, phosphorus, potassium) of around 10-10-10 or 14-14-14.
* Watering Can or Hose: You’ll need a way to water your corn regularly. A watering can with a gentle rose head is ideal for young seedlings, while a hose with a spray nozzle is fine for mature plants.
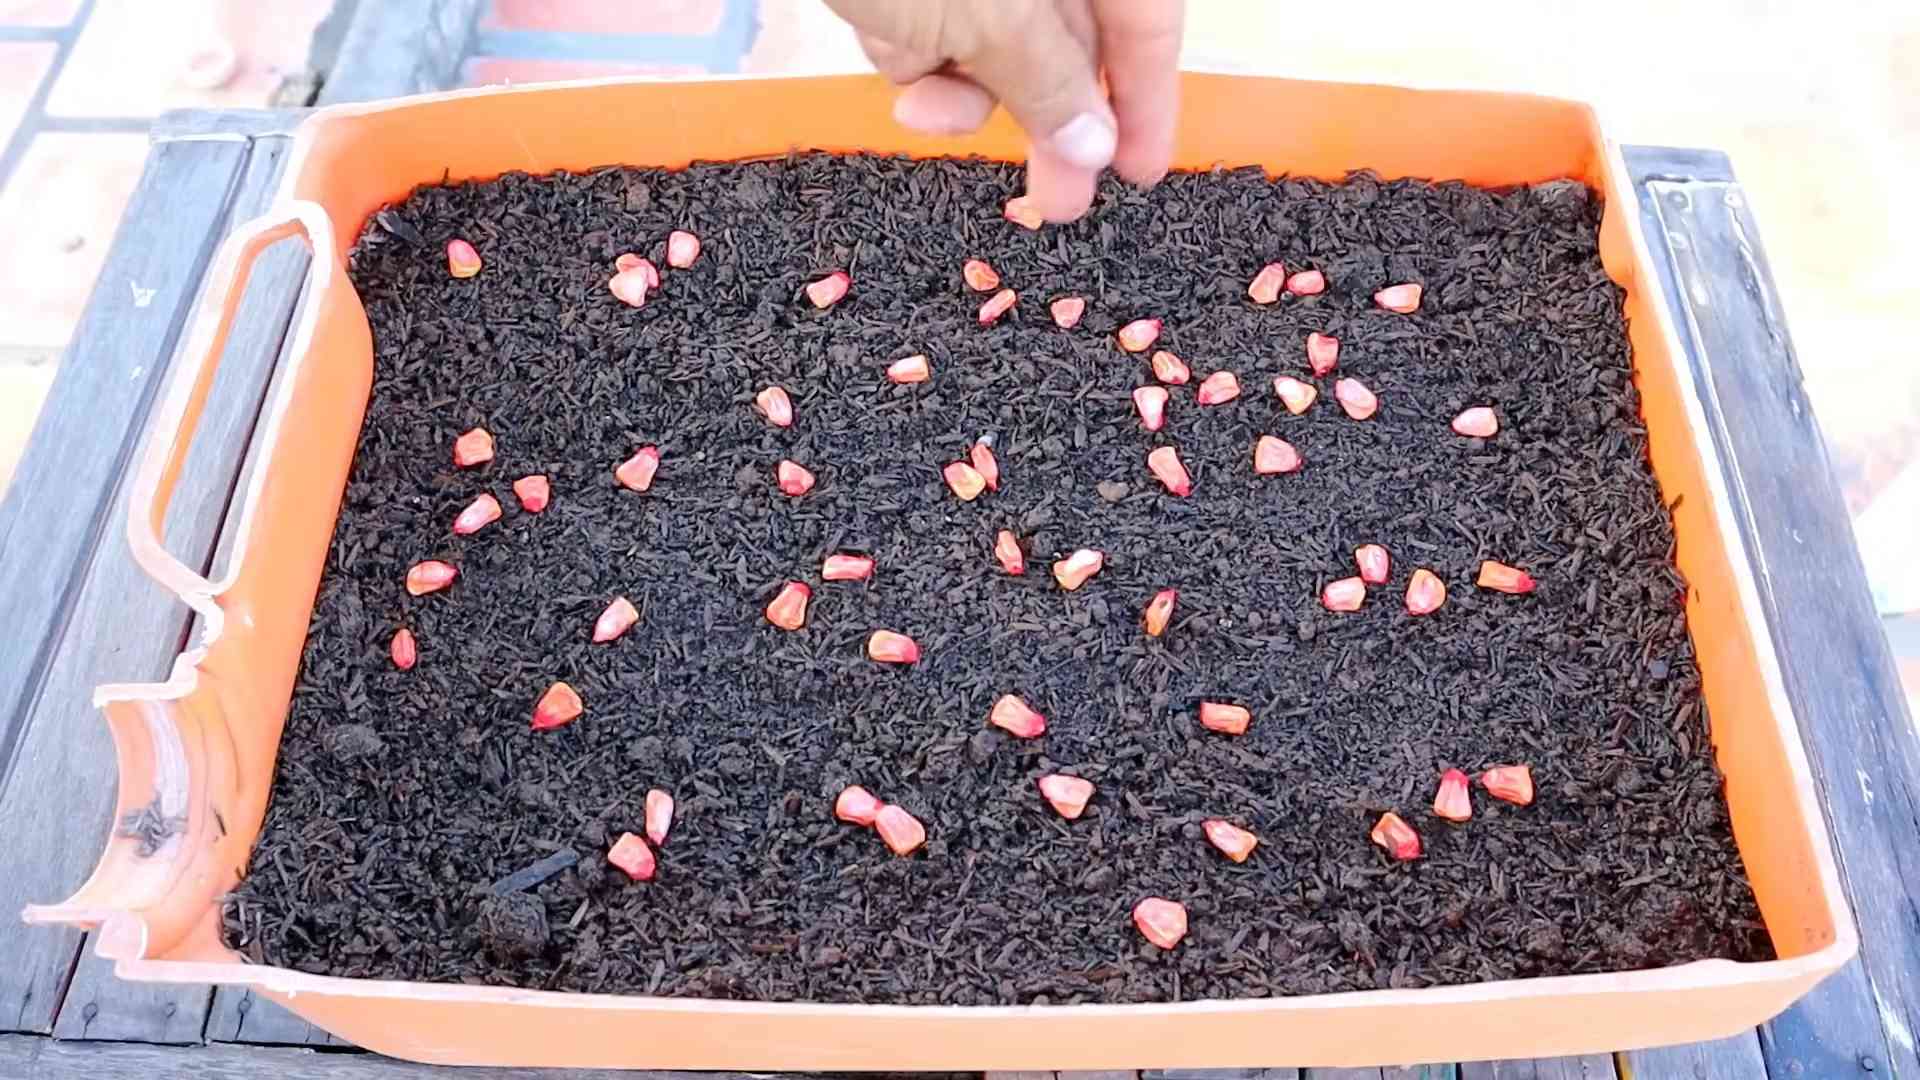
* Seeds: Of course! Make sure you’re using fresh, viable seeds.
* Optional:
* Mulch: Mulch helps retain moisture in the soil and suppress weeds. Straw, wood chips, or shredded bark are all good options.
* Stakes or Trellis: While dwarf varieties are more compact, they can still get top-heavy, especially in windy conditions. Stakes or a small trellis can provide extra support.
Planting Your Corn
Alright, let’s get our hands dirty! Here’s how to plant your sweet corn in containers:
1. Prepare the Containers: Fill your containers with potting mix, leaving about an inch or two of space at the top.
2. Add Slow-Release Fertilizer: Mix the slow-release fertilizer into the top few inches of the potting mix, following the instructions on the fertilizer package.
3. Sow the Seeds: Plant the corn seeds about 1-2 inches deep and 4-6 inches apart. I usually plant 3-4 seeds per container and then thin them out later, keeping the strongest seedling. Remember, corn is wind-pollinated, so planting multiple plants close together increases the chances of successful pollination.
4. Water Thoroughly: Gently water the soil until it’s evenly moist but not soggy.
5. Choose a Sunny Location: Corn needs at least 6-8 hours of direct sunlight per day. Place your containers in the sunniest spot you have.
6. Keep the Soil Moist: Water regularly, especially during hot, dry weather. The soil should be consistently moist but not waterlogged.
Caring for Your Corn
Now that your corn is planted, it’s time to nurture it and watch it grow! Here’s what you need to do:
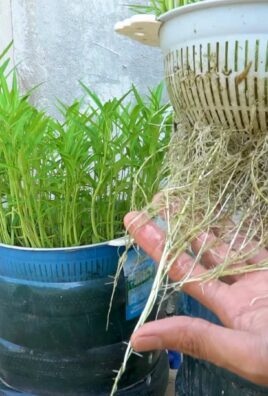
1. Thin the Seedlings: Once the seedlings are a few inches tall, thin them out to one plant per container (if you planted multiple seeds). Choose the strongest, healthiest-looking seedling and gently snip off the others at the soil line.
2. Water Regularly: As I mentioned before, corn needs consistent moisture. Check the soil moisture daily and water when the top inch feels dry to the touch. During hot weather, you may need to water more frequently.
3. Fertilize Regularly: Even with slow-release fertilizer, you may need to supplement with liquid fertilizer every few weeks, especially as the plants start to grow rapidly. Use a balanced liquid fertilizer, following the instructions on the package.
4. Provide Support: If your corn plants start to get top-heavy or are exposed to strong winds, provide support with stakes or a trellis. Gently tie the stalks to the stakes with soft twine.
5. Watch for Pests and Diseases: Keep an eye out for common corn pests like corn earworms, aphids, and spider mites. If you spot any pests, treat them with an appropriate insecticide or insecticidal soap. Also, watch for signs of diseases like corn smut or leaf blight. Remove any infected leaves or plants to prevent the disease from spreading.
6. Pollination Assistance (If Needed): Corn is wind-pollinated, but if you’re growing your corn in a sheltered location or the weather is calm, you may need to assist with pollination. When the tassels (the male flowers at the top of the plant) start to shed pollen, gently shake the plants to release the pollen. You can also collect the pollen in a paper bag and then dust it onto the silks (the female flowers that emerge from the developing ears of corn). Do this for a few days to ensure good pollination.
Harvesting Your Sweet Corn
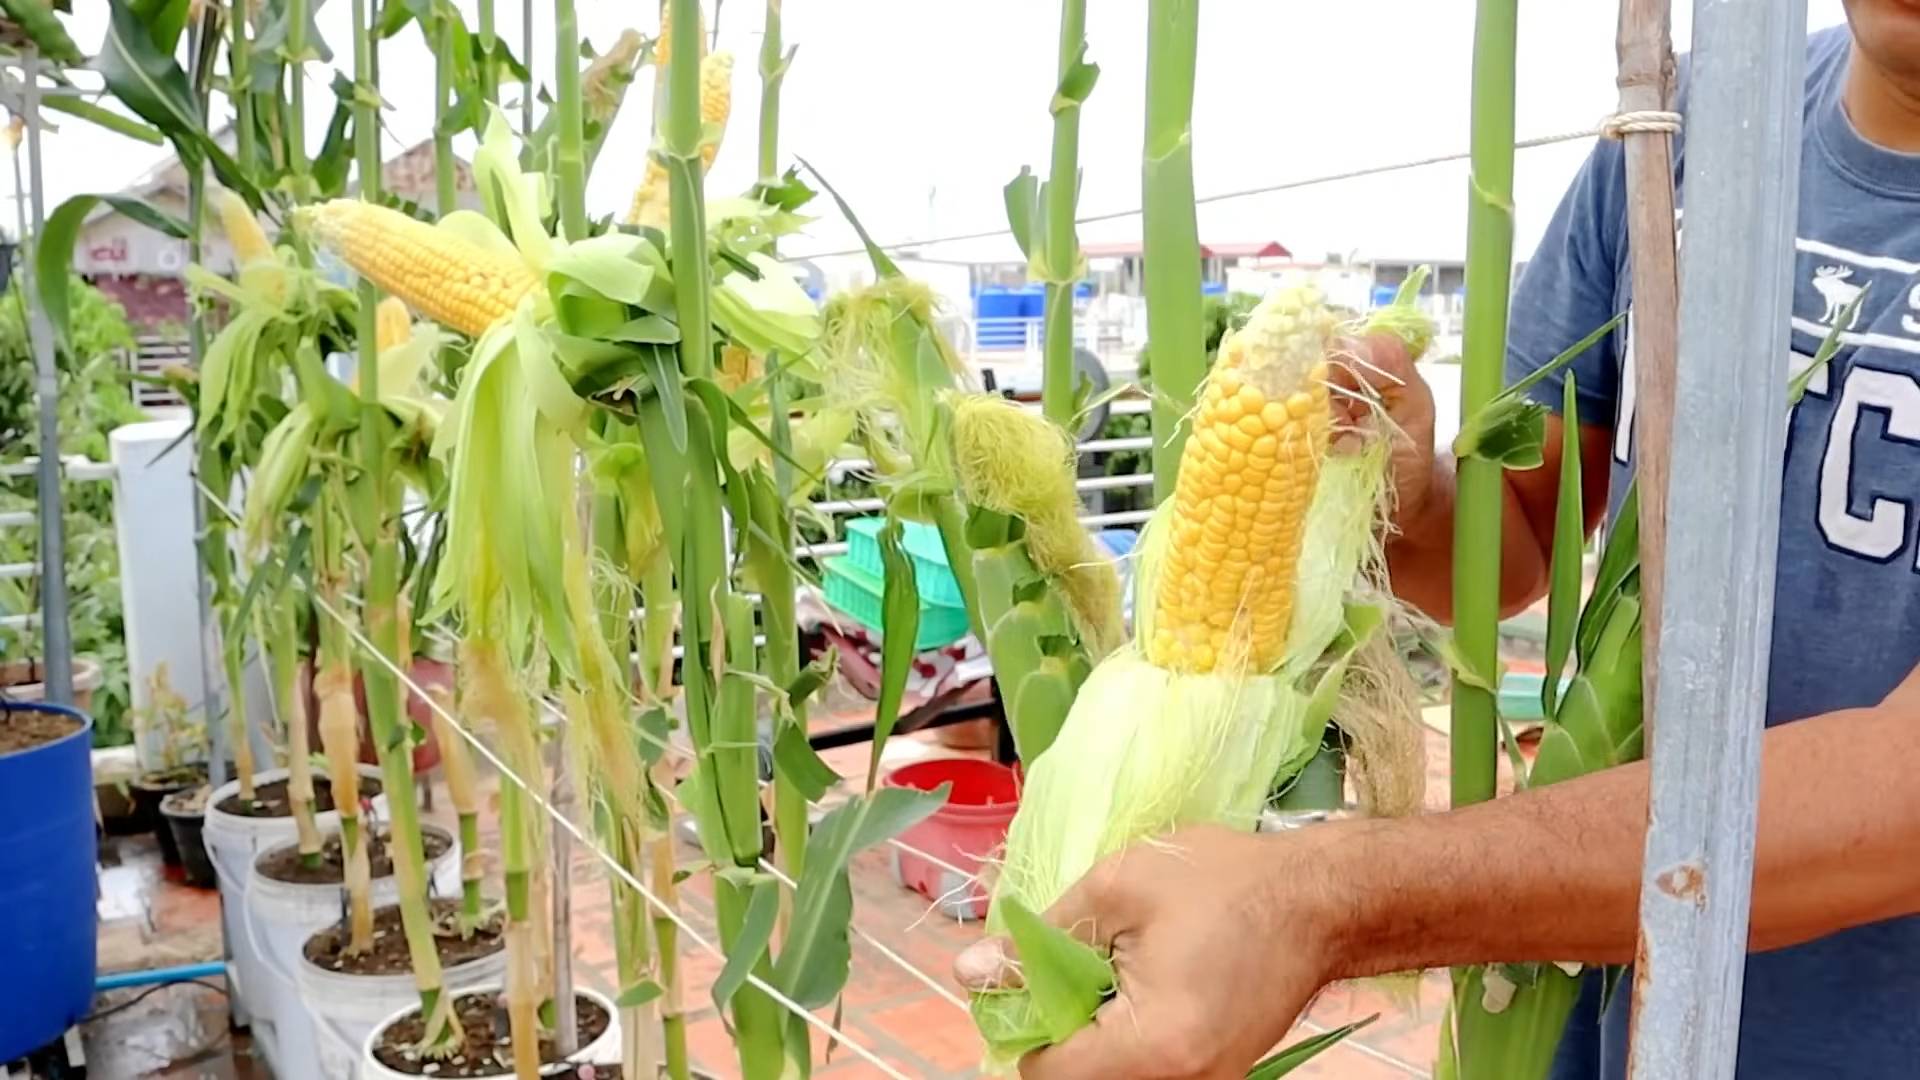
The moment we’ve all been waiting for! Harvesting your homegrown sweet corn is the most rewarding part of the process. Here’s how to know when it’s time to harvest:
1. Check the Silks: The silks should be brown and dry.
2. Feel the Ears: Gently feel the ears of corn. They should be plump and filled out.
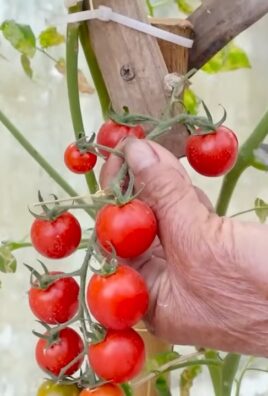
3. Test a Kernel: Carefully peel back a small portion of the husk and puncture a kernel with your fingernail. If the liquid that comes out is milky, the corn is ready to harvest. If it’s clear, it needs more time. If it’s thick and doughy, it’s overripe.
4. Harvest Carefully: To harvest, grasp the ear firmly and twist it downward. It should snap off easily from the stalk.
Enjoying Your Harvest
Congratulations! You’ve successfully grown sweet corn in containers. Now it’s time to enjoy the fruits (or rather, vegetables) of your labor.
* Eat it Fresh: Sweet corn is best eaten fresh, right after it’s harvested. You can grill it, boil it, steam it, or even eat it raw.
* Store it Properly: If you can’t eat all your corn right away, you can store it in the refrigerator for a few days. Wrap the ears tightly in plastic wrap or place them in a plastic bag.
* Freeze it for Later: To freeze sweet corn, blanch the ears in boiling water for a few minutes, then plunge them into ice water to stop the cooking process. Cut the kernels off the cob and freeze them in freezer bags or containers.
Troubleshooting
Even with the best planning, things can sometimes go wrong. Here are a few common problems you might encounter and how to fix them:
* Poor Pollination: If your corn ears are small and have missing kernels, it’s likely due to poor pollination. Try hand-pollinating the plants as described above.
* Stunted Growth: Stunted growth can be caused by a variety of factors, including lack of nutrients, poor drainage, or pests and diseases. Make sure you’re providing adequate fertilizer, watering properly, and addressing any pest or disease problems.
* Yellowing Leaves: Yellowing leaves can be a sign of nutrient deficiency, especially nitrogen. Try fertilizing with a nitrogen-rich fertilizer.
* Pests: As mentioned earlier, keep an eye out for common corn pests and treat them promptly.
Final Thoughts
Growing sweet corn in containers is a
Conclusion
So, there you have it! Growing sweet corn in containers might seem like a daunting task at first, but with a little planning and the right techniques, you can absolutely enjoy the taste of homegrown corn, even without a sprawling backyard. This DIY trick is a must-try for several compelling reasons.
First and foremost, it democratizes access to fresh, delicious sweet corn. No longer is this summer staple limited to those with acres of farmland. Apartment dwellers, balcony gardeners, and anyone with a sunny patio can now partake in the joy of harvesting their own ears of corn. Imagine stepping outside your door and picking the freshest, sweetest corn imaginable, knowing exactly where it came from and how it was grown. That’s the power of container gardening.
Secondly, growing sweet corn in containers offers a level of control that traditional gardening often lacks. You can meticulously manage the soil composition, ensuring it’s perfectly suited to your corn’s needs. You can easily monitor and adjust watering schedules, preventing both drought and overwatering. And you can protect your precious plants from pests and diseases with targeted interventions. This level of control translates to healthier, more productive plants and, ultimately, a more bountiful harvest.
Furthermore, this DIY project is incredibly rewarding. There’s something deeply satisfying about nurturing a plant from seed to harvest, especially when that plant yields such a delicious and versatile food. Watching your corn stalks grow tall and strong, and then finally plucking those golden ears, is an experience that connects you to nature and provides a sense of accomplishment.
But the benefits don’t stop there. Growing sweet corn in containers is also a fantastic learning opportunity. You’ll gain a deeper understanding of plant biology, soil science, and the intricacies of the growing process. You’ll become a more knowledgeable and confident gardener, ready to tackle new challenges and expand your horticultural horizons.
Now, let’s talk about variations. While the basic principles remain the same, you can certainly experiment with different aspects of this DIY project. Consider trying different varieties of sweet corn. Some varieties are specifically bred for container gardening and may be more compact and productive. You could also explore different container sizes and materials. Larger containers will generally support larger plants and higher yields, but smaller containers may be more manageable and easier to move.
Another variation to consider is companion planting. Planting certain herbs or flowers alongside your sweet corn can help deter pests, attract pollinators, and even improve the flavor of your corn. Marigolds, basil, and nasturtiums are all excellent companion plants for sweet corn.
Finally, don’t be afraid to get creative with your container design. Use colorful pots, add decorative elements, and create a visually appealing display that complements your outdoor space. Growing sweet corn in containers is not just about producing food; it’s also about enhancing your environment and adding a touch of beauty to your surroundings.
So, what are you waiting for? Grab some seeds, gather your supplies, and embark on this exciting gardening adventure. We’re confident that you’ll be amazed by the results. And once you’ve harvested your first batch of homegrown sweet corn, be sure to share your experience with us! We’d love to hear your tips, tricks, and success stories. Share your photos and comments on our social media pages, and let’s inspire others to discover the joy of growing sweet corn in containers. This **DIY trick** is a game changer for urban gardeners!
Frequently Asked Questions (FAQ)
1. What is the best variety of sweet corn to grow in containers?
Choosing the right variety is crucial for success. Look for dwarf or compact varieties specifically bred for container gardening. These varieties typically reach a shorter height and produce smaller ears, making them well-suited for limited spaces. Some popular choices include ‘On Deck’, ‘Golden Midget’, and ‘Trinity’. Read the seed packet carefully to determine the plant’s mature size and ensure it’s a good fit for your container. Consider also the days to maturity. Shorter days to maturity will allow you to harvest sooner.
2. How big should my container be for growing sweet corn?
Container size is critical. Sweet corn plants have extensive root systems and require ample space to thrive. A minimum container size of 12 inches in diameter and 12 inches deep is recommended for each plant. However, larger containers, such as 15-20 gallons, are even better, as they provide more room for root growth and help retain moisture. You can also use long rectangular containers to plant multiple corn stalks together, spacing them about 8-12 inches apart. Ensure the container has adequate drainage holes to prevent waterlogging.
3. What type of soil should I use for growing sweet corn in containers?
Sweet corn needs rich, well-draining soil. A good potting mix is essential. Avoid using garden soil, as it can become compacted in containers and hinder root growth. A mixture of potting soil, compost, and perlite or vermiculite is ideal. Compost provides essential nutrients, while perlite or vermiculite improves drainage and aeration. You can also add a slow-release fertilizer to the soil mix to provide a steady supply of nutrients throughout the growing season. Aim for a slightly acidic to neutral pH level (around 6.0 to 7.0).
4. How much sunlight does sweet corn need when grown in containers?
Sunlight is non-negotiable for sweet corn. These plants require at least 6-8 hours of direct sunlight per day to produce healthy stalks and plump ears. Choose a location that receives ample sunlight throughout the day. If you live in a particularly hot climate, some afternoon shade may be beneficial to prevent the plants from overheating. If you don’t have a naturally sunny spot, consider using grow lights to supplement the sunlight.
5. How often should I water sweet corn grown in containers?
Watering is crucial, especially during hot weather. Sweet corn plants are heavy drinkers and require consistent moisture. Water deeply whenever the top inch of soil feels dry to the touch. Avoid letting the soil dry out completely, as this can stress the plants and reduce yields. During hot, dry periods, you may need to water daily or even twice a day. Be sure to water at the base of the plant to avoid wetting the foliage, which can increase the risk of fungal diseases.
6. How do I pollinate sweet corn in containers?
Pollination is essential for ear development. Sweet corn is wind-pollinated, meaning that pollen from the tassels (the male flowers at the top of the plant) needs to reach the silks (the female flowers on the ears). In a container setting, natural wind pollination may be limited. To improve pollination, you can hand-pollinate your corn plants. Gently shake the tassels to release pollen, and then brush the pollen onto the silks. Repeat this process every day for several days to ensure adequate pollination. You can also cut the tassels and gently rub them on the silks.
7. How do I fertilize sweet corn in containers?
Fertilizing is important for healthy growth and ear production. Sweet corn is a heavy feeder and requires a steady supply of nutrients. In addition to incorporating slow-release fertilizer into the soil mix at planting time, you should also fertilize regularly throughout the growing season. Use a balanced fertilizer (e.g., 10-10-10) or a fertilizer specifically formulated for vegetables. Follow the instructions on the fertilizer label for application rates and frequency. You can also supplement with liquid fertilizer every few weeks.
8. How do I know when my sweet corn is ready to harvest?
Harvesting at the right time is key for optimal flavor. Sweet corn is typically ready to harvest about 20-25 days after the silks appear. The silks should be brown and dry, but still slightly moist. The ears should feel plump and full. To test for ripeness, gently peel back a portion of the husk and puncture a kernel with your fingernail. If the liquid that comes out is milky, the corn is ready to harvest. If the liquid is clear, the corn needs more time to mature. If the liquid is thick and pasty, the corn is overripe.
9. What are some common pests and diseases that affect sweet corn in containers?
Sweet corn can be susceptible to various pests and diseases. Common pests include corn earworms, aphids, and spider mites. Diseases include corn smut, rust, and leaf blight. Monitor your plants regularly for signs of infestation or disease. Treat infestations with insecticidal soap or neem oil. Prevent diseases by providing good air circulation, avoiding overhead watering, and removing any infected leaves or plants.
10. Can I grow sweet corn in containers indoors?
While it’s possible to grow sweet corn indoors, it’s challenging. Sweet corn requires a lot of sunlight, which can be difficult to provide indoors, even with grow lights. Additionally, indoor pollination can be tricky. If you want to try growing sweet corn indoors, choose a sunny location and use powerful grow lights. Be prepared to hand-pollinate your plants regularly. However, for best results, growing sweet corn in containers outdoors is generally recommended.
Leave a Comment