

Grow Angled Luffa at Home and unlock a world of homegrown goodness! Have you ever dreamt of strolling through your garden, plucking a fresh, naturally exfoliating sponge straight from the vine? It sounds like something out of a fairytale, right? Well, it doesn’t have to be! This DIY guide will empower you to cultivate your very own angled luffa, also known as Chinese okra, right in your backyard.
The angled luffa, with its distinctive ridges and delicious flavor, has been a staple in Asian cuisine for centuries. Beyond its culinary uses, it’s also revered for its incredible versatility as a natural sponge. Imagine the satisfaction of using a sponge you grew yourself – talk about sustainable living!
But why should you bother with this DIY project? In today’s world, we’re all looking for ways to connect with nature, reduce our reliance on mass-produced goods, and embrace a healthier lifestyle. Growing your own angled luffa allows you to do just that. Plus, it’s a fantastic conversation starter! Forget those synthetic sponges filled with chemicals; with a little effort, you can grow angled luffa at home and enjoy a truly natural and eco-friendly alternative. Let’s dive in and discover the secrets to a bountiful luffa harvest!
Grow Your Own Angled Luffa Sponges: A Step-by-Step Guide
Hey there, fellow gardening enthusiasts! Have you ever thought about growing your own sponges? I know, it sounds a little crazy, but it’s totally possible with angled luffa (also known as Chinese okra or silk gourd)! Not only is it a fun and rewarding project, but you’ll also end up with a sustainable and natural cleaning tool. I’m going to walk you through everything you need to know to successfully grow angled luffa at home.
What You’ll Need
Before we dive in, let’s gather all the necessary supplies. Trust me, having everything ready beforehand will make the process much smoother.
* **Angled Luffa Seeds:** You can find these online or at your local garden center. Make sure they are specifically angled luffa (Luffa acutangula) seeds.
* **Seed Starting Trays or Pots:** These will be used to germinate the seeds indoors.
* **Seed Starting Mix:** A light and well-draining mix is crucial for successful germination.
* **Larger Pots (if starting indoors):** You’ll need these to transplant the seedlings into before moving them outdoors. Aim for pots that are at least 6 inches in diameter.
* **Well-Draining Soil:** Luffa plants need rich, well-draining soil to thrive. Amend your garden soil with compost or aged manure.
* **Trellis or Support Structure:** Luffa vines are vigorous climbers and need a strong trellis to support their weight. This could be a fence, arbor, or a custom-built structure.
* **Fertilizer:** A balanced fertilizer (e.g., 10-10-10) or a fertilizer specifically formulated for vegetables will help your luffa plants grow strong and produce plenty of gourds.
* **Watering Can or Hose:** Consistent watering is key, especially during hot weather.
* **Gloves:** To protect your hands while working in the garden.
* **Pruning Shears or Scissors:** For trimming the vines and removing any dead or diseased foliage.
* **Patience:** Growing luffa takes time and effort, so be prepared to be patient!
Starting Your Luffa Seeds Indoors (Recommended)
Starting your luffa seeds indoors gives them a head start, especially if you live in an area with a shorter growing season. I highly recommend this method for the best results.
1. **Soak the Seeds:** Before planting, soak the luffa seeds in warm water for 24-48 hours. This helps to soften the hard outer shell and encourages germination. I usually put them in a small bowl of water on a sunny windowsill.
2. **Prepare the Seed Starting Trays:** Fill your seed starting trays or pots with seed starting mix. Moisten the mix thoroughly, but don’t let it become waterlogged.
3. **Plant the Seeds:** Plant the seeds about 1 inch deep in the seed starting mix. Place one or two seeds per cell or pot.
4. **Provide Warmth and Moisture:** Cover the trays or pots with a clear plastic lid or plastic wrap to create a humid environment. Place them in a warm location, ideally around 70-80°F (21-27°C). A heat mat can be helpful if your home is cooler.
5. **Monitor Germination:** Check the trays daily for germination. Luffa seeds typically germinate in 7-14 days. Once the seedlings emerge, remove the plastic cover and provide them with plenty of light.
6. **Provide Adequate Light:** Place the seedlings under grow lights or in a sunny window. If using a window, rotate the trays regularly to prevent the seedlings from becoming leggy.
7. **Water Regularly:** Keep the soil consistently moist, but not soggy. Water when the top inch of soil feels dry to the touch.
8. **Transplant to Larger Pots (If Necessary):** Once the seedlings have developed a few sets of true leaves, transplant them into larger pots (at least 6 inches in diameter) filled with well-draining potting mix. This will give them more room to grow before you transplant them outdoors.
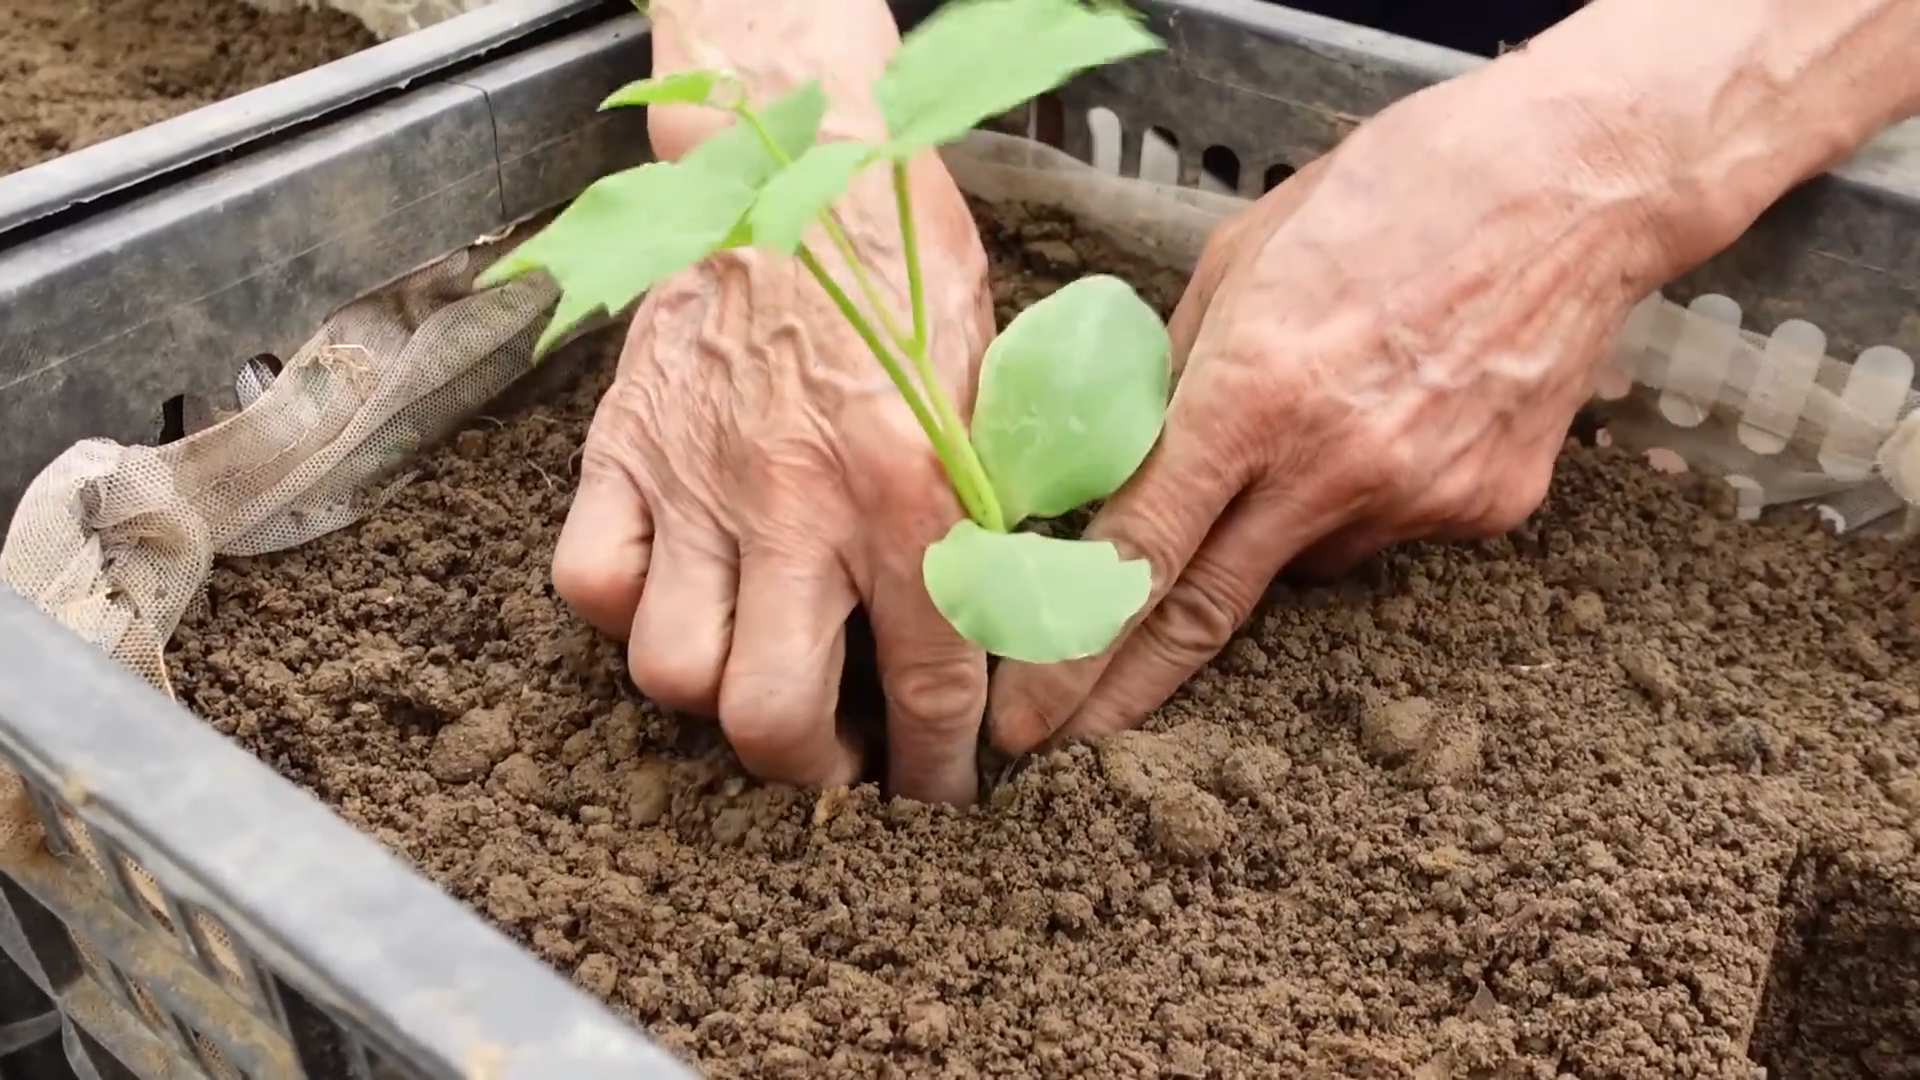
Transplanting Your Luffa Seedlings Outdoors
Once the weather warms up and the danger of frost has passed, it’s time to transplant your luffa seedlings outdoors. This is a crucial step, so make sure you do it carefully.
1. **Harden Off the Seedlings:** Before transplanting, you need to harden off the seedlings to acclimate them to outdoor conditions. This involves gradually exposing them to sunlight, wind, and cooler temperatures over a period of 7-10 days. Start by placing them outdoors for a few hours each day, gradually increasing the amount of time they spend outside.
2. **Prepare the Planting Site:** Choose a sunny location with well-draining soil. Amend the soil with compost or aged manure to improve its fertility and drainage.
3. **Install the Trellis:** Before planting, install a strong trellis or support structure for the luffa vines to climb on. Make sure the trellis is sturdy enough to support the weight of the mature vines and gourds.
4. **Plant the Seedlings:** Dig holes that are slightly larger than the root balls of the seedlings. Gently remove the seedlings from their pots and place them in the holes. Backfill with soil and water thoroughly. Space the plants about 2-3 feet apart.
5. **Mulch Around the Plants:** Apply a layer of mulch around the base of the plants to help retain moisture, suppress weeds, and regulate soil temperature.
Caring for Your Luffa Plants
Once your luffa plants are in the ground, it’s important to provide them with the care they need to thrive.
1. **Water Regularly:** Luffa plants need consistent watering, especially during hot weather. Water deeply and regularly, ensuring that the soil remains moist but not waterlogged.
2. **Fertilize Regularly:** Feed your luffa plants with a balanced fertilizer every 2-3 weeks. Follow the instructions on the fertilizer package. You can also use a fertilizer specifically formulated for vegetables.
3. **Prune the Vines:** Prune the vines to encourage branching and fruit production. Remove any dead or diseased foliage. You can also trim the tips of the vines to control their growth.
4. **Provide Support:** As the vines grow, train them to climb the trellis. Use twine or plant ties to secure the vines to the trellis if necessary.
5. **Watch Out for Pests and Diseases:** Luffa plants can be susceptible to pests such as aphids, squash bugs, and vine borers. Inspect your plants regularly and take action to control any pests or diseases that you find. Insecticidal soap or neem oil can be effective for controlling many common pests.
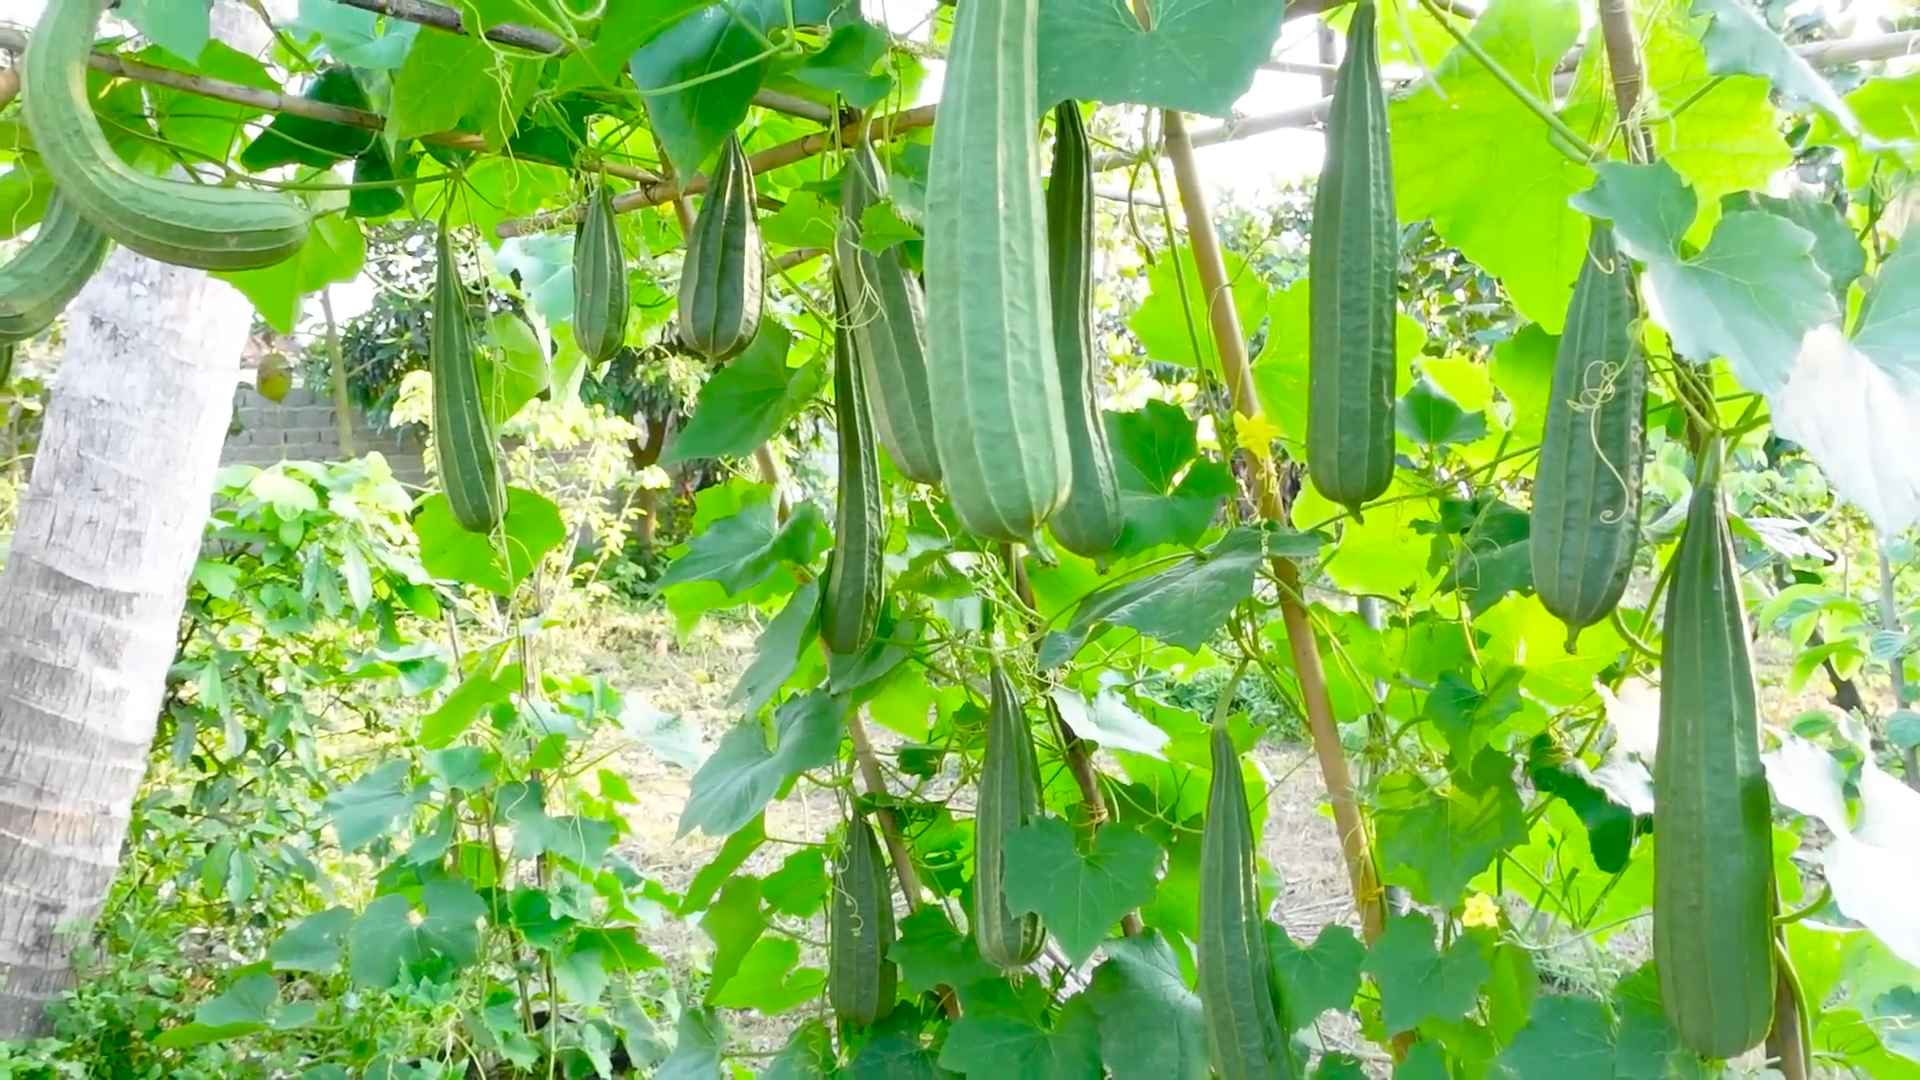
Harvesting and Processing Your Luffa Sponges
The most exciting part! Harvesting and processing your own luffa sponges is incredibly satisfying.
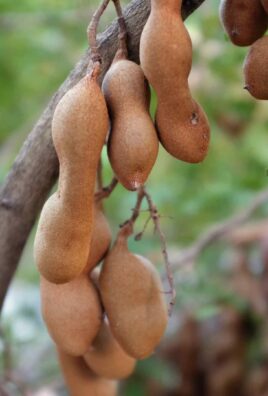
1. **Harvest When Mature:** The luffa gourds are ready to harvest when they turn yellow or brown and the skin becomes dry and brittle. You should be able to easily feel the fibers inside through the skin.
2. **Cut the Gourds from the Vine:** Use pruning shears or scissors to cut the gourds from the vine, leaving a few inches of stem attached.
3. **Peel the Skin:** To remove the skin, you can either soak the gourds in water for a few days to soften the skin, or you can simply peel it off with your hands. If soaking, the skin will become easier to remove. I usually just peel it off, it’s a bit messy but faster.
4. **Remove the Seeds:** Once the skin is removed, shake out the seeds. You can save these seeds for planting next year.
5. **Wash the Sponges:** Rinse the sponges thoroughly with water to remove any remaining pulp or debris.
6. **Dry the Sponges:** Allow the sponges to dry completely in a well-ventilated area. This may take several days or even weeks, depending on the humidity. You can hang them up to dry or place them on a wire rack.
7. **Bleach (Optional):** If you want to whiten your luffa sponges, you can soak them in a diluted bleach solution for a few minutes. Rinse them thoroughly with water after bleaching. I personally skip this step, as I prefer the natural color.
8. **Cut to Size:** Once the sponges are dry, you can cut them to the desired size and shape.
Tips for Success
Here are a few extra tips to help you succeed in growing your own angled luffa sponges:
* Start Early: Luffa plants have a long growing season, so it’s important to start your seeds early, especially if you live in a cooler climate.
* Provide Plenty of Sunlight: Luffa plants need at least 6-8 hours of sunlight per day.
* Choose a Strong Trellis: Luffa vines can become very heavy, so make sure your trellis is strong enough to support their weight.
*
Conclusion
So, there you have it! Growing angled luffa at home is not just a gardening project; it’s an investment in sustainable living, a creative outlet, and a rewarding experience that culminates in a truly unique and useful product. Forget those mass-produced, often chemically treated sponges from the store. Imagine the satisfaction of exfoliating your skin with a luffa you nurtured from seed to shower!
This DIY trick is a must-try for several compelling reasons. First, you gain complete control over the growing process, ensuring your luffa is free from harmful pesticides and herbicides. Second, you’re contributing to a more sustainable lifestyle by reducing your reliance on commercially produced goods and minimizing your environmental footprint. Third, it’s incredibly cost-effective. A single packet of seeds can yield multiple luffas, providing you with a year’s supply of natural sponges and even enough to share with friends and family. Finally, and perhaps most importantly, it’s a fascinating and educational experience that connects you with nature in a tangible way.
But the fun doesn’t stop there! Feel free to experiment with different varieties of luffa seeds to discover your favorite texture and size. You can also try companion planting to enhance growth and deter pests. Marigolds, for example, are known to repel nematodes and other unwanted insects. Consider adding a trellis or sturdy support system to maximize your luffa’s vertical growth potential.
Ready to embark on your luffa-growing adventure? Don’t be intimidated if you’re a beginner gardener. Angled luffa, while requiring some attention, is surprisingly resilient and forgiving. Start small, follow the steps outlined, and don’t be afraid to experiment. The key is to provide ample sunlight, consistent watering, and a sturdy support structure.
We encourage you to take the plunge and try growing angled luffa at home. Once you’ve harvested your first crop, be sure to share your experience with us! Post photos of your luffa plants and finished sponges on social media using #HomegrownLuffa or tag us in your posts. We’d love to see your progress and learn from your successes (and even your challenges!). Your insights can help inspire others to embrace this rewarding DIY project and discover the joys of growing their own natural sponges. Let’s cultivate a community of luffa lovers and spread the word about this amazing plant!
Variations and Further Exploration
Beyond the basic method, there are numerous ways to customize your luffa-growing experience. Consider these variations:
* Grafted Luffa: For advanced gardeners, grafting luffa onto a more vigorous rootstock can improve disease resistance and yield.
* Container Gardening: If you lack a large garden space, you can successfully grow luffa in large containers, ensuring adequate drainage and support.
* Seed Saving: Save seeds from your best-performing luffa plants to ensure a continuous supply for future growing seasons.
* Luffa Crafts: Explore the many creative uses for luffa beyond sponges, such as crafting decorative items, exfoliating soaps, or even natural scrubbers for your kitchen.
Embrace the Journey
Growing angled luffa at home is more than just a means to an end; it’s a journey of discovery, learning, and connection with nature. Embrace the challenges, celebrate the successes, and enjoy the satisfaction of creating something truly unique and sustainable.
Frequently Asked Questions (FAQ)
Q: How long does it take to grow angled luffa from seed to harvest?
A: The time from planting to harvest can vary depending on your climate and growing conditions, but generally, it takes around 120 to 150 days. You’ll need to start the seeds indoors about 6-8 weeks before the last expected frost in your area. Once the weather warms up and the risk of frost has passed, you can transplant the seedlings outdoors. Be patient, as luffa requires a long growing season to fully mature.
Q: What are the ideal growing conditions for angled luffa?
A: Angled luffa thrives in warm, sunny locations with well-drained soil. It needs at least 6-8 hours of direct sunlight per day. The soil should be rich in organic matter and have a slightly acidic to neutral pH (around 6.0 to 7.0). Consistent watering is crucial, especially during hot and dry periods. Providing a sturdy trellis or support system is essential, as luffa vines can grow quite long and heavy.
Q: How do I know when my angled luffa is ready to harvest?
A: The best time to harvest angled luffa is when the skin turns brown and dry, and the luffa feels lightweight. You should be able to hear the seeds rattling inside when you shake it. If you wait too long, the luffa will become too fibrous and difficult to process. If you harvest too early, the luffa may not be fully developed and will be less effective as a sponge.
Q: How do I process the angled luffa after harvesting?
A: Processing luffa involves removing the outer skin and seeds. First, soak the dried luffa in water for a few hours to soften the skin. Then, use your hands or a knife to peel off the skin. Once the skin is removed, shake out the seeds. You can save these seeds for future planting. Rinse the luffa thoroughly to remove any remaining debris. Finally, allow the luffa to dry completely in a well-ventilated area.
Q: Can I eat angled luffa?
A: Yes, young, immature angled luffa can be eaten. It’s often used in Asian cuisine, similar to zucchini or squash. However, once the luffa matures and becomes fibrous, it’s no longer suitable for consumption. Only the young, tender fruits are edible.
Q: What are some common problems when growing angled luffa, and how can I prevent them?
A: Some common problems include pests like squash bugs and vine borers, as well as diseases like powdery mildew. To prevent these issues, practice good garden hygiene, such as removing plant debris and weeds. You can also use organic pest control methods, such as insecticidal soap or neem oil. Ensure good air circulation to prevent powdery mildew. Crop rotation can also help to minimize soil-borne diseases.
Q: Can I grow angled luffa in containers?
A: Yes, you can grow angled luffa in containers, but you’ll need a large container (at least 20 gallons) to accommodate the plant’s extensive root system. Make sure the container has good drainage. Use a high-quality potting mix and provide a sturdy trellis or support system. Container-grown luffa may require more frequent watering and fertilization than those grown in the ground.
Q: How do I store angled luffa seeds for future planting?
A: To store luffa seeds, make sure they are completely dry. Place them in an airtight container, such as a glass jar or plastic bag. Store the container in a cool, dark, and dry place. Properly stored luffa seeds can remain viable for several years.
Q: What are the benefits of using a homegrown angled luffa sponge compared to a store-bought one?
A: Homegrown angled luffa sponges are a natural, sustainable, and biodegradable alternative to synthetic sponges. They are free from harmful chemicals and dyes. They provide excellent exfoliation and are gentle on the skin. Plus, growing your own luffa is a rewarding and educational experience. You know exactly where your sponge came from and how it was grown.
Q: What are some creative uses for angled luffa besides using it as a sponge?
A: Angled luffa has many creative uses beyond being a sponge. You can use it to make exfoliating soaps, bath mats, pot scrubbers, or even decorative items. The possibilities are endless! Let your creativity guide you and explore the many ways to utilize this versatile plant.
Q: How can I encourage more female flowers on my angled luffa vine?
A: Female flowers are essential for fruit production. To encourage more female flowers, ensure your luffa vine receives adequate sunlight, water, and nutrients. Avoid over-fertilizing with nitrogen, as this can promote excessive vegetative growth at the expense of flowering. You can also try pinching off the tips of the vines to encourage branching and more flower production. Some gardeners also recommend foliar feeding with a phosphorus-rich fertilizer to promote flowering.
Leave a Comment