

Clean bathroom, healthier home – it’s more than just a catchy phrase; it’s a fundamental truth! Let’s face it, our bathrooms are often the unsung heroes (or villains!) of our homes. They’re where we start and end our days, but they can also become breeding grounds for germs and bacteria if we’re not careful. Think about it: humidity, moisture, and constant use create the perfect environment for unwanted guests.
Historically, maintaining cleanliness has always been linked to well-being. From ancient Roman bathhouses to traditional cleansing rituals across cultures, the importance of hygiene is deeply ingrained in our history. Today, while we have modern plumbing and cleaning products, the core principle remains the same: a clean space promotes a healthier life.
But who has time for endless scrubbing and harsh chemicals? That’s where this DIY guide comes in! I’m going to share some simple, effective, and often surprising tricks to help you achieve a sparkling clean bathroom, healthier home without spending hours or breaking the bank. These aren’t just quick fixes; they’re sustainable habits that will transform your bathroom into a sanctuary of cleanliness and well-being. Get ready to ditch the grime and embrace a fresher, healthier you!

DIY Bathroom Cleaning Hacks for a Sparkling and Healthier Home
Okay, let’s face it, cleaning the bathroom isn’t exactly anyone’s favorite chore. But a clean bathroom is crucial for a healthy home and a happy you! I’m going to share some of my favorite DIY bathroom cleaning hacks that are not only effective but also use ingredients you probably already have in your pantry. Get ready to ditch those harsh chemicals and embrace a naturally clean and fresh bathroom!
The Power of Natural Cleaning: Why DIY?
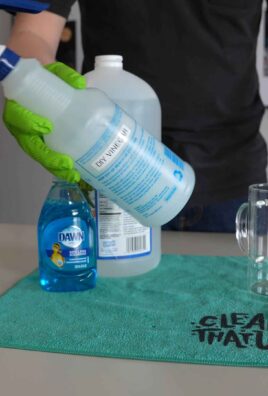
Before we dive into the nitty-gritty, let’s talk about why I’m such a big fan of DIY cleaning. Store-bought cleaners often contain harsh chemicals that can irritate your skin, lungs, and even contribute to indoor air pollution. Plus, they can be pretty expensive! DIY cleaning, on the other hand, is often cheaper, safer, and just as effective. We’re talking about using ingredients like vinegar, baking soda, lemon juice, and essential oils – all natural powerhouses that can tackle grime, mildew, and odors.
Essential DIY Cleaning Supplies
Before we get started, let’s gather our arsenal of natural cleaning supplies. Here’s what you’ll need:
* White Vinegar: This is your all-purpose cleaner, disinfectant, and deodorizer.
* Baking Soda: A gentle abrasive cleaner and deodorizer.
* Lemon Juice: A natural disinfectant and degreaser, plus it smells amazing!
* Essential Oils (optional): Tea tree, lavender, eucalyptus, and lemon are great for their antibacterial and antifungal properties, and they add a lovely scent.
* Spray Bottles: For mixing and applying your cleaning solutions.
* Microfiber Cloths: These are super absorbent and won’t leave streaks.
* Scrub Brush: For tackling tough stains and grime.
* Old Toothbrush: Perfect for cleaning grout and hard-to-reach areas.
* Rubber Gloves: To protect your hands.
* Squeegee: For keeping your shower doors and walls sparkling.
* Toilet Brush: An essential for obvious reasons!
Cleaning the Toilet: A Two-Step Approach
Let’s start with the toilet, the throne of the bathroom (pun intended!). I like to break this down into two phases: cleaning the bowl and cleaning the exterior.
Cleaning the Toilet Bowl
1. Flush the Toilet: Get rid of any, well, you know.
2. Pour in Baking Soda: Sprinkle about 1 cup of baking soda into the toilet bowl.
3. Add Vinegar: Slowly pour 2 cups of white vinegar into the bowl. It will fizz – that’s the magic happening!
4. Let it Sit: Allow the mixture to sit for at least 30 minutes, or even better, overnight. This gives the baking soda and vinegar time to break down stains and grime.
5. Scrub: Use your toilet brush to scrub the bowl thoroughly, paying attention to any stains or buildup.
6. Flush Again: Flush the toilet to rinse away the cleaning solution and any loosened debris.
7. Optional: Add Essential Oils: For a fresh scent, add a few drops of tea tree or lemon essential oil to the bowl after flushing.
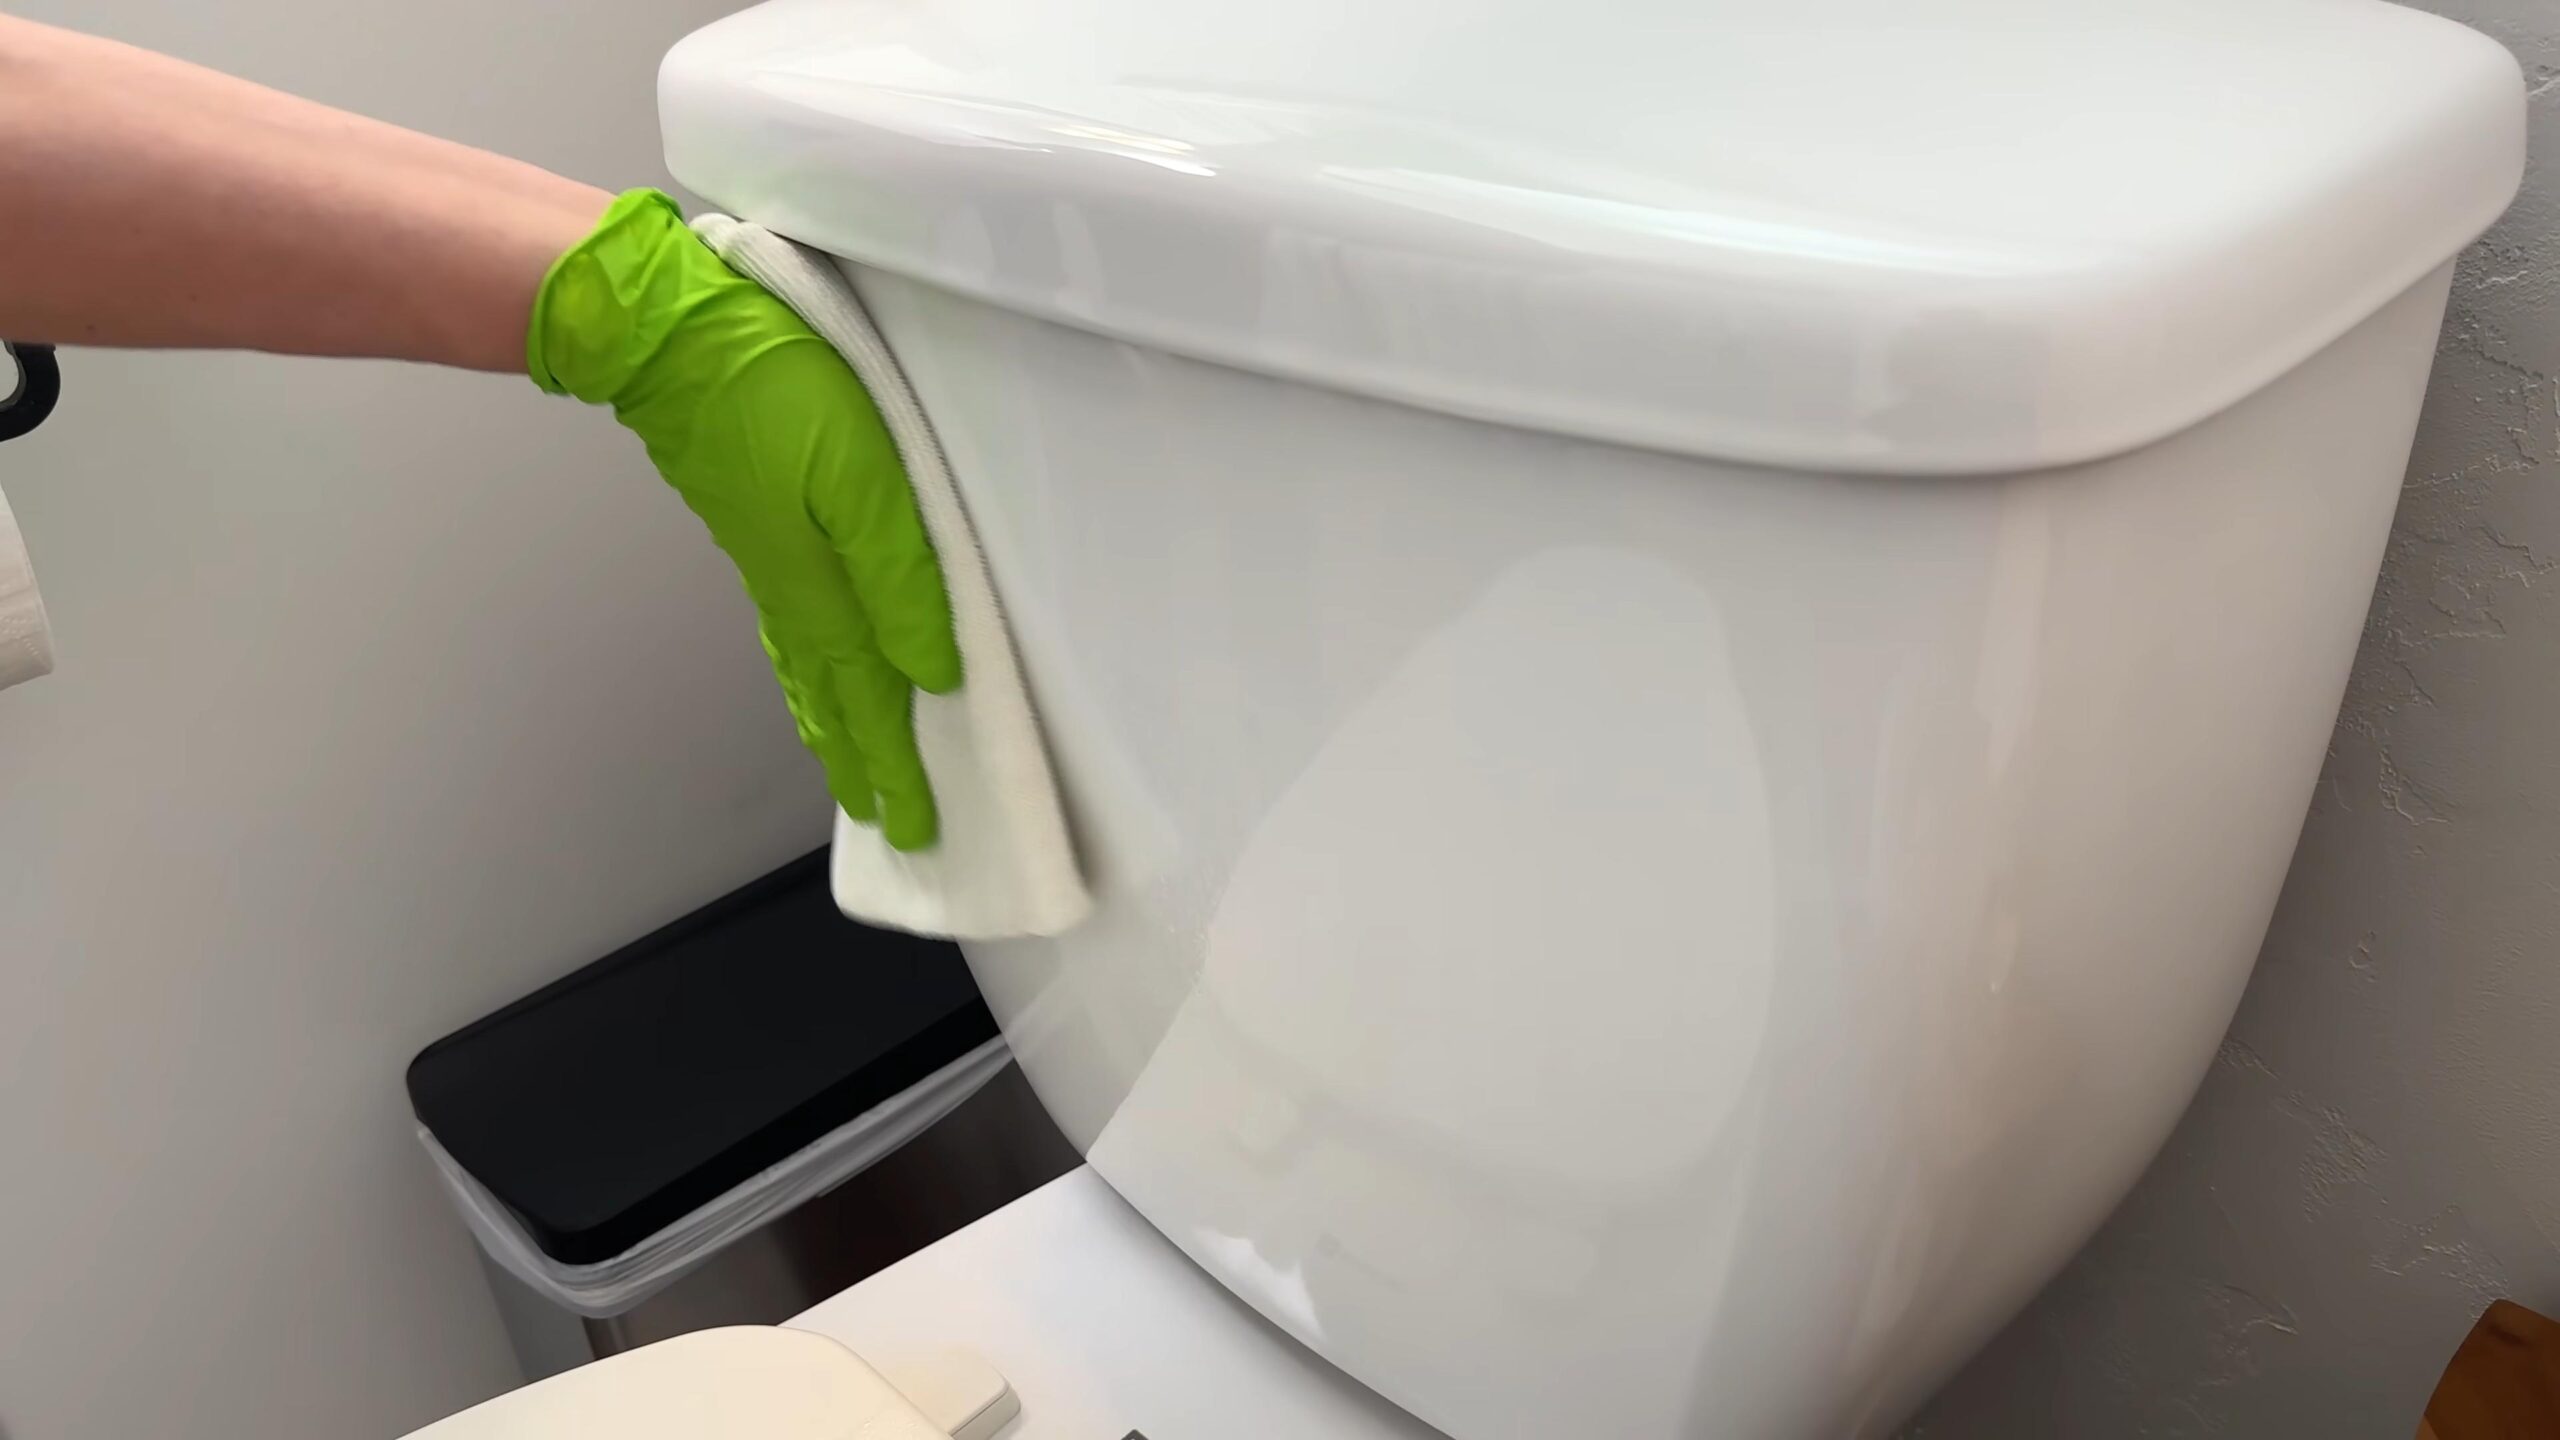
Cleaning the Toilet Exterior
1. Mix Your Cleaning Solution: In a spray bottle, mix equal parts white vinegar and water. You can add a few drops of your favorite essential oil for a pleasant scent.
2. Spray and Wipe: Spray the entire exterior of the toilet, including the seat, lid, tank, and base, with your cleaning solution.
3. Wipe Down: Use a microfiber cloth to wipe down all surfaces, making sure to get into all the nooks and crannies.
4. Dry: Use a clean, dry microfiber cloth to dry the toilet.
Shining the Shower and Tub: Banishing Soap Scum
Soap scum is the bane of every bathroom cleaner’s existence! But don’t worry, I’ve got a few tricks up my sleeve to tackle it naturally.
1. Vinegar Spray: Fill a spray bottle with undiluted white vinegar.
2. Warm the Vinegar (Optional): For extra cleaning power, you can warm the vinegar in the microwave for a minute or two before pouring it into the spray bottle. Be careful not to overheat it!
3. Spray the Shower/Tub: Generously spray the shower walls, tub, and shower door with the vinegar.
4. Let it Sit: Allow the vinegar to sit for at least 15-30 minutes to soften the soap scum.
5. Scrub: Use a scrub brush or sponge to scrub away the loosened soap scum. For stubborn areas, you can sprinkle some baking soda on the sponge for extra abrasive power.
6. Rinse: Rinse the shower and tub thoroughly with water.
7. Squeegee: Use a squeegee to remove excess water from the shower walls and door. This will help prevent future soap scum buildup.
8. Vinegar-Soaked Cloth for Showerhead: Fill a plastic bag with white vinegar and secure it around your showerhead with a rubber band, ensuring the showerhead is submerged in the vinegar. Let it soak overnight to dissolve mineral deposits. Remove the bag and run the shower to flush out any remaining vinegar.
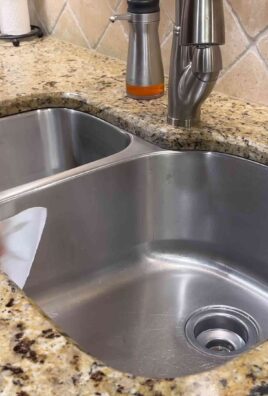
Sparkling Sinks and Countertops: A Simple Solution
Cleaning your sinks and countertops is a breeze with this simple DIY solution.
1. Mix Your Cleaning Solution: In a spray bottle, mix equal parts white vinegar and water. Add a few drops of your favorite essential oil for a pleasant scent.
2. Spray and Wipe: Spray the sink and countertops with your cleaning solution.
3. Wipe Down: Use a microfiber cloth to wipe down all surfaces, paying attention to any spills or stains.
4. Dry: Use a clean, dry microfiber cloth to dry the sink and countertops.
5. Baking Soda Paste for Stubborn Stains: For stubborn stains, make a paste of baking soda and water. Apply the paste to the stain, let it sit for a few minutes, and then scrub gently with a sponge or cloth. Rinse thoroughly.
Grout Cleaning: The Toothbrush Trick
Grout can be a breeding ground for mold and mildew, so it’s important to keep it clean. My favorite tool for this job is an old toothbrush!
1. Make a Baking Soda Paste: Mix baking soda with a little bit of water to create a thick paste.
2. Apply the Paste: Apply the baking soda paste to the grout lines.
3. Scrub: Use an old toothbrush to scrub the grout lines thoroughly.
4. Rinse: Rinse the grout lines with water.
5. Vinegar Spray for Mold: For moldy grout, spray the grout lines with white vinegar. Let it sit for a few minutes, then scrub with the toothbrush and rinse.
Mirror, Mirror on the Wall: Streak-Free Shine
Achieving a streak-free shine on your bathroom mirror is easier than you think!
1. Mix Your Cleaning Solution: In a spray bottle, mix equal parts white vinegar and water.
2. Spray the Mirror: Lightly spray the mirror with your cleaning solution.
3. Wipe with Microfiber Cloth: Use a clean, dry microfiber cloth to wipe the mirror in a circular motion.
4. Buff: Buff the mirror with a clean, dry microfiber cloth to remove any streaks.
Floor Cleaning: A Final Sweep
Don’t forget the floor! A clean floor is the finishing touch to a sparkling bathroom.
1. Sweep or Vacuum: Start by sweeping or vacuuming the floor to remove any loose dirt or debris.
2. Mix Your Cleaning Solution: In a bucket, mix 1/4 cup of white vinegar with 1 gallon of warm water.
3. Mop the Floor: Use a mop to clean the floor with your vinegar solution.
4. Rinse (Optional): If you prefer, you can rinse the floor with clean water after mopping.
5. Dry: Allow the floor to air dry or use a clean towel to dry it.
Preventative Measures: Keeping Your Bathroom Clean Longer
Cleaning is great, but prevention is even better! Here are a few tips to help keep your bathroom clean longer:
* Ventilate: Always run the exhaust fan during and after showers to reduce moisture and prevent mold growth.
* Squeegee After Showers: Use a squeegee to remove excess water from the shower walls and door after each shower.
* Wipe Down Surfaces: Wipe down sinks and countertops after each use to prevent water spots and buildup.
* Empty Trash Regularly: Empty the bathroom trash can regularly to prevent odors.
* Store Toiletries Properly: Store toiletries
Conclusion
So, there you have it! Transforming your bathroom into a sparkling sanctuary doesn’t require harsh chemicals or a hefty cleaning bill. This simple, yet incredibly effective DIY trick for a cleaner bathroom and healthier home is a game-changer. We’ve shown you how to harness the power of readily available ingredients to create a cleaning solution that’s not only effective but also environmentally conscious and gentle on your skin.
Why is this a must-try? Because it’s a win-win-win! You save money, reduce your exposure to potentially harmful chemicals, and achieve a level of clean that rivals, and often surpasses, store-bought products. Think about it: no more lingering chemical smells, no more worrying about harsh residues, and a bathroom that truly feels fresh and inviting.
But the beauty of this DIY approach lies in its adaptability. Feel free to experiment with variations to suit your specific needs and preferences. For instance, if you’re dealing with stubborn hard water stains, consider adding a splash of white vinegar to your solution. The acidity will help break down those mineral deposits with ease. Or, if you prefer a more fragrant cleaning experience, infuse your solution with a few drops of your favorite essential oil, like lavender for a calming effect or tea tree for its antibacterial properties. Just be sure to use essential oils safely and sparingly, especially if you have sensitivities or allergies.
Another variation to consider is the application method. While we’ve suggested using a spray bottle, you can also use a sponge or microfiber cloth for targeted cleaning. For grout, a small brush or even an old toothbrush can work wonders in scrubbing away grime and mildew. The key is to find what works best for you and your bathroom.
We understand that trying something new can sometimes feel daunting, but we urge you to give this DIY trick a try. The results speak for themselves, and we’re confident that you’ll be amazed at how easy and effective it is. Plus, you’ll be contributing to a healthier home environment for yourself and your family.
Don’t just take our word for it, though. We encourage you to experiment, adapt, and discover the magic of this simple cleaning solution for yourself. And most importantly, we want to hear about your experience! Share your tips, variations, and before-and-after photos with us in the comments below. Let’s create a community of clean bathroom enthusiasts who are passionate about creating healthier homes, one DIY trick at a time. Your insights could inspire others to ditch the harsh chemicals and embrace a more natural and effective way to clean. Together, we can make a difference, one sparkling bathroom at a time. So go ahead, give it a try, and let us know what you think! We can’t wait to hear from you.
Frequently Asked Questions (FAQ)
What exactly makes this DIY cleaning solution better than store-bought cleaners?
Store-bought cleaners often contain harsh chemicals like bleach, ammonia, and phthalates, which can be harmful to your health and the environment. These chemicals can irritate your skin, eyes, and respiratory system, and they can also contribute to indoor air pollution. Our DIY solution uses natural ingredients that are gentler on your body and the planet. Plus, you have complete control over what goes into your cleaner, allowing you to avoid any ingredients you’re sensitive to. It’s also significantly cheaper!
Is this DIY cleaner effective against mold and mildew?
Yes, the ingredients in this DIY cleaner, particularly if you incorporate tea tree oil or white vinegar, possess antifungal and antibacterial properties that can help combat mold and mildew. However, for severe mold infestations, it’s always best to consult with a professional mold remediation service. This DIY cleaner is more suitable for preventing and maintaining a mold-free environment. Regular cleaning with this solution can significantly reduce the likelihood of mold and mildew growth in your bathroom.
Can I use this cleaner on all bathroom surfaces?
While this cleaner is generally safe for most bathroom surfaces, it’s always a good idea to test it on an inconspicuous area first, especially on delicate surfaces like natural stone (marble, granite) or certain types of painted surfaces. The acidity of vinegar, if used, can potentially etch or damage these surfaces. For natural stone, a milder solution with less vinegar or a pH-neutral cleaner is recommended. Always err on the side of caution and test before applying liberally.
How often should I use this DIY cleaner in my bathroom?
The frequency of cleaning depends on how often you use your bathroom and how quickly it gets dirty. As a general guideline, aim to clean your bathroom at least once a week. For high-traffic bathrooms or those prone to moisture buildup, you may need to clean more frequently, perhaps two or three times a week. Regular cleaning with this DIY solution will help prevent the buildup of soap scum, hard water stains, and mold, making your bathroom easier to maintain in the long run.
What if I don’t have all the ingredients listed in the recipe? Can I substitute anything?
The beauty of DIY is its flexibility! While the core ingredients are important, you can often make substitutions based on what you have on hand. For example, if you don’t have tea tree oil, you can substitute it with another essential oil known for its antibacterial properties, such as eucalyptus or lemon. If you don’t have distilled water, you can use tap water, but be aware that it may contain minerals that can leave spots on surfaces. In that case, boiling and cooling the tap water before use can help reduce mineral content.
How long does this DIY cleaning solution last?
Because this solution doesn’t contain any preservatives, it’s best to use it within a week or two. Over time, the ingredients may start to separate or lose their effectiveness. To maximize its shelf life, store the solution in a cool, dark place in an airtight container. If you notice any changes in color, odor, or consistency, it’s best to discard the solution and make a fresh batch. Making a new batch is quick and easy, so it’s always better to err on the side of caution.
Is this DIY cleaner safe to use around children and pets?
While this DIY cleaner is generally safer than store-bought cleaners, it’s still important to exercise caution when using it around children and pets. Keep the solution out of their reach and avoid spraying it directly on them. If they accidentally ingest the solution, contact a poison control center or veterinarian immediately. Even though the ingredients are natural, they can still cause irritation or discomfort if ingested in large quantities. Always supervise children when they are helping with cleaning and teach them about the importance of handling cleaning products safely.
Can I use this cleaner on my shower doors to remove soap scum?
Absolutely! This DIY cleaner is excellent for removing soap scum from shower doors. For best results, spray the solution generously on the shower doors and let it sit for a few minutes to allow the ingredients to break down the soap scum. Then, scrub the doors with a sponge or microfiber cloth and rinse thoroughly with water. For stubborn soap scum, you may need to repeat the process or use a slightly more abrasive scrubber. Regular cleaning with this solution will help prevent soap scum from building up in the first place, making your shower doors easier to keep clean.
Leave a Comment