

DIY Vertical Vegetable Garden: Imagine stepping outside your door and plucking fresh, sun-ripened tomatoes or crisp lettuce leaves for your salad, all grown in a space-saving, visually stunning garden you built yourself! That’s the magic of a DIY vertical vegetable garden, and I’m here to show you how to create one, even if you have limited space or gardening experience.
Vertical gardening isn’t a new fad; its roots can be traced back to ancient civilizations, like the Hanging Gardens of Babylon, one of the Seven Wonders of the Ancient World. While we might not be building anything quite so grand, the principle remains the same: maximizing space and bringing the beauty and bounty of nature closer to home. In modern times, vertical gardening has seen a resurgence, driven by a desire for fresh, locally sourced food and a growing awareness of sustainable living.
Why do you need this DIY trick in your life? Well, think about it: are you tired of tasteless supermarket vegetables? Do you dream of having a garden but lack the yard space? Or perhaps you simply want to add a unique and eye-catching feature to your balcony or patio. A DIY vertical vegetable garden solves all these problems and more! It’s a fantastic way to grow your own organic produce, beautify your surroundings, and even reduce your carbon footprint. Plus, it’s a fun and rewarding project that anyone can tackle. So, let’s get started and transform your small space into a thriving edible oasis!
DIY Vertical Vegetable Garden: Grow Up, Not Out!
Hey there, fellow garden enthusiasts! Are you dreaming of fresh veggies but short on space? Don’t worry, I’ve got you covered! I’m going to walk you through building your very own vertical vegetable garden. It’s a fantastic way to maximize your yield, add a touch of green to a small balcony or patio, and even create a stunning living wall. Let’s get our hands dirty!
What You’ll Need
Before we dive in, let’s gather our supplies. This project is customizable, so feel free to adapt it to your space and preferences. Here’s a general list to get you started:
* **Wooden Pallet:** Look for a sturdy, untreated pallet. Check for the “HT” stamp, which indicates heat treatment and is safe for gardening. Avoid pallets marked “MB,” which means they were treated with methyl bromide, a harmful pesticide. You can often find these for free at local businesses or online marketplaces.
* **Heavy-Duty Landscape Fabric:** This will line the pallet and create pockets for your soil.
* **Staple Gun and Staples:** Essential for securing the landscape fabric.
* **Potting Soil:** Choose a high-quality potting mix specifically formulated for vegetables.
* **Vegetable Seedlings or Seeds:** Select compact varieties like herbs, lettuce, strawberries, spinach, or dwarf tomatoes.
* **Gloves:** Protect your hands from splinters and dirt.
* **Measuring Tape:** For accurate fabric cutting.
* **Scissors or Utility Knife:** For cutting the landscape fabric.
* **Sandpaper (Optional):** To smooth out any rough edges on the pallet.
* **Exterior Wood Stain or Paint (Optional):** To protect and beautify your pallet.
* **Drill and Screws (Optional):** If you want to reinforce the pallet or add a watering system.
* **Watering Can or Hose:** For watering your plants.
Preparing the Pallet
This is a crucial step to ensure your vertical garden is safe and long-lasting.
1. **Inspect the Pallet:** Carefully examine the pallet for any loose nails, splinters, or damage. Remove any loose nails with a hammer and pliers.
2. **Sand the Pallet (Optional):** If the pallet has rough edges or splinters, use sandpaper to smooth them out. This will make it safer to handle and prevent injuries.
3. **Clean the Pallet:** Use a brush and soapy water to clean the pallet thoroughly. Rinse it well and let it dry completely. This will remove any dirt, debris, or potential contaminants.
4. **Stain or Paint the Pallet (Optional):** If you want to protect the pallet from the elements and give it a more polished look, apply an exterior wood stain or paint. Choose a color that complements your outdoor space. Let it dry completely before moving on to the next step. I personally love a natural wood stain to show off the pallet’s character.
Creating the Planting Pockets
This is where the magic happens! We’ll transform the pallet into a series of individual planting pockets.
1. **Measure the Pallet Openings:** Use a measuring tape to determine the dimensions of the openings between the pallet slats. These openings will become our planting pockets.
2. **Cut the Landscape Fabric:** Cut the landscape fabric into pieces that are large enough to line each opening and create a pocket. You’ll need to account for overlapping the fabric to create a secure bottom and sides. A good rule of thumb is to add about 6-8 inches to both the width and height of each opening measurement. For example, if an opening is 12 inches wide and 8 inches high, cut the fabric to 18-20 inches wide and 14-16 inches high.
3. **Line the Bottom Row:** Start with the bottom row of openings. Fold the landscape fabric in half, creating a double layer for extra strength. Place the folded edge at the bottom of the opening and staple the fabric to the inside of the pallet frame, creating a secure bottom for the pocket. Make sure the staples are close together to prevent the soil from leaking out.
4. **Secure the Sides:** Fold the sides of the landscape fabric inward, creating a pocket shape. Staple the sides to the inside of the pallet frame, again ensuring the staples are close together. You want to create a sturdy, watertight pocket that can hold the soil and plants.
5. **Repeat for Remaining Rows:** Repeat steps 3 and 4 for each row of openings, working your way up the pallet. Make sure each pocket is securely lined and can hold a good amount of soil. I like to double-check each pocket by gently pressing on it to make sure it’s strong and won’t tear.
6. **Reinforce the Bottom (Optional):** For extra support, especially for heavier plants like tomatoes, you can add an extra layer of landscape fabric to the bottom of each pocket. This will help prevent the fabric from sagging or tearing under the weight of the soil and plants.
Planting Your Vertical Garden
Now for the fun part – bringing your garden to life!
1. **Fill the Pockets with Potting Soil:** Carefully fill each pocket with high-quality potting soil. Leave about an inch or two of space at the top to prevent the soil from spilling out when you water. Gently pat down the soil to remove any air pockets.
2. **Choose Your Plants:** Select vegetable seedlings or seeds that are suitable for vertical gardening. Compact varieties like herbs, lettuce, strawberries, spinach, and dwarf tomatoes are excellent choices. Consider the amount of sunlight your garden will receive and choose plants that thrive in those conditions.
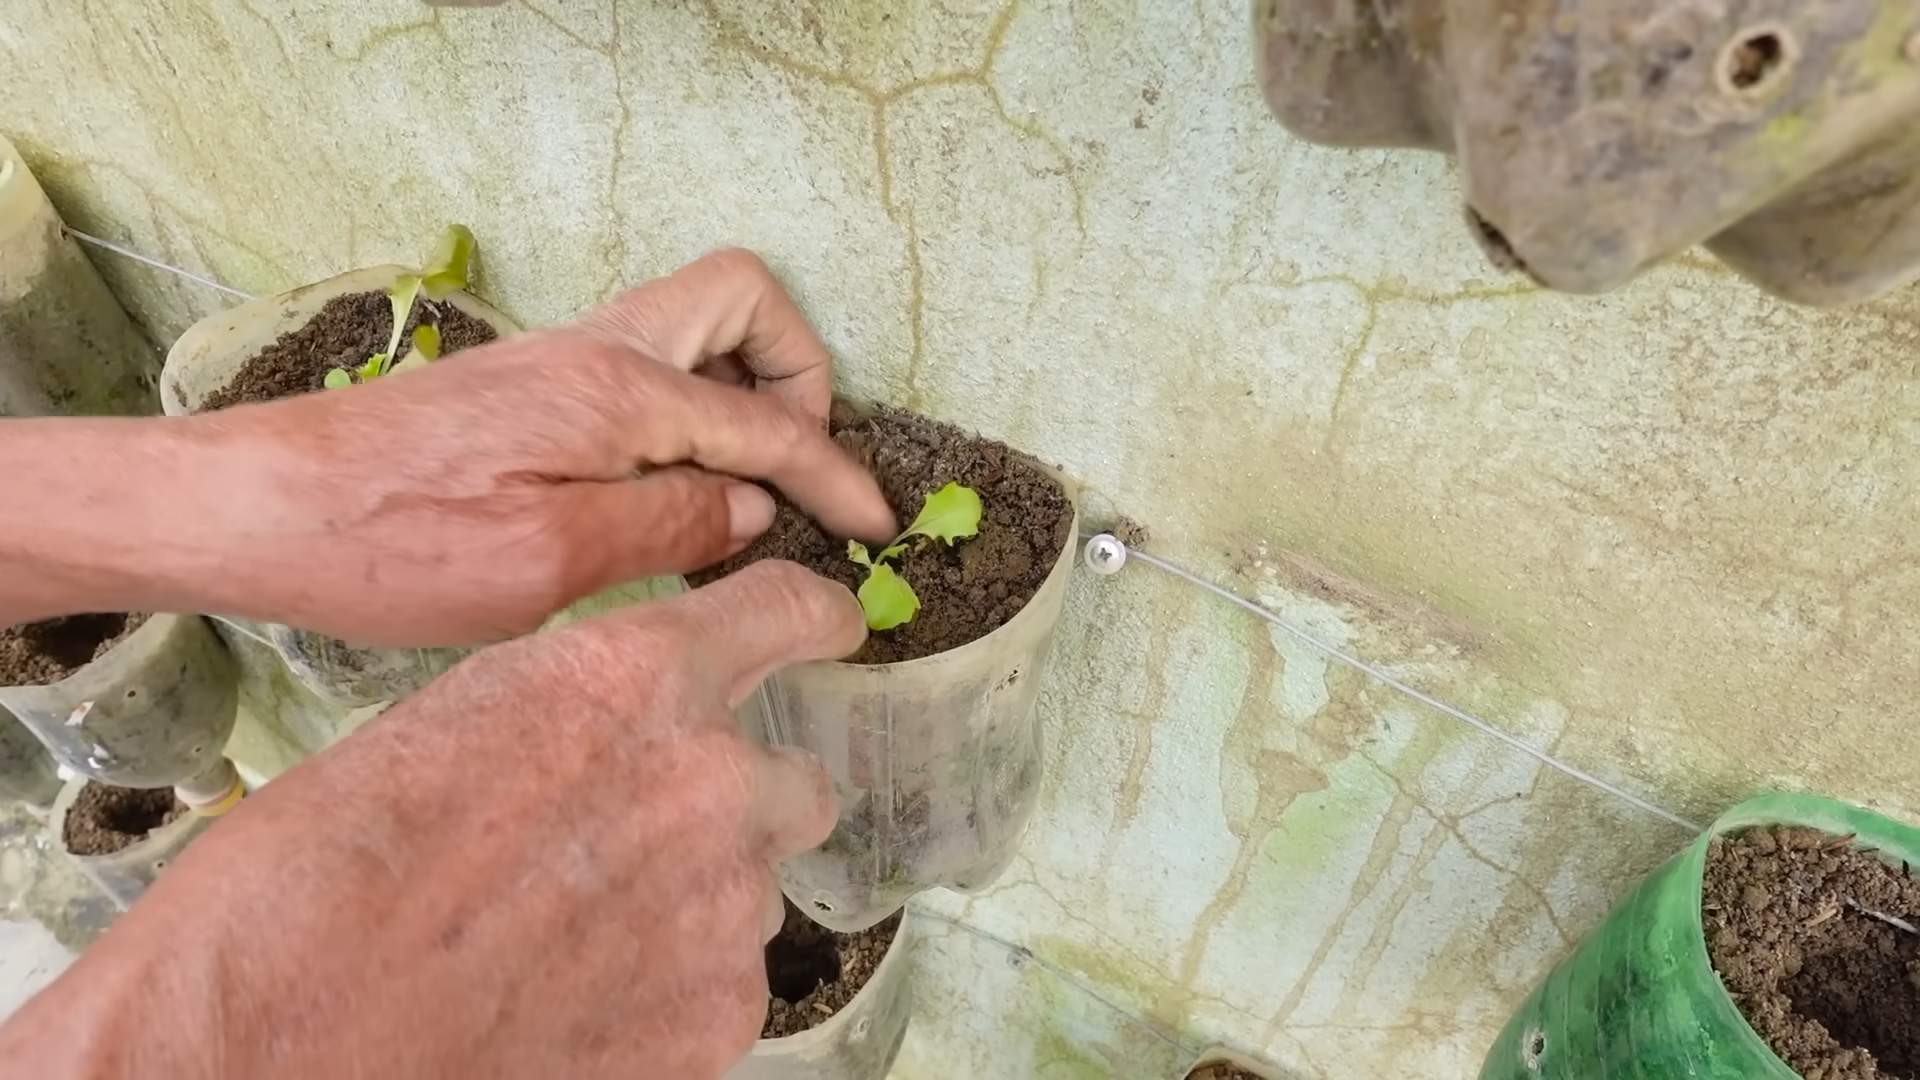
3. **Plant Your Seedlings or Seeds:** Gently remove the seedlings from their containers and loosen the roots slightly. Plant them in the soil-filled pockets, spacing them according to the instructions on the seed packet or plant label. If you’re using seeds, sow them directly into the soil, following the recommended planting depth.
4. **Water Thoroughly:** After planting, water the entire garden thoroughly. This will help settle the soil and encourage the plants to establish their roots.
5. **Add Support (Optional):** For taller plants like tomatoes, you may need to add some support to help them grow upright. You can use bamboo stakes, twine, or small trellises to provide support.
Maintaining Your Vertical Garden
A little TLC will keep your vertical garden thriving!
1. **Water Regularly:** Vertical gardens tend to dry out more quickly than traditional gardens, so it’s important to water them regularly. Check the soil moisture daily and water when the top inch feels dry to the touch. Water deeply, ensuring the water reaches the roots of the plants.
2. **Fertilize Regularly:** Vegetable plants need nutrients to grow and produce a bountiful harvest. Fertilize your vertical garden every two to four weeks with a balanced liquid fertilizer. Follow the instructions on the fertilizer label.
3. **Prune and Deadhead:** Regularly prune and deadhead your plants to encourage new growth and prevent disease. Remove any yellowing or dead leaves and flowers.
4. **Monitor for Pests and Diseases:** Keep an eye out for pests and diseases. If you notice any problems, take action immediately. You can use organic pest control methods like insecticidal soap or neem oil to control pests.
5. **Rotate Your Crops:** To prevent soil depletion and disease buildup, rotate your crops each season. Plant different types of vegetables in the same pockets each year.
6. **Sunlight:** Ensure your vertical garden receives adequate sunlight. Most vegetables need at least six hours of sunlight per day. If your garden doesn’t receive enough sunlight, you may need to supplement with artificial lighting.
7. **Winter Protection:** In colder climates, you may need to protect your vertical garden from frost and freezing temperatures. You can cover the garden with a blanket or move it indoors during the winter months.
Optional Enhancements
Want to take your vertical garden to the next level? Here are a few ideas:
* **Drip Irrigation System:** Install a drip irrigation system to automate watering and ensure consistent moisture levels. This is especially helpful if you’re away from home frequently. You can find affordable drip irrigation kits at most garden centers.
* **Herb Spiral:** Create a small herb spiral at the base of the pallet to add visual interest and provide a convenient source of fresh herbs.
* **Lighting:** Add string lights or spotlights to illuminate your vertical garden at night. This will create a beautiful ambiance and allow you to enjoy your garden even after dark.
* **Water Collection System:** Install a rain barrel to collect rainwater and use it to water your vertical garden. This is an eco-friendly way to conserve water and save money.
* **Labels:** Use plant labels to identify your vegetables and herbs. This will help you keep track of what you’ve planted and ensure you’re watering and fertilizing them correctly.
Troubleshooting
Even with the best planning, you might encounter a few challenges. Here are some common issues and how to address them:
* **Plants are Wilting:** This could be due to underwatering, overwatering, or excessive heat. Check the soil moisture and adjust your watering schedule accordingly. Provide shade during
Conclusion
So, there you have it! Creating your own DIY vertical vegetable garden isn’t just a trendy project; it’s a game-changer for anyone looking to maximize space, enjoy fresh produce, and add a touch of green to their lives. We’ve walked you through the steps, highlighted the benefits, and hopefully, inspired you to take the plunge.
Why is this a must-try? Because it’s more than just gardening; it’s about reclaiming your space, connecting with nature, and enjoying the unparalleled satisfaction of harvesting vegetables you’ve grown yourself. Imagine stepping onto your balcony or into your small backyard and picking fresh tomatoes, herbs, or lettuce for your dinner – all thanks to your own ingenuity and a little bit of effort.
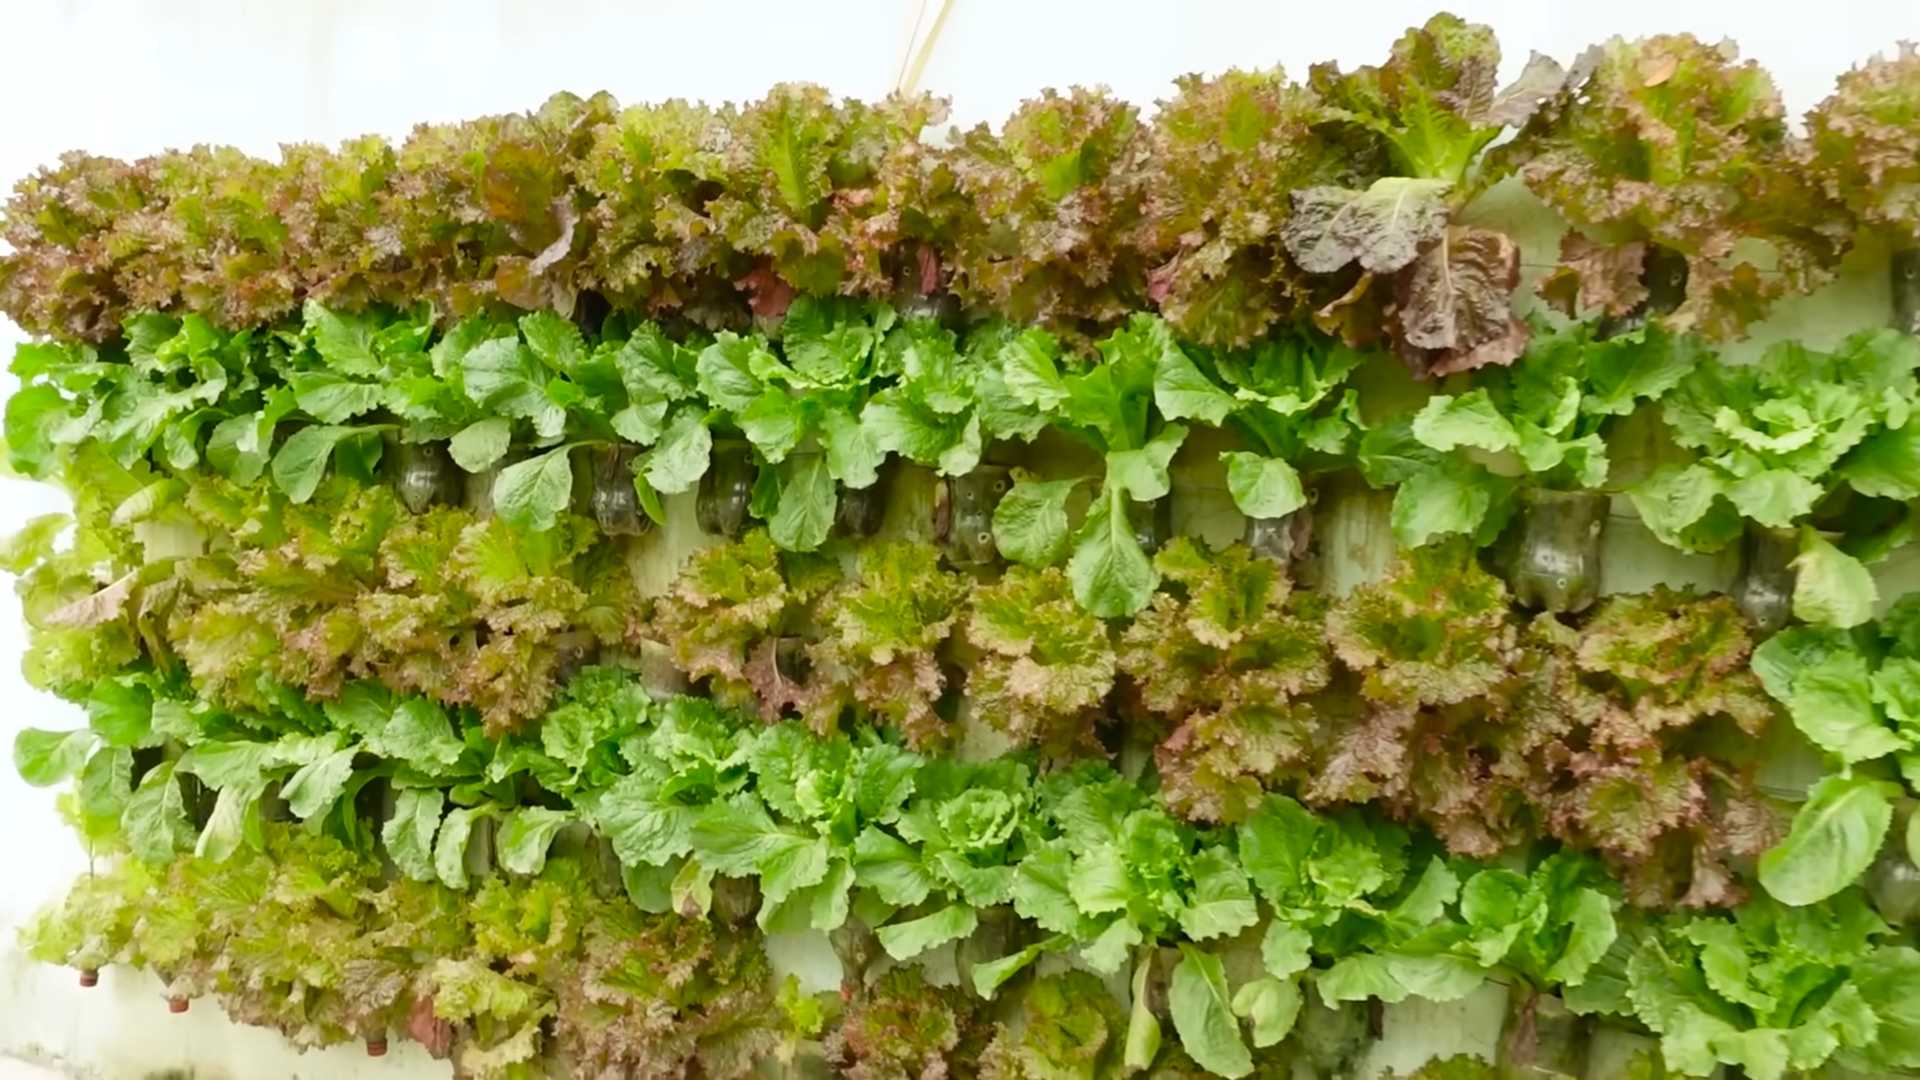
But the beauty of a DIY project lies in its adaptability. Feel free to experiment with different materials. Instead of plastic bottles, consider repurposing old wooden pallets, creating a rustic and charming vertical garden. Or, if you’re feeling ambitious, build a tiered structure using reclaimed wood, adding visual interest and maximizing planting space.
Consider the types of vegetables you want to grow. Leafy greens like spinach, lettuce, and kale thrive in vertical gardens, as do herbs like basil, mint, and parsley. Strawberries are another excellent choice, cascading beautifully down the structure. For larger vegetables like tomatoes and peppers, ensure you provide adequate support and choose a sturdy structure.
Don’t be afraid to get creative with your design. Incorporate colorful flowers to attract pollinators and add visual appeal. Use different sized containers to create a dynamic and interesting display. Add a small drip irrigation system to automate watering and save time. The possibilities are endless!
The key to success with your DIY vertical vegetable garden is to start small, learn as you go, and don’t be afraid to experiment. Observe how your plants are growing, adjust your watering schedule as needed, and don’t hesitate to seek advice from other gardeners.
We are confident that once you experience the joy of growing your own food in a vertical garden, you’ll be hooked. It’s a rewarding, sustainable, and incredibly satisfying project that will transform your space and your relationship with food.
So, what are you waiting for? Gather your materials, roll up your sleeves, and get started on your own DIY vertical vegetable garden today! We can’t wait to see what you create. Share your photos and experiences with us in the comments below. Let’s build a community of vertical gardeners and inspire others to embrace this innovative and rewarding way of growing food. Tell us about your successes, your challenges, and any tips you’ve learned along the way. Together, we can make the world a greener, more sustainable, and more delicious place, one vertical garden at a time.
Frequently Asked Questions (FAQ)
What are the best vegetables to grow in a vertical garden?
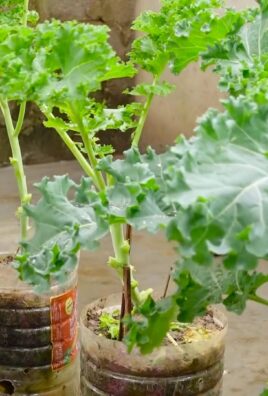
The best vegetables for a vertical garden are generally those that don’t require a lot of space for their root systems and can tolerate being grown in containers. Leafy greens like lettuce, spinach, kale, and arugula are excellent choices. Herbs such as basil, mint, parsley, thyme, and oregano also thrive in vertical gardens. Strawberries are another popular option, as their trailing growth habit looks beautiful cascading down the structure. Smaller varieties of tomatoes and peppers can also be grown successfully, but they may require more support and attention. Avoid large, sprawling vegetables like pumpkins or watermelons, as they are not well-suited for vertical gardening.
How much sunlight does my vertical garden need?
The amount of sunlight your vertical garden needs depends on the types of vegetables you are growing. Most vegetables require at least 6-8 hours of direct sunlight per day to thrive. Leafy greens can tolerate partial shade, but fruiting vegetables like tomatoes and peppers need full sun to produce a good harvest. Observe your plants carefully and adjust their location as needed to ensure they are getting enough sunlight. If you don’t have enough natural sunlight, you can supplement with grow lights.
How often should I water my vertical garden?
Watering frequency depends on several factors, including the type of plants, the weather, and the type of container you are using. In general, vertical gardens tend to dry out more quickly than traditional gardens, so you may need to water them more frequently. Check the soil moisture regularly by sticking your finger into the soil. If the top inch or two feels dry, it’s time to water. Water deeply until the water drains out of the bottom of the container. Avoid overwatering, as this can lead to root rot. Consider using a drip irrigation system to automate watering and ensure consistent moisture levels.
What type of soil should I use for my vertical garden?
Use a high-quality potting mix specifically formulated for containers. Avoid using garden soil, as it can become compacted and doesn’t drain well in containers. A good potting mix will be lightweight, well-draining, and contain essential nutrients for plant growth. You can also amend your potting mix with compost or other organic matter to improve its fertility and water-holding capacity.
How do I fertilize my vertical garden?
Vertical gardens require regular fertilization to provide the nutrients that plants need to grow and produce a good harvest. Use a balanced fertilizer specifically formulated for vegetables. You can use a slow-release granular fertilizer or a liquid fertilizer. Follow the instructions on the fertilizer package carefully. Fertilize every 2-4 weeks during the growing season.
How do I protect my vertical garden from pests and diseases?
Regularly inspect your plants for signs of pests or diseases. Remove any affected leaves or plants immediately. Use organic pest control methods such as insecticidal soap or neem oil to control pests. Ensure good air circulation around your plants to prevent fungal diseases. Avoid overwatering, as this can create a favorable environment for diseases.
Can I grow a vertical garden indoors?
Yes, you can grow a vertical garden indoors, but you will need to provide adequate light. Use grow lights to supplement natural light. Choose plants that tolerate low light conditions, such as leafy greens and herbs. Ensure good air circulation and monitor humidity levels.
What materials can I use to build a vertical garden?
There are many different materials you can use to build a vertical garden, including plastic bottles, wooden pallets, repurposed gutters, fabric pockets, and stacked planters. Choose materials that are durable, weather-resistant, and safe for growing food. Ensure that your structure is sturdy and can support the weight of the plants and soil.
How do I choose the right location for my vertical garden?
Consider the amount of sunlight, water access, and wind exposure when choosing a location for your vertical garden. Choose a location that receives at least 6-8 hours of direct sunlight per day. Ensure that you have easy access to water for irrigation. Protect your vertical garden from strong winds, which can damage plants and dry out the soil.
How do I prevent my vertical garden from becoming too heavy?
Use lightweight materials for your structure and containers. Choose a lightweight potting mix. Avoid overwatering, as this can add extra weight. Distribute the weight evenly across the structure. Consider using a support system to reinforce the structure.
Leave a Comment