

Wall Mounted Vegetable Garden: Imagine stepping outside your door and harvesting fresh, flavorful herbs and vegetables right from your wall! Sounds like a dream, right? Well, it doesn’t have to be! This DIY guide will show you how to create your very own stunning and productive wall-mounted vegetable garden, even if you have limited space or a less-than-green thumb.
The concept of vertical gardening, including wall-mounted variations, has roots stretching back centuries. Think of the Hanging Gardens of Babylon, one of the Seven Wonders of the Ancient World! While we might not be building anything quite so grand, the principle remains the same: maximizing space and bringing nature closer to our living areas. Today, with urban living on the rise and garden space shrinking, the need for innovative solutions like a wall mounted vegetable garden is greater than ever.
I know what you’re thinking: “I don’t have the time or skills for a complicated project!” But trust me, this DIY project is surprisingly simple and incredibly rewarding. Not only will you enjoy the satisfaction of growing your own food, but you’ll also add a beautiful and unique feature to your home. Plus, imagine the money you’ll save on groceries! So, let’s dive in and transform that blank wall into a thriving edible oasis. I’m excited to guide you through each step!
DIY Wall-Mounted Vegetable Garden: Bring the Green Indoors (or Out!)
Okay, so you’re itching to grow your own veggies but short on space? Or maybe you just want to add a touch of green to your balcony or kitchen? I totally get it! That’s why I’m going to walk you through building your very own wall-mounted vegetable garden. It’s a fantastic project that’s both functional and aesthetically pleasing. Plus, imagine the bragging rights when you serve a salad made with ingredients you grew yourself!
What You’ll Need: The Supply List
Before we dive in, let’s gather our supplies. Don’t worry, you probably have some of this stuff lying around already!
* **Wooden Pallets:** These are the backbone of our garden. Look for pallets that are heat-treated (HT) rather than chemically treated (MB – methyl bromide, which you definitely want to avoid). You can often find them for free at local businesses, construction sites, or online marketplaces.
* **Heavy-Duty Landscape Fabric:** This will line the pallet and prevent soil from spilling out.
* **Staple Gun and Staples:** Essential for securing the landscape fabric.
* **Gloves:** Protect your hands from splinters and dirt.
* **Safety Glasses:** Always a good idea when working with tools.
* **Measuring Tape:** For accurate cuts and placement.
* **Scissors or Utility Knife:** For cutting the landscape fabric.
* **Potting Soil:** Choose a high-quality potting mix specifically designed for vegetables.
* **Vegetable Seedlings or Seeds:** Select plants that are suitable for container gardening and your local climate. Herbs like basil, mint, and oregano are great choices, as are smaller vegetables like lettuce, spinach, strawberries, and radishes.
* **Sandpaper (Optional):** If your pallet is rough, a little sanding can make it smoother and safer.
* **Wood Stain or Paint (Optional):** To customize the look of your garden.
* **Drill and Screws (Optional):** For extra reinforcement, especially if you’re hanging a heavy pallet.
* **Wall Mounting Hardware:** Depending on the weight of your filled pallet and the type of wall you’re mounting it on, you’ll need appropriate hooks, screws, and anchors. Consider using heavy-duty eye hooks and strong chain if you’re hanging it.
* **Level:** To ensure your garden is straight when mounted.
Step-by-Step Instructions: Building Your Vertical Oasis
Alright, let’s get our hands dirty!
1. **Pallet Inspection and Preparation:**
* First things first, give your pallet a thorough inspection. Look for any loose nails, splinters, or damaged boards. Remove any loose nails with a hammer and pliers. Sand down any rough spots with sandpaper.
* If you want to stain or paint your pallet, now’s the time to do it! Choose a weather-resistant stain or paint if you’re planning to keep your garden outdoors. Let it dry completely before moving on to the next step. I personally love a rustic, natural look, so I often skip this step.
* Consider adding extra support to the back of the pallet if you think it needs it. You can use extra pieces of wood and screws to reinforce any weak points.
2. **Lining the Pallet with Landscape Fabric:**
* This is where we create the pockets that will hold our soil. Start by measuring the width and depth of each section of the pallet where you want to plant.
* Cut pieces of landscape fabric that are large enough to line each section, leaving plenty of extra fabric to fold over and staple. I usually add about 6-8 inches extra on each side.
* Begin stapling the landscape fabric to the inside of each section, creating a pouch. Make sure the fabric is taut and secure. Overlap the fabric at the corners to prevent soil from leaking out.
* Pay close attention to the bottom of each section. This is where the most pressure will be, so reinforce the fabric with extra staples.
* Repeat this process for each section of the pallet that you want to use for planting.
3. **Adding Drainage (Important!):**
* Before filling the pockets with soil, it’s crucial to create drainage. Without drainage, your plants will become waterlogged and their roots will rot.
* You can create drainage holes by poking small holes in the bottom of each landscape fabric pocket with scissors or a utility knife. Be careful not to make the holes too large, or the soil will leak out.
* Alternatively, you can add a layer of gravel or small stones to the bottom of each pocket before adding the soil. This will help to improve drainage and prevent the soil from becoming compacted.
4. **Filling the Pockets with Potting Soil:**
* Now for the fun part! Carefully fill each pocket with high-quality potting soil. Make sure the soil is loose and well-draining.
* Don’t pack the soil too tightly, as this can restrict root growth. Leave a little space at the top of each pocket to prevent the soil from spilling out when you water.
* As you fill the pockets, gently press down on the soil to remove any air pockets.
5. **Planting Your Vegetables:**
* Choose vegetable seedlings or seeds that are suitable for container gardening and your local climate. Herbs like basil, mint, and oregano are great choices, as are smaller vegetables like lettuce, spinach, strawberries, and radishes.
* If you’re using seedlings, gently remove them from their containers and loosen the roots before planting.
* Plant the seedlings in the center of each pocket, making sure the roots are covered with soil.
* If you’re using seeds, follow the instructions on the seed packet for planting depth and spacing.
* Water the plants thoroughly after planting.
6. **Mounting Your Wall Garden:**
* This is a crucial step, so take your time and make sure you do it right. The weight of the filled pallet can be significant, so you need to use appropriate mounting hardware.
* Determine the best location for your wall garden. Consider the amount of sunlight the area receives, as well as the accessibility for watering and harvesting.
* Use a stud finder to locate the studs in your wall. If you’re mounting the pallet on drywall, you’ll need to use wall anchors that are designed to support heavy weight.
* Attach the mounting hardware to the wall according to the manufacturer’s instructions. Make sure the hardware is securely fastened to the wall.
* If you’re hanging the pallet, use heavy-duty eye hooks and strong chain. Attach the eye hooks to the top corners of the pallet and then hang the pallet from the chain.
* Use a level to ensure your garden is straight when mounted.
7. **Watering and Maintenance:**
* Water your plants regularly, especially during hot weather. Check the soil moisture regularly and water when the top inch of soil feels dry to the touch.
* Be careful not to overwater, as this can lead to root rot.
* Fertilize your plants regularly with a balanced fertilizer. Follow the instructions on the fertilizer package.
* Remove any dead or yellowing leaves to prevent the spread of disease.
* Check your plants regularly for pests and diseases. Treat any problems promptly.
Tips and Tricks for a Thriving Wall Garden
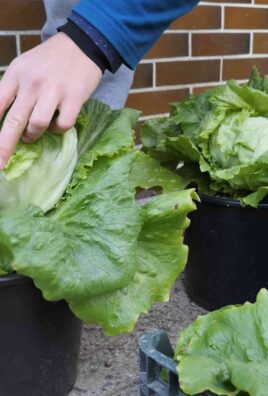
* Choose the Right Plants: Not all vegetables thrive in containers. Opt for compact varieties like bush beans, dwarf tomatoes, and leafy greens. Herbs are almost always a good choice!
* Sunlight is Key: Most vegetables need at least 6 hours of sunlight per day. Position your garden accordingly. If you don’t have enough natural light, consider using grow lights.
* Water Wisely: Container gardens dry out quickly. Water deeply and regularly, especially during hot weather. Consider adding water-retaining crystals to the soil to help retain moisture.
* Fertilize Regularly: Container plants need regular fertilization because nutrients leach out of the soil quickly. Use a balanced fertilizer specifically formulated for vegetables.
* Consider Microclimates: Walls can create microclimates that are warmer or cooler than the surrounding area. Be mindful of this when choosing plants and positioning your garden.
* Protect from the Elements: If you live in an area with harsh weather, protect your garden from frost, strong winds, and excessive heat. You can use row covers, shade cloth, or move the garden indoors during extreme weather events.
* Rotate Your Crops: To prevent soil depletion and pest problems, rotate your crops each season.
* Get Creative with Design: Don’t be afraid to experiment with different plant combinations and arrangements. You can create a beautiful and functional wall garden that reflects your personal style.
Troubleshooting Common Problems
* Yellowing Leaves: This could be a sign of overwatering, underwatering, nutrient deficiency, or pest infestation. Check the soil moisture, fertilize your plants, and inspect them for pests.
* Wilting
Conclusion
So, there you have it! Creating your own wall mounted vegetable garden is not just a trendy DIY project; it’s a game-changer for anyone looking to maximize space, add a touch of green to their lives, and enjoy the unparalleled satisfaction of harvesting their own fresh produce. We’ve walked you through the process, highlighting the ease and affordability of this fantastic gardening solution.
But why is this a must-try? Beyond the obvious aesthetic appeal, a wall mounted vegetable garden offers a multitude of benefits. It’s perfect for apartment dwellers, balcony gardeners, or anyone with limited yard space. It elevates your plants, making them less susceptible to pests and diseases that thrive in the soil. Plus, it brings the joy of gardening to those who might find bending and kneeling difficult. Imagine stepping outside your kitchen door and snipping fresh herbs for dinner, or harvesting ripe tomatoes for a salad, all grown just an arm’s reach away. That’s the magic of a wall mounted vegetable garden.
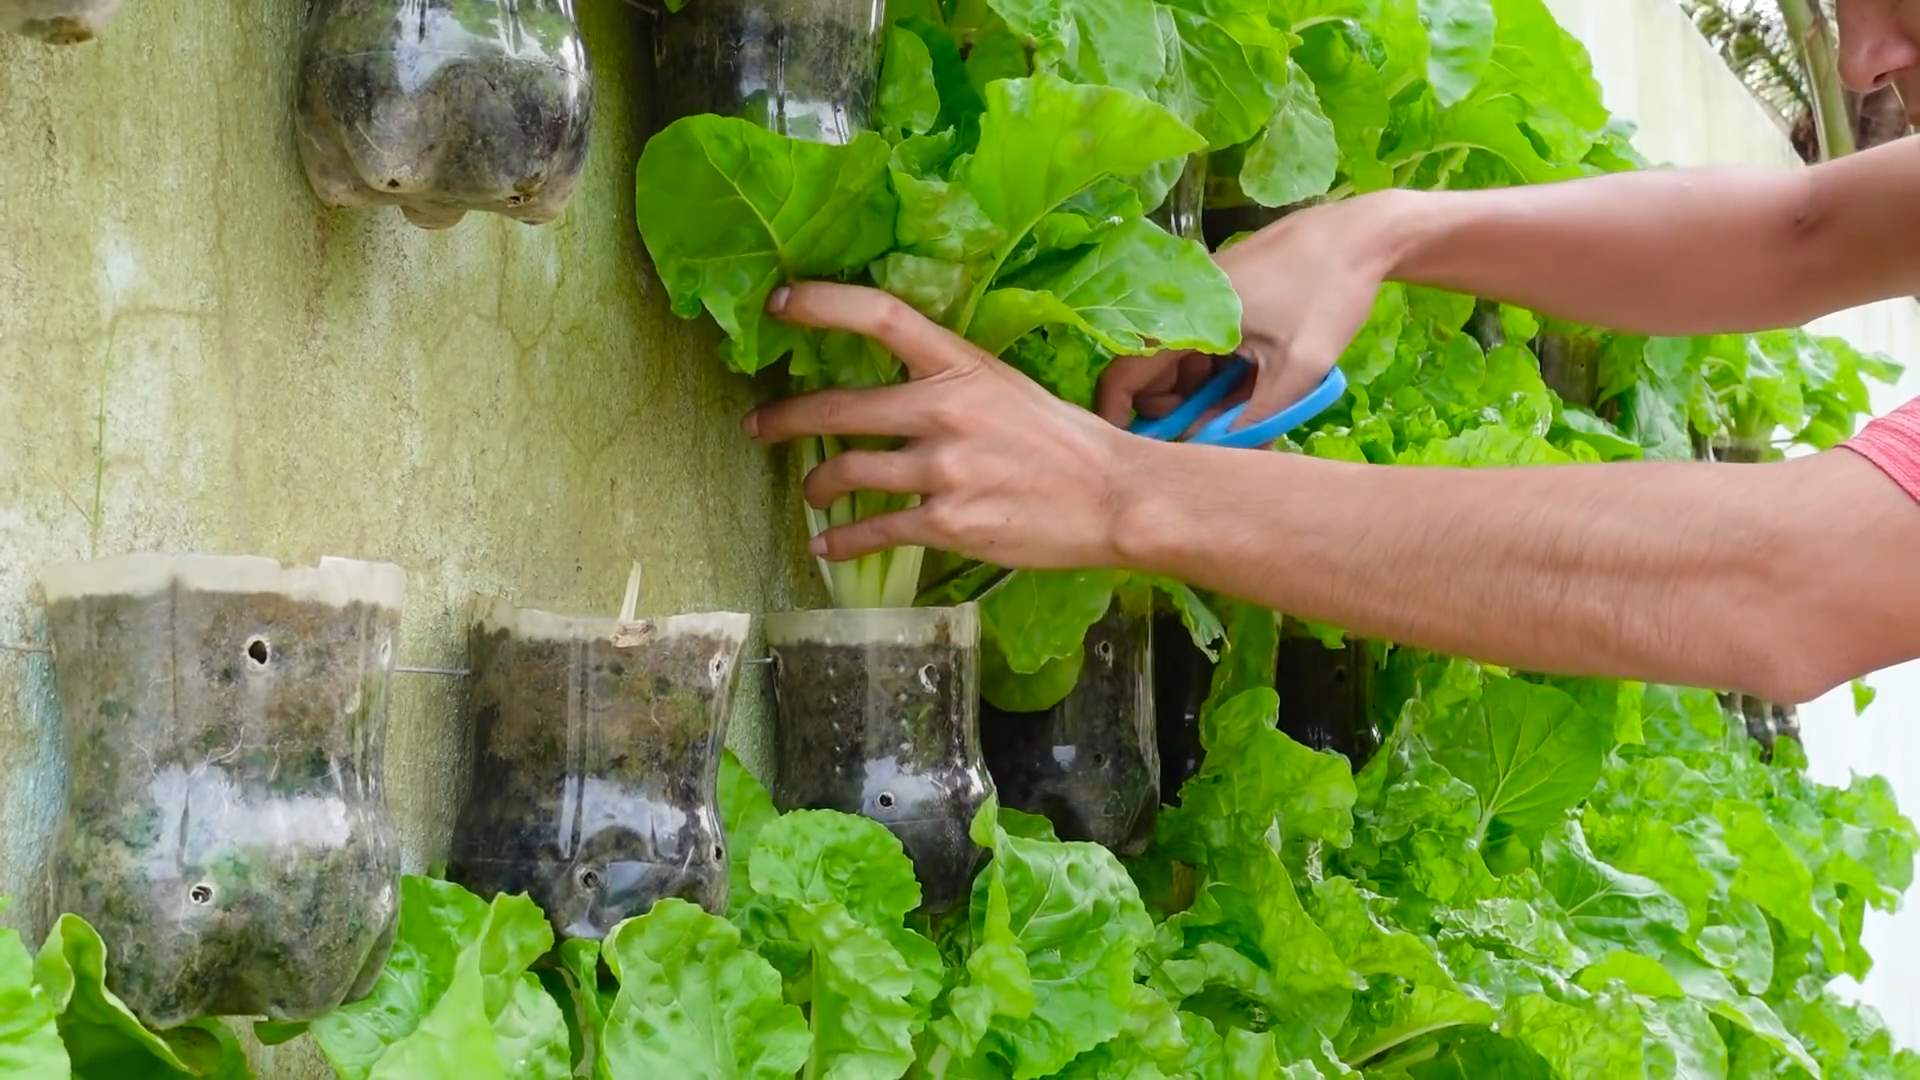
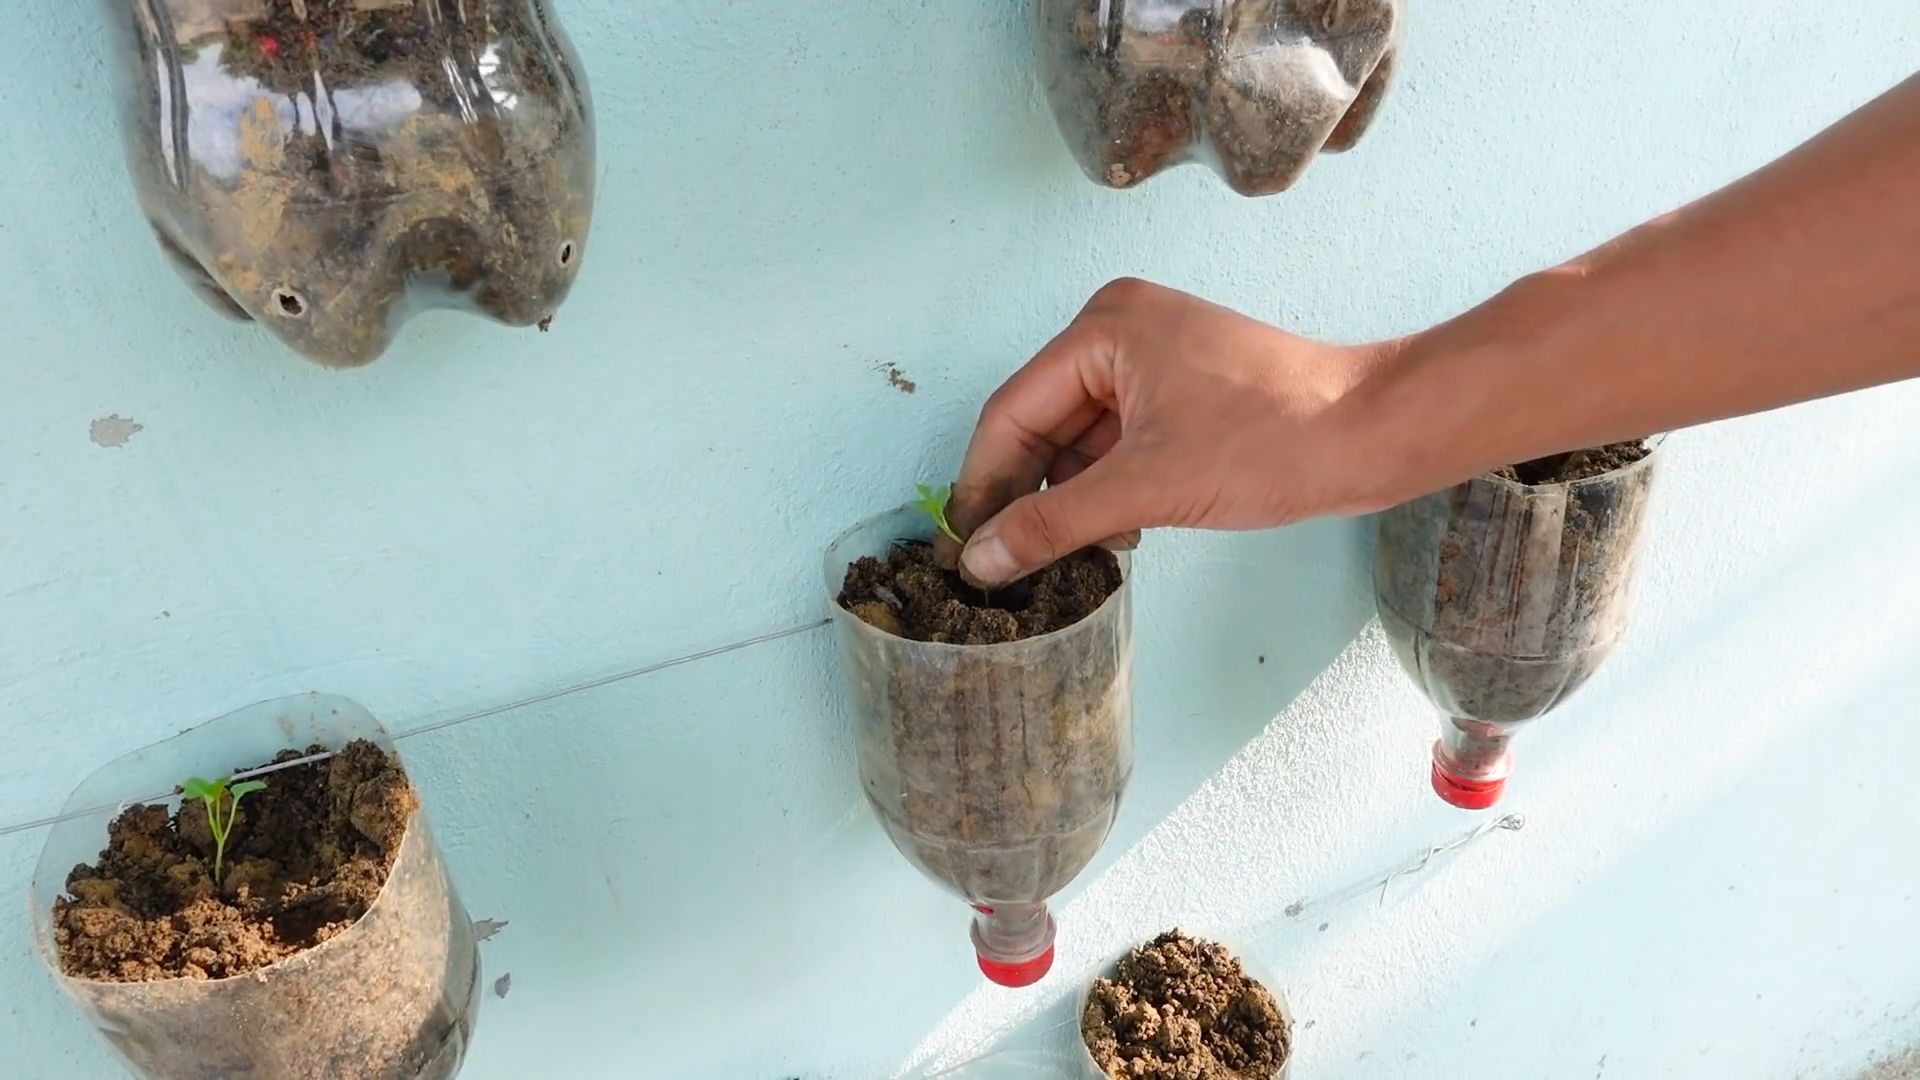
Now, let’s talk variations. Feel free to get creative! Instead of using pallets, consider repurposing old wooden crates or even plastic bottles. For a more modern look, explore using metal planters or sleek, minimalist shelving. Think about the types of plants you want to grow and choose a system that best suits their needs. Trailing plants like strawberries or cherry tomatoes look stunning cascading down a wall, while herbs like basil and mint thrive in smaller containers. You can even incorporate vertical irrigation systems for easier watering. Consider adding grow lights if your wall doesn’t receive enough sunlight. The possibilities are truly endless!
Don’t be afraid to experiment with different layouts and designs. A staggered arrangement can create a visually appealing focal point, while a symmetrical design offers a more structured look. You can even paint your wall or add decorative elements to further personalize your garden. Remember, this is your space, so make it your own!
We’re confident that you’ll find the process of creating your own wall mounted vegetable garden both rewarding and enjoyable. It’s a fantastic way to connect with nature, reduce your carbon footprint, and enjoy the freshest, most flavorful produce imaginable.
So, what are you waiting for? Gather your materials, unleash your creativity, and get started on your own wall mounted vegetable garden today! We can’t wait to see what you create. Be sure to share your photos and experiences with us in the comments below or on social media using #WallMountedGardenDIY. We’re eager to learn from your successes and help you troubleshoot any challenges you might encounter. Happy gardening!
Frequently Asked Questions (FAQ)
What types of vegetables and herbs grow best in a wall mounted garden?
Many vegetables and herbs thrive in wall mounted gardens, but some are particularly well-suited due to their size and growth habits. Leafy greens like lettuce, spinach, and kale are excellent choices, as they have shallow root systems and don’t require a lot of space. Herbs such as basil, mint, thyme, oregano, and rosemary are also ideal, as they are relatively compact and easy to maintain. For vegetables, consider smaller varieties like cherry tomatoes, bush beans, strawberries, peppers, and radishes. Avoid planting large, sprawling vegetables like pumpkins or watermelons, as they will quickly outgrow the space and become difficult to support. When selecting plants, consider the amount of sunlight your wall receives and choose varieties that are appropriate for those conditions.
How much sunlight does my wall mounted vegetable garden need?
The amount of sunlight your wall mounted vegetable garden needs depends on the types of plants you are growing. Most vegetables and herbs require at least six hours of direct sunlight per day to thrive. However, some leafy greens and herbs can tolerate partial shade, especially during the hottest part of the day. Observe your wall throughout the day to determine how much sunlight it receives. If your wall doesn’t get enough sunlight, consider using grow lights to supplement the natural light. Grow lights can provide the necessary light spectrum for healthy plant growth, even in indoor or shaded environments.
What type of soil should I use for my wall mounted garden?
Using the right soil is crucial for the success of your wall mounted vegetable garden. Avoid using garden soil, as it is often too heavy and compacted for containers. Instead, opt for a lightweight, well-draining potting mix specifically formulated for container gardening. Look for a mix that contains ingredients like peat moss, perlite, and vermiculite, which help to retain moisture while providing good drainage. You can also amend your potting mix with compost or other organic matter to improve its fertility and water-holding capacity. Make sure the soil is loose and airy to allow for proper root growth.
How often should I water my wall mounted vegetable garden?
The frequency of watering depends on several factors, including the type of plants, the weather conditions, and the type of containers you are using. In general, wall mounted gardens tend to dry out more quickly than traditional gardens, so it’s important to check the soil moisture regularly. Stick your finger into the soil about an inch deep. If it feels dry, it’s time to water. Water thoroughly until the water drains out of the bottom of the container. Avoid overwatering, as this can lead to root rot. During hot, dry weather, you may need to water your garden daily, while during cooler, wetter weather, you may only need to water every few days. Consider using a drip irrigation system or self-watering containers to make watering easier and more efficient.
How do I fertilize my wall mounted vegetable garden?
Vegetables and herbs grown in containers require regular fertilization to provide them with the nutrients they need to thrive. Use a balanced, water-soluble fertilizer specifically formulated for vegetables and herbs. Follow the instructions on the fertilizer package for application rates and frequency. You can also use organic fertilizers like compost tea or fish emulsion. Avoid over-fertilizing, as this can burn the roots of your plants. A slow-release fertilizer can also be incorporated into the soil at planting time to provide a steady supply of nutrients over several months.
How do I protect my wall mounted vegetable garden from pests and diseases?
Regularly inspect your plants for signs of pests and diseases. Common pests that can affect wall mounted gardens include aphids, spider mites, and whiteflies. You can control these pests by spraying your plants with insecticidal soap or neem oil. Diseases like powdery mildew and fungal leaf spots can also be a problem. To prevent these diseases, ensure good air circulation around your plants and avoid overwatering. If you notice any signs of disease, remove the affected leaves and treat the plants with a fungicide. Consider companion planting to naturally deter pests. For example, planting basil near tomatoes can help repel tomato hornworms.
What are some creative ideas for designing my wall mounted vegetable garden?
There are endless possibilities for designing your wall mounted vegetable garden. Consider using different types of containers to add visual interest. You can mix and match terracotta pots, hanging baskets, and repurposed materials like wooden crates or plastic bottles. Create a vertical tapestry by arranging plants with different colors and textures. Use trellises or climbing structures to support vining plants like tomatoes or cucumbers. Add decorative elements like garden gnomes, wind chimes, or fairy lights to personalize your garden. Paint your wall in a vibrant color to create a stunning backdrop for your plants. Don’t be afraid to experiment and have fun with your design!
How do I overwinter my wall mounted vegetable garden?
If you live in a climate with cold winters, you’ll need to take steps to protect your wall mounted vegetable garden from frost and freezing temperatures. Some plants, like herbs such as rosemary and thyme, are relatively hardy and can survive mild winters with minimal protection. Other plants, like tomatoes and peppers, are more sensitive to cold and will need to be brought indoors or protected with frost blankets. Before the first frost, prune back any dead or damaged foliage. Move your containers to a sheltered location, such as a garage or shed. Water sparingly during the winter months, only when the soil is dry to the touch. In the spring, gradually acclimate your plants to outdoor conditions before moving them back to their original location.


Leave a Comment