

Grow Potatoes in Containers: Imagine harvesting a bounty of fresh, homegrown potatoes right from your patio or balcony! No sprawling garden needed. This isn’t just a dream; it’s an achievable reality with the right know-how. For centuries, potatoes have been a staple food source, originating in the Andes Mountains and spreading across the globe to become a culinary cornerstone. From simple roasted potatoes to elaborate gratins, their versatility is undeniable.
But what if you lack the space for a traditional potato patch? That’s where the magic of container gardening comes in! I’m going to show you how to grow potatoes in containers, a fantastic solution for urban dwellers, apartment residents, or anyone with limited garden space. This DIY guide will walk you through every step, from choosing the right container and soil to planting, watering, and harvesting your very own potato crop.
Why is this DIY trick so essential? Because fresh, homegrown potatoes taste infinitely better than store-bought ones! Plus, you’ll have complete control over the growing process, ensuring your potatoes are free from harmful pesticides and chemicals. Get ready to experience the joy of digging into your own container-grown potato harvest – it’s easier than you think!
Grow Your Own Spuds: A Beginner’s Guide to Container Potato Gardening
Hey there, fellow garden enthusiasts! Ever dreamt of harvesting your own fresh, earthy potatoes right from your patio or balcony? Well, dream no more! Growing potatoes in containers is surprisingly easy, even if you’re a complete newbie like I was. It’s a fantastic way to enjoy homegrown goodness without needing a huge garden. Plus, it’s super satisfying to dig up your own treasure trove of spuds! Let me walk you through everything you need to know to get started.
Choosing the Right Container and Potato Variety
First things first, let’s talk about the essentials: your container and your potato variety. These two choices will significantly impact your success.
* Container Size: Bigger is definitely better when it comes to potato containers. You’ll need a container that’s at least 15 gallons in size, but I highly recommend going for 20 gallons or more. This gives the potato plants plenty of room to grow and develop those delicious tubers. Think large plastic tubs, trash cans (with drainage holes, of course!), or even fabric grow bags. I personally love using fabric grow bags because they allow for excellent drainage and aeration.
* Drainage: This is non-negotiable! Potatoes hate sitting in soggy soil. Make sure your container has plenty of drainage holes at the bottom to allow excess water to escape. If you’re using a container without pre-made holes, drill several yourself.
* Potato Variety: Not all potatoes are created equal, especially when it comes to container gardening. Look for varieties that are known to be productive in containers and mature relatively quickly. Here are a few of my favorites:
* Yukon Gold: These are my go-to! They’re incredibly versatile, with a buttery flavor and smooth texture. They also tend to produce well in containers.
* Red Pontiac: These red-skinned potatoes are great for boiling and salads. They’re also relatively early-maturing.
* Fingerling Potatoes: These long, slender potatoes are a gourmet treat. They’re perfect roasted or steamed.
* ‘Irish Cobbler’: A classic early variety that does well in containers.
Getting Started: Sprouting Your Seed Potatoes
Before you can plant your potatoes, you’ll need to “chit” or sprout them. This gives them a head start and encourages faster growth.
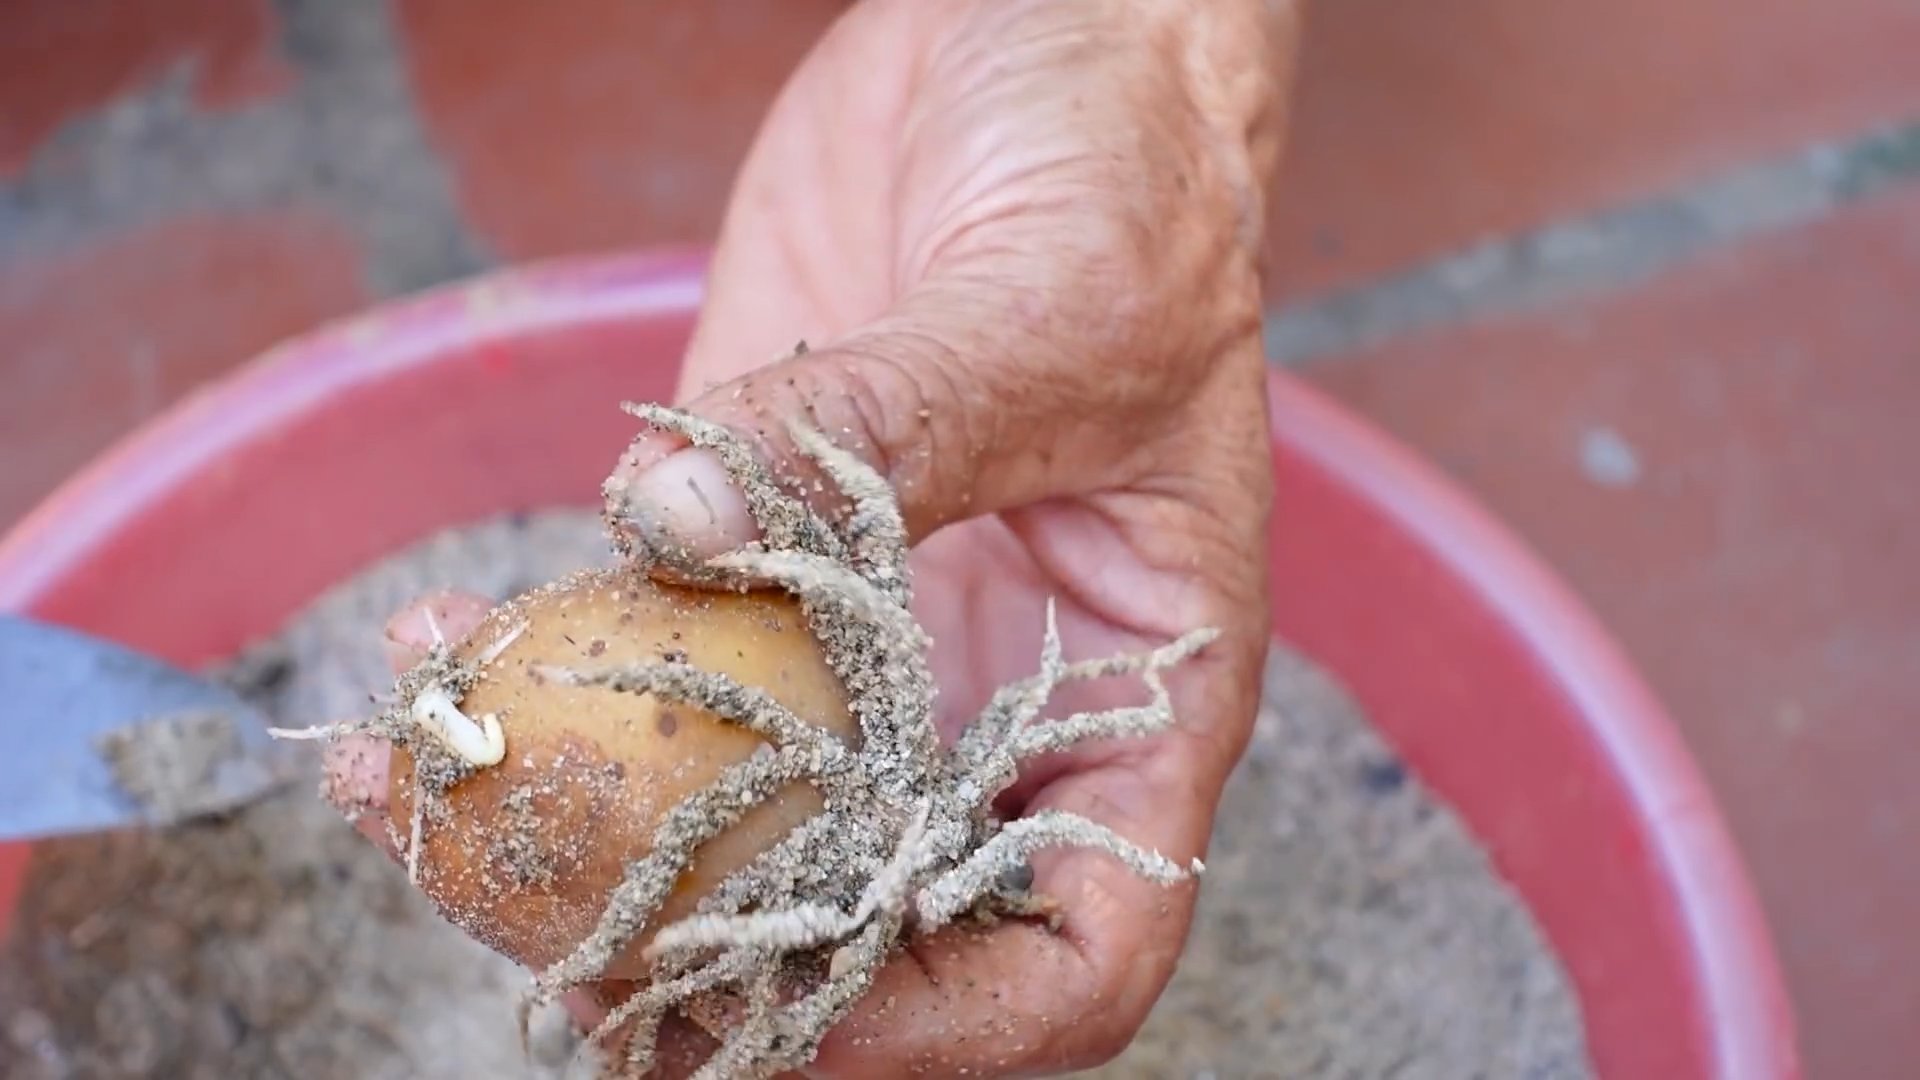
1. Choose Your Seed Potatoes: You can buy certified seed potatoes from a garden center or online. Avoid using potatoes from the grocery store, as they may have been treated to prevent sprouting. Look for potatoes that are firm and free from blemishes.
2. Chitting Process: Place your seed potatoes in a cool, bright location (but not in direct sunlight) for a few weeks. An egg carton or a shallow tray works well. You’ll start to see small “eyes” or sprouts emerging from the potatoes.
3. Cutting (Optional): If your seed potatoes are large, you can cut them into smaller pieces, ensuring that each piece has at least one or two eyes. Let the cut pieces dry for a day or two to prevent rotting. I usually don’t cut mine unless they are exceptionally large.
Planting Your Potatoes: The Layering Technique
Now for the fun part: planting! The key to successful container potato gardening is the layering technique. This encourages the plant to produce more potatoes along the stem.
1. Prepare Your Container: Fill the bottom of your container with about 4-6 inches of well-draining potting mix. I like to use a mix of compost, peat moss (or coconut coir), and perlite. Make sure the potting mix is loose and airy.
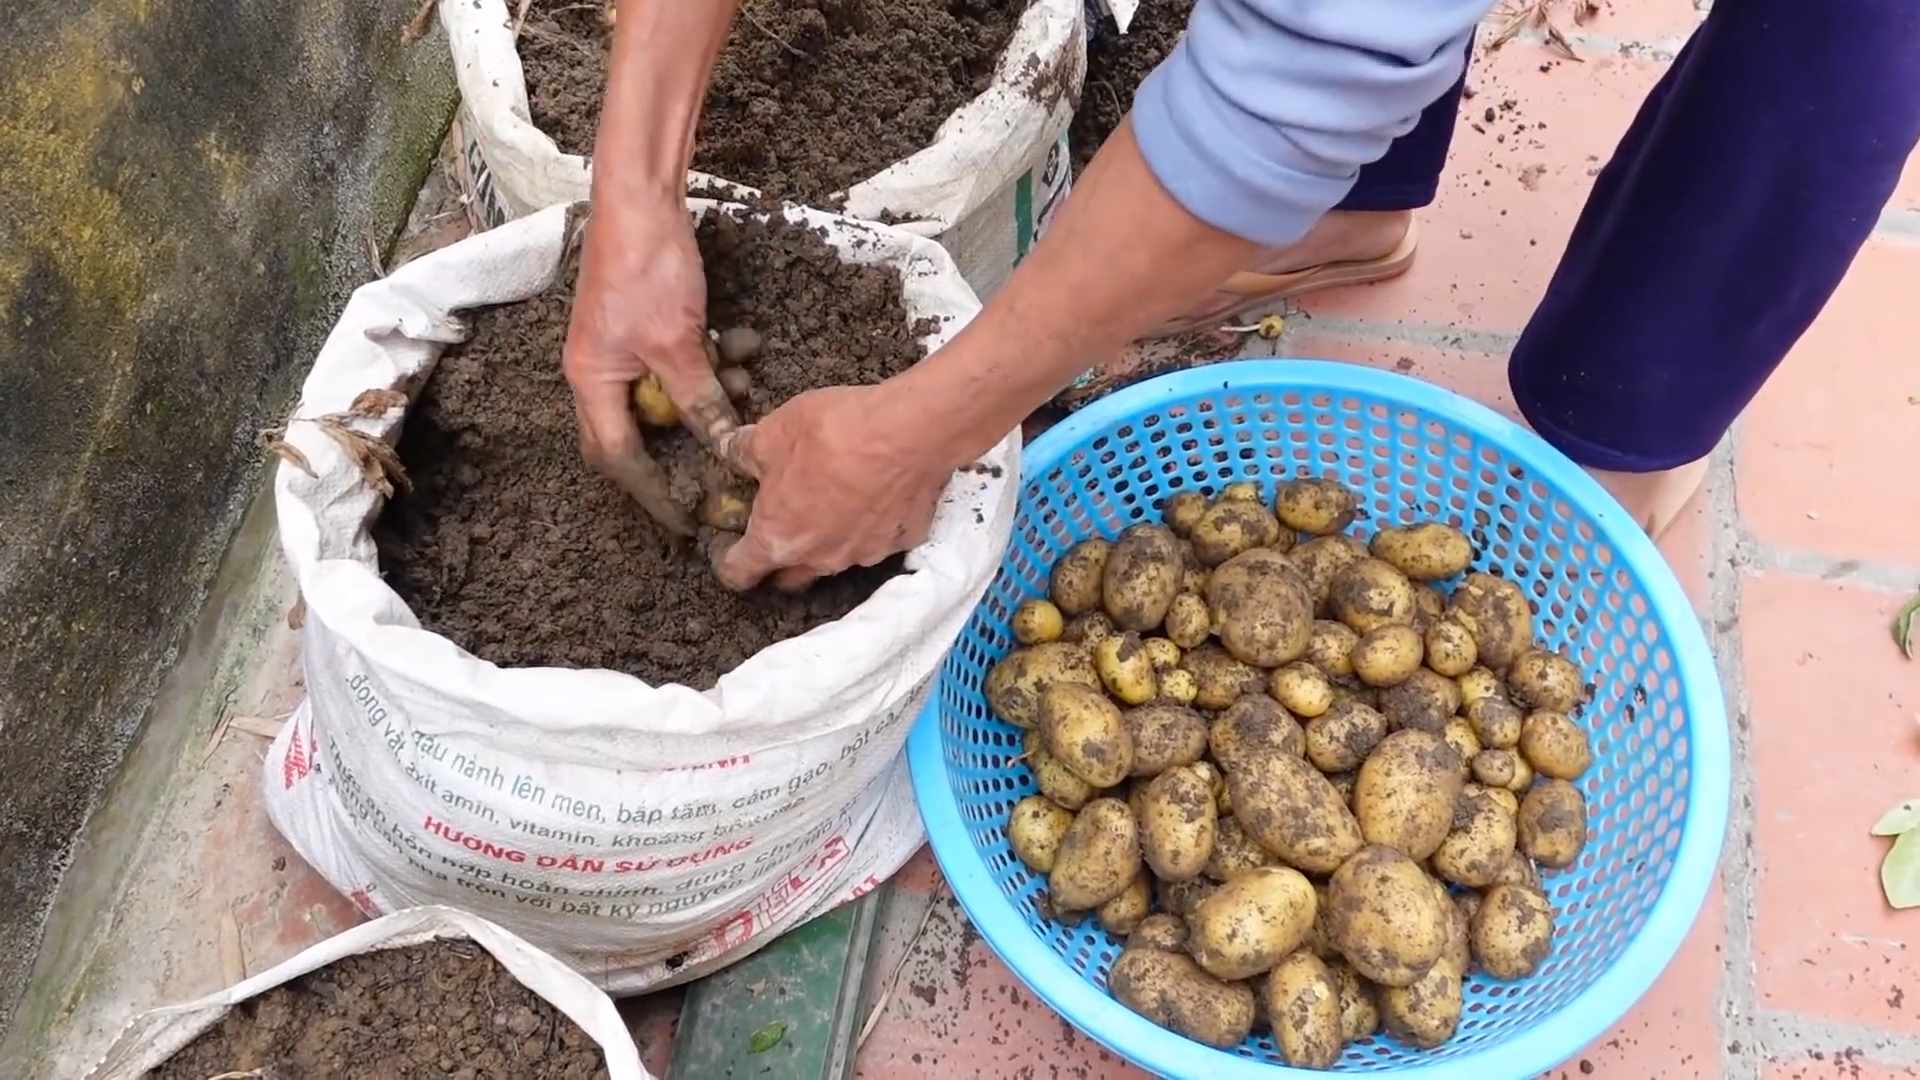
2. Plant the Seed Potatoes: Place your sprouted seed potatoes on top of the soil, with the sprouts facing upwards. Space them evenly if you’re planting multiple potatoes in the same container. I usually plant 2-3 seed potatoes in a 20-gallon container.
3. Cover with Soil: Cover the seed potatoes with another 4-6 inches of potting mix. Water gently to moisten the soil.
4. Wait and Watch: Place your container in a sunny location. Potatoes need at least 6-8 hours of sunlight per day.
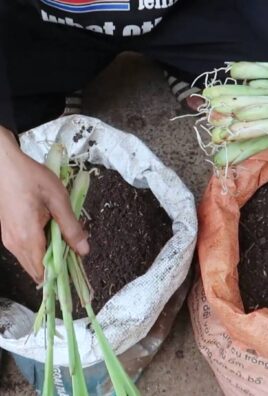
5. Hilling (The Key to Success!): As the potato plants grow, you’ll need to “hill” them. This means adding more soil to the container as the stems emerge. When the stems are about 6-8 inches tall, add another 4-6 inches of potting mix, burying the lower part of the stems. Repeat this process every few weeks until the container is almost full. This encourages the plant to produce more potatoes along the buried stems.
Caring for Your Potato Plants: Watering, Fertilizing, and Pest Control
Once your potatoes are planted, it’s important to provide them with proper care to ensure a bountiful harvest.
* Watering: Potatoes need consistent moisture, especially during tuber formation. Water deeply whenever the top inch of soil feels dry to the touch. Avoid overwatering, as this can lead to rot.
* Fertilizing: Feed your potato plants with a balanced fertilizer every few weeks. Look for a fertilizer that’s high in phosphorus and potassium, which are essential for tuber development. I like to use a liquid fertilizer diluted according to the package instructions.
* Pest Control: Keep an eye out for common potato pests, such as aphids, potato beetles, and flea beetles. You can control these pests with insecticidal soap or neem oil. Handpicking the pests off the plants is also an effective method.
* Sunlight: Ensure your container receives at least 6-8 hours of direct sunlight daily. If you live in a particularly hot climate, some afternoon shade might be beneficial.
Harvesting Your Potatoes: The Moment of Truth!
The most exciting part of growing potatoes is, of course, the harvest!
1. When to Harvest: You can harvest “new potatoes” (small, tender potatoes) about 2-3 weeks after the plants flower. For larger, more mature potatoes, wait until the foliage starts to turn yellow and die back. This usually takes about 80-100 days from planting.
2. Harvesting Technique: The easiest way to harvest potatoes from a container is to simply dump the entire contents of the container onto a tarp or into a wheelbarrow. Then, carefully sift through the soil and collect your potatoes. You can also reach into the container and gently dig around the plants to harvest the potatoes.
3. Curing (Optional): If you plan to store your potatoes for a longer period, you’ll need to cure them. To cure potatoes, spread them out in a cool, dark, and well-ventilated place for about a week. This allows the skins to harden and helps prevent rot.
Troubleshooting: Common Problems and Solutions
Even with the best care, you might encounter some problems while growing potatoes in containers. Here are a few common issues and how to address them:
* Potato Scab: This is a common fungal disease that causes rough, scabby patches on the potato skins. To prevent potato scab, use disease-resistant varieties and avoid overwatering.
* Early Blight: This fungal disease causes brown spots on the leaves. To prevent early blight, provide good air circulation and avoid overhead watering.
* Potato Beetles: These pests can quickly defoliate your potato plants. Handpick the beetles off the plants or use insecticidal soap.
* Lack of Tubers: If your potato plants are growing well but not producing tubers, it could be due to a lack of phosphorus or potassium in the soil. Amend the soil with a fertilizer that’s high in these nutrients. Also, ensure they are getting enough sunlight.
Extra Tips for Success
* Rotate Your Crops: Avoid planting potatoes in the same container year after year. This can help prevent soilborne diseases.
* Use High-Quality Potting Mix: Don’t skimp on the potting mix! Use a well-draining mix that’s rich in organic matter.
* Don’t Be Afraid to Experiment: Try different potato varieties and growing techniques to see what works best for you.
* Enjoy the Process! Growing potatoes in containers is a rewarding experience. Don’t get discouraged if you encounter some challenges along the way. Just keep learning and experimenting, and you’ll be harvesting your own delicious potatoes in no time!
So, there you have it! My comprehensive guide to growing potatoes in containers. I hope this inspires you to give it a try. Trust me, there’s nothing quite like the taste of homegrown potatoes. Happy gardening!
Conclusion
So, there you have it! Growing potatoes in containers is not just a gardening trend; it’s a game-changer for anyone with limited space, a desire for fresh, homegrown produce, or simply a love for getting their hands dirty. We’ve walked you through the entire process, from selecting the right container and seed potatoes to nurturing your plants and harvesting your bounty.
Why is this DIY trick a must-try? Because it puts the power of fresh, delicious potatoes directly into your hands, regardless of whether you have a sprawling backyard or just a sunny balcony. Imagine the satisfaction of digging into your own container-grown potatoes, knowing exactly where they came from and how they were grown. The taste difference between store-bought and homegrown is undeniable – a burst of earthy flavor that will elevate your meals to a whole new level.
Beyond the taste, growing potatoes in containers offers unparalleled convenience. No more back-breaking digging in the garden! The container method allows you to control the soil quality, watering, and sunlight exposure, leading to healthier plants and a more abundant harvest. Plus, it’s a fantastic way to get kids involved in gardening, teaching them about where their food comes from and fostering a love for nature.
But the benefits don’t stop there. Container gardening is inherently more sustainable. You can use organic soil and fertilizers, minimizing your environmental impact. And by growing your own food, you’re reducing your reliance on industrial agriculture and supporting a more localized food system.
Ready to take your potato growing to the next level? Consider these variations:
* Experiment with different potato varieties: From Yukon Gold to Russet to fingerling potatoes, each variety offers a unique flavor and texture. Try growing a mix of varieties to discover your favorites.
* Add companion plants: Marigolds, basil, and nasturtiums can help deter pests and attract beneficial insects to your potato plants.
* Try vertical gardening: If you’re really short on space, consider using a potato grow bag or building a vertical potato tower.
* Compost tea boost: Give your potato plants an extra boost of nutrients by watering them with diluted compost tea every few weeks.
Ultimately, the best way to learn is by doing. Don’t be afraid to experiment and adapt the techniques to suit your own environment and preferences. The joy of gardening lies in the process of discovery and the satisfaction of nurturing life from seed to harvest.
We wholeheartedly encourage you to try growing potatoes in containers this season. It’s a rewarding and delicious experience that you won’t regret. And most importantly, we want to hear about your journey! Share your successes, your challenges, and your tips with us in the comments below. Let’s build a community of container potato growers and learn from each other. Show us your pictures, tell us your stories, and let’s celebrate the joy of homegrown potatoes together! We are confident that you will find that growing your own potatoes is a rewarding experience.
Frequently Asked Questions (FAQ)
What kind of container should I use for growing potatoes?
The ideal container for growing potatoes should be large enough to accommodate the growing root system and allow for the “hilling” process. A container that is at least 20 inches in diameter and 18 inches deep is generally recommended. You can use plastic pots, grow bags, wooden crates, or even repurposed containers like old trash cans (with drainage holes drilled in the bottom). The key is to ensure good drainage to prevent the potatoes from rotting. Fabric grow bags are particularly popular because they allow for excellent aeration and drainage, and they also prevent the roots from becoming root-bound.
What type of soil is best for growing potatoes in containers?
Potatoes thrive in well-draining, slightly acidic soil. A good potting mix specifically designed for vegetables is ideal. You can also create your own mix by combining equal parts of compost, peat moss (or coconut coir), and perlite or vermiculite. Avoid using garden soil, as it can be too heavy and compacted, hindering drainage and root growth. The compost provides essential nutrients, the peat moss or coconut coir helps retain moisture, and the perlite or vermiculite improves drainage and aeration.
How many seed potatoes can I plant in one container?
This depends on the size of your container and the variety of potato you’re growing. For a container that is 20 inches in diameter, you can typically plant 2-3 seed potatoes. If you’re using a smaller container, stick to just one seed potato. Make sure to space the seed potatoes evenly within the container to allow for adequate growth. Overcrowding can lead to smaller potatoes and reduced yields.
How often should I water my container potatoes?
Potatoes need consistent moisture, especially during tuber formation. Water deeply whenever the top inch of soil feels dry to the touch. Avoid overwatering, as this can lead to root rot. The frequency of watering will depend on the weather conditions, the size of your container, and the type of soil you’re using. In hot, dry weather, you may need to water daily, while in cooler, wetter weather, you may only need to water every few days. A good rule of thumb is to check the soil moisture regularly and water accordingly.
How much sunlight do container potatoes need?
Potatoes need at least 6-8 hours of direct sunlight per day to thrive. Choose a location that receives plenty of sunlight throughout the day. If you live in a particularly hot climate, you may need to provide some afternoon shade to prevent the plants from overheating. Insufficient sunlight can lead to weak, leggy plants and reduced yields.
What is “hilling” and why is it important for growing potatoes in containers?
Hilling is the process of gradually adding more soil to the container as the potato plants grow. This encourages the plants to produce more tubers along the buried stem. As the plants grow taller, add a few inches of soil to the container, covering the lower part of the stem. Repeat this process every few weeks until the container is nearly full. Hilling also helps to protect the developing tubers from sunlight, which can cause them to turn green and produce solanine, a toxic compound.
When and how do I harvest my container potatoes?
You can start harvesting “new potatoes” (small, immature potatoes) about 2-3 weeks after the plants flower. To harvest new potatoes, carefully reach into the container and remove a few tubers without disturbing the rest of the plant. For a full harvest, wait until the foliage starts to die back and turn yellow, usually about 80-100 days after planting. At this point, the potatoes will have reached their full size and maturity. To harvest, simply tip the container over and carefully sift through the soil to collect the potatoes.
What are some common pests and diseases that affect container potatoes?
Common pests that can affect container potatoes include aphids, potato beetles, and flea beetles. Diseases include early blight, late blight, and potato scab. Regularly inspect your plants for signs of pests or diseases and take action promptly. You can use organic pest control methods, such as insecticidal soap or neem oil, to control pests. To prevent diseases, ensure good air circulation, avoid overwatering, and use disease-resistant potato varieties.
Can I reuse the soil from my potato containers?
Yes, you can reuse the soil from your potato containers, but it’s important to amend it with fresh compost and fertilizer before planting again. Potatoes are heavy feeders, so the soil will likely be depleted of nutrients after a growing season. Adding compost will replenish the nutrients and improve the soil structure. You may also want to sterilize the soil to kill any potential pests or diseases. This can be done by baking the soil in the oven at 180°F for 30 minutes or by solarizing it in a black plastic bag for several weeks.
How do I store my harvested potatoes?
Store your harvested potatoes in a cool, dark, and well-ventilated place. The ideal temperature for storing potatoes is between 40-50°F (4-10°C). Avoid storing potatoes in the refrigerator, as this can cause them to convert starch to sugar, resulting in a sweet taste. Store potatoes away from apples and bananas, as these fruits release ethylene gas, which can cause potatoes to sprout prematurely. Properly stored potatoes can last for several months.

Leave a Comment