

Balcony vegetable garden hanging – sounds dreamy, right? Imagine stepping onto your balcony and being greeted by a lush, vibrant tapestry of greens, reds, and yellows, all edible and ready to be harvested. Forget those bland, store-bought veggies; we’re talking about fresh, flavorful produce grown right outside your door! For centuries, people have cultivated small gardens in limited spaces, from window boxes in bustling cities to terraced gardens clinging to hillsides. This tradition speaks to our innate desire to connect with nature and nourish ourselves with homegrown goodness.
But let’s be honest, not everyone has a sprawling backyard. That’s where the magic of a balcony vegetable garden hanging comes in! It’s the perfect solution for apartment dwellers, condo owners, or anyone with limited ground space who craves the taste of homegrown vegetables. This DIY guide will unlock the secrets to creating a thriving vertical garden that not only adds beauty to your balcony but also provides you with a steady supply of fresh, organic produce. I’m going to show you some clever tricks and hacks to maximize space, choose the right plants, and keep your hanging garden flourishing. Get ready to transform your balcony into a green oasis!

Creating Your Dream Balcony Vegetable Garden: A Hanging Delight!
Hey there, fellow gardening enthusiasts! I’m so excited to share my favorite DIY project with you: creating a thriving hanging vegetable garden right on your balcony! Even if you have limited space, you can still enjoy fresh, homegrown veggies. This guide will walk you through every step, from choosing the right plants to building your own hanging planters. Let’s get our hands dirty!
Choosing the Right Plants
Before we dive into the construction, let’s talk about the stars of our show: the vegetables! Not all veggies are created equal when it comes to hanging gardens. We need to consider size, weight, and sunlight requirements.
Here’s a list of my top recommendations:
* Tomatoes (especially cherry and grape varieties): These are balcony garden staples! They love the sun and produce delicious, bite-sized treats. Look for determinate or bush varieties, as they stay more compact.
* Peppers (bell peppers, chili peppers): Peppers are relatively easy to grow in containers and come in a rainbow of colors. They also enjoy plenty of sunshine.
* Strawberries: Who doesn’t love fresh strawberries? They thrive in hanging baskets and add a touch of sweetness to your balcony.
* Lettuce and other leafy greens (spinach, kale, arugula): These are perfect for a quick harvest and don’t require as much sunlight as some other vegetables.
* Herbs (basil, mint, parsley, thyme, oregano): Herbs are a must-have for any garden, and they do exceptionally well in hanging planters. Plus, they’ll add a wonderful fragrance to your balcony!
* Radishes: These fast-growing root vegetables are perfect for adding a little zing to your salads.
* Bush Beans: Compact and productive, bush beans are a great choice for smaller spaces.
Things to Consider:
* Sunlight: How much direct sunlight does your balcony receive? Choose plants that match your balcony’s light conditions. Most vegetables need at least 6 hours of sunlight per day.
* Weight: Remember that hanging planters can get heavy, especially after watering. Make sure your balcony railing or support structure can handle the weight.
* Size: Consider the mature size of the plants you choose. You don’t want them to outgrow their containers too quickly.
* Watering: Hanging planters tend to dry out faster than ground-level gardens, so choose plants that can tolerate slightly drier conditions or be prepared to water frequently.
Building Your Hanging Planters: Two Awesome Options!
I’m going to share two different methods for creating your hanging planters. The first is a super simple DIY using repurposed materials, and the second involves a bit more construction but offers a more polished look.
Option 1: Repurposed Bucket Hanging Planters (Easy & Budget-Friendly!)
This method is perfect if you’re on a budget or just want a quick and easy project.
Materials You’ll Need:
* Plastic buckets (5-gallon buckets work great, but you can use smaller ones too)
* Drill with various sized drill bits
* Heavy-duty rope or chain
* Potting soil
* Your chosen vegetable seedlings or seeds
* Measuring tape
* Marker
Step-by-Step Instructions:
1. Prepare the Buckets: First, clean your buckets thoroughly. Make sure there’s no residue or dirt inside.
2. Drill Drainage Holes: This is crucial! Drill several drainage holes (about 1/2 inch in diameter) in the bottom of each bucket. This will prevent water from logging and rotting your plants’ roots. I usually drill about 5-6 holes evenly spaced.
3. Drill Hanging Holes: Now, we need to create holes for the rope or chain. Measure down about 1-2 inches from the top rim of the bucket. Mark four equally spaced points around the bucket. Drill holes at these points, making sure they’re large enough to accommodate your rope or chain.
4. Attach the Rope or Chain: Cut four equal lengths of rope or chain. The length will depend on how low you want your planters to hang. Thread each length through one of the holes you drilled and tie a secure knot on the inside of the bucket. Make sure the knots are strong and won’t slip. If using chain, use S-hooks or quick links to attach the chain to the bucket.
5. Add Potting Soil: Fill the buckets with high-quality potting soil, leaving about an inch or two of space at the top. Don’t use garden soil, as it can compact and not drain well in containers.
6. Plant Your Vegetables: Gently remove your vegetable seedlings from their containers and plant them in the buckets. Follow the spacing recommendations on the seed packet or plant label. If you’re starting from seeds, sow them according to the instructions.
7. Water Thoroughly: Water the newly planted vegetables thoroughly until water drains out of the drainage holes.
8. Hang Your Planters: Find a sturdy spot on your balcony railing or support structure to hang your planters. Make sure the support can handle the weight of the filled planters.
9. Enjoy Your Garden! Water regularly, fertilize as needed, and watch your vegetables grow!
Option 2: Wooden Hanging Planter Box (More Advanced & Stylish!)
This option requires a bit more woodworking skill, but the result is a beautiful and durable hanging planter box.
Materials You’ll Need:
* Untreated wood (cedar or redwood are excellent choices for outdoor use)
* Measuring tape
* Saw (hand saw or power saw)
* Drill with drill bits
* Screws or nails
* Wood glue
* Heavy-duty chain or rope
* Potting soil
* Your chosen vegetable seedlings or seeds
* Landscape fabric (optional)
* Stain or paint (optional)
* Sandpaper
Step-by-Step Instructions:
1. Design and Cut the Wood: First, decide on the size of your planter box. I recommend a box that’s about 24 inches long, 8 inches wide, and 8 inches deep. Cut the wood pieces according to your desired dimensions. You’ll need two pieces for the sides, two for the ends, and one for the bottom.
2. Assemble the Box: Apply wood glue to the edges of the wood pieces and then screw or nail them together to form a box. Make sure the corners are square and the joints are tight.
3. Drill Drainage Holes: Drill several drainage holes (about 1/2 inch in diameter) in the bottom of the box.
4. Add Landscape Fabric (Optional): Line the inside of the box with landscape fabric to help retain moisture and prevent soil from washing out. Secure the fabric with staples or tacks.
5. Attach Hanging Hardware: This is where things get interesting! You have a few options for attaching the chain or rope.
* Option A: Eye Hooks: Drill pilot holes near the top corners of the box and screw in heavy-duty eye hooks. Attach the chain or rope to the eye hooks using S-hooks or quick links.
* Option B: Drill Through the Sides: Drill holes through the sides of the box near the top corners. Thread the chain or rope through the holes and secure it with knots or metal clamps.
6. Sand and Finish (Optional): Sand the box smooth and apply a stain or paint to protect the wood and give it a more polished look. Let the finish dry completely before proceeding.
7. Add Potting Soil: Fill the box with high-quality potting soil, leaving about an inch or two of space at the top.
8. Plant Your Vegetables: Gently remove your vegetable seedlings from their containers and plant them in the box. Follow the spacing recommendations on the seed packet or plant label.
9. Water Thoroughly: Water the newly planted vegetables thoroughly until water drains out of the drainage holes.
10. Hang Your Planter: Find a sturdy spot on your balcony railing or support structure to hang your planter. Make sure the support can handle the weight of the filled planter.
11. Enjoy Your Garden! Water regularly, fertilize as needed, and watch your vegetables grow!
Caring for Your Hanging Vegetable Garden
Now that you’ve built and planted your hanging garden, it’s time to learn how to keep it thriving!
* Watering: Hanging planters dry out quickly, especially in hot weather. Check the soil moisture daily and water when the top inch feels dry to the touch. Water deeply until water drains out of the drainage holes.
* Fertilizing: Vegetables need nutrients to grow and produce. Fertilize your plants every 2-3 weeks with a balanced liquid fertilizer. Follow the instructions on the fertilizer label.
* Sunlight: Make sure your plants are getting enough sunlight. If they’re
Conclusion
Transforming your balcony into a vibrant, productive vegetable garden with hanging planters is not just a trend; it’s a revolution in urban gardening. It’s a way to reconnect with nature, enjoy fresh, homegrown produce, and maximize limited space, all while adding a touch of beauty to your outdoor living area. This DIY balcony vegetable garden hanging system is a must-try for anyone looking to embrace sustainable living, even in the smallest of apartments.
Why is this DIY approach so compelling? Firstly, it’s incredibly cost-effective. Forget expensive pre-made systems; with a few readily available materials and a little creativity, you can create a stunning and functional hanging garden that rivals anything you’d find in a store. Secondly, it’s completely customizable. You have the freedom to choose the types of planters, the arrangement, and the vegetables you want to grow, tailoring the garden to your specific needs and preferences. Imagine a cascade of cherry tomatoes tumbling down, fragrant herbs swaying gently in the breeze, and vibrant leafy greens providing a constant supply of fresh ingredients for your meals.
But the benefits extend beyond just aesthetics and cost savings. Growing your own vegetables is incredibly rewarding. There’s a unique satisfaction in nurturing a plant from seed to harvest, knowing that you’re providing yourself and your family with healthy, organic food. Plus, gardening is a fantastic stress reliever. The simple act of tending to your plants, feeling the soil between your fingers, and watching them grow can be incredibly therapeutic.
Ready to take your balcony garden to the next level? Consider these variations to personalize your hanging garden:
* **Vertical Pallet Garden:** Repurpose an old wooden pallet by attaching fabric planters to the slats. This creates a rustic and visually appealing vertical garden that’s perfect for herbs, strawberries, or lettuce.
* **Macrame Plant Hangers:** Add a touch of bohemian flair with macrame plant hangers. These are relatively easy to make and can be customized with different colors and patterns.
* **Tiered Hanging Baskets:** Create a dramatic display with tiered hanging baskets. This is a great way to maximize vertical space and grow a variety of vegetables in a single hanging system.
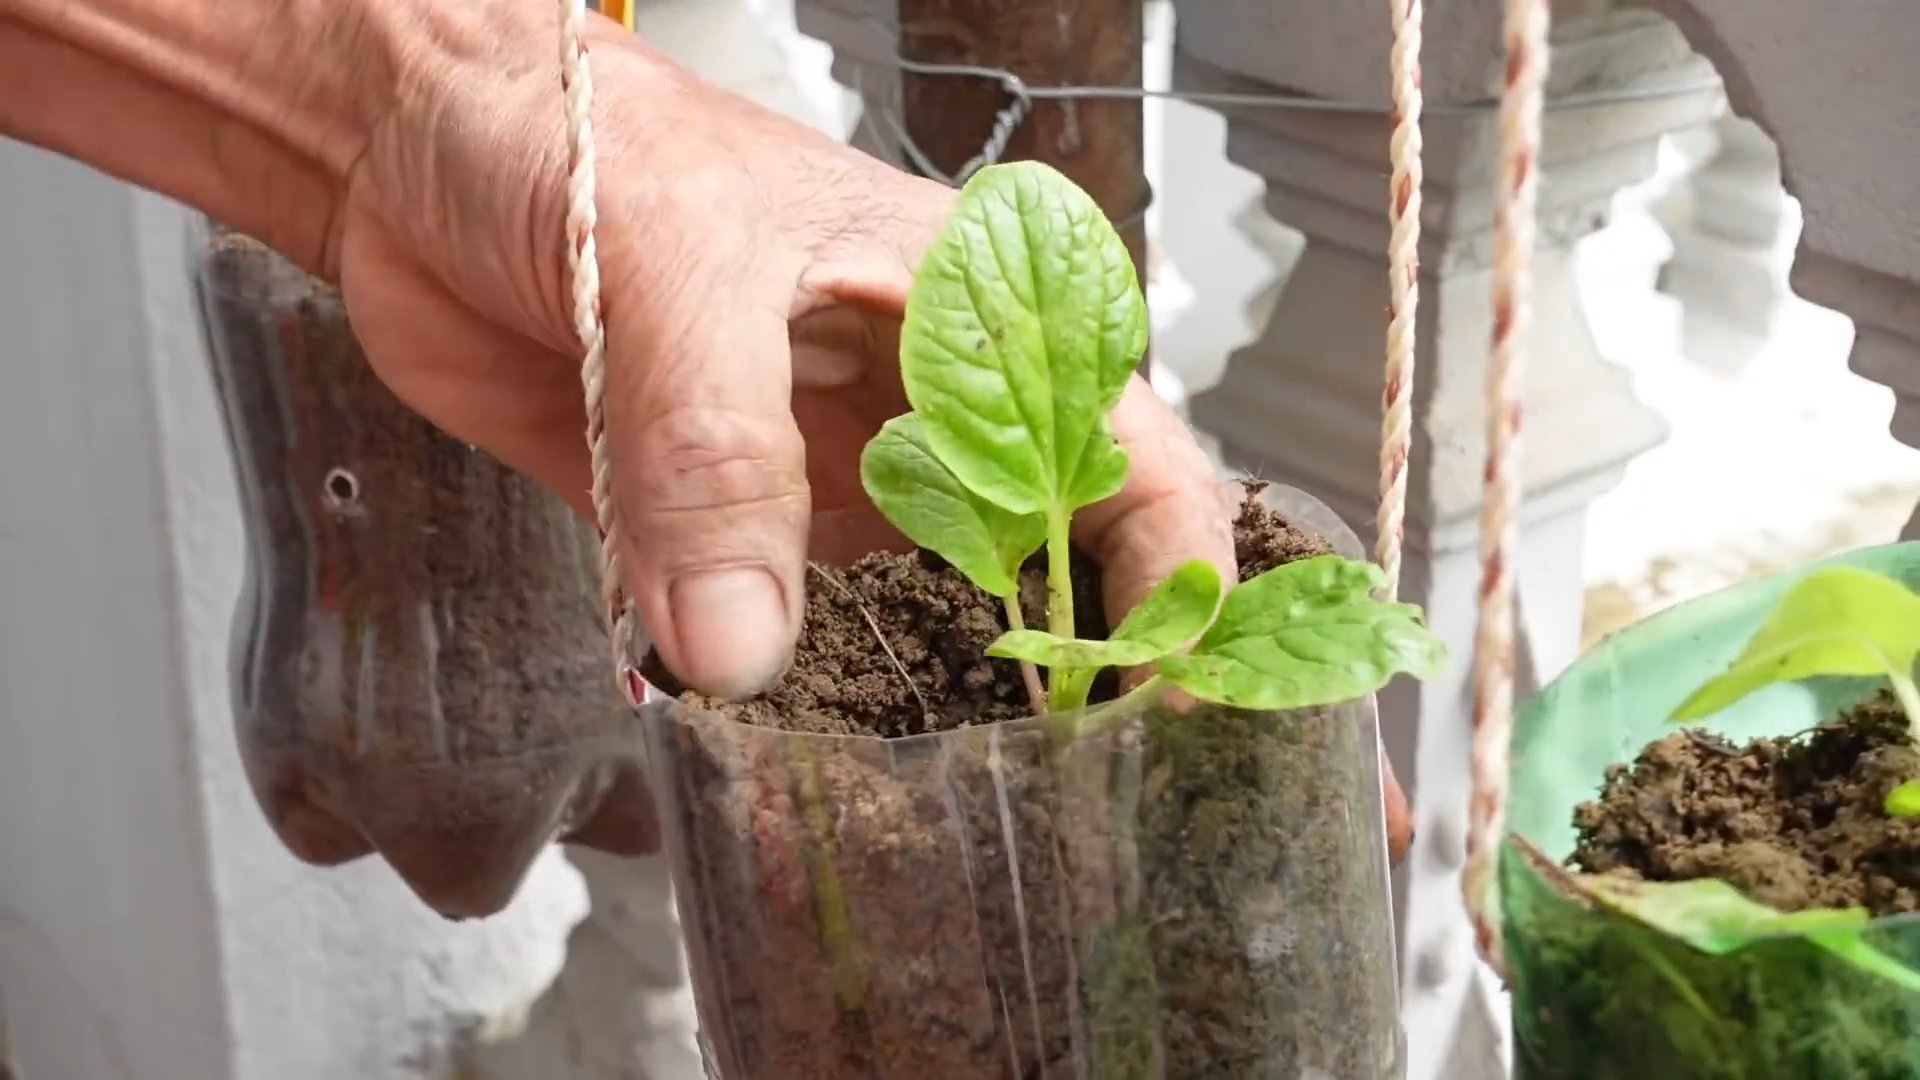
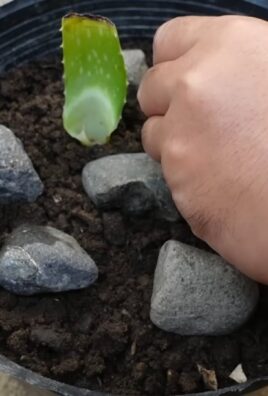
* **Upcycled Container Garden:** Get creative with upcycled containers like old buckets, tin cans, or even plastic bottles. Just make sure to drill drainage holes in the bottom.
* Consider companion planting. Planting certain vegetables together can help them thrive. For example, basil repels pests that attack tomatoes, and carrots deter onion flies.
Don’t be afraid to experiment and find what works best for your balcony and your growing conditions. Remember to choose vegetables that are well-suited to container gardening and that receive adequate sunlight. Regular watering and fertilization are also essential for healthy growth.
We are confident that this DIY balcony vegetable garden hanging project will transform your outdoor space into a thriving oasis. We encourage you to give it a try and share your experience with us! Post photos of your creations on social media using #BalconyGardenDIY and let us know what vegetables you’re growing. We can’t wait to see what you create! Your success story could inspire others to embrace the joys of urban gardening and create their own little slice of paradise.
Frequently Asked Questions (FAQ)
What are the best vegetables to grow in a hanging balcony garden?
The best vegetables for a hanging balcony garden are those that are compact, lightweight, and don’t require a lot of space. Some excellent choices include:
* **Tomatoes (especially cherry and grape varieties):** These are prolific producers and their trailing vines look beautiful in hanging baskets.
* **Lettuce and other leafy greens:** These are easy to grow and provide a continuous harvest.
* **Herbs (basil, mint, thyme, oregano, parsley):** Herbs thrive in containers and add fragrance and flavor to your garden.
* **Strawberries:** These are a delicious and rewarding crop to grow in hanging baskets.
* **Peppers (especially smaller varieties like chili peppers):** Peppers are relatively easy to grow and add a splash of color to your garden.
* **Radishes:** These are quick to mature and can be harvested in just a few weeks.
* **Spinach:** Similar to lettuce, spinach is easy to grow and harvest.
Consider the amount of sunlight your balcony receives when choosing your vegetables. Some vegetables, like tomatoes and peppers, require at least 6-8 hours of sunlight per day, while others, like lettuce and spinach, can tolerate partial shade.
How much sunlight do my hanging vegetables need?
The amount of sunlight your hanging vegetables need depends on the specific type of vegetable. As a general rule:
* **Full Sun (6-8 hours of direct sunlight per day):** Tomatoes, peppers, cucumbers, beans, and most herbs.
* **Partial Sun (4-6 hours of direct sunlight per day):** Lettuce, spinach, kale, radishes, and strawberries.
* **Shade (Less than 4 hours of direct sunlight per day):** Some leafy greens like arugula and certain herbs like mint can tolerate shade.
Observe your balcony throughout the day to determine how much sunlight it receives. If your balcony doesn’t get enough sunlight, you may need to supplement with grow lights.
What type of soil should I use for my hanging vegetable garden?
Use a high-quality potting mix specifically designed for containers. Avoid using garden soil, as it can be too heavy and compacted for containers. A good potting mix will be lightweight, well-draining, and contain nutrients to support plant growth. You can also amend your potting mix with compost or other organic matter to improve its fertility.
How often should I water my hanging vegetable garden?
Hanging baskets tend to dry out quickly, especially in hot weather. Check the soil moisture daily and water when the top inch of soil feels dry to the touch. Water thoroughly until water drains out of the bottom of the container. Avoid overwatering, as this can lead to root rot. The frequency of watering will depend on the weather, the type of vegetables you’re growing, and the size of your containers.
How do I fertilize my hanging vegetable garden?
Vegetables grown in containers need regular fertilization to thrive. Use a balanced liquid fertilizer or slow-release fertilizer specifically formulated for vegetables. Follow the instructions on the fertilizer packaging. Fertilize every 2-4 weeks during the growing season.
How do I protect my hanging vegetable garden from pests and diseases?
Regularly inspect your plants for signs of pests or diseases. Common pests include aphids, spider mites, and whiteflies. You can control pests with insecticidal soap, neem oil, or by handpicking them off the plants. To prevent diseases, ensure good air circulation around your plants and avoid overwatering.
What kind of containers are best for a hanging balcony vegetable garden?
There are many different types of containers that can be used for a hanging balcony vegetable garden. Some popular options include:
* **Hanging baskets:** These are readily available and come in a variety of sizes and materials.
* **Self-watering planters:** These planters have a built-in reservoir that provides a constant supply of water to the plants.
* **Fabric planters:** These are lightweight and breathable, which helps to prevent root rot.
* **Upcycled containers:** Get creative and use old buckets, tin cans, or plastic bottles as planters.
Choose containers that are the appropriate size for the vegetables you’re growing. Make sure the containers have drainage holes to prevent waterlogging.
How do I hang my vegetable garden safely?
Ensure that your balcony railing or support structure is strong enough to support the weight of the hanging planters. Use sturdy hooks or brackets to hang the planters. Distribute the weight evenly to avoid overloading any one area. Regularly inspect the hanging system for signs of wear and tear.
What if I don’t have a balcony? Can I still use this DIY trick?
Absolutely! While the article focuses on balconies, the principles of creating a hanging vegetable garden can be adapted to other spaces. You can hang planters from a porch, a patio, a pergola, or even indoors near a sunny window. The key is to find a sturdy support structure that can handle the weight of the planters and provide adequate sunlight for your vegetables. If you’re growing indoors, you may need to supplement with grow lights.


Leave a Comment