

Basil Growing Tips are what every home gardener needs to unlock the full potential of this fragrant and flavorful herb! Have you ever dreamed of snipping fresh basil leaves right from your own garden to add that perfect touch to your pasta sauce, pesto, or Caprese salad? I know I have! For centuries, basil has been cherished not only for its culinary uses but also for its medicinal properties and even its symbolic meaning in various cultures. From ancient Greece, where it was associated with royalty, to India, where it’s considered a sacred herb, basil has a rich and fascinating history.
But let’s be honest, sometimes growing basil can feel a little tricky. It can be frustrating to see your basil plants struggling, turning yellow, or just not producing as much as you’d hoped. That’s where these basil growing tips come in! I’m going to share some simple yet effective DIY tricks and hacks that will help you cultivate thriving basil plants, even if you’re a complete beginner. Imagine the satisfaction of harvesting basketfuls of fragrant basil, knowing you grew it yourself. Let’s dive in and transform your garden into a basil paradise!
DIY: Propagating Basil from Cuttings – A Beginner’s Guide
Hey there, fellow plant enthusiasts! Ever find yourself with a gorgeous basil plant that’s just begging to be multiplied? Or maybe you just want to save a few sprigs from going to waste? Well, you’re in the right place! I’m going to walk you through the super easy process of propagating basil from cuttings. Trust me, it’s way simpler than you think, and before you know it, you’ll have a whole army of basil plants ready to spice up your kitchen.
Why Propagate Basil from Cuttings?
Before we dive in, let’s talk about why this method is so awesome:
* It’s Cost-Effective: Forget buying new basil plants all the time. This method lets you create new plants from existing ones, saving you money.
* It’s Fast: Basil roots incredibly quickly from cuttings, often within a week or two.
* It’s Easy: Seriously, even if you’re a complete beginner, you can do this.
* It’s a Great Way to Clone Your Favorite Basil: If you have a basil plant with particularly delicious flavor or beautiful leaves, propagating from cuttings ensures you get an exact copy.
* It’s Sustainable: You’re reducing waste by using what you already have.
What You’ll Need
Alright, let’s gather our supplies. You probably have most of these things lying around already:
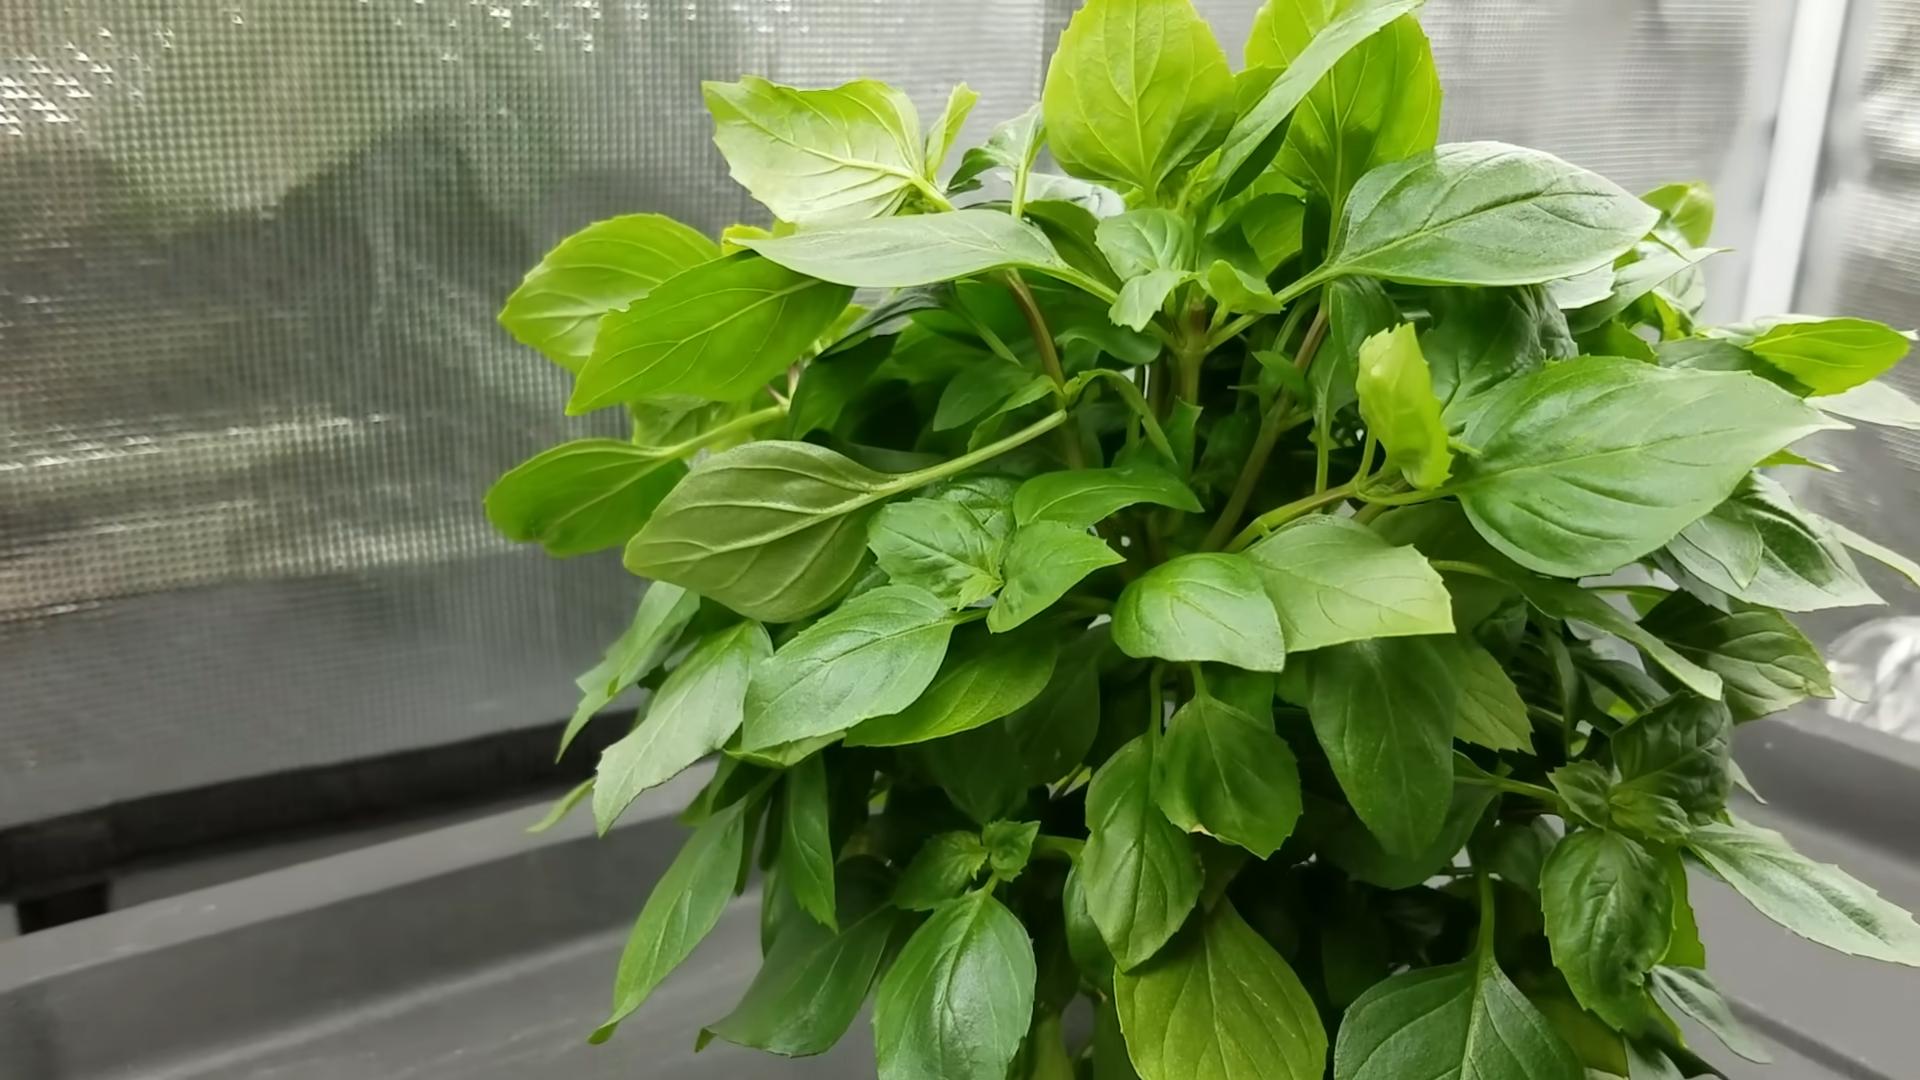
* A Healthy Basil Plant: This is the star of the show! Choose a plant that’s vibrant and free from pests or diseases.
* Sharp Scissors or Pruning Shears: Cleanliness is key to prevent infection.
* A Glass or Jar: To hold the cuttings while they root.
* Water: Tap water is fine, but filtered water is even better.
* Rooting Hormone (Optional): This can speed up the rooting process, but it’s not essential.
* Small Pots: For transplanting your rooted cuttings.
* Potting Mix: A well-draining potting mix is ideal.
* A Sunny Spot: Basil loves sunlight!
Taking the Cuttings
This is where the magic begins!
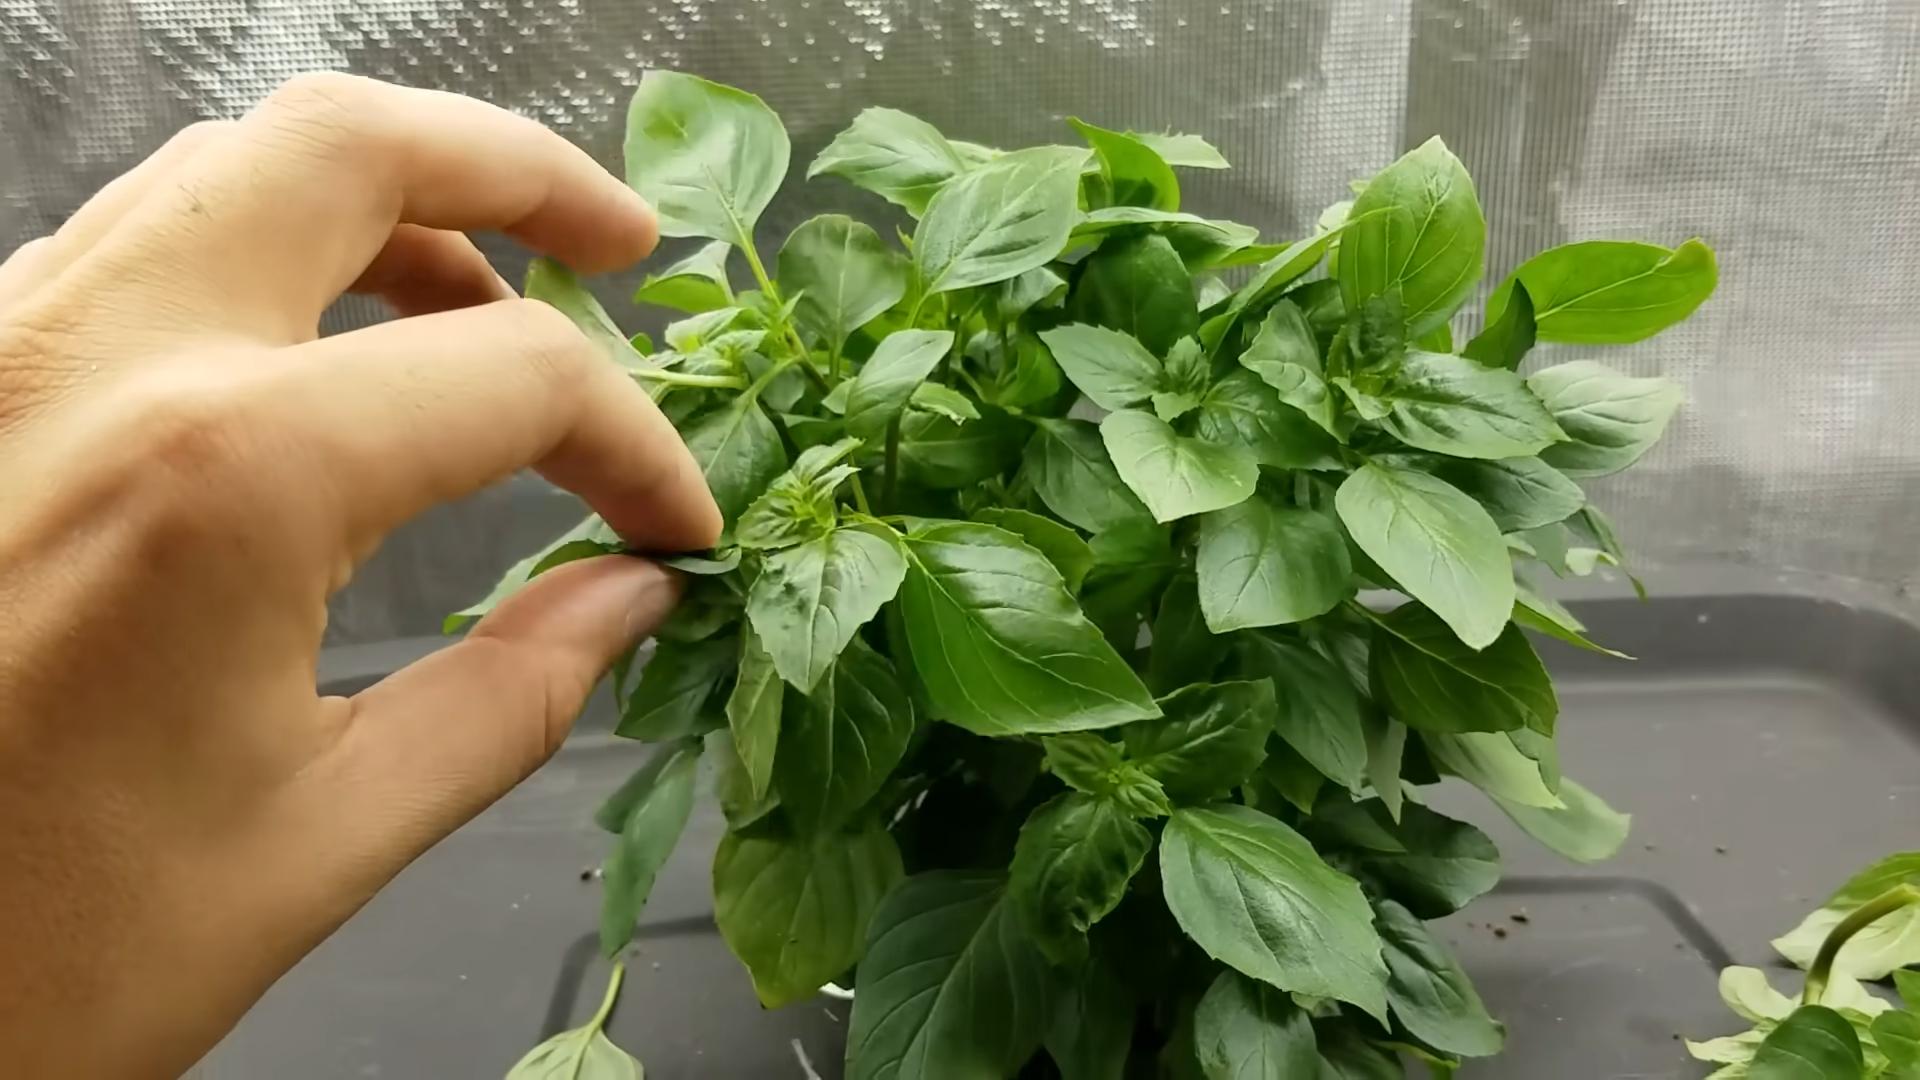
1. Choose Your Cuttings: Look for healthy stems that are about 4-6 inches long. Avoid stems that are flowering or have buds, as these will focus their energy on flowering rather than rooting.
2. Make the Cut: Using your clean scissors or pruning shears, make a clean cut just below a leaf node (the point where leaves grow from the stem). This is where the roots will emerge.
3. Remove the Lower Leaves: Strip off the leaves from the bottom 1-2 inches of the stem. This prevents them from rotting in the water and encourages root growth.
4. Optional: Dip in Rooting Hormone: If you’re using rooting hormone, dip the cut end of the stem into the powder or liquid. Follow the instructions on the product label.
Rooting the Cuttings in Water
This is the easiest and most common method.
1. Prepare the Water: Fill your glass or jar with fresh water.
2. Place the Cuttings: Arrange the cuttings in the water, making sure that the bottom 1-2 inches of the stem are submerged, but the leaves are above the water line. Don’t overcrowd the jar; give each cutting some space.
3. Find a Sunny Spot: Place the jar in a bright, indirect sunlight location. Avoid direct sunlight, which can scorch the leaves. A windowsill is usually a good option.
4. Change the Water Regularly: Change the water every 1-2 days to keep it fresh and prevent bacteria from growing. This also provides the cuttings with fresh oxygen.
5. Wait for Roots to Grow: Be patient! Roots should start to appear within a week or two. You’ll see small white roots emerging from the nodes where you removed the leaves.
Transplanting the Rooted Cuttings
Once the roots are about 1-2 inches long, it’s time to transplant your cuttings into soil.
1. Prepare the Pots: Fill your small pots with well-draining potting mix.
2. Gently Remove the Cuttings: Carefully remove the rooted cuttings from the water. Be gentle, as the roots are delicate.
3. Plant the Cuttings: Make a small hole in the potting mix and gently place the rooted cutting into the hole. Cover the roots with soil and gently press down to secure the plant.
4. Water Thoroughly: Water the newly planted cuttings thoroughly until the water drains out of the bottom of the pot.
5. Provide Humidity: Basil cuttings love humidity, especially when they’re first transplanted. You can increase humidity by covering the pots with a clear plastic bag or dome for a few days. Make sure to vent the bag or dome occasionally to prevent mold growth.
6. Place in a Sunny Spot: Place the pots in a bright, indirect sunlight location.
Caring for Your New Basil Plants
Now that you’ve successfully propagated your basil cuttings, it’s important to provide them with the right care to help them thrive.
* Watering: Water your basil plants regularly, keeping the soil moist but not soggy. Allow the top inch of soil to dry out between waterings.
* Sunlight: Basil needs at least 6 hours of sunlight per day. If you don’t have enough natural sunlight, you can supplement with a grow light.
* Fertilizing: Feed your basil plants with a balanced liquid fertilizer every 2-4 weeks during the growing season.
* Pinching: Pinch off the top sets of leaves regularly to encourage bushier growth. This also prevents the plant from flowering too early, which can reduce leaf production.
* Pest Control: Keep an eye out for pests like aphids, spider mites, and whiteflies. Treat infestations promptly with insecticidal soap or neem oil.
* Harvesting: Harvest basil leaves regularly to encourage new growth. Simply snip off the leaves with scissors or pruning shears.
Troubleshooting
Sometimes things don’t go exactly as planned. Here are a few common problems and how to fix them:
* Cuttings Rotting: This is usually caused by bacteria in the water. Make sure to change the water regularly and use clean scissors or pruning shears.
* Cuttings Not Rooting: This could be due to a number of factors, such as poor lighting, low humidity, or using cuttings from a plant that’s not healthy. Make sure to provide your cuttings with the right conditions and use cuttings from a healthy plant.
* Yellowing Leaves: This could be a sign of overwatering or underwatering. Adjust your watering schedule accordingly.
* Leggy Growth: This is usually caused by insufficient sunlight. Move your basil plants to a sunnier location or supplement with a grow light.
Alternative Method: Rooting Directly in Soil
While I prefer rooting in water because you can see the roots develop, you *can* also root basil cuttings directly in soil. Here’s how:
1. Prepare the Pot: Fill a small pot with well-draining potting mix. Moisten the soil thoroughly.
2. Take the Cutting: Follow the same steps as above for taking a cutting (4-6 inches long, cut below a node, remove lower leaves).
3. Dip in Rooting Hormone (Optional): As before, this can help, but isn’t required.
4. Plant the Cutting: Make a hole in the soil and insert the cutting, burying the bottom 1-2 inches. Gently press the soil around the stem.
5. Increase Humidity: This is crucial for success with this method. Cover the pot with a clear plastic bag or dome to create a humid environment. Make sure to vent it daily to prevent mold.
6. Place in Indirect Light: Avoid direct sunlight until the cutting has rooted.
7. Keep Soil Moist: The soil should be consistently moist, but not soggy.
8. Check for Roots: After a week or two, gently tug on the cutting. If it resists, it has likely rooted.
9. Gradually Acclimate: Once rooted, gradually remove the plastic bag or dome over a few days to acclimate the plant to lower humidity.
Tips for Success
Here are a few extra tips to help you succeed with propagating basil from cuttings:
* Use Clean Tools: Always use clean scissors or pruning shears to prevent the spread of disease.
* Choose Healthy Cuttings: Select cuttings from healthy, vigorous plants.
* Provide Adequate Light: Basil needs plenty of light to thrive.
* Maintain Humidity: Basil cuttings love humidity, especially when they’re first rooting.
*
Conclusion
So, there you have it! Mastering these simple yet effective basil growing tips will transform your gardening experience and ensure a bountiful harvest of fragrant, flavorful basil all season long. We’ve covered everything from selecting the right variety and preparing the perfect soil to providing optimal sunlight and water, and even tackling common pests and diseases.
But why is this DIY approach a must-try? Because it empowers you to take control of your basil’s health and vitality, resulting in a superior product compared to store-bought options. Imagine the satisfaction of snipping fresh basil leaves, bursting with aroma, knowing you nurtured them from seed to table. The flavor difference alone is worth the effort – a vibrant, peppery sweetness that elevates any dish. Plus, you’ll save money and reduce your environmental impact by avoiding plastic packaging and long-distance transportation.
Beyond the basics, feel free to experiment! Try growing different basil varieties like Thai basil for Asian-inspired dishes, lemon basil for a citrusy twist, or purple basil for a visually stunning addition to your garden. You can also explore companion planting, pairing basil with tomatoes, peppers, or marigolds to deter pests and improve growth. Consider using a self-watering planter for consistent moisture, especially if you live in a hot or dry climate. Another variation is to propagate basil cuttings in water to create new plants from your existing ones, expanding your basil empire effortlessly. You can even dry your excess basil for use during the winter months, preserving its flavor and aroma for year-round enjoyment.
Don’t be afraid to get your hands dirty and embrace the learning process. Gardening is a journey, and every mistake is an opportunity to grow (pun intended!). The rewards of fresh, homegrown basil are well worth the effort.
We are confident that these basil growing tips will set you on the path to success. Now, it’s your turn! We encourage you to put these techniques into practice and witness the magic of growing your own basil. Share your experiences with us in the comments below. We’d love to hear about your successes, challenges, and any unique tips you’ve discovered along the way. Let’s build a community of basil enthusiasts, sharing knowledge and inspiring each other to cultivate thriving gardens. Happy growing!
Frequently Asked Questions (FAQs)
Q: What is the best time of year to plant basil?
A: Basil is a warm-weather herb, so it’s best to plant it after the last frost when the soil has warmed up to at least 60°F (15°C). In most regions, this is typically in late spring or early summer. You can start seeds indoors 6-8 weeks before the last frost to get a head start. If you’re buying basil seedlings from a nursery, make sure they are hardened off before transplanting them outdoors. Planting too early in cold soil can stunt their growth or even kill them.
Q: How much sunlight does basil need?
A: Basil thrives in full sun, which means it needs at least 6-8 hours of direct sunlight per day. If you’re growing basil indoors, place it near a sunny window or use a grow light to supplement natural light. Insufficient sunlight can lead to leggy growth and reduced flavor. If you live in a very hot climate, providing some afternoon shade can prevent the leaves from scorching.
Q: What kind of soil is best for growing basil?
A: Basil prefers well-draining soil that is rich in organic matter. A slightly acidic to neutral pH (6.0-7.5) is ideal. Before planting, amend your soil with compost, aged manure, or other organic materials to improve drainage and fertility. Avoid heavy clay soils, as they can become waterlogged and lead to root rot. You can also grow basil successfully in containers using a high-quality potting mix.
Q: How often should I water my basil plants?
A: Basil needs consistent moisture, but it doesn’t like to be waterlogged. Water deeply when the top inch of soil feels dry to the touch. Avoid overhead watering, as this can promote fungal diseases. Instead, water at the base of the plant. During hot, dry weather, you may need to water more frequently. Mulching around the base of the plant can help retain moisture and suppress weeds.
Q: How do I harvest basil leaves?
A: The best time to harvest basil is in the morning, after the dew has dried. Pinch or cut off the leaves just above a leaf node (where leaves grow from the stem). This will encourage the plant to branch out and produce more leaves. Avoid harvesting more than one-third of the plant at a time, as this can stress it. Regularly harvesting basil will also prevent it from flowering, which can make the leaves taste bitter.
Q: Why is my basil plant turning yellow?
A: Yellowing basil leaves can be caused by several factors, including overwatering, underwatering, nutrient deficiencies, or pests and diseases. Check the soil moisture to ensure you’re not overwatering or underwatering. If the soil is consistently wet, improve drainage. If the leaves are pale green or yellow, the plant may be lacking nutrients. Fertilize with a balanced fertilizer or compost tea. Inspect the leaves for signs of pests or diseases, such as aphids, spider mites, or fungal spots. Treat accordingly with appropriate organic pest control methods or fungicides.
Q: How do I prevent basil from flowering?
A: Once basil starts to flower, the leaves can become bitter and less flavorful. To prevent flowering, regularly pinch off the flower buds as soon as they appear. This will encourage the plant to focus its energy on producing more leaves. You can also harvest the entire stem just above a leaf node to promote branching and prevent flowering.
Q: What are some common pests and diseases that affect basil?
A: Common pests that affect basil include aphids, spider mites, slugs, and Japanese beetles. Diseases include fungal diseases like downy mildew, powdery mildew, and fusarium wilt. To prevent pests and diseases, provide good air circulation, avoid overhead watering, and inspect your plants regularly. Use organic pest control methods like insecticidal soap, neem oil, or diatomaceous earth to control pests. For fungal diseases, use a copper fungicide or remove and destroy infected leaves.
Q: Can I grow basil indoors?
A: Yes, you can grow basil indoors, but it requires sufficient sunlight or a grow light. Place your basil plant near a sunny window that receives at least 6-8 hours of direct sunlight per day. If you don’t have enough natural light, use a grow light to supplement. Use a well-draining potting mix and water regularly, allowing the soil to dry slightly between waterings. Provide good air circulation to prevent fungal diseases.
Q: How can I store fresh basil?
A: There are several ways to store fresh basil. One method is to place the stems in a glass of water, like a bouquet of flowers, and cover the leaves with a plastic bag. Change the water every day or two. This method can keep basil fresh for up to a week. Another method is to wrap the basil leaves in a damp paper towel and store them in a plastic bag in the refrigerator. You can also freeze basil leaves by blanching them briefly in boiling water and then freezing them in ice cube trays with water or olive oil. Dried basil can be stored in an airtight container in a cool, dark place.
Leave a Comment