

Bottled Cabbage Gardening: Ever dreamt of a lush, vibrant garden bursting with fresh cabbage, even if you’re short on space or time? I know I have! Forget sprawling fields and back-breaking labor; we’re diving into a revolutionary, space-saving technique that’s taking the gardening world by storm. This isn’t your grandma’s cabbage patch – unless your grandma was a super-savvy, eco-conscious gardener ahead of her time!
The beauty of bottled cabbage gardening lies in its simplicity and accessibility. While the exact origins are a bit murky, the concept of container gardening has been around for centuries, with evidence suggesting its use in ancient civilizations. Think of the Hanging Gardens of Babylon, a testament to human ingenuity in cultivating plants in unconventional spaces. Today, we’re adapting that spirit to the humble cabbage, transforming discarded bottles into miniature ecosystems.
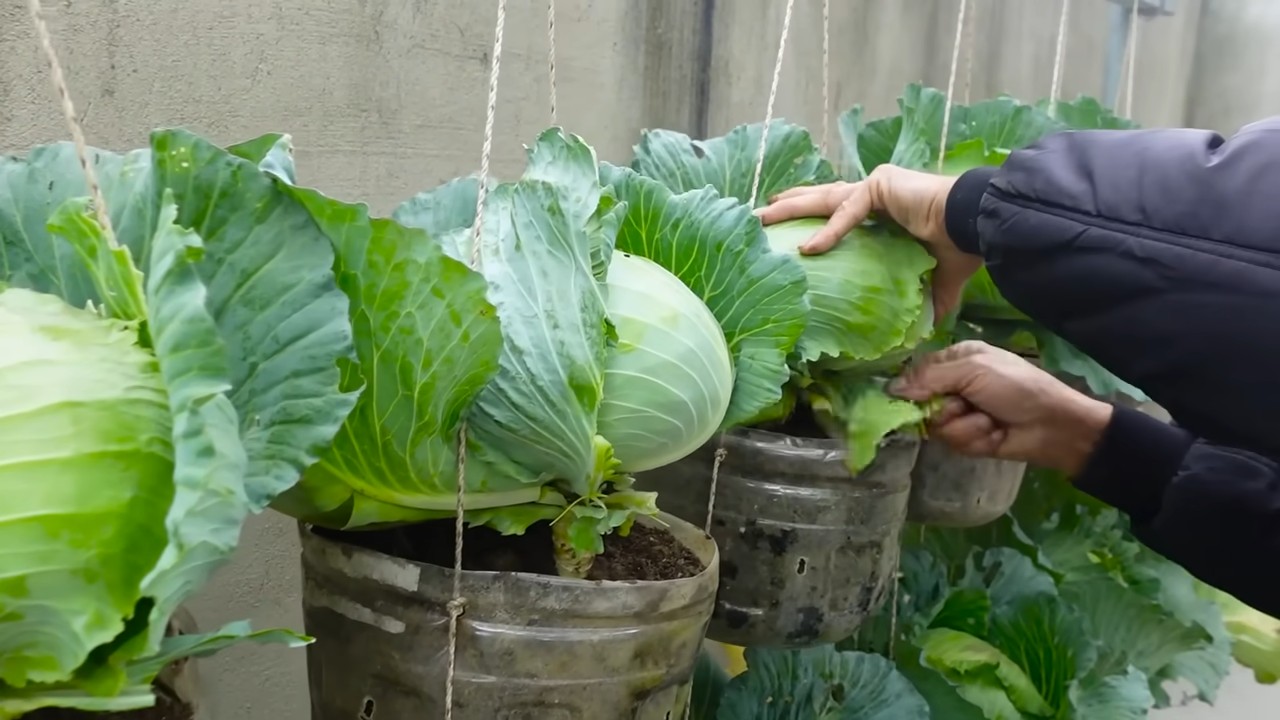
Why should you embrace this DIY trick? Well, for starters, it’s incredibly budget-friendly and environmentally responsible. We’re repurposing plastic bottles, reducing waste, and growing our own food – a win-win! But more importantly, it allows anyone, regardless of their living situation, to experience the joy of gardening and enjoy fresh, homegrown cabbage. Imagine the satisfaction of harvesting your own crisp, flavorful cabbage heads, knowing you nurtured them from tiny seedlings in recycled bottles. Plus, it’s a fantastic way to teach kids about sustainability and where their food comes from. So, let’s get our hands dirty (or rather, bottle-y!) and unlock the secrets to successful bottled cabbage gardening!
Bottled Cabbage Gardening: A Fun and Sustainable DIY Project
Hey there, fellow gardening enthusiasts! Ever thought about growing your own cabbage in recycled plastic bottles? It’s a fantastic way to reduce waste, save space, and enjoy fresh, homegrown veggies. I’ve been experimenting with this method for a while now, and I’m excited to share my experience with you. It’s surprisingly easy and rewarding!
What You’ll Need
Before we dive in, let’s gather all the necessary materials. This will make the process smoother and more enjoyable.
* Plastic Bottles: The star of the show! I recommend using 2-liter soda bottles or larger water bottles. Make sure they’re clean and free of any residue. The number of bottles depends on how many cabbage plants you want to grow.
* Cabbage Seeds or Seedlings: You can start from seeds or buy young seedlings from a local nursery. Seedlings are a faster option if you’re impatient like me!
* Potting Soil: Use a good quality potting mix that’s well-draining and rich in nutrients. Cabbage plants are heavy feeders.
* Drill or Sharp Knife: For creating drainage holes and cutting the bottles. Be careful!
* Scissors or Utility Knife: For trimming and shaping the bottles.
* Watering Can or Hose: For watering your cabbage plants.
* Fertilizer (Optional): A balanced liquid fertilizer can help boost growth.
* Gloves (Optional): To keep your hands clean.
* Measuring Tape or Ruler: To ensure consistent cuts and spacing.
* Marker: For marking cutting lines on the bottles.
* Small Stones or Gravel: For drainage at the bottom of the bottles.
Preparing the Bottles
This is a crucial step to ensure your cabbage plants have a comfortable and healthy home.
1. Clean the Bottles: Thoroughly wash the plastic bottles with soap and water to remove any dirt, debris, or sugary residue. Rinse them well and let them dry completely. This prevents mold and other issues.
2. Cut the Bottles: There are a couple of ways to cut the bottles, depending on how you want to set up your garden.
* Option 1: Hanging Planters: Cut the bottle in half horizontally. Discard the top half (or save it for another project!). The bottom half will be your planter.
* Option 2: Stacked Planters: Cut a large rectangular opening on one side of the bottle, leaving the top and bottom intact. This creates a “window” for the cabbage to grow out of. You can then stack these bottles on top of each other to create a vertical garden.
* Option 3: Simple Pots: Cut off the top third of the bottle. Invert the top portion and place it inside the bottom portion to act as a self-watering system. You’ll need to drill a hole in the bottle cap for the water to wick up.
I personally prefer the hanging planter method because it’s simple and allows for good drainage.
3. Create Drainage Holes: Using a drill or sharp knife, carefully create several drainage holes at the bottom of each bottle. This is essential to prevent waterlogging, which can lead to root rot. I usually make about 4-5 holes, each about ¼ inch in diameter.
4. Smooth the Edges: Use scissors or a utility knife to smooth any sharp edges on the cut bottles. This will prevent you from accidentally cutting yourself.
Planting Your Cabbage
Now for the fun part – planting your cabbage!
1. Add Drainage Layer: Place a layer of small stones or gravel at the bottom of each bottle. This will further improve drainage and prevent the potting soil from clogging the drainage holes.
2. Fill with Potting Soil: Fill the bottles with high-quality potting soil, leaving about an inch of space at the top. Gently pat down the soil to remove any air pockets.
3. Plant the Seeds or Seedlings:
* From Seeds: Sow the cabbage seeds according to the instructions on the seed packet. Usually, this involves planting them about ½ inch deep and spacing them a few inches apart. Once the seedlings emerge, thin them out to one plant per bottle.
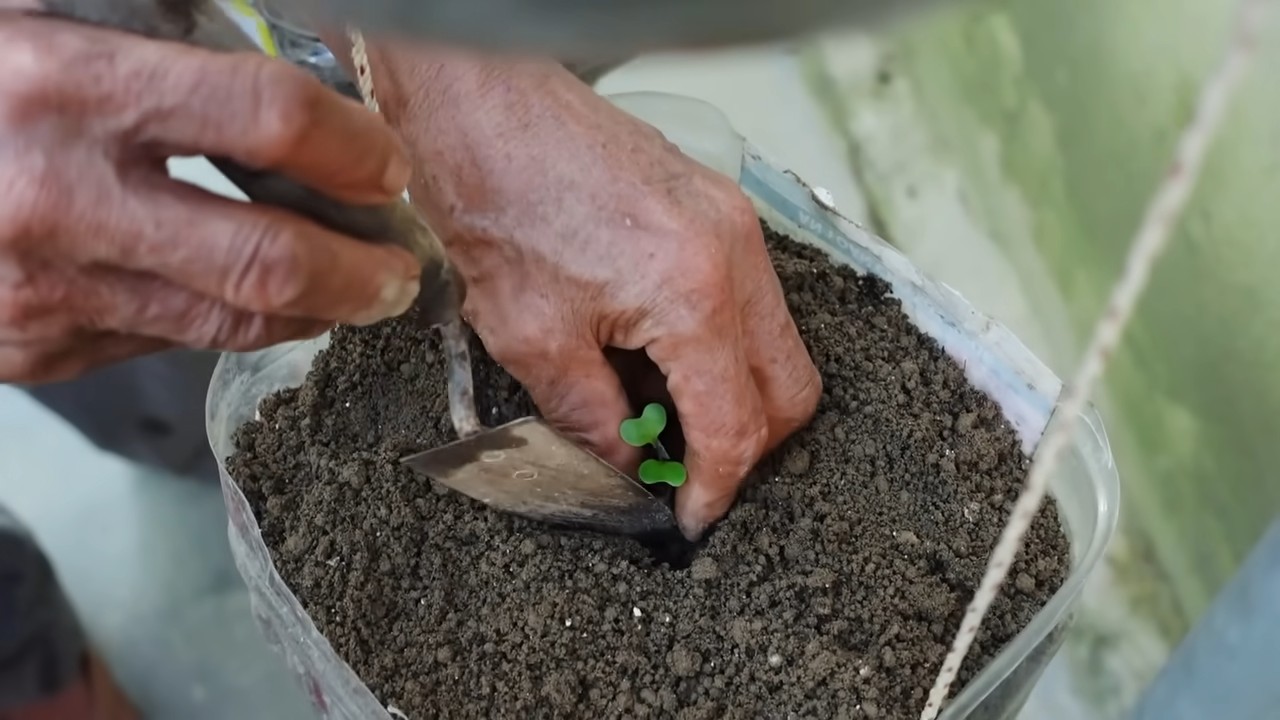
* From Seedlings: Carefully remove the cabbage seedlings from their containers. Gently loosen the roots and plant them in the center of each bottle. Make sure the top of the root ball is level with the soil surface.
4. Water Thoroughly: After planting, water the cabbage plants thoroughly until the water drains out of the drainage holes. This will help settle the soil and ensure the roots are well-hydrated.
Caring for Your Bottled Cabbage
Caring for your bottled cabbage is relatively straightforward, but here are some key things to keep in mind.
1. Sunlight: Cabbage plants need at least 6 hours of sunlight per day. Place your bottled cabbage garden in a sunny location, such as a balcony, patio, or windowsill. If you don’t have enough natural light, you can supplement with grow lights.
2. Watering: Water your cabbage plants regularly, especially during hot and dry weather. Check the soil moisture by sticking your finger into the soil. If the top inch feels dry, it’s time to water. Avoid overwatering, as this can lead to root rot.
3. Fertilizing: Cabbage plants are heavy feeders, so they benefit from regular fertilization. Use a balanced liquid fertilizer every 2-3 weeks, following the instructions on the fertilizer label. You can also add compost or other organic matter to the soil to provide additional nutrients.
4. Pest Control: Keep an eye out for common cabbage pests, such as cabbage worms, aphids, and slugs. You can control these pests with organic methods, such as handpicking, insecticidal soap, or neem oil.
5. Support: As your cabbage plants grow, they may need some support to prevent them from toppling over. You can use stakes or trellises to provide support.
6. Rotation: If you’re growing cabbage in the same bottles year after year, it’s important to rotate your crops to prevent soilborne diseases. Plant different vegetables in the bottles each year.
Troubleshooting
Even with the best care, you might encounter some challenges. Here are a few common issues and how to address them:
* Yellowing Leaves: This could be a sign of nutrient deficiency, overwatering, or underwatering. Check the soil moisture and fertilize if necessary.
* Slow Growth: This could be due to insufficient sunlight, poor soil, or pest infestation. Make sure your cabbage plants are getting enough sunlight, use a good quality potting mix, and control any pests.
* Root Rot: This is caused by overwatering and poor drainage. Make sure your bottles have adequate drainage holes and avoid overwatering.
* Pest Infestation: Regularly inspect your cabbage plants for pests and take action promptly.
Harvesting Your Cabbage
The moment you’ve been waiting for!
1. Timing: Cabbage is typically ready to harvest in 60-100 days, depending on the variety. The head should be firm and compact.
2. Harvesting: Use a sharp knife to cut the cabbage head from the stem. Leave a few outer leaves on the plant, as these can continue to produce smaller heads.
3. Enjoy! Enjoy your fresh, homegrown cabbage in salads, soups, stews, or any other dish you like.
Creative Ideas and Variations
* Vertical Garden: Stack the bottles on top of each other to create a vertical garden. This is a great way to save space and add a touch of greenery to your balcony or patio.
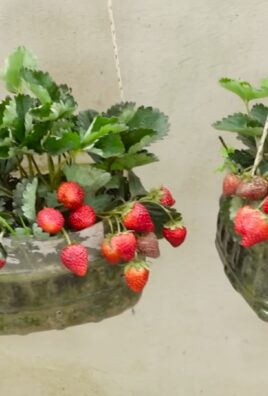
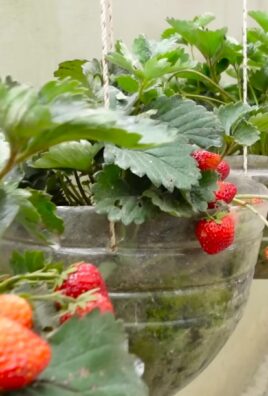
* Hanging Garden: Hang the bottles from a fence, railing, or ceiling to create a hanging garden. This is a fun and unique way to display your cabbage plants.
* Self-Watering System: Use the inverted top portion of the bottle as a self-watering system. This is a great way to reduce watering frequency and ensure your cabbage plants stay hydrated.
* Companion Planting: Plant companion plants, such as marigolds or nasturtiums, alongside your cabbage to attract beneficial insects and deter pests.
* Labeling: Use labels to identify the different varieties of cabbage you’re growing. This will help you keep track of your plants and learn about their unique characteristics.
Why I Love Bottled Cabbage Gardening
I’m a big fan of this method for several reasons:
* Sustainability: It’s a great way to recycle plastic bottles and reduce waste.
* Space-Saving: It’s perfect for small spaces, such as balconies, patios, and apartments.
* Cost-Effective: It’s a relatively inexpensive way to grow your own vegetables.
* Educational: It’s a fun and educational activity for kids and adults alike.
*
Conclusion
So, there you have it! Transforming discarded plastic bottles into miniature cabbage gardens is not just a clever upcycling project; it’s a gateway to fresh, homegrown produce, even if you’re short on space or gardening experience. This method offers a multitude of benefits, from reducing waste and saving money to enjoying the unparalleled flavor of freshly harvested cabbage. It’s a sustainable, accessible, and surprisingly rewarding way to connect with nature and cultivate your own food.
Why is this DIY trick a must-try? Because it democratizes gardening. It removes the barriers of large plots, expensive equipment, and extensive knowledge. Anyone, anywhere, can participate in growing their own food with minimal resources. Imagine the satisfaction of harvesting crisp, vibrant cabbage leaves from a bottle you once considered trash. It’s a tangible demonstration of resourcefulness and a step towards a more sustainable lifestyle.
Beyond the basic method, there’s ample room for experimentation and personalization. Consider using different types of plastic bottles – larger bottles can accommodate larger cabbage varieties, while smaller bottles are perfect for starting seedlings. You can also explore different soil mixes to optimize growth, perhaps incorporating compost or other organic amendments. For added visual appeal, paint the bottles with vibrant colors or decorate them with stencils. Get creative and make your bottled cabbage garden a reflection of your personal style.
Furthermore, think about the specific varieties of cabbage you want to grow. While traditional green cabbage is a reliable choice, don’t be afraid to branch out and try red cabbage, savoy cabbage, or even bok choy. Each variety offers a unique flavor and texture, adding diversity to your homegrown harvest. You can also experiment with companion planting, placing herbs like rosemary or thyme near your cabbage to deter pests and enhance flavor.
The possibilities are truly endless. This bottled cabbage gardening technique is more than just a trend; it’s a sustainable solution with the potential to transform the way we think about food production. It’s a practical, eco-friendly, and deeply satisfying activity that can bring joy and nourishment to your life.
We wholeheartedly encourage you to give this DIY trick a try. Gather your empty plastic bottles, prepare your soil, and sow your cabbage seeds. Witness the magic of transformation as discarded waste becomes a source of fresh, delicious food. And most importantly, share your experience with us! We’d love to see your bottled cabbage gardens, hear about your successes and challenges, and learn from your unique approaches. Post photos and stories on social media using relevant hashtags, or leave a comment below. Let’s build a community of bottled cabbage gardeners and inspire others to embrace sustainable living.
Remember, every small action counts. By choosing to grow your own food, even in a small way, you’re making a positive impact on the environment and your own well-being. So, grab those bottles and get growing! Your delicious, homegrown cabbage awaits. This method of **bottled cabbage gardening** is a game changer.
Frequently Asked Questions (FAQ)
What type of plastic bottles are best for bottled cabbage gardening?
Ideally, you should use food-grade plastic bottles, such as those that previously contained water, juice, or soda. These are generally made from PET (polyethylene terephthalate) or HDPE (high-density polyethylene), which are considered relatively safe for growing food. Avoid using bottles that contained harsh chemicals or cleaning products, as these may leach harmful substances into the soil. Thoroughly wash and rinse the bottles before using them for planting. The size of the bottle will depend on the variety of cabbage you intend to grow. Larger bottles are suitable for larger cabbage heads, while smaller bottles are perfect for starting seedlings or growing smaller varieties like bok choy.
What kind of soil should I use for growing cabbage in bottles?
A well-draining, nutrient-rich soil mix is essential for healthy cabbage growth. You can use a commercial potting mix or create your own by combining equal parts of garden soil, compost, and perlite or vermiculite. Compost provides essential nutrients, while perlite or vermiculite improves drainage and aeration. Avoid using heavy clay soil, as it can become waterlogged and hinder root development. You can also amend your soil with slow-release fertilizer to provide a steady supply of nutrients throughout the growing season. Consider adding a small amount of bone meal to provide phosphorus, which is important for root development.
How often should I water my bottled cabbage plants?
The frequency of watering will depend on the climate, the type of soil you’re using, and the size of the bottle. Generally, you should water your cabbage plants when the top inch of soil feels dry to the touch. Avoid overwatering, as this can lead to root rot. Ensure that the bottles have drainage holes to allow excess water to escape. During hot, dry weather, you may need to water your plants daily. In cooler, wetter weather, you may only need to water them every few days. Check the soil moisture regularly and adjust your watering schedule accordingly.
How much sunlight do bottled cabbage plants need?
Cabbage plants need at least 6 hours of direct sunlight per day to thrive. Choose a sunny location for your bottled cabbage garden, such as a south-facing balcony or windowsill. If you don’t have access to enough natural sunlight, you can supplement with grow lights. Position the grow lights a few inches above the plants and provide them with 12-16 hours of light per day. Rotate the bottles regularly to ensure that all sides of the plants receive adequate sunlight.
How do I protect my bottled cabbage plants from pests and diseases?
Cabbage plants are susceptible to various pests and diseases, such as cabbage worms, aphids, and clubroot. To prevent pest infestations, inspect your plants regularly and remove any pests by hand. You can also use organic pest control methods, such as neem oil or insecticidal soap. To prevent diseases, ensure that your plants have good air circulation and avoid overwatering. If you notice any signs of disease, such as yellowing leaves or stunted growth, remove the affected plants immediately to prevent the spread of the disease. Consider using companion planting to deter pests. Planting herbs like rosemary or thyme near your cabbage can help repel insects.
Can I grow cabbage indoors in bottles?
Yes, you can grow cabbage indoors in bottles, but you’ll need to provide them with adequate light and ventilation. Place the bottles near a sunny window or use grow lights to provide sufficient light. Ensure that the room is well-ventilated to prevent the buildup of humidity, which can lead to fungal diseases. You may also need to hand-pollinate the plants if they are not exposed to pollinators. Indoor cabbage plants may not grow as large as outdoor plants, but you can still harvest a decent amount of leaves for salads and other dishes.
How long does it take to grow cabbage in bottles?
The time it takes to grow cabbage in bottles will depend on the variety of cabbage you’re growing and the growing conditions. Generally, it takes about 60-90 days from planting to harvest. You can start harvesting the outer leaves of the cabbage head when they are large enough to eat. The entire head can be harvested when it is firm and compact.
What are some variations I can try with bottled cabbage gardening?
There are many variations you can try with bottled cabbage gardening. You can experiment with different types of plastic bottles, different soil mixes, and different varieties of cabbage. You can also try growing other vegetables in bottles, such as lettuce, spinach, or herbs. Consider creating a vertical garden by stacking the bottles on top of each other. You can also decorate the bottles with paint or other materials to create a visually appealing garden.
How do I harvest my bottled cabbage?
Harvesting your bottled cabbage is simple. For leaf cabbage varieties, you can harvest individual leaves as needed, starting with the outer leaves. For head cabbage varieties, wait until the head is firm and compact. Use a sharp knife to cut the head from the stem, leaving a few outer leaves intact.
What do I do with the plastic bottles after harvesting the cabbage?
After harvesting your cabbage, you can reuse the plastic bottles for another planting season. Simply wash and sterilize the bottles before replanting. If the bottles are damaged or no longer usable, you can recycle them. Alternatively, you can repurpose them for other gardening projects, such as starting seedlings or creating a mini greenhouse.

Leave a Comment