

Clean Dirty Oven Easily? Sounds like a dream, right? I know, the thought of tackling that baked-on grime can be seriously daunting. But what if I told you there’s a way to make your oven sparkle without harsh chemicals or endless scrubbing?
For generations, keeping a clean oven was a symbol of a well-maintained home. In many cultures, the oven represented the heart of the kitchen, where families gathered and meals were prepared with love. While our modern ovens are far more sophisticated than their wood-fired ancestors, the challenge of keeping them clean remains a constant.
Let’s face it, nobody enjoys spending hours wrestling with oven cleaner. That’s why I’m so excited to share these simple, effective DIY tricks to clean dirty oven easily. These hacks will not only save you time and energy but also help you avoid exposing yourself and your family to potentially harmful chemicals. Plus, you’ll be amazed at how many of the ingredients you already have in your pantry! So, ditch the elbow grease and get ready to discover the secrets to a sparkling clean oven, the easy way!
DIY Oven Cleaning: The Baking Soda and Vinegar Powerhouse
Okay, let’s face it, cleaning the oven is probably on everyone’s list of least favorite chores. But a sparkling clean oven is essential for delicious cooking and avoiding that burnt smell every time you preheat. Forget those harsh chemical cleaners! I’m going to show you how to clean your oven using just baking soda and vinegar – it’s safe, effective, and surprisingly satisfying.
What You’ll Need:
* Baking Soda
* White Vinegar
* Water
* Spray Bottle
* Rubber Gloves (trust me, you’ll want these)
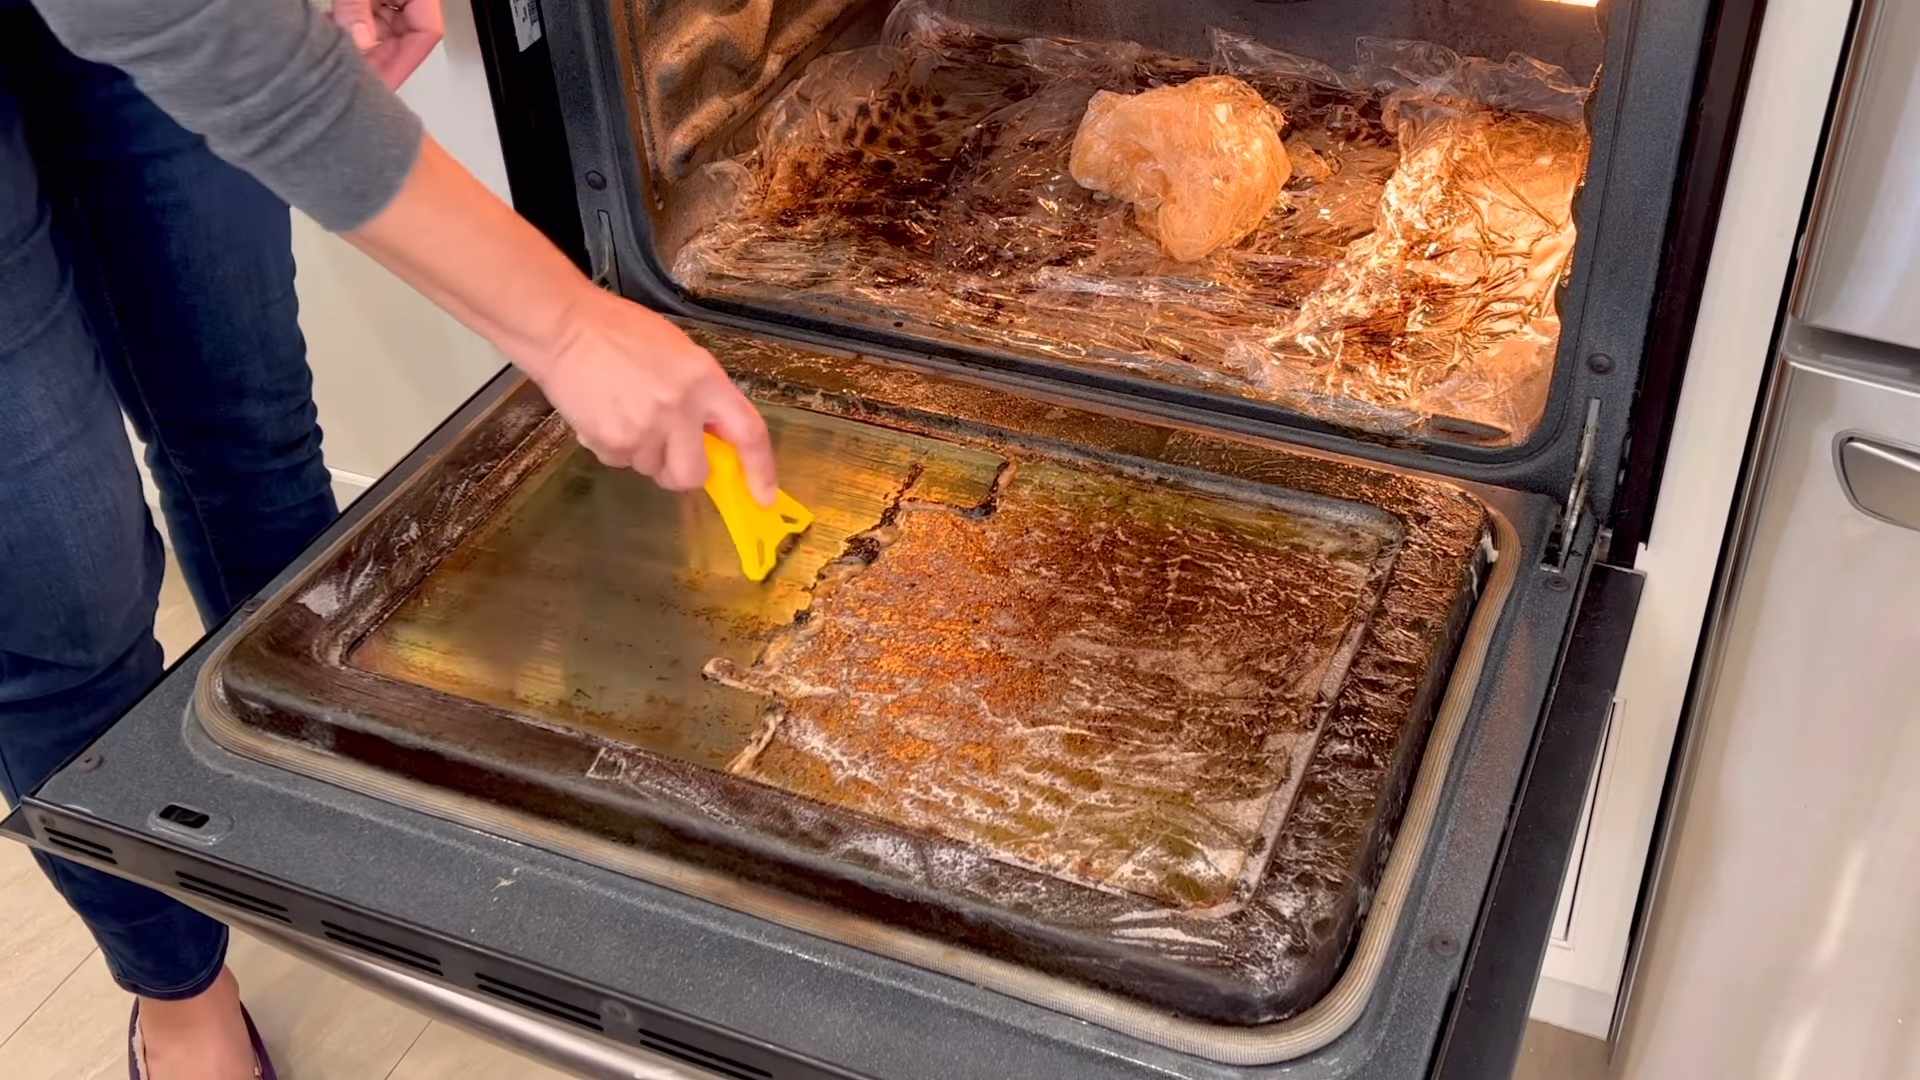
* Spatula or Scraper
* Sponge or Cloth
* Old Towels or Rags
* Small Bowl
Step-by-Step Instructions:
1. Prep Your Oven: First things first, safety first! Make sure your oven is completely cool. Remove the oven racks, pizza stone, thermometer, or anything else inside. We’ll clean the racks separately. Place old towels or rags on the floor in front of your oven to catch any drips or spills. This will save you from extra cleanup later.
2. Make the Baking Soda Paste: In your small bowl, mix 1/2 cup of baking soda with enough water to form a spreadable paste. You want it to be thick enough to stick to the oven surfaces but not too dry. Think toothpaste consistency. I usually start with a few tablespoons of water and add more gradually until I get the right texture.
3. Coat the Oven: Now, put on your rubber gloves (seriously, don’t skip this step!). Using your hands or a spatula, spread the baking soda paste all over the interior surfaces of your oven. This includes the back, sides, top, bottom, and even the door. Avoid the heating elements! I usually apply a thicker layer to areas with baked-on grime. Don’t be shy; really get in there and cover everything.
4. Let it Sit (and Work its Magic): This is the crucial part. Let the baking soda paste sit for at least 12 hours, or even better, overnight. The longer it sits, the more time it has to loosen the baked-on grease and grime. I usually do this before I go to bed so it can work its magic while I sleep.
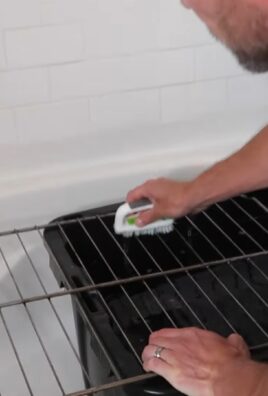
5. Clean the Oven Racks: While the baking soda is working in the oven, let’s tackle those racks. There are a few ways to do this.
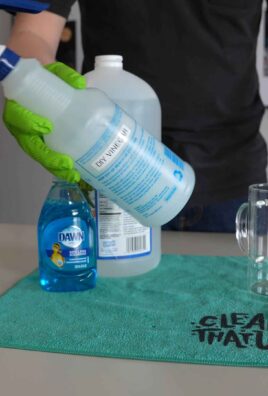
* Option 1: The Bathtub Soak: If your racks fit in your bathtub, line the tub with old towels to protect the surface. Fill the tub with hot water and add about 1/2 cup of dish soap and 1/2 cup of laundry detergent. Submerge the racks in the water and let them soak for several hours or overnight. The hot water and detergent will help loosen the grime. After soaking, scrub the racks with a scrub brush or sponge to remove any remaining residue. Rinse thoroughly and dry.
* Option 2: The Trash Bag Method: If your racks don’t fit in the tub, you can use a large trash bag. Place the racks inside the bag, pour in about 1/2 cup of ammonia (be careful with ammonia – use gloves and work in a well-ventilated area!), and seal the bag tightly. Let it sit overnight. The ammonia fumes will help loosen the grime. The next day, carefully open the bag (again, in a well-ventilated area!), remove the racks, and scrub them with a scrub brush or sponge. Rinse thoroughly and dry. Important Note: Never mix ammonia with bleach! This can create dangerous fumes.
* Option 3: Baking Soda Paste (for lighter grime): If your racks aren’t too dirty, you can use the same baking soda paste we used for the oven. Apply the paste to the racks, let it sit for a few hours, and then scrub with a scrub brush or sponge. Rinse thoroughly and dry.
6. Wipe Away the Baking Soda Paste: After the baking soda has sat overnight, it’s time to wipe it away. Use a damp sponge or cloth to remove as much of the paste as possible. You might need to use a spatula or scraper to loosen any stubborn areas. This part can be a little messy, so be patient and keep rinsing your sponge or cloth frequently.
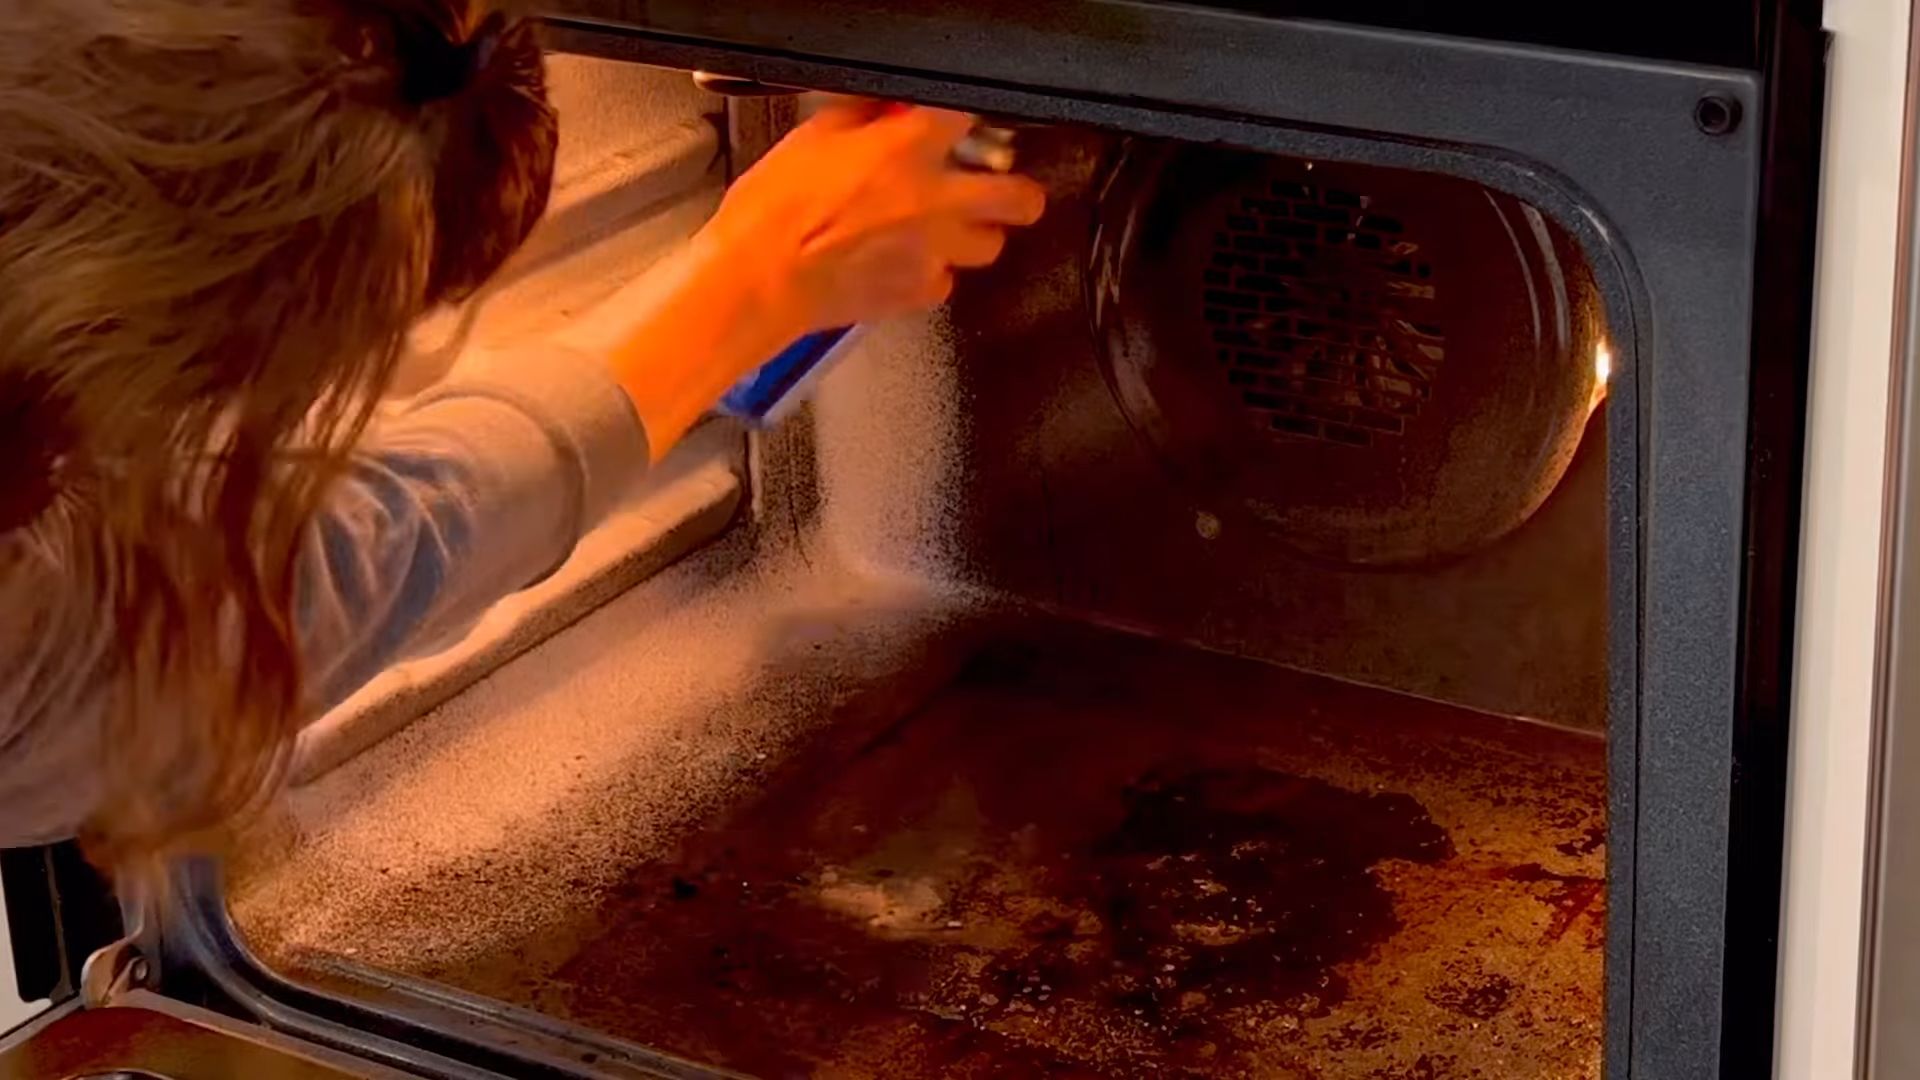
7. The Vinegar Spray: Now for the fun part! Pour some white vinegar into your spray bottle. Spray the entire interior of the oven with vinegar. The vinegar will react with any remaining baking soda, creating a fizzy action. Don’t be alarmed; this is normal! This reaction helps to further loosen any remaining grime.
8. Final Wipe Down: Once the fizzing has subsided, use a clean, damp sponge or cloth to wipe away the vinegar and any remaining residue. You might need to rinse and repeat this step a few times to get everything completely clean.
9. Replace the Racks: Once the oven is completely clean and dry, replace the oven racks.
10. The Final Touch: Turn on your oven to a low temperature (around 200 degrees Fahrenheit) for about 15-20 minutes to dry out any remaining moisture. Keep an eye on it and make sure there are no lingering odors.
Dealing with Stubborn Spots:
Sometimes, you might encounter some really stubborn spots that just won’t budge. Here are a few tips for dealing with them:
* More Baking Soda Paste: Apply a thicker layer of baking soda paste to the stubborn spot and let it sit for a longer period of time, even up to 24 hours.
* Scrubbing Power: Use a non-scratch scouring pad or a scrub brush to scrub the stubborn spot. Be careful not to damage the oven’s interior.
* Vinegar Soak: Soak a paper towel in vinegar and place it over the stubborn spot for a few hours. This can help to loosen the grime.
* Razor Blade Scraper (Use with Caution!): For really tough spots, you can try using a razor blade scraper. However, be extremely careful not to scratch the oven’s interior. Hold the scraper at a shallow angle and use gentle pressure.
Cleaning the Oven Door Glass:
The oven door glass can often get covered in baked-on grease and grime. Here’s how to clean it:
* Baking Soda Paste: Apply the baking soda paste to the oven door glass and let it sit for a few hours. Then, wipe it away with a damp sponge or cloth.
* Vinegar Spray: Spray the glass with vinegar and wipe it clean.
* Commercial Oven Glass Cleaner: If the baking soda and vinegar don’t work, you can try using a commercial oven glass cleaner. Follow the instructions on the product label.
Preventative Measures:
The best way to keep your oven clean is to prevent it from getting too dirty in the first place. Here are a few tips:
* Line the Bottom of the Oven: Place a sheet of aluminum foil or an oven liner on the bottom of the oven to catch any drips or spills.
* Clean Up Spills Immediately: If something spills in the oven, clean it up as soon as possible.
* Regular Cleaning: Give your oven a quick cleaning every few months to prevent grime from building up.
Important Safety Tips:
* Always make sure the oven is completely cool before cleaning it.
* Wear rubber gloves to protect your hands.
* Work in a well-ventilated area.
* Never mix ammonia with bleach.
* Be careful when using a razor blade scraper.
Why This Method Works:
Baking soda is a mild alkali that helps to dissolve grease and grime. Vinegar is a mild acid that helps to break down mineral deposits and soap scum. When combined, baking soda and vinegar create a powerful cleaning action that is safe and effective. Plus, it’s a much more eco-friendly option than harsh chemical cleaners.
Final Thoughts:
Cleaning your oven with baking soda and vinegar might take a little more time and elbow grease than using chemical cleaners, but it’s definitely worth it. You’ll have a sparkling clean oven without exposing yourself to harmful chemicals. And honestly, there’s something really satisfying about seeing all that grime disappear! Happy cleaning!
Conclusion
So, there you have it! No more dreading oven cleaning day. This simple, effective, and surprisingly affordable DIY method to clean dirty oven easily is a game-changer. Forget harsh chemicals, expensive oven cleaners, and hours of scrubbing. This approach leverages the power of readily available ingredients and a little bit of patience to deliver sparkling results.
But why is this DIY trick a must-try? It’s not just about saving money (although that’s a definite perk!). It’s about creating a healthier home environment by avoiding the fumes and residue left behind by commercial cleaners. It’s about the satisfaction of knowing you’re using a natural, eco-friendly solution. And, let’s be honest, it’s about the sheer joy of seeing that stubborn grime melt away with minimal effort.
Beyond the basic method, there are plenty of ways to customize this cleaning solution to suit your needs and preferences. For instance, if you have a particularly stubborn stain, you can create a paste of baking soda and water and apply it directly to the affected area, letting it sit overnight before wiping it away. You can also add a few drops of your favorite essential oil, like lemon or lavender, to the water and vinegar mixture for a more pleasant scent. If you have a self-cleaning oven, you can still use this method for a quick refresh between self-cleaning cycles, preventing buildup and keeping your oven in tip-top shape. Remember to always consult your oven’s manual before using any cleaning method.
Consider using a pumice stone for baked-on spills, but be gentle to avoid scratching the oven surface. For the oven door glass, a simple solution of equal parts water and white vinegar works wonders. Spray it on, let it sit for a few minutes, and then wipe clean with a microfiber cloth.
We’re confident that once you try this DIY oven cleaning trick, you’ll never go back to store-bought cleaners. It’s effective, affordable, eco-friendly, and easy to do. What’s not to love?
Now, it’s your turn! We encourage you to give this DIY method a try and experience the difference for yourself. Don’t forget to take before-and-after photos – we’d love to see your results! Share your experiences, tips, and variations in the comments below. Let’s build a community of clean oven enthusiasts and help each other achieve sparkling ovens with minimal effort. We can’t wait to hear your success stories! Happy cleaning!
Frequently Asked Questions (FAQ)
Q: Is this DIY oven cleaning method safe for all types of ovens?
A: Generally, yes, this method is safe for most ovens, including gas and electric models. However, it’s always a good idea to consult your oven’s manual before using any cleaning method, especially if you have a self-cleaning oven. Some manufacturers may have specific recommendations or warnings regarding cleaning products. Avoid spraying the heating elements directly.
Q: Can I use this method on a self-cleaning oven?
A: Yes, you can use this method on a self-cleaning oven, but primarily for maintenance and spot cleaning between self-cleaning cycles. The self-cleaning cycle uses extremely high temperatures to burn off food residue, but it can also produce unpleasant odors and consume a lot of energy. This DIY method is a great way to prevent buildup and keep your oven relatively clean, reducing the frequency of using the self-cleaning function. Always allow the oven to cool completely before applying any cleaning solutions.
Q: How often should I clean my oven using this method?
A: The frequency of cleaning depends on how often you use your oven and how much food spills inside. As a general guideline, cleaning your oven every 1-3 months is a good practice. However, if you notice significant spills or buildup, you may want to clean it more frequently. Regular maintenance with this DIY method can prevent stubborn stains and make future cleanings easier.
Q: What if I have really stubborn, baked-on stains?
A: For particularly stubborn stains, create a paste of baking soda and water (or baking soda and vinegar) and apply it directly to the affected area. Let it sit overnight or for several hours before wiping it away. You can also try using a plastic scraper or a non-scratch scouring pad to gently loosen the grime. Avoid using metal scouring pads, as they can scratch the oven surface. A pumice stone, used gently, can also be effective.
Q: Can I use this method to clean the oven door glass?
A: Yes, this method can be used to clean the oven door glass. A simple solution of equal parts water and white vinegar works wonders. Spray it on, let it sit for a few minutes to loosen the grime, and then wipe clean with a microfiber cloth. For stubborn stains, you can also use the baking soda paste mentioned above.
Q: What if I don’t have vinegar? Can I use something else?
A: While vinegar is a key ingredient in this method due to its acidity and cleaning properties, you can try using lemon juice as a substitute. Lemon juice also has acidic properties that can help break down grease and grime. Use the same amount of lemon juice as you would vinegar in the recipe.
Q: Is baking soda safe to use on all oven surfaces?
A: Baking soda is generally safe to use on most oven surfaces, but it’s always a good idea to test it on a small, inconspicuous area first to ensure it doesn’t cause any discoloration or damage. Avoid using baking soda on delicate surfaces or areas with special coatings.
Q: How do I get rid of the baking soda residue after cleaning?
A: After wiping away the baking soda paste, rinse the oven thoroughly with clean water to remove any remaining residue. Use a clean, damp cloth to wipe down all surfaces until they are free of baking soda. You may need to rinse and wipe several times to ensure all residue is gone.
Q: My oven has a strong odor after cleaning. What should I do?
A: If your oven has a strong odor after cleaning, you can try placing a bowl of vinegar or baking soda inside the oven overnight to absorb the odor. You can also heat the oven to a low temperature (around 200°F) for 30 minutes with the door slightly ajar to help dissipate the odor. Make sure the oven is completely dry before using it again.
Q: Can I use essential oils in the cleaning solution?
A: Yes, you can add a few drops of your favorite essential oil, like lemon, lavender, or tea tree oil, to the water and vinegar mixture for a more pleasant scent. Essential oils also have antibacterial and antifungal properties, which can help further sanitize your oven. However, be sure to use essential oils sparingly, as some can be overpowering.
Leave a Comment