

Clean Silver with Baking Soda: Are your cherished silver heirlooms losing their luster? Don’t despair! Before you rush out to buy expensive silver cleaners, I’m going to share a simple, yet incredibly effective DIY trick that will restore their shine using something you probably already have in your pantry: baking soda!
Silver has been prized for centuries, not just for its beauty, but also for its antimicrobial properties. From ancient Roman tableware to ornate Victorian tea sets, silver has always held a place of honor in homes around the world. But, alas, silver tarnishes. That dull, dark film is the result of a chemical reaction with sulfur in the air.
Why is this DIY trick so essential? Because commercial silver cleaners can be harsh and expensive. Plus, many contain chemicals you might not want around your home. My method to clean silver with baking soda is gentle, affordable, and uses readily available ingredients. It’s a win-win! I’ll guide you through each step, ensuring your silver regains its brilliance without any harsh chemicals or damage. Get ready to be amazed at how easy it is to bring back the sparkle to your treasured silver pieces!
DIY Silver Cleaning with Baking Soda: A Sparkly Transformation!
Hey there, fellow DIY enthusiasts! Are you tired of looking at your tarnished silver jewelry, silverware, or decorative items? Don’t despair! You don’t need harsh chemicals or expensive cleaning solutions to bring back their shine. I’m going to show you a super easy and effective way to clean your silver using baking soda – yes, that humble ingredient you probably already have in your pantry! This method is gentle, affordable, and surprisingly powerful. Let’s get started!
What You’ll Need
Before we dive in, let’s gather our supplies. This is a pretty straightforward process, so the list is short and sweet:
* Baking soda (the star of the show!)
* Aluminum foil (this is crucial for the chemical reaction)
* Boiling water (be careful!)
* A non-reactive container (glass or plastic works best; avoid metal)
* Soft cloths (microfiber cloths are ideal)
* Tongs or a slotted spoon (for retrieving the silver)
* Optional: Dish soap (for pre-cleaning heavily soiled items)
* Optional: Rubber gloves (to protect your hands from the hot water)
Understanding the Science Behind the Sparkle
Okay, before we jump into the steps, let’s briefly talk about why this method works. Tarnish on silver is actually silver sulfide, a black layer that forms when silver reacts with sulfur compounds in the air. The baking soda and aluminum foil create an electrochemical reaction. The aluminum is more reactive than silver, so it attracts the sulfur away from the silver sulfide, effectively reversing the tarnishing process. Pretty cool, right?
Step-by-Step Instructions: Let’s Get Cleaning!
Now for the fun part! Follow these steps carefully, and you’ll be amazed at the results.
1. Prepare Your Silver: If your silver items are heavily soiled with grease or food particles, give them a quick wash with warm water and mild dish soap. This will remove any surface grime that might interfere with the cleaning process. Rinse them thoroughly and pat them dry with a soft cloth. This step is optional, but it can definitely improve the overall outcome.
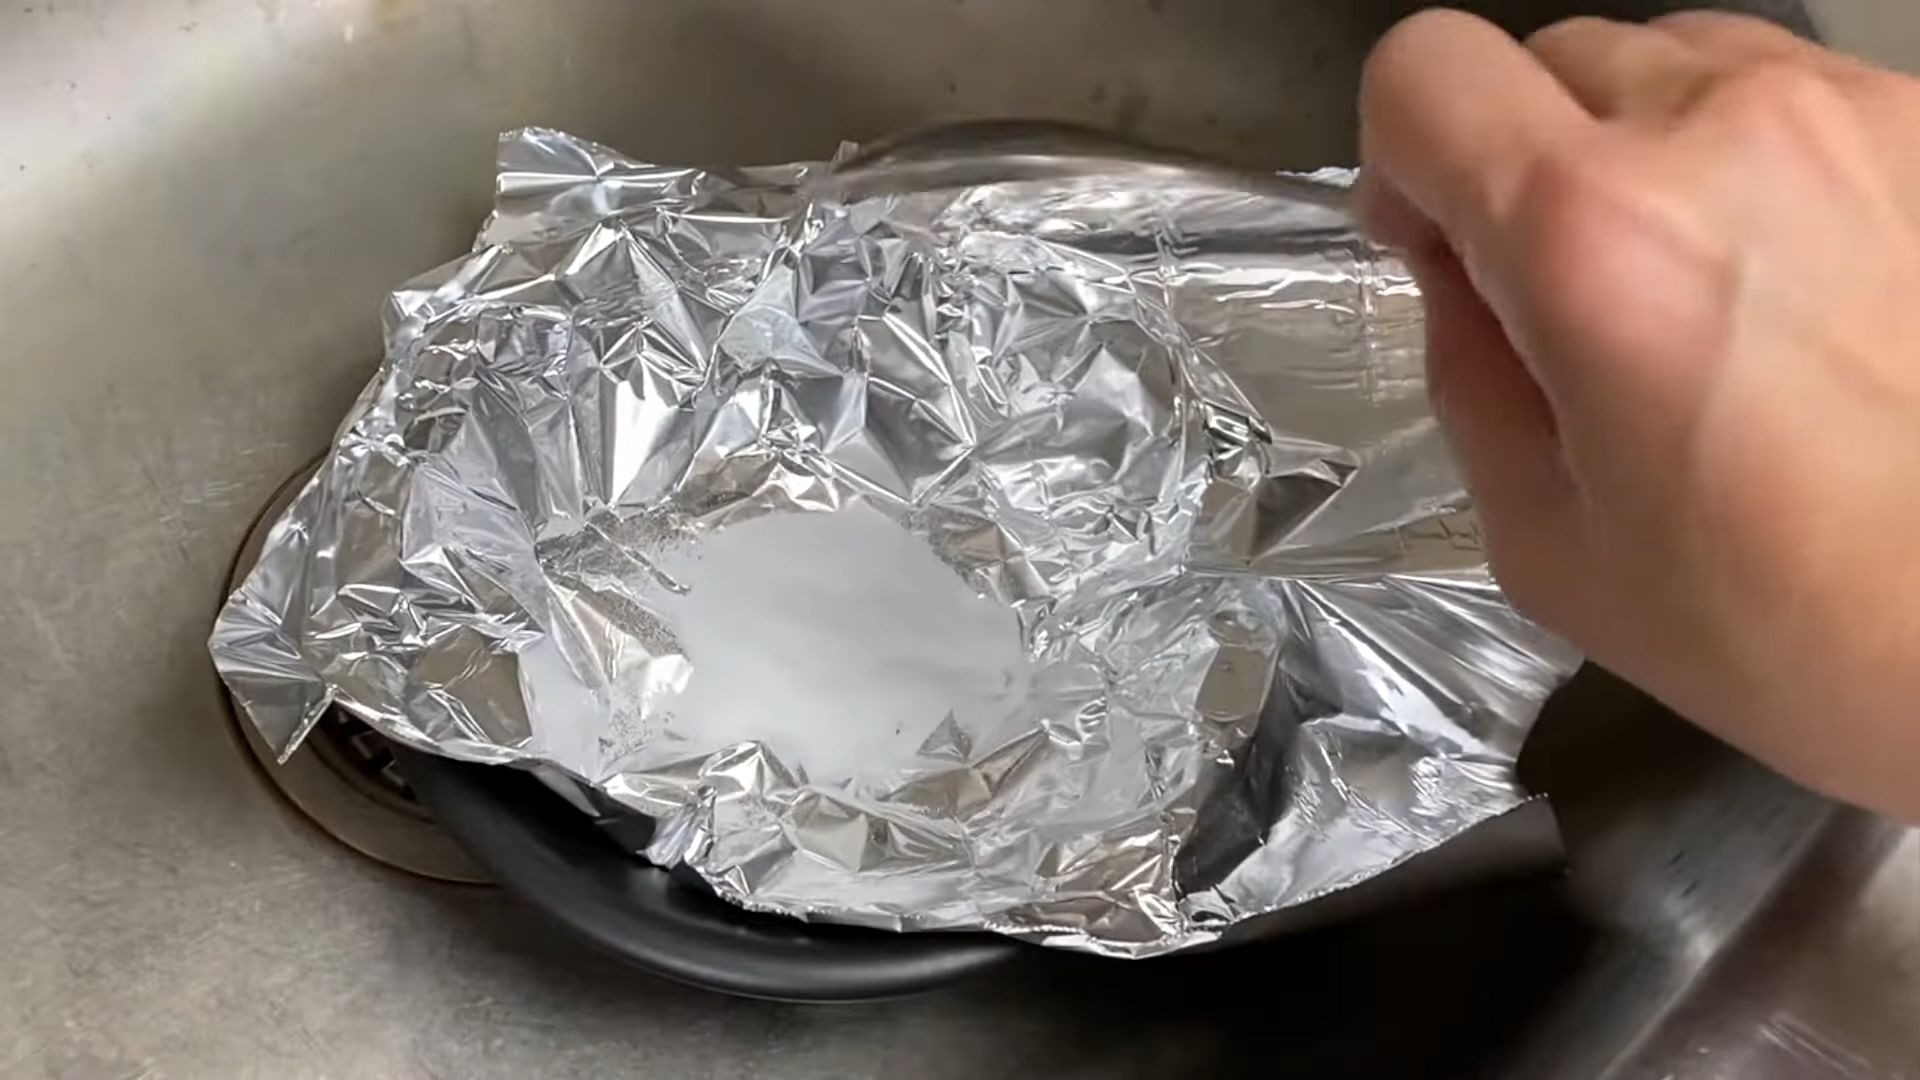
2. Line Your Container with Aluminum Foil: This is a key step! Take your non-reactive container (a glass baking dish or a plastic tub works great) and line it completely with aluminum foil. Make sure the shiny side of the foil is facing up, as this is the side that will be in contact with the silver and baking soda solution. The foil needs to be in direct contact with the silver for the reaction to work.
3. Add Baking Soda: Now, sprinkle a generous amount of baking soda into the container. The amount you need will depend on the size of your container and the number of silver items you’re cleaning. A good rule of thumb is to use about 1 tablespoon of baking soda per cup of boiling water. Don’t be shy; you can always add more if needed.
4. Pour in the Boiling Water: Carefully pour the boiling water into the container, over the baking soda and aluminum foil. Be extremely cautious when handling boiling water to avoid burns. The water will immediately start to fizz and bubble as the baking soda dissolves.
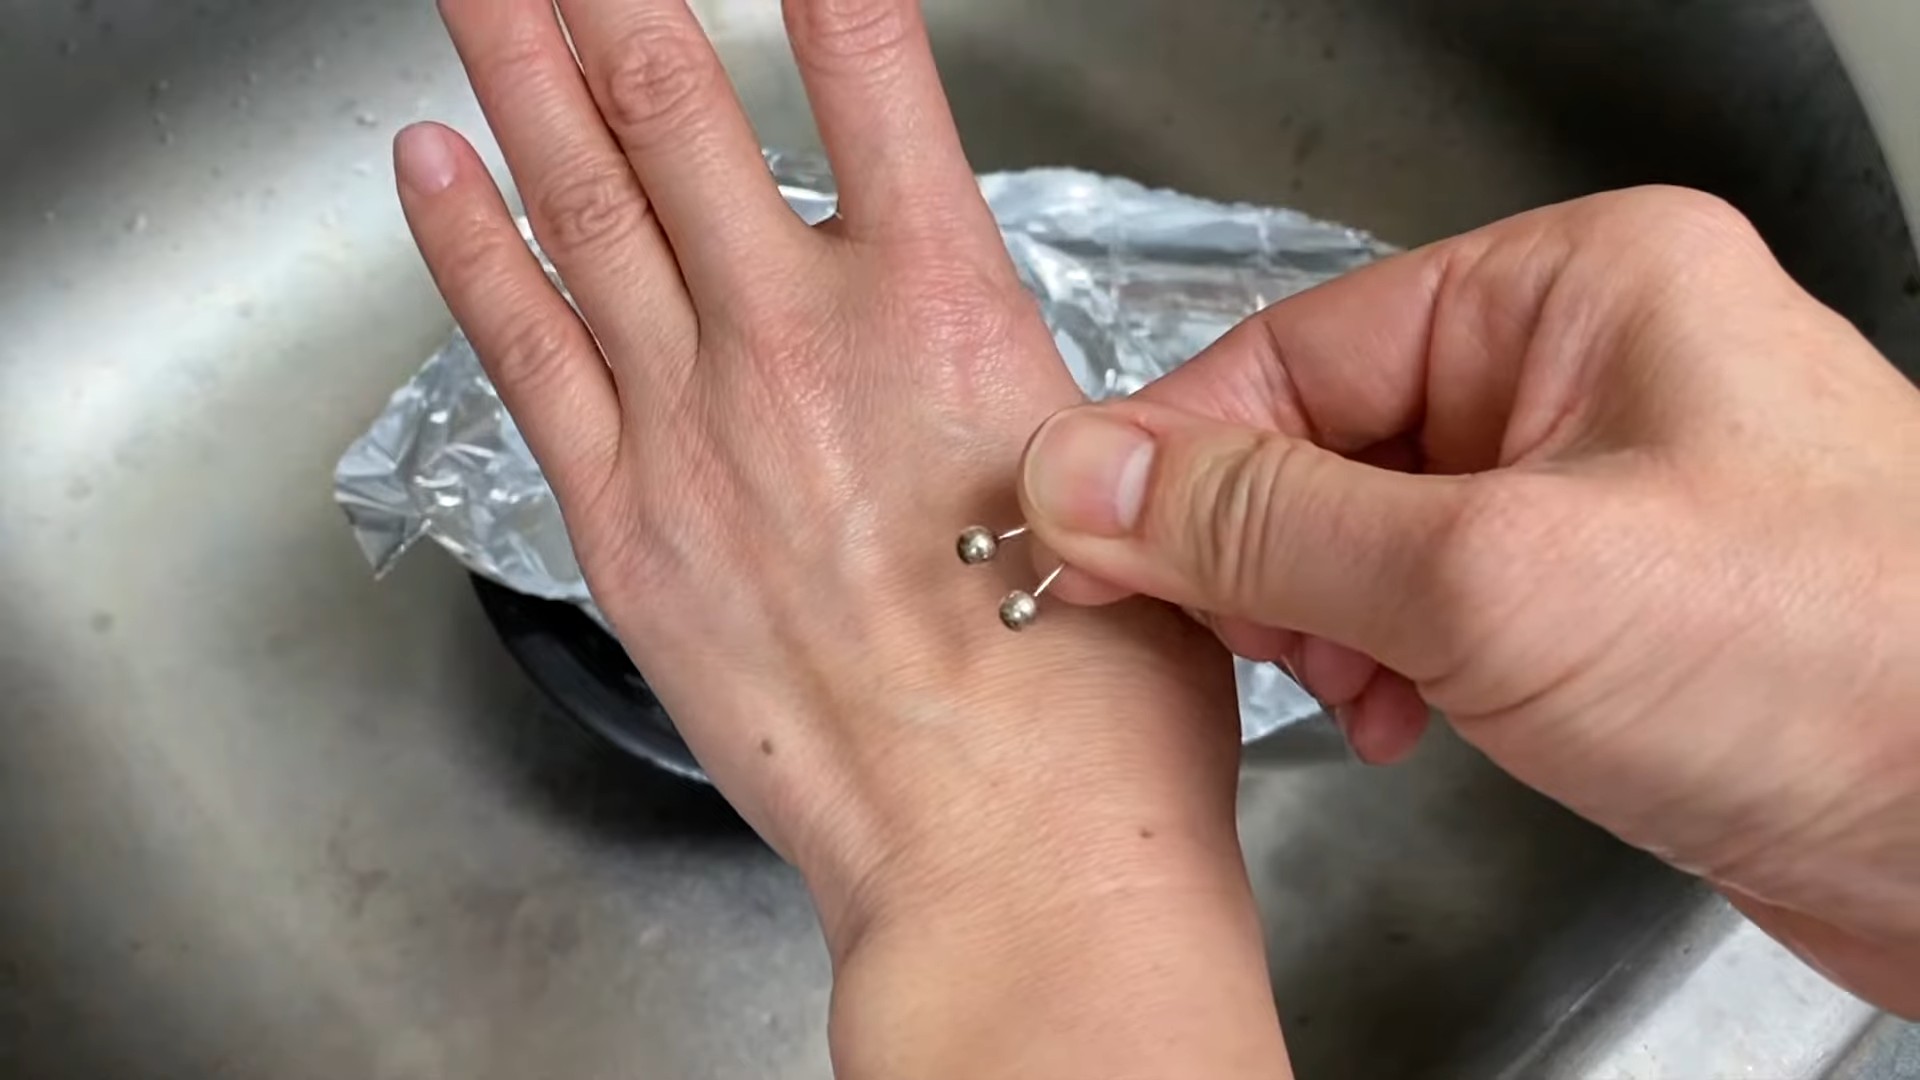
5. Submerge Your Silver: Using tongs or a slotted spoon, gently submerge your silver items into the baking soda solution. Make sure each piece is touching the aluminum foil. This is essential for the electrochemical reaction to occur. If you have a lot of items, you might need to do this in batches to ensure proper contact.
6. Watch the Magic Happen: Now, sit back and watch the magic happen! You should start to see the tarnish disappearing from your silver almost immediately. The length of time it takes will depend on the severity of the tarnish. Lightly tarnished items might only need a few minutes, while heavily tarnished pieces could take up to 30 minutes or even longer.
7. Check and Rotate: Every few minutes, check the progress of your silver. If some areas are more tarnished than others, rotate the items to ensure even cleaning. You might also need to add more baking soda if the solution seems to be losing its effectiveness.
8. Remove and Rinse: Once the tarnish has disappeared (or significantly reduced), carefully remove the silver items from the solution using tongs or a slotted spoon. Rinse them thoroughly under warm running water to remove any remaining baking soda residue.
9. Dry and Polish: Pat the silver items dry with a soft, clean cloth. For an extra shine, you can gently polish them with a silver polishing cloth. This will remove any lingering water spots and bring out their brilliance.
Dealing with Stubborn Tarnish
Sometimes, you might encounter stubborn tarnish that doesn’t completely disappear with the first treatment. Don’t worry! Here are a few tips for dealing with those tricky spots:
* Repeat the Process: If the tarnish is particularly heavy, you can simply repeat the cleaning process. Prepare a fresh batch of baking soda solution and submerge the silver items again.
* Increase the Baking Soda Concentration: For stubborn tarnish, try increasing the amount of baking soda you use in the solution. This will create a stronger cleaning action.
* Use a Baking Soda Paste: For localized tarnish, you can make a paste of baking soda and water. Apply the paste directly to the tarnished area, gently rub it with a soft cloth, and then rinse thoroughly.
* Consider a Silver Polish: If all else fails, you can resort to a commercial silver polish. However, be sure to choose a gentle polish that is specifically designed for silver. Follow the instructions on the product label carefully.
Cleaning Silverware: A Few Extra Tips
Cleaning silverware can be a bit different than cleaning other silver items, especially if it has intricate designs or crevices. Here are a few extra tips to keep in mind:
* Soak Silverware Separately: If you’re cleaning a large batch of silverware, it’s best to soak them separately from other silver items. This will prevent them from scratching each other.
* Use a Soft Brush: For silverware with intricate designs, use a soft brush (like an old toothbrush) to gently scrub away any tarnish that might be trapped in the crevices.
* Dry Immediately: Silverware is particularly prone to water spots, so it’s important to dry it immediately after rinsing. Use a soft, absorbent cloth to thoroughly dry each piece.
Important Considerations and Safety Precautions
While this baking soda cleaning method is generally safe and gentle, there are a few important considerations and safety precautions to keep in mind:
* Avoid Cleaning Certain Items: This method is not suitable for cleaning all types of silver. Avoid using it on antique silver pieces with delicate finishes or on items that contain other metals or gemstones. Always test a small, inconspicuous area first before cleaning the entire item.
* Handle Boiling Water with Care: Boiling water can cause serious burns, so be extremely careful when handling it. Use oven mitts or pot holders to protect your hands, and pour the water slowly and steadily to avoid splashing.
* Ventilate the Area: While the fumes from the baking soda solution are not toxic, it’s still a good idea to ventilate the area while you’re cleaning. Open a window or turn on a fan to ensure proper air circulation.
* Don’t Mix with Other Cleaners: Never mix baking soda with other cleaning products, especially those containing bleach or ammonia. This can create dangerous fumes.
* Dispose of the Solution Properly: Once you’re finished cleaning, dispose of the baking soda solution down the drain. Flush the drain with plenty of water to prevent any clogs.
Maintaining Your Sparkling Silver
Now that you’ve cleaned your silver, you’ll want to keep it looking its best. Here are a few tips for preventing tarnish and maintaining your silver’s shine:
* Store Silver Properly: Store your silver in a cool, dry place, away from direct sunlight and humidity. Wrap each piece in acid-free tissue paper or a silver storage bag to protect it from tarnish.
* Use Anti-Tarnish Strips: Place anti-tarnish strips in your silver storage containers. These strips absorb sulfur compounds in the air, helping to prevent tarnish from forming.
* Clean Regularly: Clean your silver regularly, even if it doesn’t appear to be tarnished. This will prevent tarnish from building up and make it easier to clean in the future.
* Handle Silver with Clean Hands: Oils and acids from your skin can contribute to tarnish, so always handle silver with clean hands.
* Avoid Contact with Certain Substances: Certain substances, such as rubber, wool, and some foods, can accelerate tarnishing. Avoid exposing your silver to these substances.
Conclusion
So there you have it! A simple, effective, and affordable way to clean your silver using baking soda. I hope you found this guide helpful and that your silver is now sparkling like new. Remember to take proper precautions and always test a small area first. Happy cleaning!
Conclusion
So, there you have it! A simple, effective, and surprisingly satisfying way to breathe new life into your tarnished silver using the power of baking soda. Forget expensive silver polishes laden with harsh chemicals. This DIY method is not only gentler on your precious silverware and jewelry, but it’s also kinder to your wallet and the environment.
Why is this baking soda silver cleaning trick a must-try? Because it works! It’s a testament to the power of simple chemistry, transforming dull, lifeless silver into gleaming treasures with minimal effort. The visual transformation is genuinely remarkable, and the satisfaction of knowing you achieved it with readily available household ingredients is unparalleled.
Beyond the basic method, feel free to experiment! For heavily tarnished items, you might consider increasing the amount of baking soda or extending the soaking time. Some people swear by adding a pinch of salt to the mixture to further boost the cleaning power. You can also use a soft toothbrush to gently scrub intricate details or hard-to-reach areas after the initial soak. Remember to always test a small, inconspicuous area first, especially with antique or delicate silver pieces.
Consider the type of aluminum you use as well. While aluminum foil is the most common choice, you can also use an aluminum baking pan. Just ensure the silver is in direct contact with the aluminum for the electrochemical reaction to occur effectively.
This method is particularly effective for cleaning silver jewelry, flatware, and decorative items. However, be cautious when cleaning items with gemstones or other delicate materials, as the baking soda solution could potentially damage them. Always research the specific cleaning requirements of any non-silver components before proceeding.
We are confident that once you try this DIY baking soda silver cleaning method, you’ll be amazed by the results. It’s a game-changer for anyone who wants to keep their silver sparkling without resorting to harsh chemicals or costly professional cleaning services.
Don’t just take our word for it – give it a try! We encourage you to embrace this simple yet powerful technique and rediscover the beauty of your silver. And most importantly, we want to hear about your experience! Share your before-and-after photos, tips, and variations in the comments below. Let’s build a community of silver-cleaning enthusiasts and help each other keep our precious silver shining bright for years to come. Your insights could be invaluable to others looking for a safe and effective way to clean their silver. Let us know if you have any questions, and happy cleaning!
Frequently Asked Questions (FAQ)
What kind of silver can I clean with baking soda?
This method is generally safe for most sterling silver and silver-plated items. However, it’s crucial to exercise caution when cleaning antique silver, items with delicate gemstones, or pieces with intricate designs. Always test a small, inconspicuous area first to ensure the baking soda solution doesn’t cause any damage or discoloration. For items with non-silver components, research their specific cleaning requirements before proceeding. If you are unsure about the composition of your silver item, consult a professional jeweler or silver expert.
How much baking soda should I use?
A general guideline is to use about 1 tablespoon of baking soda per cup of boiling water. However, you can adjust the ratio depending on the severity of the tarnish. For heavily tarnished items, you might increase the amount of baking soda to 2 tablespoons per cup of water. Remember to completely dissolve the baking soda in the boiling water before adding the silver items.
How long should I soak the silver?
The soaking time will vary depending on the level of tarnish. Start by soaking the silver for 5 minutes and check its progress. If the tarnish is still present, continue soaking for another 5-10 minutes, checking periodically. For heavily tarnished items, you might need to soak them for up to 30 minutes. Avoid soaking the silver for extended periods, as it could potentially damage the finish.
What if the tarnish doesn’t come off completely?
If some tarnish remains after soaking, you can gently scrub the affected areas with a soft toothbrush or a microfiber cloth. Be careful not to apply too much pressure, as this could scratch the silver. You can also make a paste of baking soda and water and apply it directly to the tarnished areas. Let the paste sit for a few minutes before gently scrubbing and rinsing.
Can I use this method on silver jewelry with gemstones?
Exercise extreme caution when cleaning silver jewelry with gemstones. Some gemstones are porous and can be damaged by the baking soda solution. Avoid soaking the entire piece of jewelry in the solution. Instead, use a cotton swab dipped in the solution to gently clean the silver parts, being careful to avoid contact with the gemstones. If you are unsure about the safety of cleaning a particular gemstone, consult a professional jeweler.
Why does this method work?
This method works due to a chemical reaction called an electrochemical reaction. When silver tarnish (silver sulfide) comes into contact with aluminum in a baking soda solution, the aluminum donates electrons to the silver sulfide. This process converts the silver sulfide back into metallic silver, effectively removing the tarnish. The sulfur then bonds with the aluminum, causing the aluminum to tarnish instead of the silver.
What kind of container should I use?
Use a glass or ceramic container that is large enough to hold the silver items and the baking soda solution. Avoid using metal containers, as they could interfere with the electrochemical reaction. Line the container with aluminum foil, ensuring that the silver items are in direct contact with the foil.
Is it safe to use boiling water?
Yes, boiling water is necessary for this method to work effectively. The heat helps to dissolve the baking soda and facilitates the electrochemical reaction. However, exercise caution when handling boiling water to avoid burns. Use oven mitts or pot holders to protect your hands.
Can I reuse the baking soda solution?
It’s best to use a fresh baking soda solution for each cleaning session. The solution becomes less effective as it is used, as the aluminum foil becomes coated with sulfur.
How often should I clean my silver with baking soda?
The frequency of cleaning will depend on how quickly your silver tarnishes. Factors such as humidity, exposure to air, and the presence of sulfur in the environment can affect the rate of tarnishing. Clean your silver as needed to maintain its shine.
What are some tips for preventing silver from tarnishing?
To prevent silver from tarnishing, store it in airtight containers or tarnish-resistant bags. You can also place anti-tarnish strips or cloths in the storage containers. Avoid exposing silver to humidity, sulfur, and other corrosive substances. Regularly wipe down your silver with a soft cloth to remove fingerprints and dust.


Leave a Comment