

Deep cleaning cluttered home can feel like climbing Mount Everest, right? I totally get it! You look around, see the piles, the dust bunnies multiplying, and suddenly that burst of energy you had vanishes. But don’t despair! This isn’t just about tidying up; it’s about reclaiming your space and your peace of mind. For centuries, cultures around the world have understood the connection between a clean home and a clear mind. Think of the ancient practice of Feng Shui, where decluttering is essential for positive energy flow.
But let’s be honest, sometimes we need more than just a philosophical approach. We need practical, actionable steps to tackle the chaos. That’s where these DIY tricks come in. I’m going to share some of my favorite hacks for deep cleaning cluttered home, turning it from a daunting task into a manageable and even enjoyable process. These aren’t your grandma’s cleaning tips (though, respect to grandma!). These are clever, efficient strategies designed to help you conquer the clutter, save time, and create a space you truly love. So, grab your gloves, put on some music, and let’s get started! You’ll be amazed at the difference a few simple tricks can make.
Deep Cleaning Your Cluttered Home: A DIY Guide to Reclaim Your Space
Okay, let’s be honest, we’ve all been there. Life gets busy, and suddenly our homes resemble a chaotic landscape more than a peaceful sanctuary. Don’t worry, I’m not judging! I’m here to help you tackle that clutter and deep clean your way to a sparkling, organized home. This isn’t just about surface cleaning; we’re going deep, decluttering, and creating a space you’ll actually love to be in. So, roll up your sleeves, put on some music, and let’s get started!
Phase 1: The Great Decluttering
Before we even think about cleaning, we need to address the elephant in the room: the clutter. This is the most crucial step, and it might feel overwhelming, but trust me, it’s worth it.
* **The Four-Box Method:** This is my go-to strategy for decluttering any space. Grab four boxes (or bags) and label them:
* **Keep:** Items you use regularly and love.
* **Donate/Sell:** Items in good condition that you no longer need or want.
* **Trash:** Items that are broken, damaged, or unusable.
* **Relocate:** Items that belong in another room.
* **One Room at a Time:** Don’t try to declutter your entire house in one day. It’s a recipe for burnout. Focus on one room, or even one area within a room, at a time. This makes the task feel more manageable and less daunting.
* **Ask Yourself the Tough Questions:** As you go through each item, ask yourself these questions:
* Have I used this in the past year?
* Do I love this item?
* Is it useful or necessary?
* If I were shopping today, would I buy this again?
* Am I keeping this out of guilt or obligation?
* **Be Ruthless!** This is the hardest part, but it’s essential. If you’re on the fence about an item, err on the side of getting rid of it. You can always buy a replacement if you truly miss it later.
* **Don’t Get Distracted:** It’s easy to get sidetracked when you find old photos or sentimental items. Acknowledge the memory, but don’t let it derail your decluttering process. Put those items aside to deal with later.
* **Empty Surfaces:** Clear off all surfaces – countertops, tables, shelves – before you start cleaning. This will give you a clear view of what needs to be cleaned and make the process much easier.
Phase 2: Deep Cleaning Room by Room
Now that we’ve decluttered, it’s time to get down to the nitty-gritty of deep cleaning. I’m going to walk you through each room, providing specific tips and tricks for tackling common cleaning challenges.
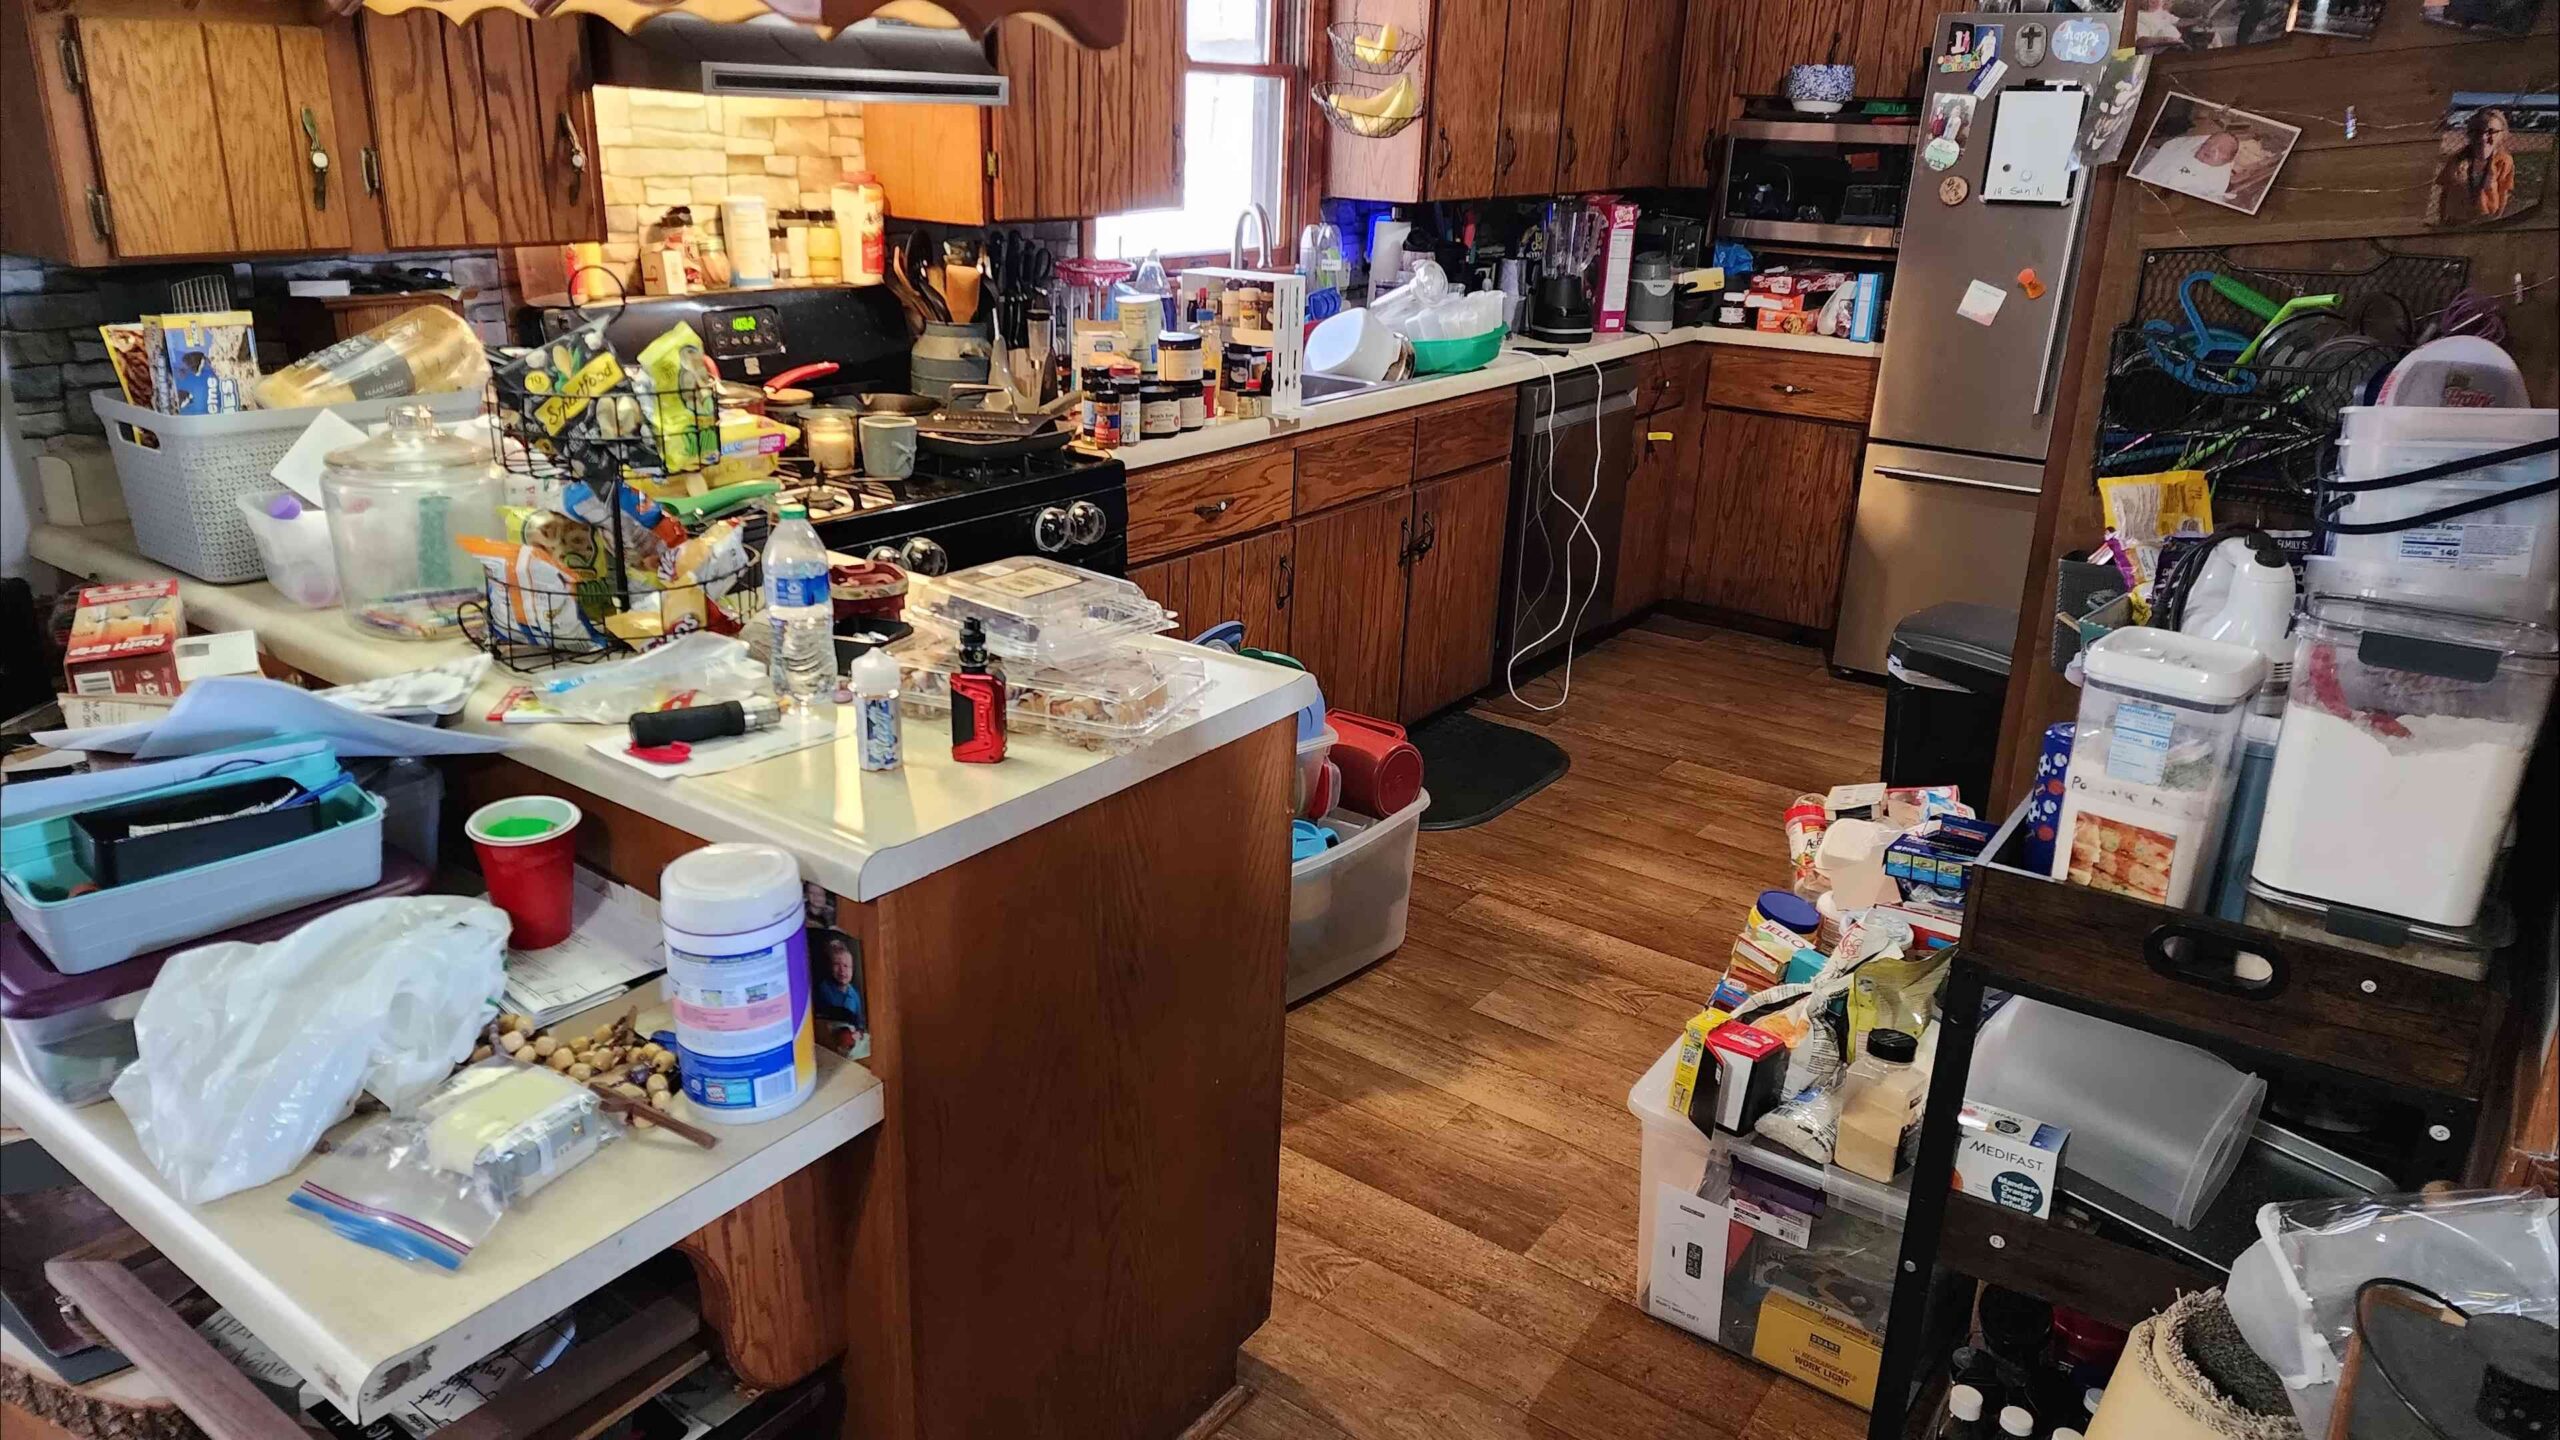
The Kitchen: The Heart of the Home (and the Germiest!)
1. **Clean Out the Refrigerator:**
* Remove all items from the refrigerator.
* Discard expired or spoiled food.
* Remove shelves and drawers and wash them with warm, soapy water.
* Wipe down the interior of the refrigerator with a solution of baking soda and water (this helps eliminate odors).
* Dry everything thoroughly before replacing shelves and drawers.
* Organize food items by category (e.g., dairy, produce, leftovers).
2. **Deep Clean the Oven:**
* **Self-Cleaning Oven:** Follow the manufacturer’s instructions for using the self-cleaning cycle. Be aware that this can produce strong odors and heat, so ventilate the kitchen well.
* **Manual Cleaning:**
* Remove oven racks and soak them in hot, soapy water.
* Make a paste of baking soda and water.
* Coat the interior of the oven with the paste, avoiding the heating elements.
* Let the paste sit overnight.
* Scrub the oven with a sponge or brush.
* Rinse thoroughly with water.
* Replace the oven racks.
3. **Clean the Stovetop:**
* Remove burner grates and soak them in hot, soapy water.
* Wipe down the stovetop with a degreasing cleaner.
* Use a scraper to remove stubborn food residue.
* Clean burner caps with a brush and soapy water.
* Dry everything thoroughly before replacing burner grates and caps.
4. **Clean the Microwave:**
* Microwave a bowl of water with a few slices of lemon for 5 minutes.
* Let the steam loosen food particles.
* Wipe down the interior of the microwave with a damp cloth.
5. **Clean the Dishwasher:**
* Remove the filter and clean it thoroughly.
* Run an empty dishwasher cycle with a cup of vinegar in the top rack.
* Sprinkle baking soda on the bottom of the dishwasher and run another short cycle.
6. **Clean the Sink:**
* Scrub the sink with a baking soda paste.
* Rinse thoroughly with water.
* Pour boiling water down the drain to flush out any debris.
7. **Clean the Countertops:**
* Wipe down countertops with a cleaner appropriate for the material (e.g., granite cleaner for granite countertops).
* Pay attention to corners and edges where grime can accumulate.
8. **Mop the Floor:**
* Sweep or vacuum the floor to remove loose dirt and debris.
* Mop the floor with a cleaning solution appropriate for the flooring material.
The Bathroom: A Sanctuary of Cleanliness
1. **Clean the Toilet:**
* Pour toilet bowl cleaner into the bowl and let it sit for a few minutes.
* Scrub the bowl with a toilet brush.
* Flush the toilet.
* Wipe down the exterior of the toilet with a disinfectant cleaner.
2. **Clean the Shower/Tub:**
* Spray the shower/tub with a shower cleaner.
* Let the cleaner sit for a few minutes.
* Scrub the shower/tub with a sponge or brush.
* Rinse thoroughly with water.
* Clean the showerhead by soaking it in vinegar overnight.
3. **Clean the Sink and Countertop:**
* Wipe down the sink and countertop with a cleaner.
* Pay attention to areas around the faucet and drain.
4. **Clean the Mirror:**
* Spray the mirror with glass cleaner.
* Wipe the mirror with a clean cloth.
5. **Mop the Floor:**
* Sweep or vacuum the floor to remove loose dirt and debris.
* Mop the floor with a cleaning solution.
6. **Clean Shower Curtain or Door:**
* Spray with a mildew cleaner.
* Wipe clean.
* For shower curtains, consider washing them in the washing machine (check the label first!).
The Living Room: A Space for Relaxation
1. **Dust Everything:**
* Dust all surfaces, including furniture, shelves, and picture frames.
* Use a microfiber cloth to avoid scratching surfaces.
* Don’t forget to dust light fixtures and ceiling fans.
2. **Vacuum or Sweep the Floor:**
* Vacuum carpets and rugs thoroughly.
* Sweep or mop hard floors.
3. **Clean Upholstery:**
* Vacuum upholstery to remove loose dirt and debris.
* Spot clean stains with an upholstery cleaner.
* Consider using a steam cleaner for a deeper clean.
4. **Clean Windows and Mirrors:**
* Spray windows and mirrors with glass cleaner.
* Wipe with a clean cloth.
5. **Organize Bookshelves and Media Centers:**
* Dust shelves and items on shelves.
* Reorganize books and media for a neater appearance.
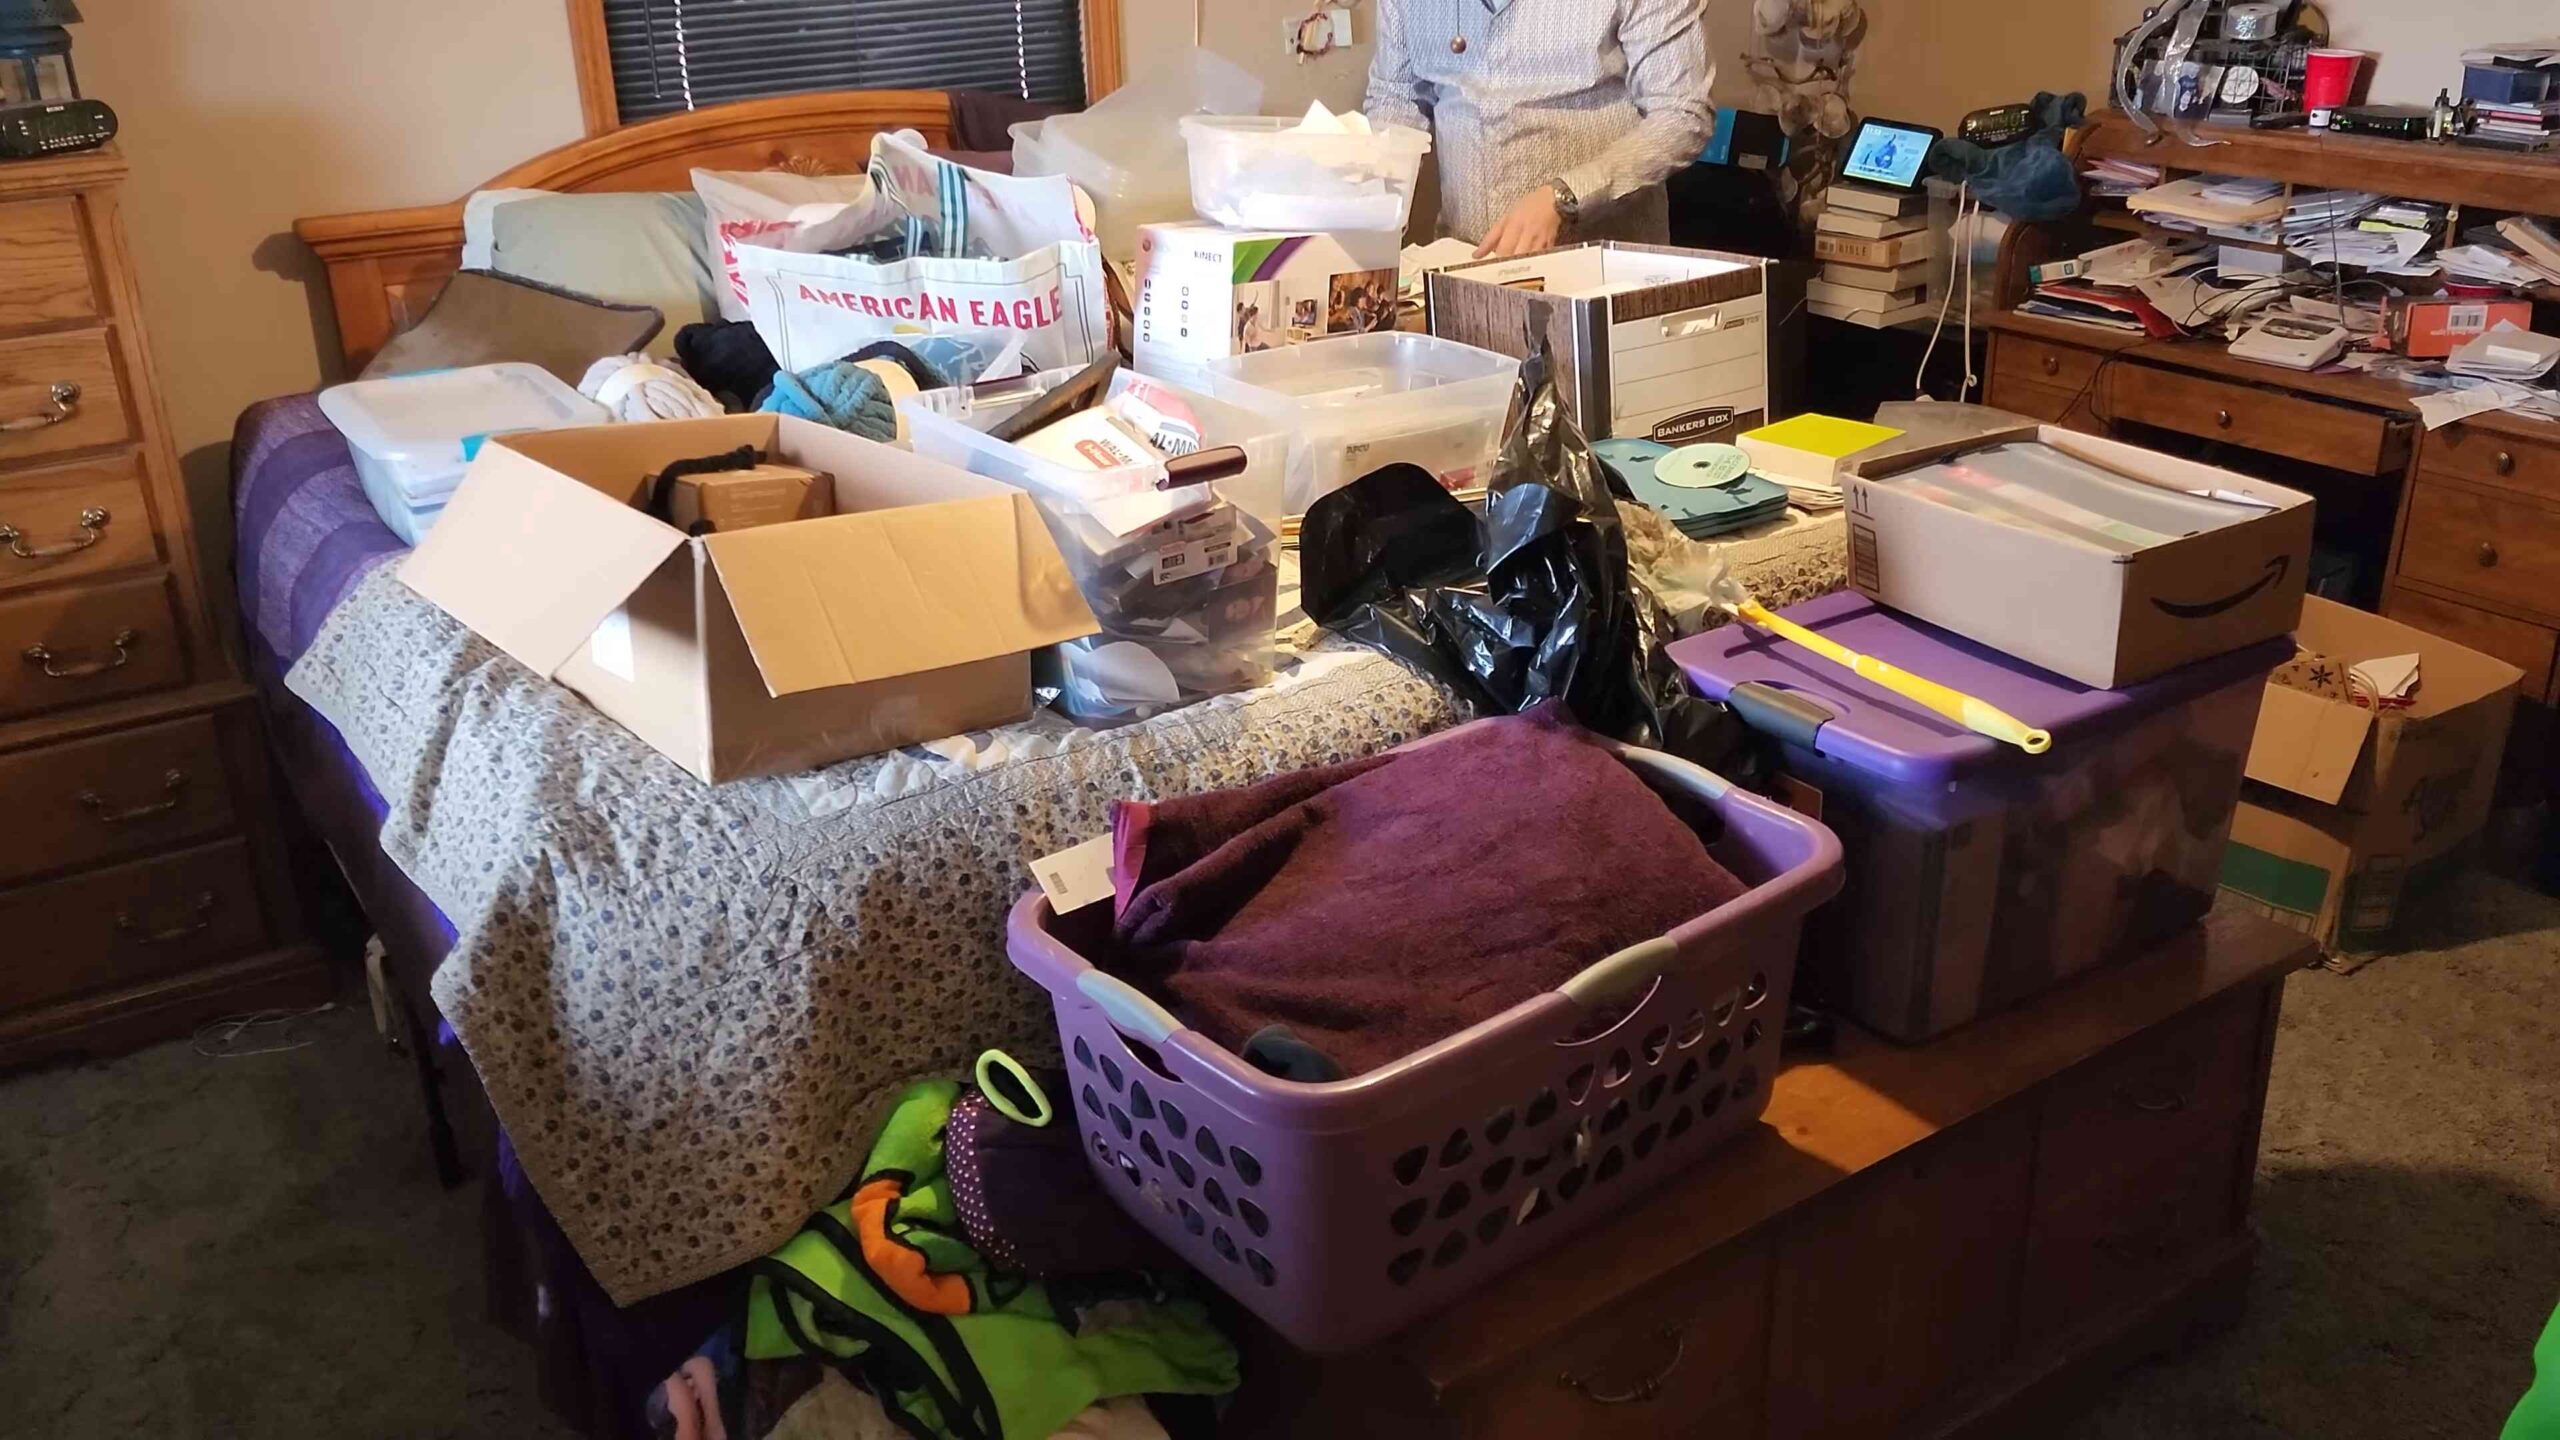
The Bedrooms: Your Personal Sanctuaries
1. **Wash Bedding:**
* Wash sheets, pillowcases, and blankets in hot water.
* Dry thoroughly.
2. **Dust Everything:**
* Dust all surfaces, including furniture, shelves, and picture frames.
3. **Vacuum or Sweep the Floor:**
* Vacuum carpets and rugs thoroughly.
* Sweep or mop hard floors.
4. **Clean Closets:**
* Declutter closets by removing items you no longer need or wear.
* Organize remaining items by category (e.g., shirts, pants, dresses).
5. **Clean Windows and Mirrors:**
* Spray windows and mirrors with glass cleaner.
* Wipe with a clean cloth.
Conclusion
So, there you have it! This DIY deep cleaning trick for decluttering your home isn’t just another cleaning hack; it’s a game-changer. It’s about reclaiming your space, your time, and your sanity. We’ve all been there – overwhelmed by the sheer volume of stuff that seems to multiply overnight. This method, however, provides a structured, manageable approach to tackling even the most daunting clutter.
Why is this a must-try? Because it’s effective, adaptable, and ultimately empowering. It’s not about striving for some unattainable level of perfection; it’s about creating a living environment that supports your well-being and reflects your values. It’s about making your home a sanctuary, not a source of stress.
The beauty of this deep cleaning method lies in its flexibility. Feel free to adapt the timeline to suit your schedule. If you only have 15 minutes a day, break down the tasks into even smaller, more manageable chunks. Or, if you’re feeling particularly motivated, dedicate a whole weekend to conquering the clutter.
Consider these variations to personalize the process:
* **Themed Decluttering:** Focus on a specific category each week, such as clothing, books, or kitchen gadgets. This can help you stay focused and avoid feeling overwhelmed.
* **The “One In, One Out” Rule:** For every new item you bring into your home, commit to getting rid of something similar. This helps prevent future clutter buildup.
* **The Donation Station:** Designate a specific area for items you plan to donate. This makes it easy to gather and transport them when you’re ready.
* **The Sentimental Box:** Acknowledge that some items hold significant emotional value. Create a designated box for these items and revisit it later to decide what to keep and what to let go of. Be honest with yourself about what truly brings you joy versus what’s simply collecting dust.
Remember, the goal isn’t to get rid of everything you own. It’s about making conscious choices about what you want to keep and what no longer serves you. It’s about creating a space that is both functional and beautiful, a space that supports your lifestyle and reflects your personality.
We are confident that this DIY deep cleaning trick will transform your home and your life. But don’t just take our word for it. We encourage you to try it for yourself and see the difference it can make. Start small, be patient, and celebrate your progress along the way.
And most importantly, we want to hear about your experience! Share your before-and-after photos, your tips and tricks, and your biggest decluttering victories in the comments below. Let’s create a community of support and inspiration, helping each other create homes that are truly our havens. Let us know how this **deep cleaning** method worked for you!
Frequently Asked Questions
Q: How often should I deep clean my home?
A: The frequency of deep cleaning depends on several factors, including your lifestyle, the size of your home, and the number of people living there. As a general guideline, aim for a deep clean every 3-6 months. However, if you have pets, children, or allergies, you may need to deep clean more frequently. Regular maintenance cleaning, such as vacuuming, dusting, and wiping down surfaces, should be done weekly to prevent dirt and grime from building up.
Q: What’s the best way to get started when I feel completely overwhelmed by clutter?
A: The key is to break down the task into smaller, more manageable steps. Don’t try to tackle everything at once. Start with one room, one drawer, or even one shelf. Set a timer for 15-30 minutes and focus on decluttering that specific area. Once the timer goes off, take a break and assess your progress. Celebrate your accomplishments, no matter how small, and then decide if you want to continue or move on to something else. The “one in, one out” rule can also be helpful in preventing future clutter.
Q: I have a hard time letting go of sentimental items. What should I do?
A: Sentimental items can be the most challenging to declutter. Start by acknowledging the emotional value of these items. Create a designated “sentimental box” to store items you’re not ready to part with. Revisit the box later, perhaps in a few weeks or months, and reassess whether you truly need to keep everything. Ask yourself: Does this item bring me joy? Does it serve a purpose? Does it represent a positive memory? If the answer is no, consider taking a photo of the item and then donating or discarding it. You can also try reframing your thinking. Instead of focusing on what you’re losing, focus on the space you’re creating for new memories and experiences.
Q: What cleaning supplies do I need for a deep clean?
A: A well-stocked cleaning kit is essential for a successful deep clean. Here are some must-have supplies:
* All-purpose cleaner: For general cleaning of surfaces.
* Glass cleaner: For windows, mirrors, and glass surfaces.
* Bathroom cleaner: For toilets, showers, and sinks.
* Disinfectant: For killing germs and bacteria.
* Floor cleaner: Appropriate for your type of flooring.
* Microfiber cloths: For dusting and wiping surfaces.
* Sponges: For scrubbing stubborn stains.
* Vacuum cleaner: With various attachments for different surfaces.
* Mop and bucket: For cleaning floors.
* Rubber gloves: To protect your hands.
* Trash bags: For disposing of unwanted items.
* Baking soda and vinegar: Natural cleaning alternatives.
Q: How can I make deep cleaning more enjoyable?
A: Put on some music, a podcast, or an audiobook to keep you entertained. Enlist the help of family members or friends to make it a more social activity. Reward yourself with a treat or a relaxing activity after you’ve completed a task. Break down the tasks into smaller, more manageable chunks and celebrate your progress along the way. Remember, the goal is to create a clean and comfortable living space, so focus on the positive outcome.
Q: What are some common areas that are often overlooked during a deep clean?
A: Many areas are often neglected during regular cleaning routines. These include:
* Light fixtures and ceiling fans: Dust and grime can accumulate on these surfaces.
* Baseboards and moldings: These areas can collect dust and dirt.
* Window sills and frames: These areas can be prone to mold and mildew.
* Behind appliances: Food and debris can accumulate behind refrigerators, stoves, and washing machines.
* Underneath furniture: Dust and dirt can collect under sofas, beds, and tables.
* Inside drawers and cabinets: These areas can become cluttered and disorganized.
* Doorknobs and light switches: These high-touch surfaces can harbor germs and bacteria.
Q: How can I maintain a clean and clutter-free home after a deep clean?
A: Maintaining a clean and clutter-free home requires consistent effort and a few simple habits:
* Make your bed every morning: This simple task can make a big difference in the overall appearance of your bedroom.
* Wipe down surfaces after each use: Clean up spills and messes immediately to prevent them from becoming stains.
* Do a quick tidy-up each evening: Put away items that are out of place and clear off surfaces.
* Declutter regularly: Get rid of items you no longer need or use.
* Involve the whole family: Assign cleaning tasks to each family member.
* Schedule regular maintenance cleaning: Set aside time each week to vacuum, dust, and mop.
* Use storage solutions: Utilize bins, baskets, and shelves to keep items organized.
* The “one in, one out” rule: For every new item you bring into your home, get rid of something similar.
Q: Is it worth hiring a professional cleaning service for a deep clean?
A: Hiring a professional cleaning service can be a great option if you’re short on time, overwhelmed by the task, or have specific cleaning needs. Professional cleaners have the experience, equipment, and supplies to thoroughly clean your home. They can also tackle areas that are difficult or time-consuming to clean yourself. However, professional cleaning services can be expensive, so it’s important to weigh the costs and benefits before making a decision. If you decide to hire a professional, be sure to research different companies, read reviews, and get quotes from multiple providers.
Q: What are some eco-friendly cleaning alternatives I can use?
A: Many natural ingredients can be used to effectively clean your home without harsh chemicals. Here are a few examples:
* Vinegar: A natural disinfectant and degreaser.
* Baking soda: A mild abrasive cleaner and deodorizer.
* Lemon juice: A natural disinfectant and stain remover.
* Essential oils: Can be added to cleaning solutions for fragrance and antibacterial properties.
* Castile soap: A gentle and versatile cleaner.
By using these eco-friendly alternatives, you can reduce your exposure to harmful chemicals and create a healthier living environment.


Leave a Comment