

Deep cleaning kitchen tips – who doesn’t need them? Let’s be honest, the kitchen is the heart of the home, but it’s also a magnet for mess! From splattered sauces to lingering odors, keeping it sparkling can feel like a never-ending battle. But fear not, fellow home enthusiasts, because I’m about to share some game-changing DIY tricks that will transform your kitchen from chaotic to captivating!
For centuries, cultures around the world have recognized the importance of a clean and organized kitchen. In many traditions, a tidy kitchen symbolizes prosperity and well-being. Think of the meticulously cleaned hearths of old, representing a warm and welcoming home. While we might not be scrubbing with lye soap anymore, the desire for a spotless kitchen remains strong.
Why are these deep cleaning kitchen tips so essential? Because a clean kitchen isn’t just about aesthetics; it’s about health and hygiene. Lingering bacteria and grime can lead to foodborne illnesses, and nobody wants that! Plus, a clean and organized kitchen makes cooking more enjoyable and efficient. Imagine effortlessly whipping up your favorite meals in a space that’s both beautiful and functional. That’s the power of a good deep clean! So, grab your gloves and let’s dive into these simple yet effective DIY hacks that will leave your kitchen sparkling and you feeling like a culinary superstar!

Deep Cleaning Your Kitchen: A DIY Guide to Sparkling Surfaces and Sanity!
Okay, let’s face it, the kitchen. It’s the heart of the home, but also the battlefield of crumbs, splatters, and mysterious sticky substances. A quick wipe-down here and there just doesn’t cut it sometimes. That’s where deep cleaning comes in! Don’t worry, it’s not as daunting as it sounds. I’m going to walk you through a step-by-step guide to get your kitchen sparkling, organized, and feeling brand new.
What You’ll Need: Your Arsenal of Cleaning Supplies
Before we dive in, let’s gather our supplies. Having everything ready will make the process so much smoother. Trust me on this one!
* All-Purpose Cleaner: A good all-purpose cleaner is your best friend for tackling most surfaces.
* Dish Soap: Essential for washing dishes and degreasing.
* Baking Soda: A natural deodorizer and mild abrasive – perfect for scrubbing.
* White Vinegar: Another natural wonder! Great for disinfecting and removing hard water stains.
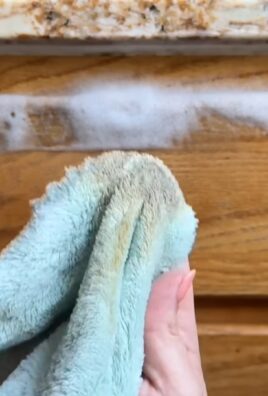
* Microfiber Cloths: These are amazing for cleaning without leaving streaks. Stock up!
* Scrub Brushes: Different sizes for different tasks – a small brush for grout, a larger one for countertops.
* Sponges: For general cleaning and wiping.
* Rubber Gloves: Protect your hands!
* Trash Bags: For all the clutter we’re about to get rid of.
* Vacuum Cleaner or Broom: For sweeping up crumbs and debris.
* Old Toothbrush: Perfect for getting into those hard-to-reach corners.
* Glass Cleaner: For sparkling windows and mirrors.
* Oven Cleaner: (Optional, but highly recommended if your oven needs some serious TLC). Make sure to choose one appropriate for your oven type (self-cleaning or not).
* Cleaning Caddy or Bucket: To keep all your supplies organized.
* Lemon (Optional): For a fresh, natural scent and extra cleaning power.
Phase 1: Declutter and Prep
Before we start scrubbing, let’s declutter and prep the kitchen. This will make the actual cleaning process much more efficient.
1. Clear the Counters: Remove everything from your countertops – appliances, utensils, mail, everything! This gives you a blank canvas to work with.
2. Empty the Sink: Get rid of any dirty dishes. Load them into the dishwasher or wash them by hand.
3. Take Out the Trash: Replace the trash bag and recycling bin liners.
4. Clear the Floor: Pick up any loose items, like toys or shoes, and move any rugs or mats.
5. Open the Windows: Ventilation is key! Open the windows to let in fresh air and help dry surfaces.
Phase 2: Tackling the Appliances
Now, let’s move on to the appliances. We’ll start with the big ones and work our way down.
1. The Oven: This is often the most dreaded task, but it’s so satisfying when it’s done!
* Self-Cleaning Oven: If you have a self-cleaning oven, follow the manufacturer’s instructions. Be aware that this process can produce smoke and odors, so make sure your kitchen is well-ventilated.
* Manual Cleaning: If you don’t have a self-cleaning oven, or prefer to clean it manually, here’s how:
* Remove the racks and soak them in hot, soapy water.
* Mix a paste of baking soda and water.
* Spread the paste all over the inside of the oven, avoiding the heating elements.
* Let it sit overnight.
* The next day, wipe away the paste with a damp cloth. You may need to scrub a bit.
* Rinse thoroughly with clean water.
* Clean the oven racks with a scrub brush and rinse well.
* Dry everything thoroughly before putting it back in the oven.
2. The Refrigerator: A clean fridge is a happy fridge!
* Unplug the Refrigerator: This is important for safety.
* Remove All Items: Take everything out of the fridge and freezer. Discard any expired or spoiled food.
* Remove Shelves and Drawers: Wash them in hot, soapy water.
* Wipe Down the Interior: Use a solution of warm water and baking soda to wipe down the interior walls, shelves, and drawers.
* Clean the Exterior: Wipe down the exterior of the refrigerator with all-purpose cleaner.
* Clean the Door Seals: Use a damp cloth to clean the door seals. This will help them seal properly.
* Replace Shelves and Drawers: Once everything is dry, put the shelves and drawers back in place.
* Restock the Refrigerator: Put the food back in the refrigerator, organizing it as you go.
* Plug the Refrigerator Back In: Don’t forget to plug it back in!
3. The Dishwasher: Yes, even the dishwasher needs cleaning!
* Remove Food Particles: Check the drain and remove any food particles.
* Clean the Filter: Remove the filter and clean it with hot, soapy water.
* Run a Cleaning Cycle: Place a dishwasher-safe cup filled with white vinegar on the top rack and run a normal cycle.
* Clean the Exterior: Wipe down the exterior of the dishwasher with all-purpose cleaner.
4. The Microwave: Another appliance that can get pretty gross.
* Heat a Bowl of Water: Place a microwave-safe bowl filled with water and a slice of lemon in the microwave.
* Microwave for Several Minutes: Heat the water until it boils and the microwave is steamy.
* Let it Sit: Let the steam sit for a few minutes to loosen any grime.
* Wipe Clean: Wipe down the interior of the microwave with a damp cloth.
Phase 3: Countertops, Sink, and Backsplash
Now that the appliances are sparkling, let’s move on to the countertops, sink, and backsplash.
1. Countertops:
* Wipe Down: Wipe down the countertops with all-purpose cleaner.
* Scrub Stubborn Stains: For stubborn stains, use a paste of baking soda and water.
* Disinfect: Disinfect the countertops with a solution of white vinegar and water.
* Pay Attention to Edges and Corners: Use an old toothbrush to clean the edges and corners of the countertops.
2. Sink:
* Rinse: Rinse the sink with hot water.
* Scrub: Scrub the sink with dish soap and a scrub brush.
* Clean the Drain: Pour baking soda down the drain, followed by white vinegar. Let it fizz for a few minutes, then flush with hot water.
* Polish: Polish the sink with a stainless steel cleaner (if applicable).
3. Backsplash:
* Wipe Down: Wipe down the backsplash with all-purpose cleaner.
* Clean Grout: Use an old toothbrush and a grout cleaner to clean the grout.
* Rinse: Rinse the backsplash with clean water.
Phase 4: Cabinets and Drawers
Time to tackle the cabinets and drawers! This is a great opportunity to declutter and organize.
1. Empty Cabinets and Drawers: Remove everything from the cabinets and drawers.
2. Wipe Down Interiors: Wipe down the interiors of the cabinets and drawers with all-purpose cleaner.
3. Declutter: Get rid of any items you no longer need or use. Be honest with yourself!
4. Organize: Organize the remaining items in a way that makes sense for you. Use drawer dividers, shelf organizers, and other storage solutions to maximize space.
5. Clean Cabinet Doors and Hardware: Wipe down the cabinet doors and hardware with all-purpose cleaner. Pay attention to fingerprints and smudges.
Phase 5: Floors and Finishing Touches
Almost there! Let’s finish up with the floors and some finishing touches.
1. Sweep or Vacuum: Sweep or vacuum the floor to remove any crumbs or debris.
2. Mop: Mop the floor with a floor cleaner.
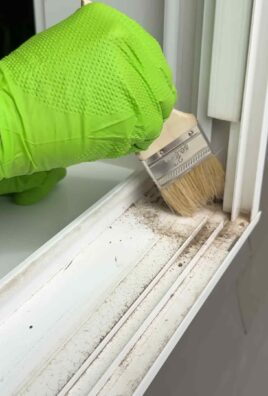
3. Clean Windows and Mirrors: Clean the windows and mirrors with glass cleaner.
4. Wipe Down Light Fixtures: Wipe down the light fixtures with a damp cloth.
5.

Conclusion
So, there you have it! Mastering these deep cleaning kitchen tips isn’t just about achieving a sparkling clean space; it’s about creating a healthier, more enjoyable environment for yourself and your family. Think of it as an investment in your well-being. A clean kitchen reduces stress, minimizes the risk of foodborne illnesses, and even makes cooking more pleasurable.
But why is this particular approach to deep cleaning so essential? Because it goes beyond surface-level tidiness. We’re talking about tackling the hidden grime, the stubborn stains, and the forgotten corners that harbor bacteria and odors. This isn’t your average wipe-down; it’s a comprehensive reset for your culinary haven.
And the best part? You don’t need to spend a fortune on expensive cleaning products or hire a professional cleaning service. These deep cleaning kitchen tips are designed to be accessible, affordable, and effective, using common household ingredients and simple techniques.
Consider this: you can adapt these methods to suit your specific needs and preferences. For example, if you’re sensitive to strong smells, you can substitute lemon juice for vinegar in many cleaning solutions. Or, if you have particularly stubborn grease buildup, you might want to let your cleaning solution sit for a longer period before scrubbing. The key is to experiment and find what works best for you and your kitchen.
Don’t be afraid to get creative! You could even add a few drops of your favorite essential oil to your cleaning solutions for a pleasant, natural fragrance. Lavender, tea tree, and eucalyptus are all excellent choices for their antibacterial and antifungal properties.
We understand that deep cleaning can seem daunting, especially if you’ve been putting it off for a while. But trust us, the results are well worth the effort. Imagine walking into a kitchen that smells fresh, looks immaculate, and feels truly clean. It’s a feeling of accomplishment and satisfaction that’s hard to beat.
So, what are you waiting for? Grab your supplies, put on some music, and get ready to transform your kitchen. We’re confident that you’ll be amazed at the difference these deep cleaning kitchen tips can make.
And most importantly, we want to hear about your experience! Share your before-and-after photos, your favorite cleaning hacks, and any tips or tricks you’ve discovered along the way. Let’s create a community of clean kitchen enthusiasts who inspire and support each other. Use the hashtag #DeepCleanKitchenTips on social media so we can all see your amazing transformations. We can’t wait to see your sparkling clean kitchens!
FAQ
What exactly does “deep cleaning” entail compared to regular cleaning?
Deep cleaning goes beyond the routine tasks of wiping down counters and washing dishes. It involves tackling areas that are often overlooked, such as cleaning inside appliances (oven, refrigerator, dishwasher), scrubbing grout, degreasing range hoods, and sanitizing garbage disposals. Regular cleaning maintains surface cleanliness, while deep cleaning addresses accumulated grime, bacteria, and odors for a more thorough and hygienic result. It’s about getting into the nitty-gritty and restoring your kitchen to its optimal state.
How often should I deep clean my kitchen?
The frequency of deep cleaning depends on how often you cook and the level of activity in your kitchen. As a general guideline, aim for a deep clean every 3-6 months. However, if you cook frequently or have pets, you might want to deep clean more often. You can also break down the deep cleaning tasks into smaller chunks and tackle one or two areas each week to make it more manageable.
What are the essential supplies I need for deep cleaning my kitchen?
You’ll need a variety of cleaning supplies, including:
* All-purpose cleaner
* Dish soap
* Baking soda
* White vinegar
* Microfiber cloths
* Scrub brushes (various sizes)
* Sponges
* Rubber gloves
* Spray bottles
* Old toothbrush (for cleaning grout and tight spaces)
* Oven cleaner (if needed)
* Refrigerator cleaner (if needed)
Consider investing in a steam cleaner for sanitizing surfaces and loosening stubborn grime.
Are there any natural alternatives to harsh chemical cleaners?
Yes, absolutely! Many effective cleaning solutions can be made using natural ingredients like baking soda, white vinegar, lemon juice, and essential oils. For example, a paste of baking soda and water can be used to scrub stubborn stains, while a solution of vinegar and water can be used to clean countertops and appliances. Lemon juice is a great natural degreaser and disinfectant. Essential oils like tea tree, lavender, and eucalyptus have antibacterial and antifungal properties and can be added to cleaning solutions for a pleasant scent and added cleaning power.
How do I deep clean my oven effectively?
There are several ways to deep clean your oven. You can use a commercial oven cleaner, following the instructions carefully. Alternatively, you can try a natural method using baking soda and vinegar. Make a paste of baking soda and water, spread it all over the inside of your oven (avoiding the heating elements), and let it sit overnight. The next day, spray the baking soda paste with white vinegar and scrub away the grime.
What’s the best way to clean a greasy range hood?
Cleaning a greasy range hood requires a degreasing solution. You can use a commercial degreaser or make your own by mixing hot water with dish soap and baking soda. Soak the range hood filters in the solution for at least 30 minutes, then scrub them clean with a brush. Wipe down the exterior of the range hood with the same solution.
How can I prevent my kitchen from getting dirty so quickly?
Prevention is key to maintaining a clean kitchen. Wipe up spills immediately, wash dishes after each meal, and regularly clean countertops and appliances. Sweep or vacuum the floor daily to remove crumbs and debris. Empty the garbage regularly and keep your sink clean. By establishing these simple habits, you can significantly reduce the amount of deep cleaning required.
What are some common mistakes to avoid when deep cleaning my kitchen?
Avoid using abrasive cleaners on delicate surfaces, as they can scratch or damage them. Always test cleaning solutions in an inconspicuous area first to ensure they don’t discolor or damage the surface. Don’t mix cleaning products, as this can create dangerous fumes. And always wear gloves to protect your hands from harsh chemicals.
How do I get rid of stubborn odors in my kitchen?
Stubborn odors can be eliminated by placing a bowl of baking soda in your refrigerator or pantry. You can also simmer a pot of water with lemon slices or cinnamon sticks to freshen the air. For lingering odors in your garbage disposal, grind lemon or lime peels.
Is it safe to use bleach in my kitchen?
Bleach is a powerful disinfectant, but it should be used with caution. Always dilute bleach with water according to the manufacturer’s instructions. Never mix bleach with ammonia or other cleaning products, as this can create toxic fumes. Use bleach sparingly and only on surfaces that can withstand its corrosive properties. Always rinse thoroughly after using bleach.

Leave a Comment