

DIY Bolster Pillow Tutorial: Ready to add a touch of elegance and comfort to your home decor without breaking the bank? I’m so excited to share this simple yet rewarding DIY project with you! Bolster pillows, with their cylindrical shape, have a rich history, dating back to ancient civilizations where they were used for support and ornamentation. Think of the opulent palaces of the East, where bolster pillows adorned luxurious seating arrangements, adding both comfort and a touch of regal flair.
Today, bolster pillows are experiencing a major resurgence in popularity, and for good reason! They’re incredibly versatile, providing excellent lumbar support while reading in bed, adding a stylish accent to your sofa, or even serving as a comfortable neck roll during travel. But let’s be honest, those store-bought options can be quite pricey. That’s where this DIY Bolster Pillow Tutorial comes in! I’ll guide you through each step, from selecting the perfect fabric to mastering the sewing techniques, so you can create a custom bolster pillow that perfectly complements your personal style and budget.
This isn’t just about saving money; it’s about unleashing your creativity and adding a personal touch to your living space. Imagine the satisfaction of saying, “I made this!” when guests admire your beautiful new bolster pillow. So, grab your sewing machine, gather your favorite fabrics, and let’s get started on this fun and fulfilling DIY adventure! You’ll be amazed at how easy it is to create a professional-looking bolster pillow that will elevate your home decor in no time.
DIY Bolster Pillow: A Beginner-Friendly Guide
Hey there, fellow crafters! Ever wanted to add a touch of elegance and comfort to your living space without breaking the bank? Well, you’re in the right place! Today, I’m going to walk you through creating your very own bolster pillow. It’s a surprisingly simple project, even for beginners, and the results are absolutely stunning. Plus, you get to customize it to perfectly match your decor. Let’s get started!
What You’ll Need
Before we dive in, let’s gather our supplies. This is crucial for a smooth and enjoyable crafting experience. Trust me, nothing’s worse than getting halfway through a project and realizing you’re missing something!
* Fabric: This is where you can really let your personality shine! Choose a fabric that complements your existing decor. I recommend a medium-weight fabric like cotton, linen, or even a durable upholstery fabric. Consider the color, pattern, and texture. For a standard bolster pillow (around 24 inches long), you’ll need about 1 yard of fabric. If you’re using a patterned fabric, be sure to account for pattern matching.
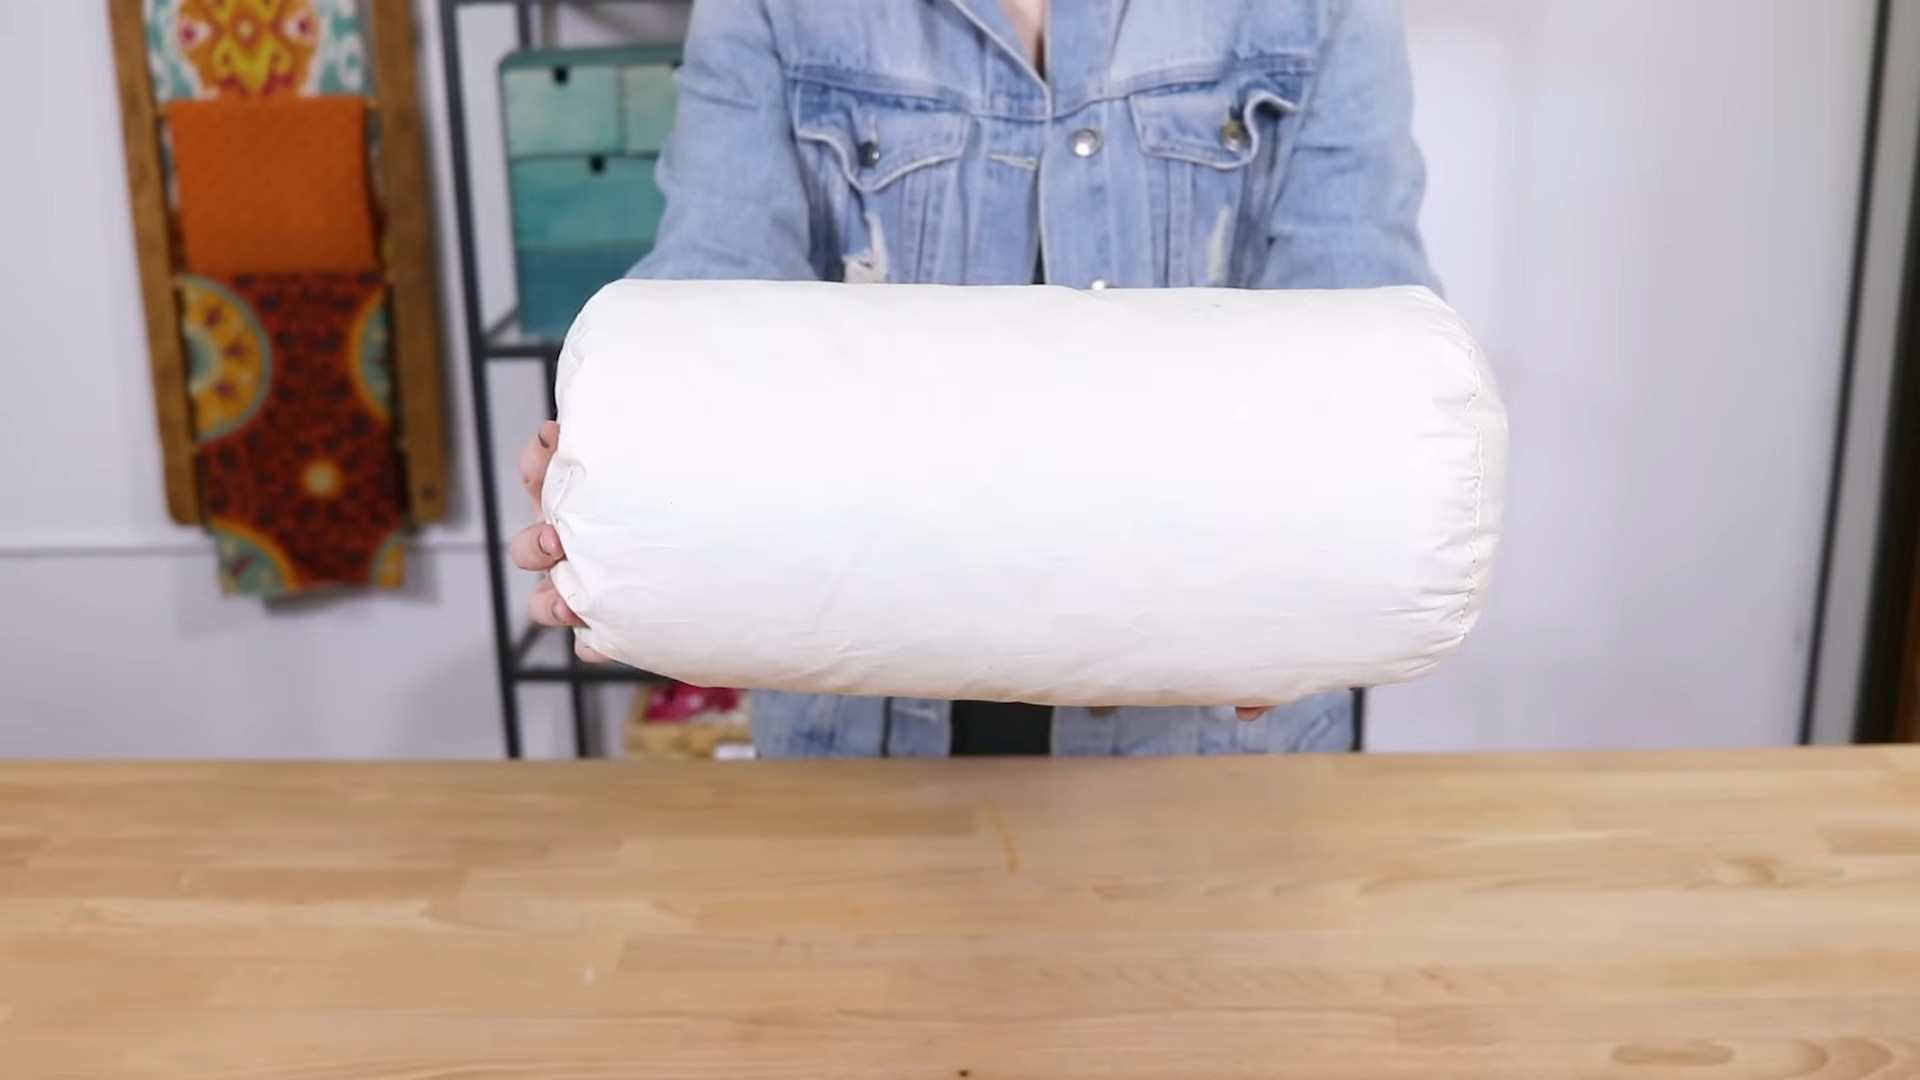
* Bolster Pillow Insert: You can purchase these online or at most craft stores. Make sure you know the dimensions of your insert before you start cutting your fabric. Common sizes are 6×18 inches, 8×20 inches, or 10×24 inches.
* Sewing Machine: A sewing machine will make this project much faster and easier, but you can also hand-sew it if you’re feeling ambitious!
* Thread: Choose a thread that matches your fabric.
* Scissors or Rotary Cutter: For precise fabric cutting. A rotary cutter and mat are especially helpful for cutting straight lines.
* Measuring Tape or Ruler: Accuracy is key!
* Pins: To hold your fabric pieces together while sewing.
* Seam Ripper: Just in case! We all make mistakes.
* Iron and Ironing Board: For pressing seams and creating a professional finish.
* Optional: Zipper or Buttons (for closure), Piping or Trim (for embellishment).
Cutting Your Fabric
Okay, now for the fun part – cutting the fabric! This is where we transform a flat piece of material into the beginnings of our beautiful bolster pillow.
1. Measure Your Insert: First, measure the length and diameter of your bolster pillow insert. Let’s say, for example, your insert is 24 inches long and has a diameter of 8 inches.
2. Calculate Fabric Dimensions:
* Length: Add 1 inch to the length of your insert for seam allowance (0.5 inch on each end). So, in our example, the length would be 24 + 1 = 25 inches.
* Width: Calculate the circumference of your insert by multiplying the diameter by pi (approximately 3.14). In our example, the circumference would be 8 x 3.14 = 25.12 inches. Add 1 inch for seam allowance (0.5 inch on each side). So, the width would be 25.12 + 1 = 26.12 inches. Round up to 26.5 inches for easier measuring.
3. Cut the Main Fabric Piece: Cut a rectangle of fabric that is 25 inches long and 26.5 inches wide (based on our example measurements).
4. Cut the End Circles (if applicable): Some bolster pillows have flat ends, while others are gathered. If you want flat ends, you’ll need to cut two circles. The diameter of each circle should be the same as the diameter of your insert (8 inches in our example). You can use a compass or trace around a plate to create the circles. Add 0.5 inch seam allowance around each circle. So, the diameter of the circles you cut should be 9 inches.
5. Pattern Matching (if applicable): If you’re using a patterned fabric, take extra care to match the pattern at the seams. This will give your finished pillow a more professional look.
Sewing the Pillow Cover
Alright, let’s get sewing! This is where the magic happens, and your fabric starts to take shape.
1. Prepare the Main Fabric Piece: Fold the main fabric piece in half lengthwise, with the right sides (the side you want to see on the outside of the pillow) facing each other. The raw edges should be aligned.
2. Sew the Long Seam: Pin along the long edge of the folded fabric, leaving a 5-6 inch opening in the middle. This opening will be used to insert the pillow form and turn the cover right side out. Sew along the pinned edge with a 0.5 inch seam allowance, remembering to backstitch at the beginning and end of the seam to secure the stitches.
3. Press the Seam: Iron the seam open to reduce bulk and create a smoother finish. This step is crucial for a professional-looking pillow.
4. Attach the End Circles (if applicable):
* Pin one circle to one end of the fabric tube, with the right sides facing each other. Align the raw edges and pin all the way around.
* Sew the circle to the tube with a 0.5 inch seam allowance. This can be a bit tricky, so take your time and use plenty of pins. You may need to ease the fabric as you sew to ensure a smooth, even seam.
* Repeat for the other end circle.
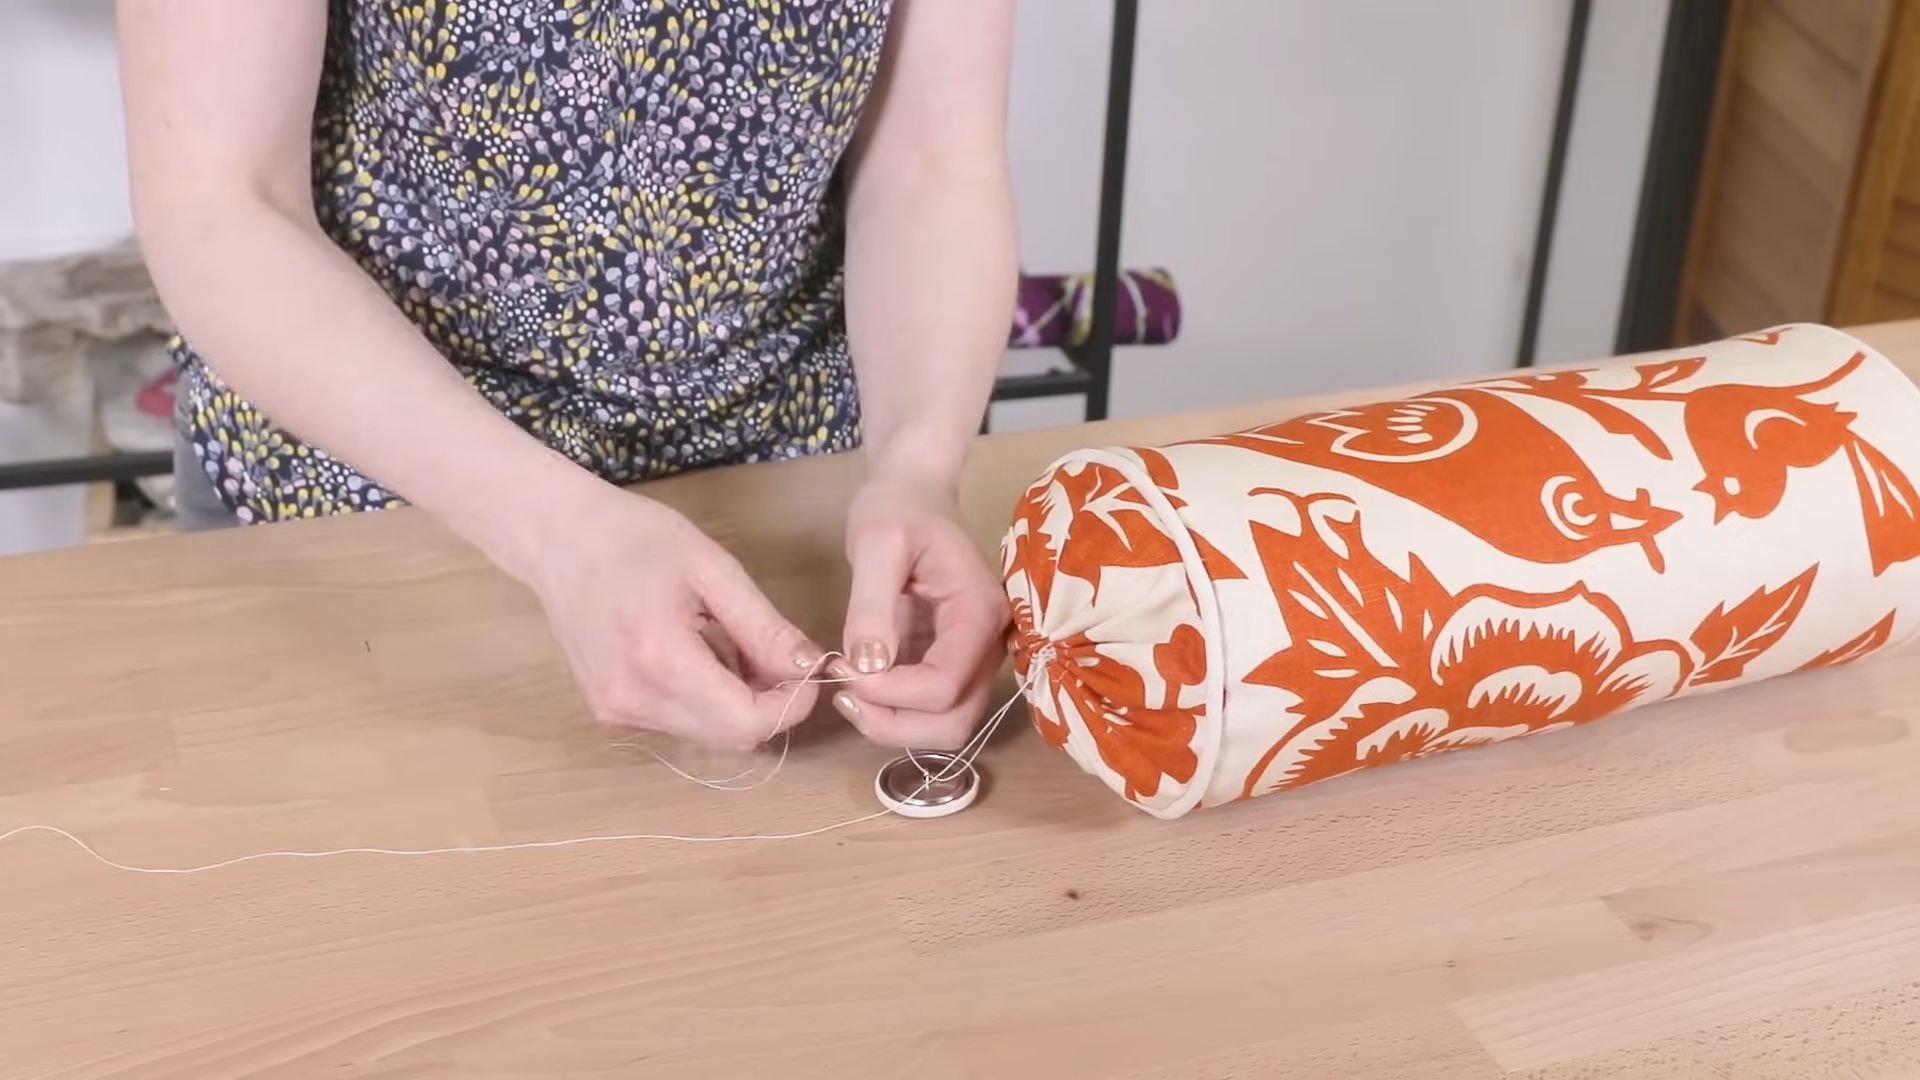
5. Finishing the Ends (if not using circles): If you’re not using end circles, you’ll need to gather the ends of the fabric tube.
* Turn the fabric tube inside out.
* Using a long stitch length on your sewing machine, sew two rows of stitches around one end of the tube, about 0.25 inch and 0.5 inch from the raw edge. Leave long thread tails at the beginning and end of each row of stitches.
* Gently pull on the thread tails to gather the fabric. Distribute the gathers evenly and secure the threads by tying them off.
* Repeat for the other end of the tube.
6. Turn the Pillow Cover Right Side Out: Carefully turn the pillow cover right side out through the opening you left in the long seam. Use a point turner or a blunt object to push out the corners and create a crisp edge.
7. Insert the Pillow Form: Gently insert the bolster pillow form into the cover.
8. Close the Opening: Fold the raw edges of the opening inward and pin them together. You can either hand-sew the opening closed with a blind stitch (for an invisible finish) or machine-sew it closed with a straight stitch.
Adding a Closure (Optional)
If you want to be able to remove the pillow cover for washing, you can add a zipper or button closure.
Zipper Closure
1. Prepare the Opening: If you haven’t already, create an opening in the long seam of the pillow cover.
2. Insert the Zipper: Use a zipper foot on your sewing machine to sew the zipper into the opening. Make sure the zipper is centered and that the teeth are facing inward.
3. Sew the Zipper in Place: Sew along both sides of the zipper, close to the teeth. Backstitch at the beginning and end of each seam to secure the stitches.
Button Closure
1. Create Buttonholes: On one side of the opening, create buttonholes that are slightly larger than the buttons you’ll be using. You can use a buttonhole foot on your sewing machine or hand-sew the buttonholes.
2. Attach Buttons: On the other side of the opening, sew the buttons in place, aligning them with the buttonholes.
Adding Embellishments (Optional)
Want to take your bolster pillow to the next level? Consider adding some embellishments!
* Piping: Piping adds a professional touch and can be used to highlight the edges of the pillow. You can purchase pre-made piping or make your own using fabric and cording.
* Trim: Add decorative trim, such as tassels, fringe, or ribbon, to the ends of the pillow.
* Embroidery: Embroider a design or monogram onto the pillow cover.
* Appliqué: Add fabric appliqués to create a unique and personalized design.
Final Touches
1. Iron the Pillow Cover: Give your finished pillow cover a final ironing to remove any wrinkles and create a crisp, professional look.
2. Fluff the Pillow: Fluff the pillow form to ensure it fills out the cover completely.
3. Enjoy Your New Bolster Pillow! Place your new bolster pillow on your sofa, bed, or favorite chair and enjoy the added comfort and style.
And there you have it
Conclusion
So, there you have it! Creating your own bolster pillow isn’t just a cost-effective alternative to buying one; it’s a gateway to personalized comfort and style. This DIY bolster pillow project allows you to tailor the size, shape, and fabric to perfectly complement your existing décor and cater to your specific needs. Forget settling for generic options from the store – with a little time and effort, you can craft a bolster pillow that’s uniquely yours.
Why is this a must-try? Because it empowers you to take control of your comfort and aesthetic. Imagine sinking into a perfectly sized bolster pillow, crafted from your favorite fabric, providing the exact support you need for reading in bed, lounging on the sofa, or practicing restorative yoga. The satisfaction of creating something beautiful and functional with your own hands is an added bonus!
But the fun doesn’t stop there! Feel free to experiment with variations to truly make this project your own. Consider adding decorative trims like piping, tassels, or fringe for a touch of elegance. Play with different filling materials – buckwheat hulls for a firmer, more supportive feel, or down feathers for ultimate softness. You could even create a bolster pillow with removable covers, allowing you to easily change the fabric to match the seasons or your mood. Think about incorporating aromatherapy by adding dried lavender or chamomile to the filling for a calming and relaxing experience. For a more structured bolster, try using a cylindrical foam insert as the core, then adding batting for a softer outer layer. Don’t be afraid to get creative with the shape, either! While the classic cylindrical shape is popular, you could experiment with oblong or even slightly curved designs.
Ultimately, this DIY bolster pillow tutorial is more than just a set of instructions; it’s an invitation to unleash your creativity and create a piece that enhances your well-being and adds a personal touch to your home. We believe that everyone deserves a little extra comfort and style in their lives, and this project is a simple and rewarding way to achieve just that.
So, what are you waiting for? Gather your materials, dust off your sewing machine (or grab a needle and thread!), and embark on this exciting DIY adventure. We’re confident that you’ll be thrilled with the results.
And most importantly, we want to hear about your experience! Share your creations with us on social media using #DIYBolsterPillow and tell us about your unique variations and the challenges you overcame. We love seeing how our readers put their own spin on our projects and inspire others to get creative. Your feedback helps us improve our tutorials and provide even better resources for the DIY community. Happy crafting!
Frequently Asked Questions (FAQ)
What kind of fabric is best for a DIY bolster pillow?
The best fabric for your DIY bolster pillow depends on your personal preferences and intended use. For a durable and easy-to-clean option, consider cotton canvas, linen, or a cotton-linen blend. These fabrics are also relatively inexpensive and come in a wide variety of colors and patterns. For a more luxurious feel, consider using velvet, silk, or a high-quality upholstery fabric. Keep in mind that these fabrics may be more delicate and require special care. If you plan to use your bolster pillow outdoors, choose a weather-resistant fabric like outdoor canvas or Sunbrella. Ultimately, the best fabric is one that you love the look and feel of and that suits your needs and budget. Consider the weight of the fabric as well; a heavier fabric will provide more structure, while a lighter fabric will be softer and more pliable.
What kind of filling should I use for my bolster pillow?
There are several options for filling your bolster pillow, each with its own advantages and disadvantages. Polyester fiberfill is a popular choice because it’s inexpensive, readily available, and hypoallergenic. It’s also easy to wash and dry. However, it can flatten over time and may not provide as much support as other options. Buckwheat hulls are a natural and eco-friendly option that provides firm support and conforms to your body. They are also breathable and can help regulate temperature. However, they can be noisy and may not be suitable for people with allergies to buckwheat. Down feathers are a luxurious option that provides exceptional softness and comfort. However, they are more expensive than other options and may not be suitable for people with allergies. A foam cylinder wrapped in batting is a great option for a firm and consistent shape. Consider a blend of fillings to achieve your desired level of comfort and support.
How much fabric do I need to make a bolster pillow?
The amount of fabric you need will depend on the size of your bolster pillow. To calculate the fabric needed, measure the desired length and circumference of your pillow. Add a few inches to each measurement for seam allowances. As a general rule, for a standard bolster pillow (approximately 24 inches long and 8 inches in diameter), you’ll need about 1 yard of fabric. However, it’s always best to measure and calculate the fabric needed based on your specific dimensions. If you are using a patterned fabric, be sure to account for pattern matching when calculating the amount of fabric needed. It’s always better to have a little extra fabric than not enough!
Can I make a bolster pillow without a sewing machine?
Yes, you can definitely make a bolster pillow without a sewing machine! While a sewing machine can speed up the process, hand-sewing is a perfectly viable option. Use a sturdy needle and thread and a simple running stitch or backstitch to create strong seams. Hand-sewing will take longer, but it can be a relaxing and meditative activity. If you’re new to hand-sewing, practice on a scrap piece of fabric before starting your project. Consider using a thicker thread for added durability.
How do I clean my DIY bolster pillow?
The cleaning method for your DIY bolster pillow will depend on the fabric and filling you used. If you used a washable fabric and polyester fiberfill, you can typically machine wash the entire pillow on a gentle cycle. However, it’s always best to check the care instructions for your specific fabric. If you used a more delicate fabric or a filling that cannot be machine washed, spot clean the pillow with a mild detergent and water. For buckwheat hulls, remove the filling before washing the cover. Air dry the cover completely before reinserting the filling. To prevent stains and keep your bolster pillow clean, consider using a pillow protector. Regular fluffing can also help maintain the shape and loft of your pillow.
How can I customize my bolster pillow to match my décor?
Customizing your bolster pillow to match your décor is one of the best things about making it yourself! Choose a fabric that complements the colors and patterns in your room. Consider adding decorative trims like piping, tassels, or fringe. You can also use embroidery, applique, or fabric paint to add unique designs. Experiment with different shapes and sizes to create a bolster pillow that perfectly fits your space. Think about the overall style of your room and choose fabrics and embellishments that reflect that style. For example, a bohemian-style room might call for a bolster pillow made from colorful patterned fabric with tassels, while a minimalist room might benefit from a bolster pillow made from a neutral-colored fabric with clean lines.
What if I don’t have experience sewing?
Don’t worry if you don’t have much sewing experience! This DIY bolster pillow project is relatively simple and can be a great way to learn basic sewing skills. Start with a simple design and use a sturdy fabric that is easy to work with. Watch online tutorials and practice your stitches on a scrap piece of fabric before starting your project. If you’re using a sewing machine, start with a slow speed and gradually increase the speed as you become more comfortable. Don’t be afraid to ask for help from a friend or family member who has sewing experience. Remember, everyone starts somewhere, and with a little patience and practice, you can create a beautiful and functional bolster pillow.


Leave a Comment