

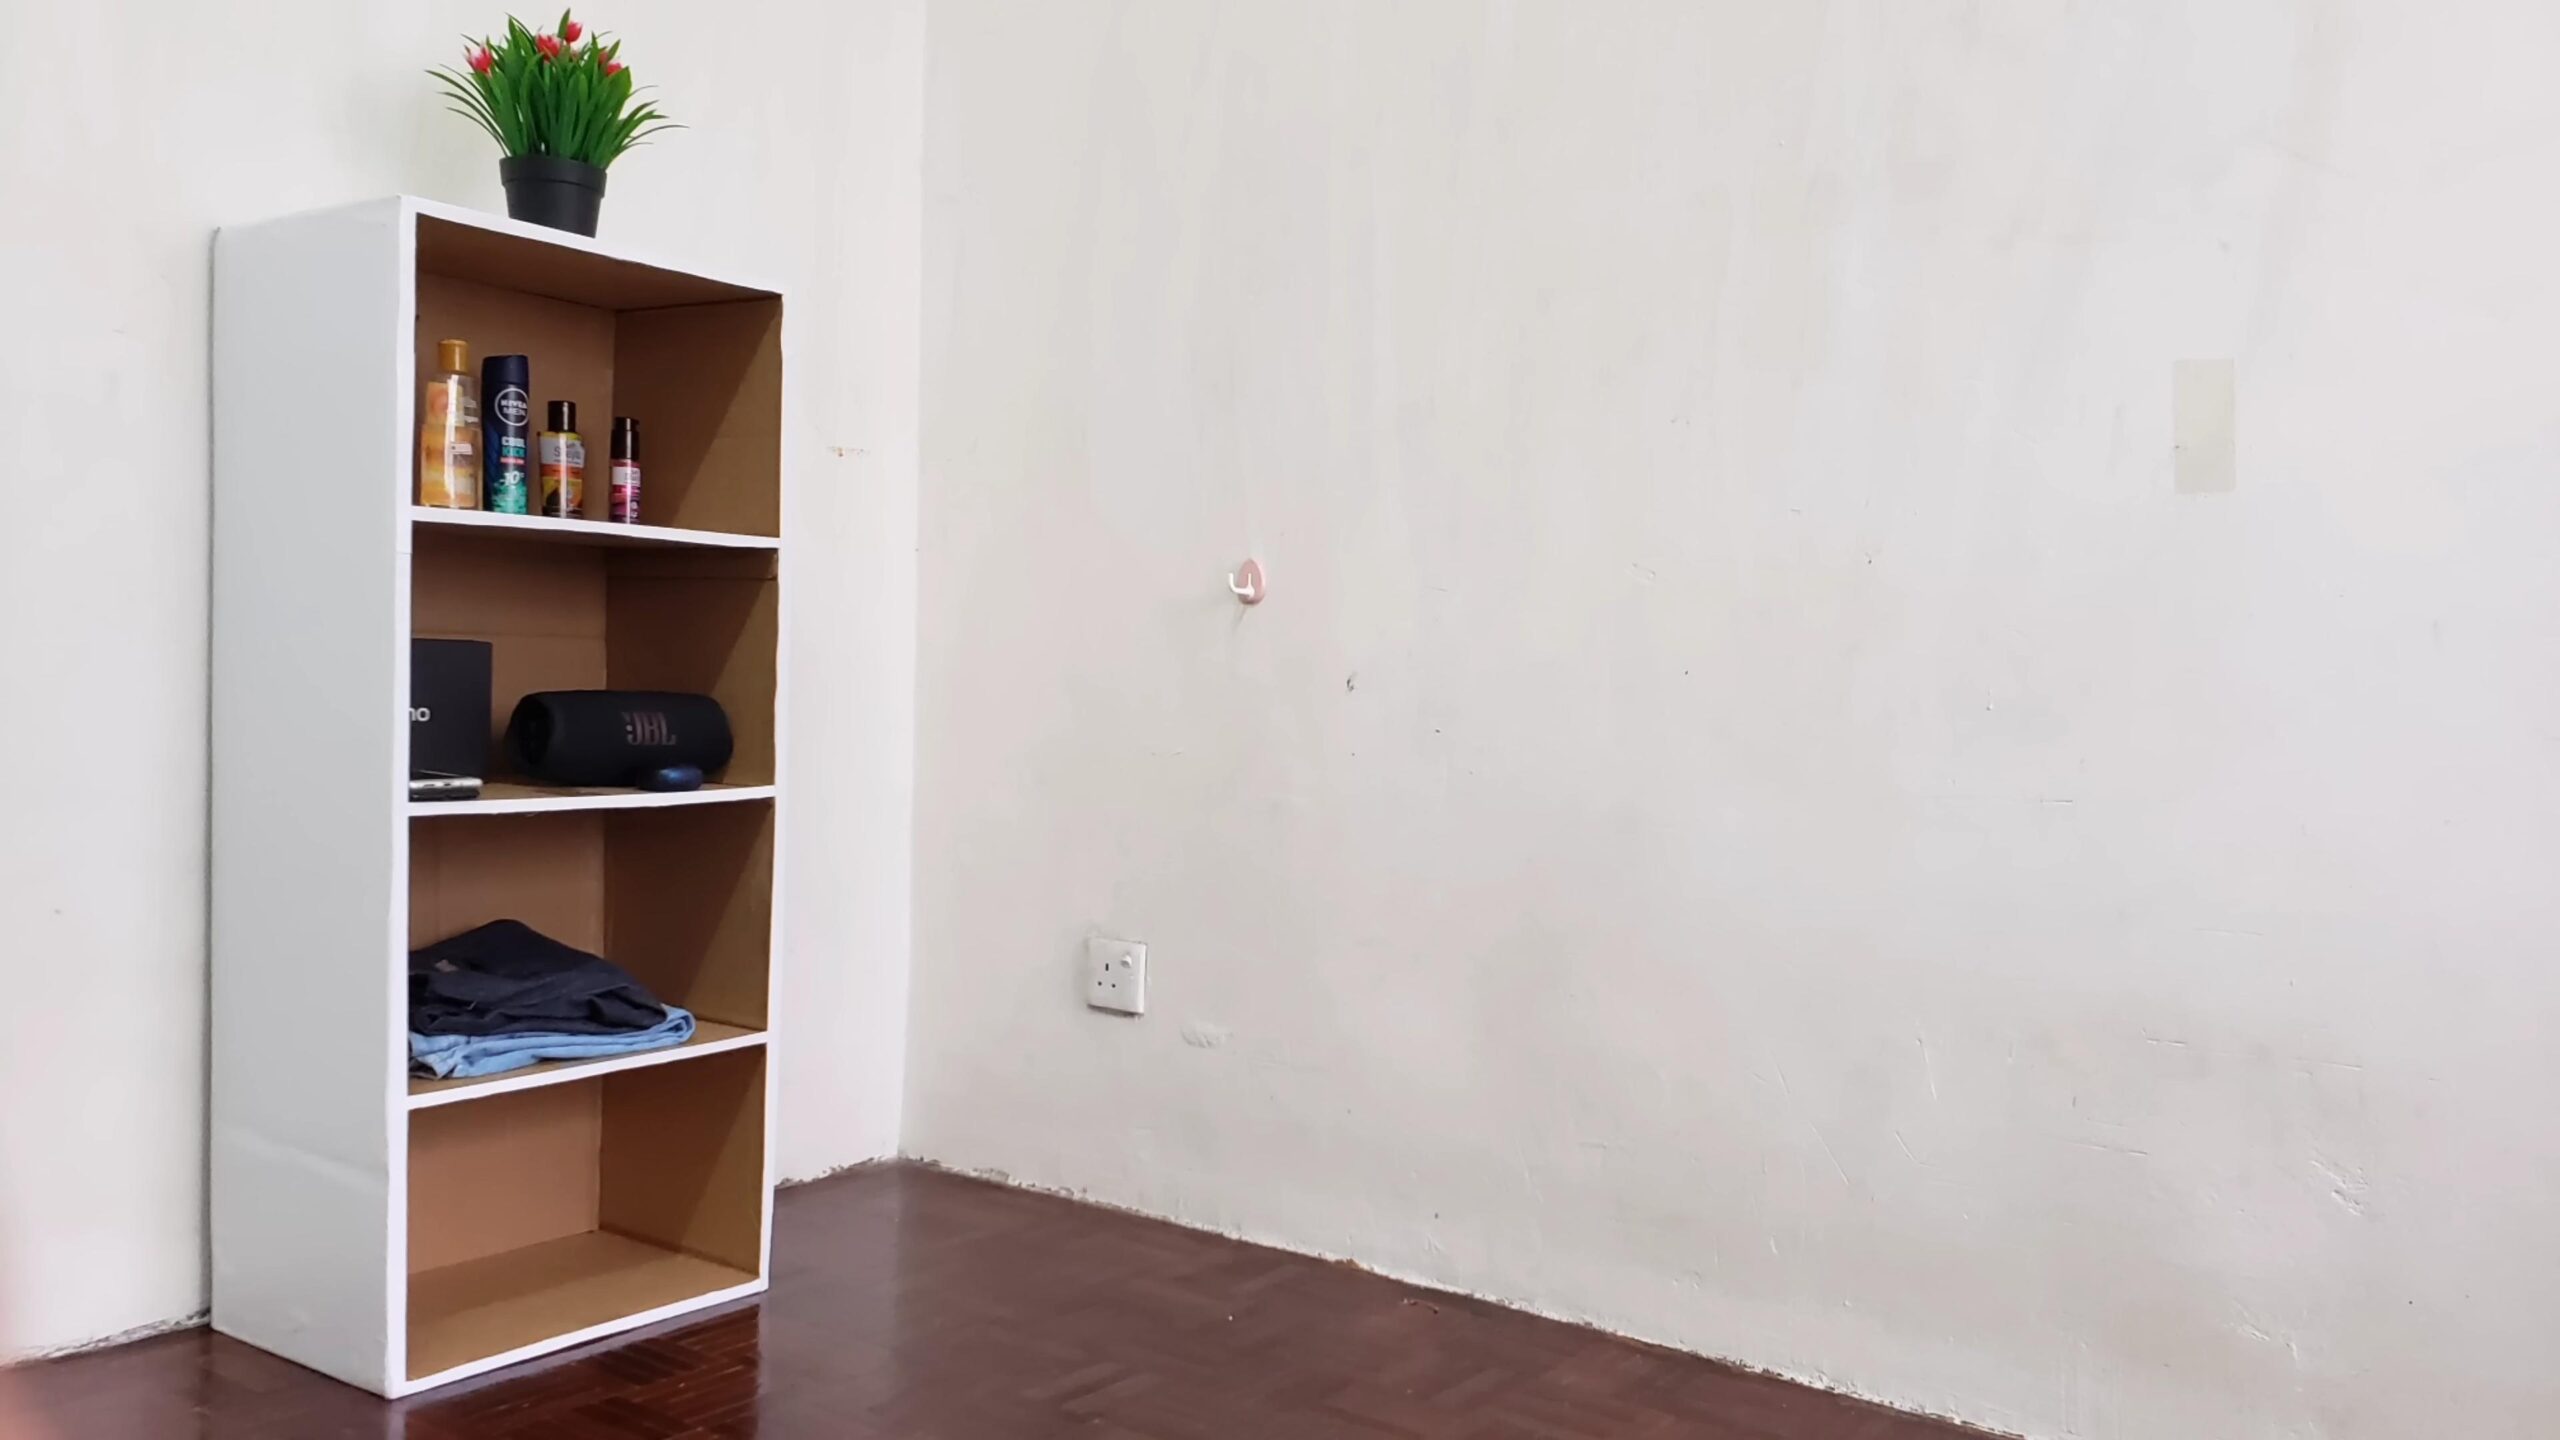
DIY Cardboard Wardrobe Project: Tired of clothes overflowing from your closet? Are you yearning for a more organized space without breaking the bank? I totally get it! We’ve all been there, staring at a mountain of clothes with nowhere to put them. That’s why I’m so excited to share this incredible DIY project with you – building your very own cardboard wardrobe!
Believe it or not, the concept of repurposing materials for storage solutions has been around for centuries. Think of ancient civilizations using woven baskets and repurposed clay pots to keep their belongings tidy. While our materials might be a little different, the spirit of resourcefulness remains the same. This isn’t just about saving money; it’s about embracing sustainability and giving new life to something that would otherwise end up in the recycling bin.
In today’s world, where consumerism often reigns supreme, finding creative and affordable ways to manage our belongings is more important than ever. A DIY Cardboard Wardrobe Project offers a fantastic solution for anyone seeking extra storage space, whether you’re a student living in a dorm, a renter with limited closet space, or simply someone who loves a good upcycling challenge. Plus, it’s a fun and rewarding project that you can customize to perfectly fit your needs and style. Let’s dive in and transform those cardboard boxes into a stylish and functional storage solution!
DIY Cardboard Wardrobe: Organize Your Clothes on a Budget!
Hey there, fellow DIY enthusiasts! Are you tired of clothes piling up everywhere? Need extra storage but don’t want to break the bank? Well, I’ve got the perfect solution for you: a DIY cardboard wardrobe! This project is surprisingly sturdy, customizable, and a fantastic way to recycle those extra cardboard boxes you’ve been hoarding (yes, I know you have them!). Let’s get started!
What You’ll Need:
Before we dive in, let’s gather our supplies. This is crucial for a smooth and efficient building process. Trust me, you don’t want to be running to the store mid-project!
* Large Cardboard Boxes: The bigger, the better! Think appliance boxes (refrigerator, washer/dryer), or furniture boxes. You’ll need at least 3-4 depending on the size you want your wardrobe to be. Make sure they are relatively clean and undamaged.
* Smaller Cardboard Boxes: These will be used for shelves, drawers (optional), and reinforcing certain areas. Shoe boxes, moving boxes, or even cereal boxes can come in handy.
* Packing Tape: Lots and lots of packing tape! Clear or brown is fine. Invest in a good quality tape dispenser; it will save you a ton of time and frustration.
* Utility Knife or Box Cutter: A sharp blade is essential for clean cuts. Be extremely careful when using this! Always cut away from yourself and use a cutting mat or protected surface.
* Metal Ruler or Straight Edge: For accurate measurements and straight lines. A long ruler (at least 3 feet) is ideal.
* Pencil or Marker: For marking measurements and cutting lines.
* Hot Glue Gun and Glue Sticks: This is optional but highly recommended for extra reinforcement and attaching smaller pieces.
* Measuring Tape: To measure the boxes and plan your wardrobe’s dimensions.
* Optional:
* Contact paper or decorative paper: To cover the cardboard and give it a more polished look.
* Spray paint: To paint the cardboard (use cardboard-friendly paint).
* Handles or knobs: For drawers (if you’re adding them).
* PVC pipe or wooden dowels: For a hanging rod.
* Cardboard tubes (from wrapping paper or paper towels): For extra support.
Planning Your Wardrobe: The Blueprint
Before you start cutting and taping, it’s important to have a plan. This will help you visualize the final product and avoid mistakes.
* Measure Your Space: Determine the maximum dimensions of your wardrobe. Consider the height, width, and depth of the area where you’ll be placing it.
* Assess Your Needs: How much hanging space do you need? How many shelves? Do you want drawers? Think about the types of clothes you’ll be storing and how you want to organize them.
* Sketch a Design: Draw a simple sketch of your wardrobe, including the dimensions and placement of shelves, drawers, and hanging rod. This doesn’t have to be a masterpiece, just a visual guide.
* Box Inventory: Take inventory of your cardboard boxes and determine how you can best utilize them based on your design.
Building the Wardrobe Frame: The Foundation
This is where we start turning those boxes into something amazing!
1. Prepare the Base Boxes: Choose the largest and sturdiest boxes for the base of your wardrobe. If the boxes have flaps, fold them inwards and tape them securely. You can also cut them off entirely for a cleaner look. I usually prefer to fold them in for extra support.
2. Stack and Secure: Stack the base boxes on top of each other to create the desired height of your wardrobe. Make sure they are aligned properly. Use packing tape to securely attach the boxes together, both inside and outside. Don’t be shy with the tape! The more tape, the sturdier the structure.
3. Reinforce the Corners: Cut strips of cardboard from your smaller boxes and use them to reinforce the corners of the stacked boxes. Attach them with packing tape or hot glue for extra strength. This will prevent the corners from collapsing under the weight of your clothes.
4. Create the Top: If you have another large box, you can use it to create a top for your wardrobe. Cut it to the desired size and attach it to the top of the stacked boxes with packing tape. Make sure it’s securely attached and reinforced. If you don’t have a large box, you can create a top by piecing together smaller pieces of cardboard.
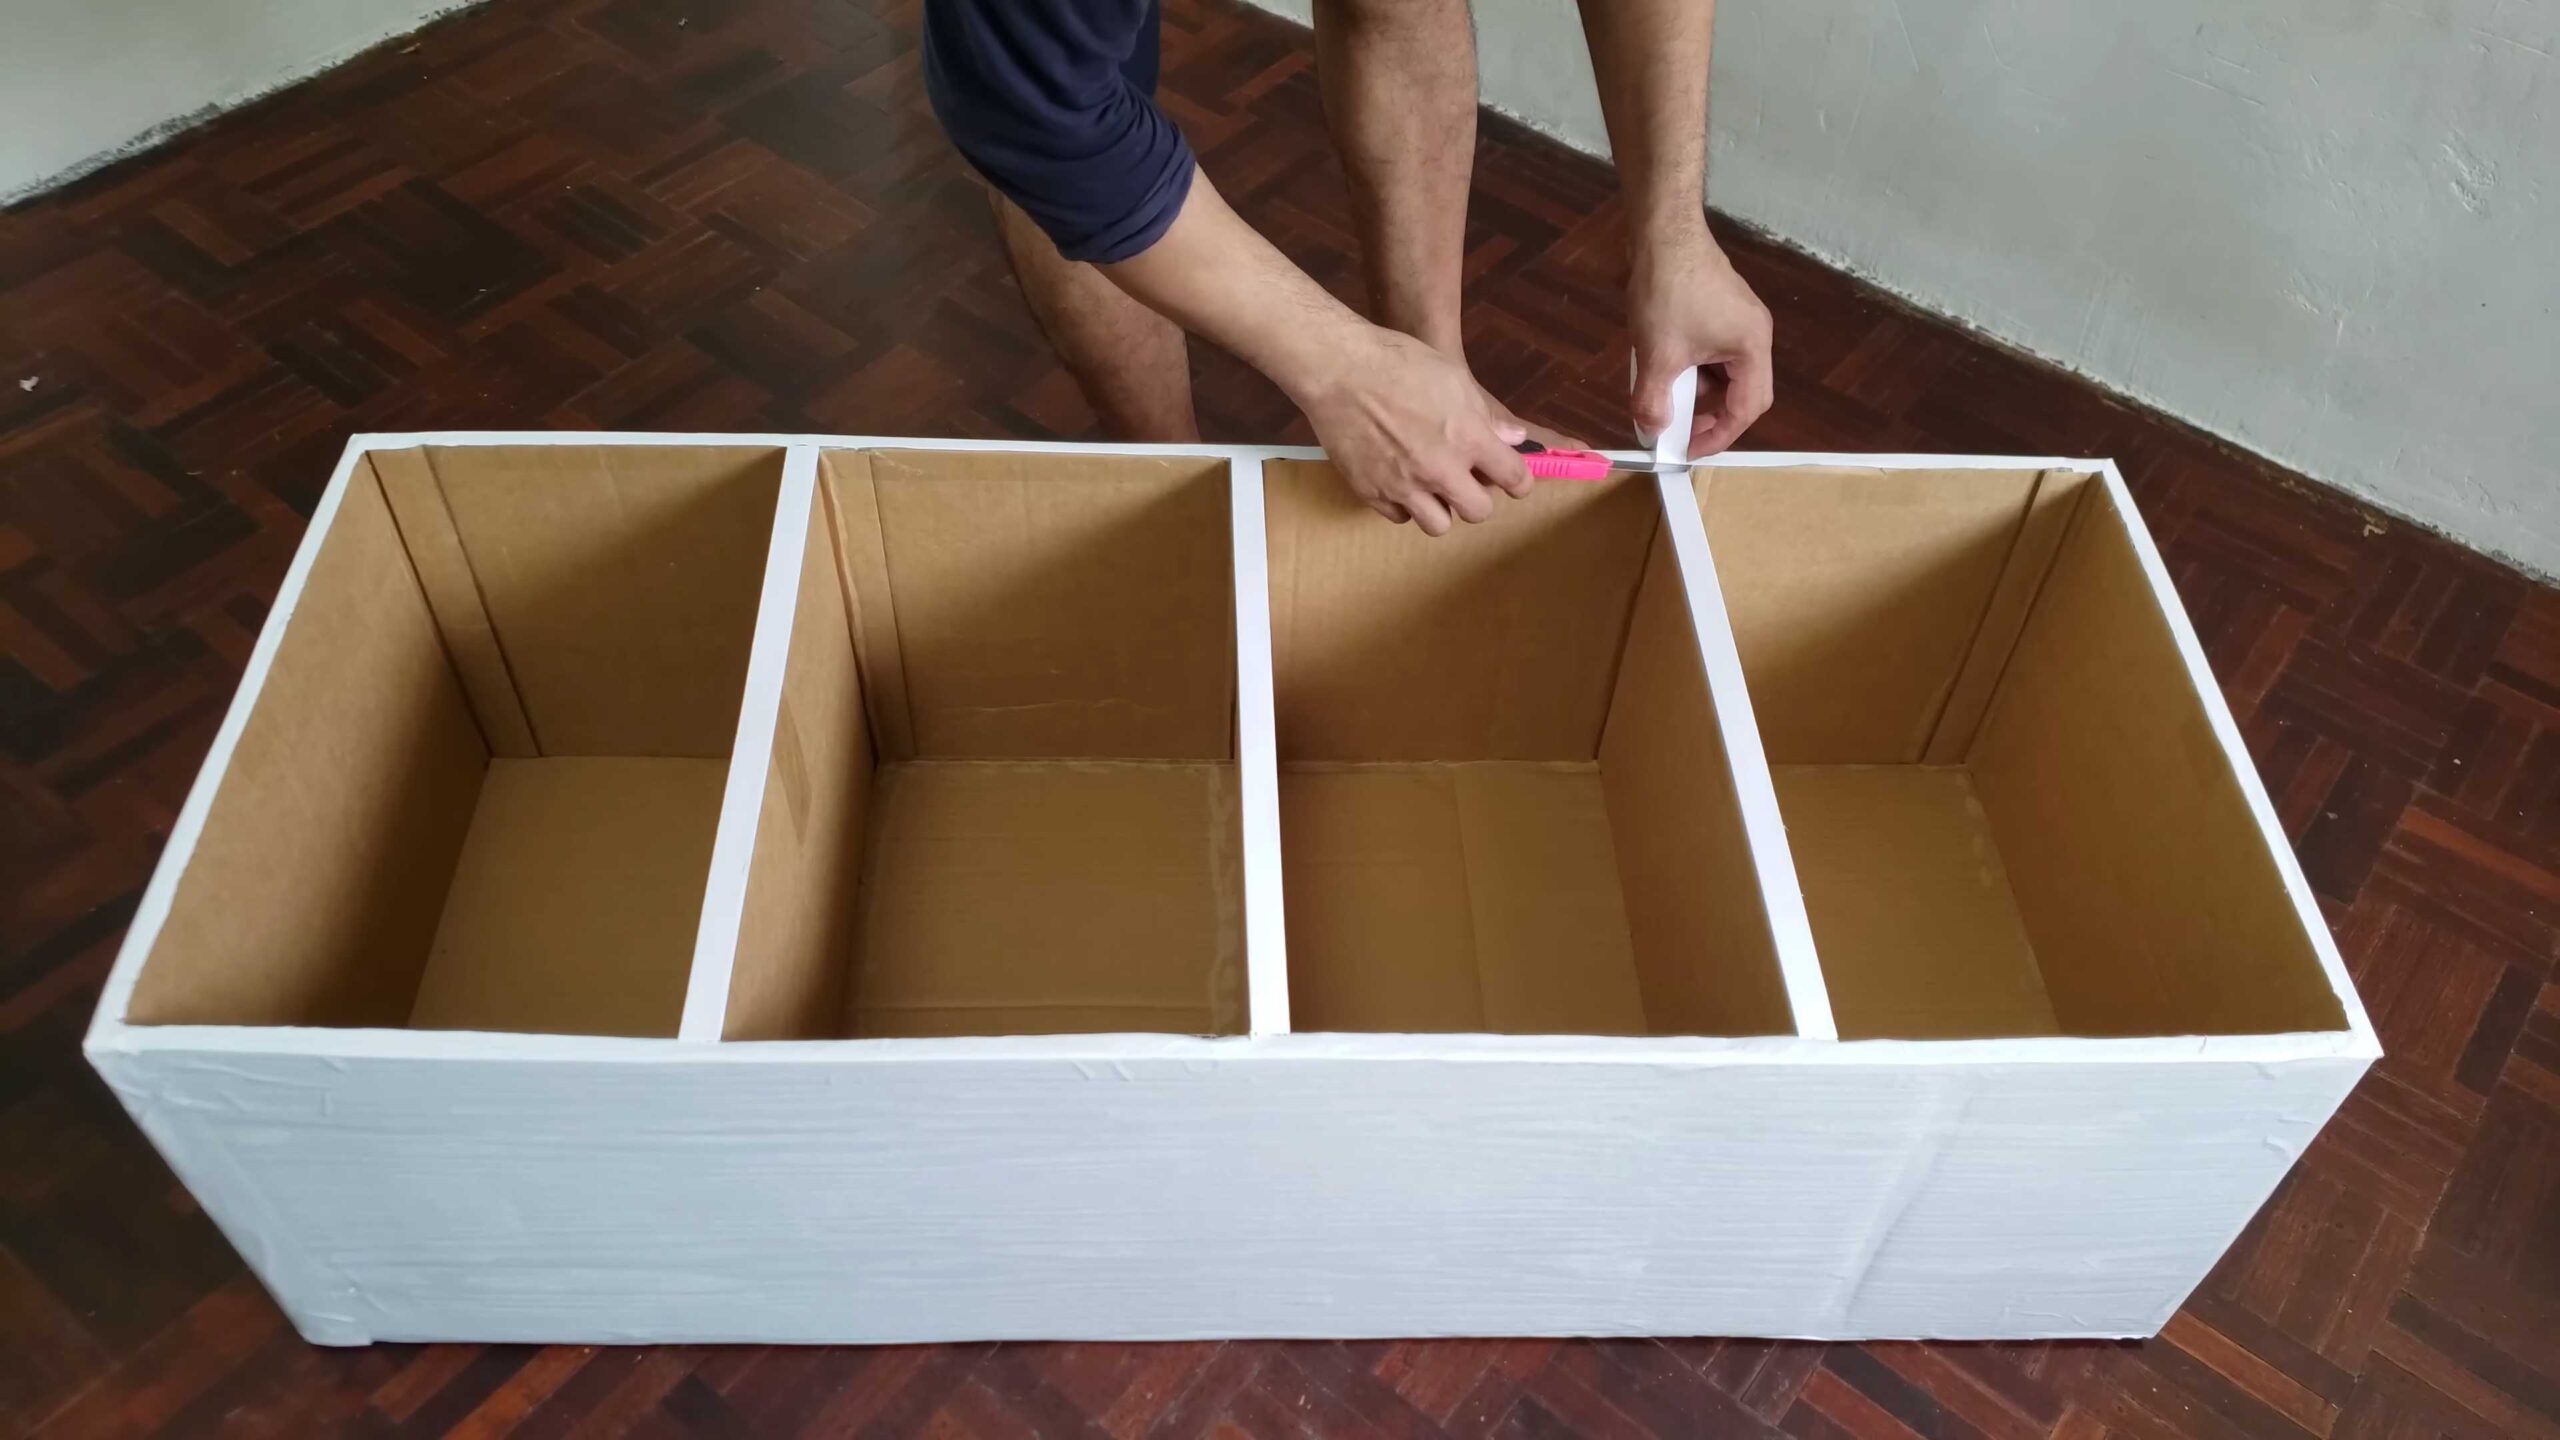
Adding Shelves: Organization is Key
Now, let’s add some shelves to maximize your storage space.
1. Measure and Mark: Measure the inside width of your wardrobe and decide where you want to place your shelves. Use a pencil and ruler to mark the shelf positions on the inside walls of the wardrobe.
2. Cut the Shelves: Cut pieces of cardboard from your smaller boxes to the desired size for your shelves. Make sure they are slightly smaller than the inside width of the wardrobe to allow for easy insertion.
3. Create Shelf Supports: Cut strips of cardboard and fold them into L-shapes to create shelf supports. These will be attached to the inside walls of the wardrobe to hold the shelves in place.
4. Attach the Supports: Attach the shelf supports to the inside walls of the wardrobe, aligning them with the pencil marks you made earlier. Use packing tape or hot glue to secure them in place. Make sure the supports are level so your shelves won’t be tilted.
5. Insert the Shelves: Slide the cardboard shelves into place, resting them on the shelf supports. If the shelves are wobbly, you can add more supports or reinforce them with extra cardboard.
Creating a Hanging Rod (Optional): For Your Dresses and Shirts
If you want to hang clothes in your wardrobe, you’ll need to create a hanging rod.
1. Measure and Mark: Measure the inside width of your wardrobe at the desired height for the hanging rod. Mark the positions for the rod supports on the inside walls of the wardrobe.
2. Create Rod Supports: You can use various materials for rod supports, such as cardboard tubes, wooden dowels, or even PVC pipe. Cut two pieces of your chosen material to the desired length.
3. Attach the Supports: Attach the rod supports to the inside walls of the wardrobe, aligning them with the pencil marks you made earlier. Use packing tape or hot glue to secure them in place. Make sure the supports are level and strong enough to hold the weight of your clothes.
4. Install the Hanging Rod: Insert the hanging rod into the supports. If the rod is too long, you can cut it to size. If it’s too short, you can extend it with extra material. Make sure the rod is securely in place and won’t fall down when you hang clothes on it.
Adding Drawers (Optional): For Socks and Underwear
If you want to add drawers to your wardrobe, here’s how:
1. Measure and Plan: Measure the space where you want to place the drawers and plan the dimensions of the drawers accordingly.
2. Build the Drawer Boxes: Cut pieces of cardboard to create the sides, bottom, front, and back of the drawer boxes. Assemble the boxes using packing tape or hot glue. Make sure the boxes are sturdy and the corners are reinforced.
3. Create Drawer Slides: Cut strips of cardboard and attach them to the inside walls of the wardrobe to create drawer slides. These will allow the drawers to slide in and out smoothly.
4. Insert the Drawers: Slide the drawer boxes into the drawer slides. If the drawers are too tight or too loose, adjust the drawer slides accordingly.
5. Add Handles: Attach handles or knobs to the front of the drawers for easy opening and closing. You can use store-bought handles or create your own from cardboard or other materials.
Finishing Touches: Making it Look Good
Now that your wardrobe is structurally sound, it’s time to add some finishing touches to make it look more presentable.
1. Cover the Cardboard: Cover the cardboard with contact paper, decorative paper, or fabric to give it a more polished look. This will also help to protect the cardboard from damage.
2. Paint the Wardrobe: If you prefer, you can paint the cardboard with cardboard-friendly paint. Choose a color that complements your room decor.
3. Add Decorative Elements: Add decorative elements such as stickers, stencils, or paint designs to personalize your wardrobe.
4. Reinforce Weak Spots: Inspect your wardrobe for any weak spots and reinforce them with extra cardboard and tape.
5. Smooth the Edges: Use sandpaper or a utility knife to smooth any rough edges or corners.
Important Considerations:
* Weight Limit: Cardboard is strong, but it has its limits. Be mindful of the weight you’re placing on the shelves and hanging
Conclusion
So, there you have it! Transforming humble cardboard boxes into a functional and surprisingly stylish DIY cardboard wardrobe is not just a budget-friendly solution; it’s a testament to the power of creativity and resourcefulness. We’ve walked you through the steps, highlighting the ease and adaptability of this project. But why is this DIY trick a must-try?
Firstly, it’s incredibly economical. Forget expensive furniture store trips; this project repurposes materials you likely already have or can acquire for next to nothing. Secondly, it’s customizable. Unlike mass-produced wardrobes, your cardboard creation can be tailored to perfectly fit your space and storage needs. Need extra shelves? Add them! Want a specific height or width? You’re in control. Thirdly, it’s eco-friendly. By giving cardboard boxes a new life, you’re reducing waste and contributing to a more sustainable lifestyle.
But the real magic lies in the possibilities for personalization. Consider these variations to truly make your DIY cardboard wardrobe your own:
* Fabric Covering: Wrap your finished wardrobe in fabric for a more polished and durable look. Burlap, canvas, or even old curtains can add texture and visual appeal. Secure the fabric with glue or staples.
* Painted Designs: Unleash your inner artist and paint your wardrobe with vibrant colors, geometric patterns, or even a mural. Use acrylic paints for best results and seal with a clear coat for protection.
* Wallpaper Accents: Add a touch of elegance with wallpaper. Apply it to the doors or sides of the wardrobe for a sophisticated look.
* Decorative Hardware: Enhance the functionality and aesthetics of your wardrobe by adding knobs, handles, or even small mirrors.
* Modular Design: Create multiple smaller cardboard wardrobes and arrange them in different configurations to suit your changing needs. This modular approach offers maximum flexibility.
* Consider adding wheels: Adding wheels to the base of your DIY cardboard wardrobe can make it easier to move around, especially if it’s filled with clothes.
This project isn’t just about building a wardrobe; it’s about embracing a DIY mindset and finding creative solutions to everyday problems. It’s about proving that you don’t need a lot of money to create a functional and beautiful space. It’s about reducing waste and making a positive impact on the environment.
We strongly encourage you to give this DIY cardboard wardrobe project a try. It’s a fun, rewarding, and surprisingly practical way to organize your belongings and add a unique touch to your home. Don’t be afraid to experiment with different designs, materials, and embellishments. The possibilities are endless!
Once you’ve completed your masterpiece, we’d love to see it! Share your photos and experiences with us on social media using #DIYCardboardWardrobe. Let’s inspire others to embrace the power of DIY and transform ordinary cardboard boxes into extraordinary creations. We can’t wait to see what you come up with!
Frequently Asked Questions (FAQ)
How durable is a cardboard wardrobe?
The durability of your DIY cardboard wardrobe depends on several factors, including the quality of the cardboard used, the construction method, and the weight of the items stored inside. Using sturdy, double-walled cardboard boxes is crucial for creating a robust structure. Reinforcing the corners and edges with packing tape or glue can also significantly enhance its strength. While a cardboard wardrobe won’t be as durable as a traditional wooden wardrobe, it can certainly hold a reasonable amount of clothing and accessories if constructed properly. Avoid overloading it with excessively heavy items. Regular inspection and minor repairs (such as re-taping weakened areas) can extend its lifespan.
What kind of cardboard boxes should I use?
Ideally, you should use sturdy, double-walled cardboard boxes for your DIY cardboard wardrobe. These boxes are designed to withstand more weight and pressure than single-walled boxes. Look for boxes that are in good condition, without any tears, dents, or water damage. Appliance boxes, moving boxes, or boxes from large retailers are often good choices. Ensure that all the boxes you use are roughly the same size and shape to create a uniform and stable structure. If you can’t find enough double-walled boxes, you can reinforce single-walled boxes by layering cardboard on the inside.
How do I prevent the cardboard from bending or collapsing?
To prevent your cardboard wardrobe from bending or collapsing, focus on reinforcement. Reinforce all corners and edges with multiple layers of packing tape. Consider adding internal supports, such as cardboard tubes or wooden dowels, to provide extra stability. Distribute the weight of the items stored inside evenly to avoid putting too much stress on any one area. Avoid storing excessively heavy items in the wardrobe. If you notice any signs of bending or weakening, reinforce the affected area immediately.
How can I make my cardboard wardrobe look more attractive?
There are many ways to enhance the appearance of your DIY cardboard wardrobe. Covering it with fabric, wallpaper, or paint is a great way to conceal the cardboard and create a more polished look. You can also add decorative hardware, such as knobs, handles, or mirrors, to enhance its functionality and aesthetics. Consider using stencils or freehand painting to create unique designs. Adding trim or molding can also give it a more finished look. The key is to get creative and personalize it to match your style.
Is a cardboard wardrobe suitable for long-term storage?
While a cardboard wardrobe can be a useful temporary storage solution, it may not be ideal for long-term storage, especially in humid or damp environments. Cardboard is susceptible to moisture damage, which can weaken the structure and attract pests. If you plan to use your cardboard wardrobe for long-term storage, ensure that it is stored in a dry, well-ventilated area. Consider lining the inside with plastic sheeting to protect your clothes from moisture. Regularly inspect the wardrobe for any signs of damage or deterioration.
How do I clean a cardboard wardrobe?
Cleaning a cardboard wardrobe requires a gentle approach. Avoid using excessive water or harsh cleaning chemicals, as these can damage the cardboard. Use a dry cloth or a slightly damp sponge to wipe down the surface. For stubborn stains, try using a mild soap solution. Always test the cleaning solution on a small, inconspicuous area first to ensure that it doesn’t damage the cardboard. Allow the wardrobe to air dry completely after cleaning.
Can I recycle the cardboard when I no longer need the wardrobe?
Yes, one of the great advantages of a DIY cardboard wardrobe is that it can be easily recycled when you no longer need it. Simply disassemble the wardrobe and flatten the cardboard boxes. Check with your local recycling center for specific guidelines on how to recycle cardboard in your area. By recycling the cardboard, you’re contributing to a more sustainable lifestyle and reducing waste.
How much weight can a DIY cardboard wardrobe hold?
The weight capacity of a DIY cardboard wardrobe varies depending on the quality of the cardboard, the construction techniques used, and the distribution of weight. A well-constructed wardrobe made from double-walled cardboard, with reinforced corners and edges, can typically hold between 30 to 50 pounds. However, it’s always best to err on the side of caution and avoid overloading it with excessively heavy items. Distribute the weight evenly to prevent any one area from bearing too much stress.
What tools and materials do I need for this project?
The essential tools and materials for building a DIY cardboard wardrobe include:
* Cardboard boxes (sturdy, double-walled preferred)
* Packing tape (lots of it!)
* Scissors or a utility knife
* Ruler or measuring tape
* Pencil or marker
* Optional: Fabric, wallpaper, paint, decorative hardware, glue, staples, cardboard tubes or wooden dowels for reinforcement.
How long does it take to build a cardboard wardrobe?
The time required to build a cardboard wardrobe depends on the complexity of the design and your level of experience. A simple wardrobe can be completed in a few hours, while a more elaborate design may take a day or two. Plan your project in advance and gather all the necessary materials before you begin. Take your time and focus on creating a sturdy and well-constructed wardrobe.

Leave a Comment