

DIY Gift Bag Wall Art: Transform your trash into treasure and unleash your inner artist! Have you ever looked at a beautifully designed gift bag and thought, “This is too pretty to throw away?” Well, you’re not alone! I’ve always felt that way, and that’s why I’m so excited to share this incredibly easy and rewarding DIY project with you.
Upcycling, in general, has a rich history, deeply rooted in resourcefulness and necessity. From the “make do and mend” ethos of wartime eras to the modern-day focus on sustainability, finding creative ways to reuse materials has always been a valuable skill. But this particular twist – turning gift bags into wall art – is a fun and relatively new way to express yourself and add a personal touch to your home decor.
Let’s be honest, buying art can be expensive! And sometimes, finding the perfect piece that truly reflects your personality and style feels impossible. That’s where this DIY Gift Bag Wall Art project comes in. It’s a budget-friendly way to create unique and eye-catching artwork using materials you likely already have on hand. Plus, it’s a fantastic way to reduce waste and contribute to a more sustainable lifestyle. I’m going to show you how to create stunning pieces that will have everyone asking, “Where did you get that?” Get ready to unleash your creativity and transform those beautiful gift bags into conversation-starting masterpieces!
DIY Gift Bag Wall Art: Upcycling Your Way to Unique Decor
Hey there, fellow crafters! Are you drowning in a sea of beautiful gift bags after the holidays or a birthday bash? Don’t toss them! I’m going to show you how to transform those gorgeous bags into stunning and personalized wall art. This project is not only budget-friendly but also a fantastic way to showcase your favorite designs and memories. Plus, it’s super easy, even if you’re a beginner. Let’s get started!
Materials You’ll Need
Before we dive in, gather these supplies. Trust me, having everything ready will make the process so much smoother.
* Gift bags (various sizes and designs)
* Canvas frames (choose sizes that complement your gift bags)
* Scissors or a craft knife
* Ruler or measuring tape
* Pencil
* Mod Podge or similar decoupage glue
* Foam brush or paintbrush
* Optional: Embellishments like glitter, ribbon, or buttons
* Optional: Spray sealant (for added protection)
* Optional: Cutting mat (if using a craft knife)
Choosing Your Gift Bags and Canvases
This is where the fun begins! Select gift bags that resonate with you. Think about color palettes, patterns, and overall aesthetic. Consider the size of your canvases when choosing your bags. You want designs that will fill the canvas nicely without being too small or awkwardly cropped.
* Consider the theme: Do you want a cohesive look throughout your home? Choose bags with similar colors or patterns.
* Mix and match: Don’t be afraid to experiment! A gallery wall with different styles can be incredibly eye-catching.
* Think about the occasion: Bags from special events like weddings or graduations can add a sentimental touch.
* Canvas size matters: Make sure the design on the bag is large enough to fill the canvas you’ve chosen. You can always trim the bag to fit, but starting with a good size match is ideal.
Preparing Your Gift Bags
Now, let’s get those gift bags ready for their transformation!
1. Flatten the bags: Carefully unfold the gift bags and flatten them out as much as possible. This will make it easier to cut and adhere them to the canvas. You can use a heavy book to press them flat if needed.
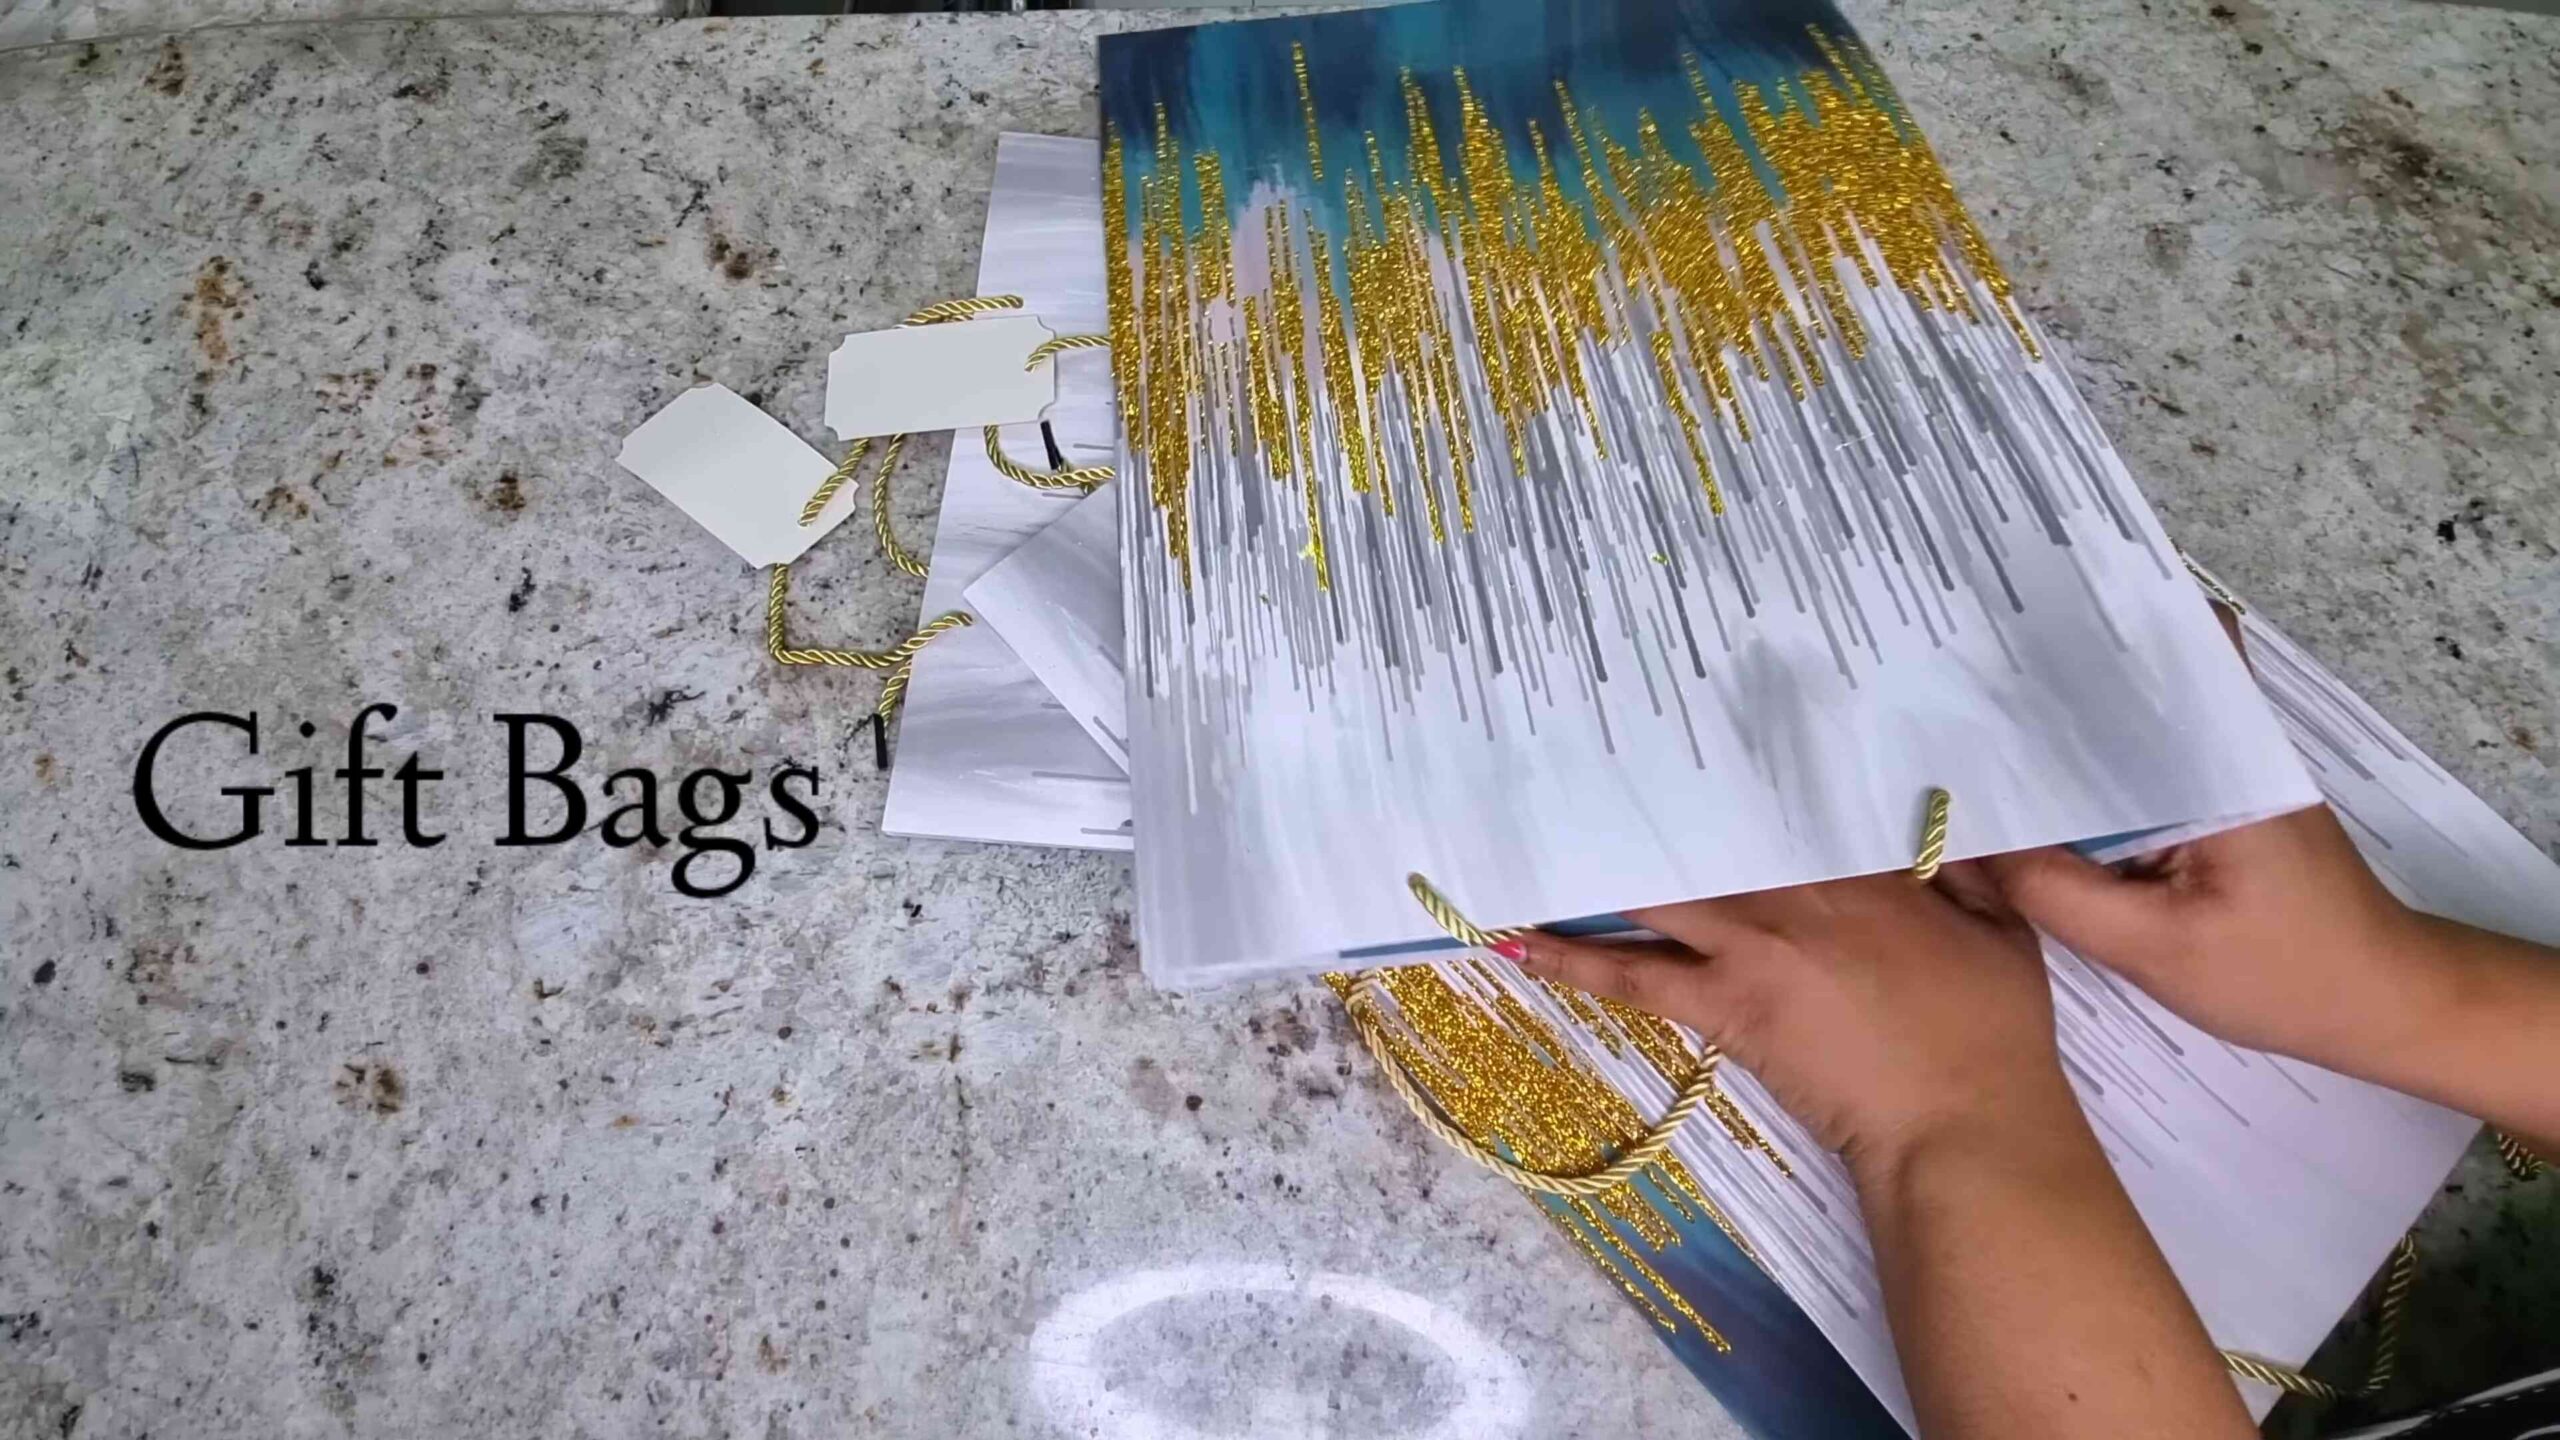
2. Cut the bags: Using your scissors or craft knife and ruler, carefully cut the front and back panels of the gift bags. Discard the sides and bottom. If your bag has handles, remove them as well.
3. Trim to size: Place the canvas on top of the cut-out gift bag panel. Trace around the canvas with a pencil, leaving a small border (about 1/2 inch) on all sides. This border will be wrapped around the back of the canvas. Cut along the traced lines.
4. Optional: Ironing: If your gift bag panels are heavily creased, you can gently iron them on a low setting. Place a thin cloth between the iron and the bag to protect the design.
Applying the Gift Bag to the Canvas
This is where the magic happens! We’ll be using Mod Podge (or a similar decoupage glue) to adhere the gift bag to the canvas.
1. Apply Mod Podge to the canvas: Using your foam brush or paintbrush, apply a generous, even layer of Mod Podge to the entire front surface of the canvas. Don’t be shy! You want to make sure the entire surface is covered.
2. Position the gift bag: Carefully place the cut-out gift bag panel onto the Mod Podge-covered canvas. Align it so that the design is centered and the borders are even on all sides.
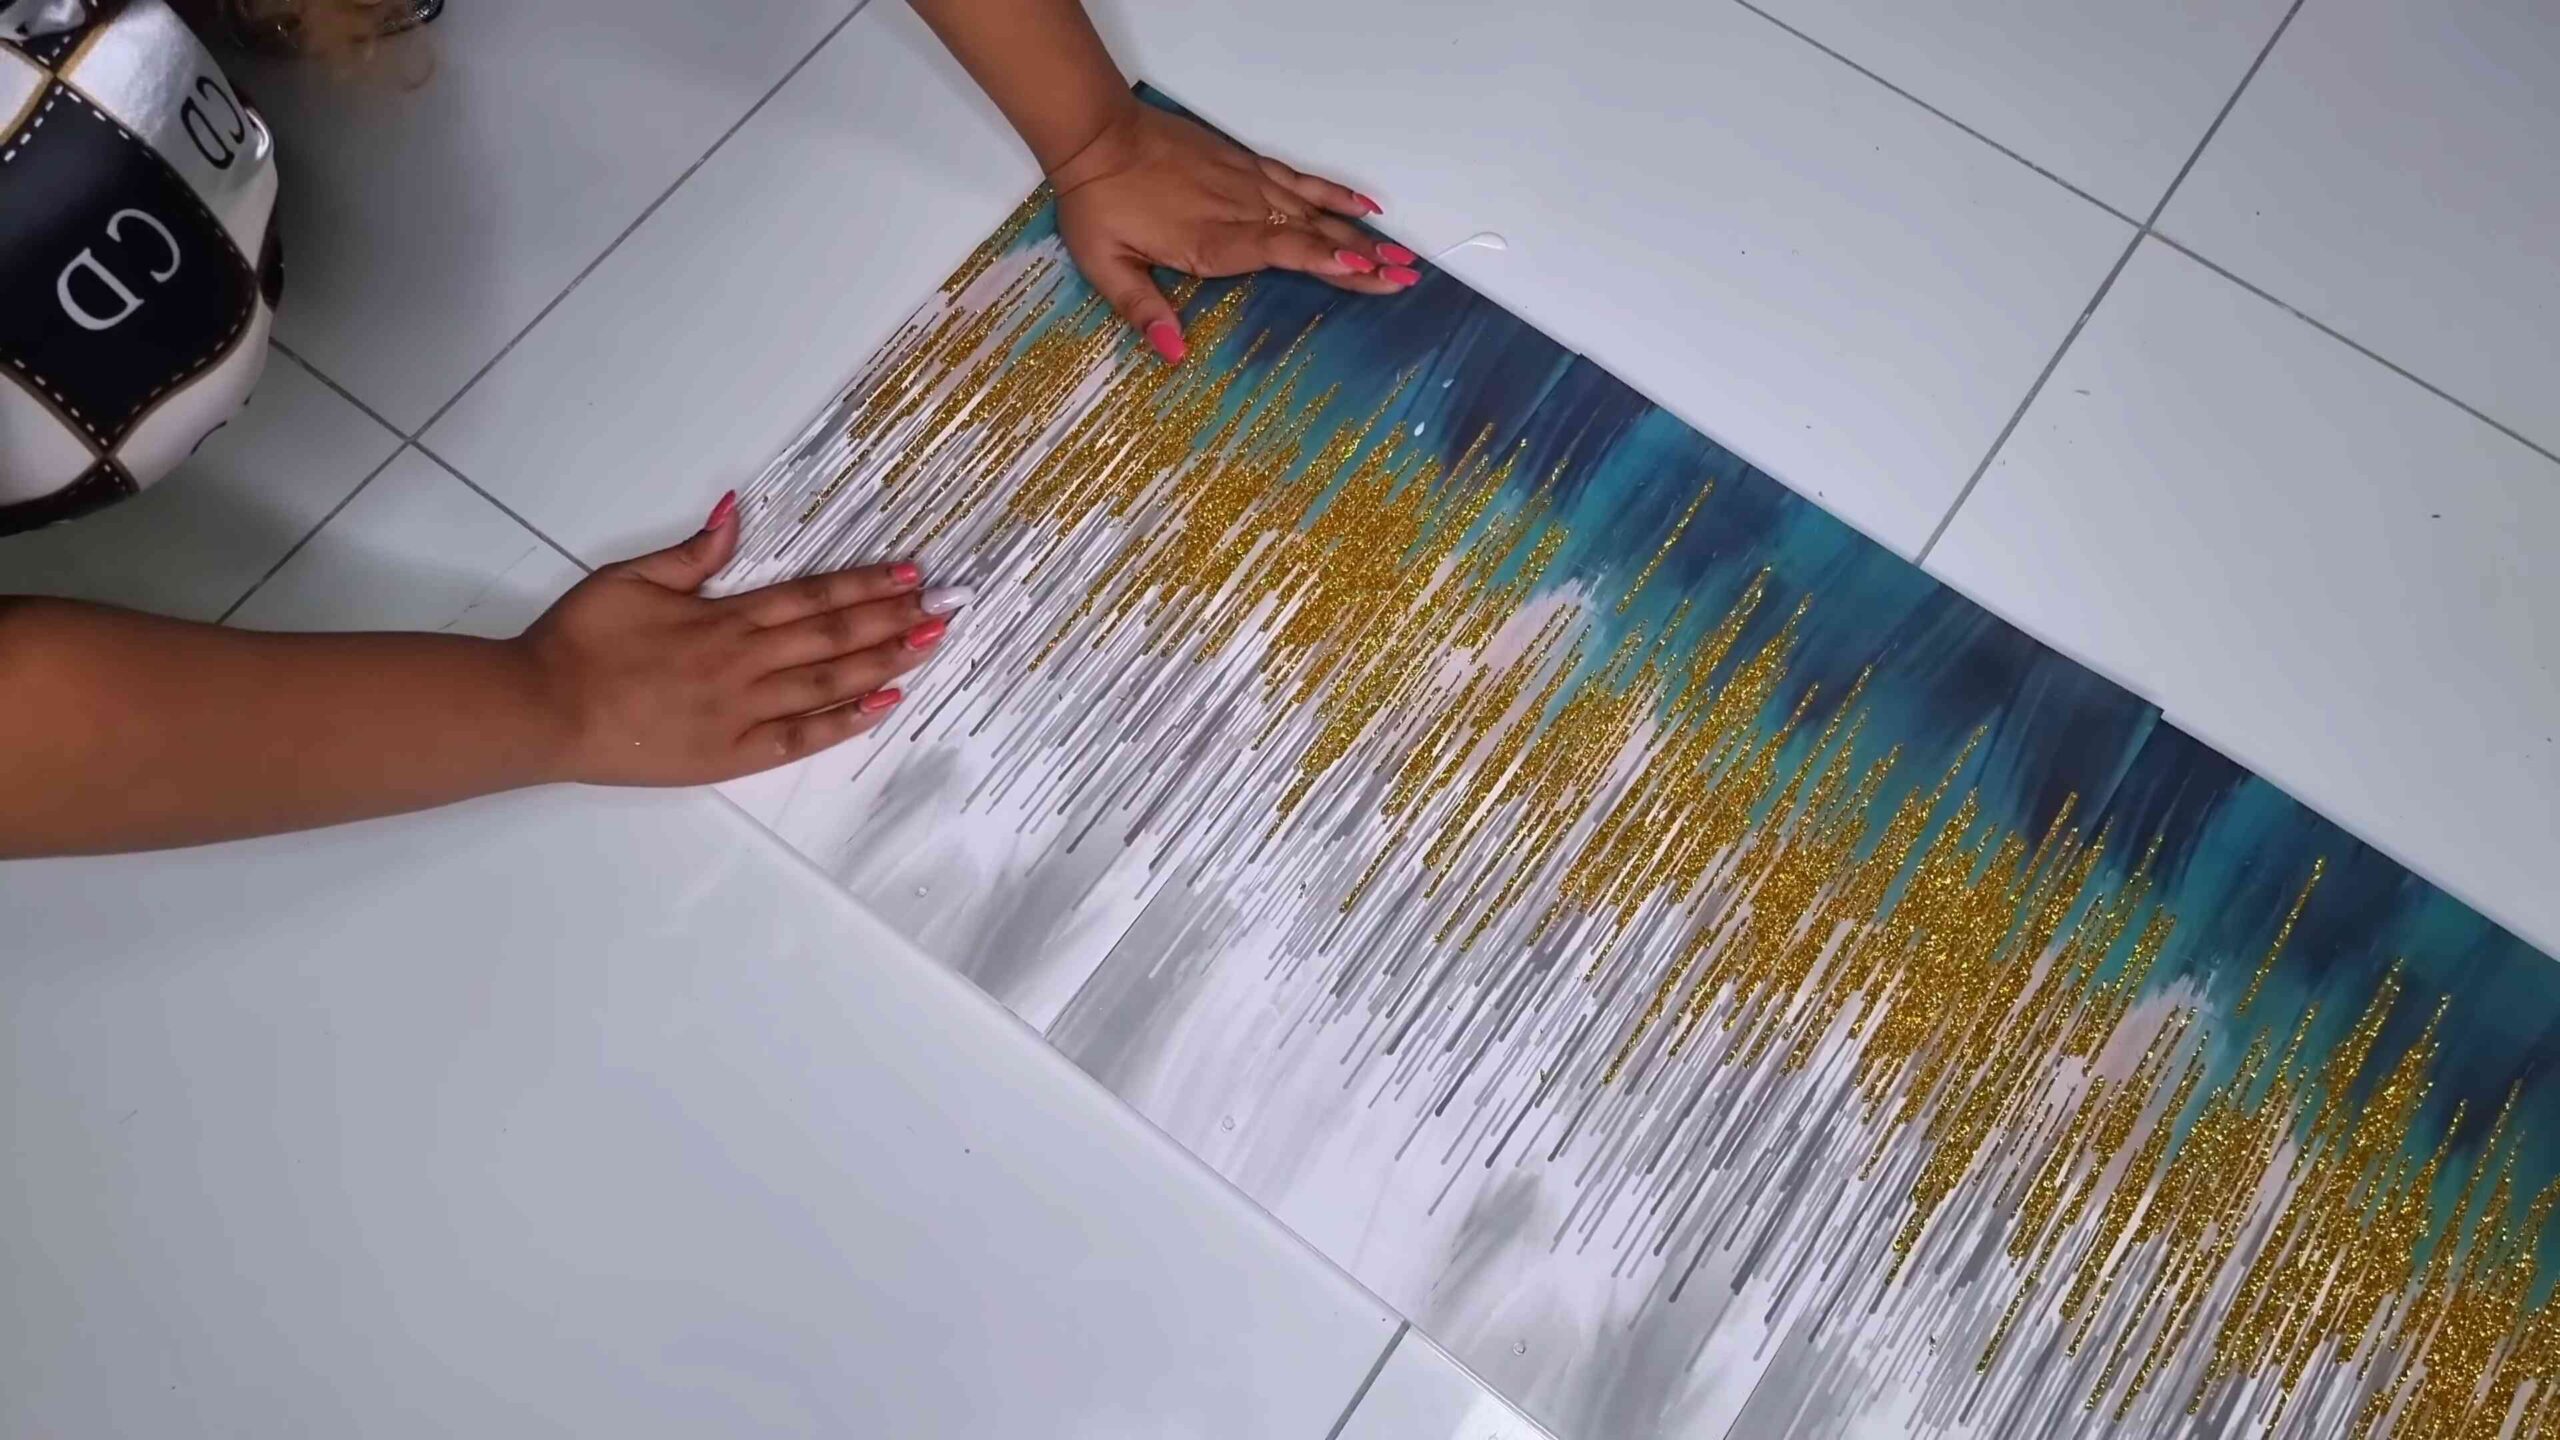
3. Smooth out wrinkles: Gently smooth out any wrinkles or air bubbles with your fingers or a brayer (a rubber roller). Start from the center and work your way outwards. Be careful not to tear the gift bag.
4. Apply Mod Podge over the gift bag: Once the gift bag is smoothly adhered to the canvas, apply another layer of Mod Podge over the entire surface. This will seal the design and protect it from damage. Again, use a generous, even layer.
5. Let it dry: Allow the Mod Podge to dry completely. This usually takes a few hours, but it’s best to let it dry overnight for best results. The Mod Podge will dry clear.
Wrapping the Edges (Optional)
This step gives your wall art a more finished and professional look.
1. Apply Mod Podge to the back edges: Apply Mod Podge to the back edges of the canvas, one side at a time.
2. Fold and adhere the edges: Fold the excess gift bag material over the edge of the canvas and press it firmly into the Mod Podge. Smooth out any wrinkles or bubbles.
3. Repeat for all sides: Repeat this process for all four sides of the canvas.
4. Let it dry: Allow the Mod Podge to dry completely.
Embellishing Your Wall Art (Optional)
Now for the fun part – adding your personal touch!
* Glitter: Add a touch of sparkle by sprinkling glitter onto wet Mod Podge.
* Ribbon: Glue ribbon around the edges of the canvas for a decorative border.
* Buttons: Attach buttons to add texture and dimension.
* Paint: Use acrylic paints to add details or highlights to the design.
* Stencils: Use stencils to create patterns or add text to your wall art.
Let your creativity run wild! There are no rules here.
Sealing Your Wall Art (Optional)
To protect your masterpiece from dust and moisture, you can apply a spray sealant.
1. Choose a sealant: Select a clear, non-yellowing spray sealant.
2. Spray in a well-ventilated area: Take your wall art outside or to a well-ventilated area.
3. Apply thin coats: Apply several thin coats of sealant, allowing each coat to dry completely before applying the next.
4. Let it dry completely: Allow the sealant to dry completely before hanging your wall art.
Hanging Your Wall Art
Now it’s time to display your beautiful creation!
* Choose your location: Select a spot on your wall where you want to hang your art.
* Use appropriate hardware: Use picture hooks or nails that are appropriate for the weight of your canvas.
* Hang and enjoy: Hang your wall art and admire your handiwork!
Creating a Gallery Wall
If you’ve made multiple pieces of gift bag wall art, consider creating a gallery wall.
* Plan your layout: Before you start hammering nails, lay out your canvases on the floor to experiment with different arrangements.
* Consider spacing: Leave a consistent amount of space between each canvas.
* Mix and match sizes and styles: Don’t be afraid to mix and match different sizes and styles of canvases to create a visually interesting display.
* Hang with confidence: Once you’re happy with the layout, start hanging your canvases on the wall.
Troubleshooting Tips
* Wrinkles and bubbles: If you have trouble smoothing out wrinkles or bubbles, try using a brayer or a credit card to gently press them out.
* Tearing: If the gift bag tears, don’t panic! You can usually patch it up with a small piece of the same bag or a similar material.
* Mod Podge issues: If the Mod Podge is too thick, you can thin it out with a little bit of water.
* Uneven edges: If the edges of the gift bag are uneven, you can trim them with scissors or a craft knife after the Mod Podge has dried.
Alternative Ideas and Variations
* Use fabric scraps: Instead of gift bags, you can use fabric scraps to create your wall art.
* Add texture: Incorporate textured materials like burlap, lace, or paper doilies.
* Create a collage: Cut out different shapes and images from the gift bags and create a collage on the canvas.
* Personalize with photos: Add photos to your wall art for a truly unique and sentimental touch.
* Decoupage onto other surfaces: You can use this technique to decoupage gift bags onto other surfaces like wooden boxes, furniture, or even flower pots.
I hope you enjoyed this tutorial and are inspired to create your own beautiful gift bag wall art! It’s a fun, easy, and eco-friendly way to add a personal touch to your home decor. Happy crafting!
Conclusion
So, there you have it! Transforming those beautiful, often discarded, gift bags into stunning wall art is not just a craft project; it’s a statement. It’s a statement about sustainability, about resourcefulness, and about injecting your personality into your living space without breaking the bank. This DIY Gift Bag Wall Art project is a must-try for anyone looking to add a touch of unique charm to their home.
Why is it a must-try? Because it’s incredibly versatile. You’re not limited by pre-set designs or sizes. You control the aesthetic, the color palette, and the overall vibe. It’s also a fantastic way to preserve memories. That gift bag from your best friend’s wedding? Turn it into a piece of art that you can admire every day. The bag from your child’s first birthday? Immortalize it on your wall.
But the beauty of this project lies in its adaptability. Feel free to experiment with different techniques. Instead of framing the entire bag, consider cutting out specific motifs or patterns to create a collage effect. Use different sized frames to add visual interest. You could even incorporate other materials like pressed flowers, dried leaves, or even small trinkets to further personalize your artwork.
Consider these variations to truly make it your own:
* **Themed Galleries:** Create a gallery wall with a specific theme, such as travel, nature, or abstract art, using gift bags that reflect those themes.
* **Seasonal Decor:** Rotate your gift bag wall art with the seasons. Use bags with autumnal colors and patterns in the fall, and festive bags during the holidays.
* **Mixed Media:** Combine gift bag elements with other art forms, such as painting, drawing, or embroidery, to create truly unique and textured pieces.
* **Upcycled Frames:** Instead of buying new frames, scour thrift stores or flea markets for vintage frames that you can repaint or repurpose. This adds an extra layer of sustainability to the project.
* **Fabric Backing:** Mount your gift bag art onto a piece of fabric before framing. This can add a luxurious touch and provide a contrasting texture. Velvet or linen would work beautifully.
* **Shadow Boxes:** For gift bags with dimensional elements or embellishments, consider using a shadow box frame to protect and showcase them.
This project is not just about creating art; it’s about unleashing your creativity and making something beautiful out of something that would otherwise be discarded. It’s about adding a personal touch to your home and expressing your unique style.
So, what are you waiting for? Gather your collection of gift bags, dust off your craft supplies, and get ready to transform your walls into a gallery of memories and creativity. We are confident that you will find this project both rewarding and enjoyable.
We can’t wait to see what you create! Share your DIY Gift Bag Wall Art creations with us on social media using #GiftBagWallArtDIY. We’re eager to see your unique interpretations and be inspired by your creativity. Let’s turn those gift bags into masterpieces together!
FAQ
What kind of gift bags work best for this project?
Almost any gift bag can be used, but those made from thicker paper or cardstock will generally hold up better and provide a more substantial base for your artwork. Bags with interesting designs, patterns, or textures are ideal. Avoid bags that are heavily creased or damaged, as these may be difficult to flatten and frame. Glossy bags can add a nice sheen, while matte bags offer a more subtle look. Consider the color palette and overall aesthetic of the bag to ensure it complements your existing decor.
How do I prepare the gift bag before framing?
First, carefully flatten the gift bag. You may need to gently iron it on a low setting (with a cloth between the bag and the iron) to remove any stubborn creases. Trim the bag to the desired size, ensuring it fits within your chosen frame. If the bag has handles, remove them carefully. Consider reinforcing the back of the bag with a piece of cardboard or foam board for added stability, especially if the bag is thin or flimsy. Use acid-free adhesive to prevent discoloration over time.
What type of adhesive should I use to attach the gift bag to the backing?
Acid-free adhesive is crucial to prevent the paper from yellowing or deteriorating over time. You can use acid-free glue sticks, double-sided tape, or spray adhesive. Ensure the adhesive is applied evenly to avoid wrinkles or bubbles. If using spray adhesive, work in a well-ventilated area and follow the manufacturer’s instructions carefully. Test the adhesive on a small, inconspicuous area of the bag first to ensure it doesn’t damage the paper.
What size frame should I use?
The size of the frame will depend on the size of the gift bag and the desired look. Measure the flattened gift bag and choose a frame that is slightly larger. This will allow you to center the bag within the frame and create a visually appealing border. Consider using a mat to further enhance the artwork and provide additional space between the bag and the frame. Experiment with different frame sizes and shapes to find what works best for your specific project.
Where can I find affordable frames?
Affordable frames can be found at a variety of places, including craft stores, discount stores, and online retailers. Look for sales and coupons to save even more money. Thrift stores and flea markets are also great sources for unique and vintage frames that can be repurposed. Consider painting or refinishing thrift store frames to match your decor. Don’t be afraid to get creative and think outside the box when it comes to finding affordable framing options.
How do I protect the finished artwork from dust and damage?
Once framed, the glass or acrylic front of the frame will protect the artwork from dust and damage. However, it’s still important to handle the framed artwork with care. Avoid placing it in direct sunlight, as this can cause the colors to fade over time. Dust the frame regularly with a soft cloth. If necessary, you can gently clean the glass or acrylic with a glass cleaner. Avoid using harsh chemicals or abrasive cleaners, as these can damage the frame or the artwork.
Can I use this technique for other paper items besides gift bags?
Absolutely! This technique can be adapted for a variety of paper items, including wrapping paper, greeting cards, scrapbook paper, and even vintage book pages. The key is to choose paper items with interesting designs, patterns, or textures that you find visually appealing. Experiment with different paper types and techniques to create unique and personalized wall art. The possibilities are endless!
How do I create a gallery wall using gift bag art?
Planning is key to creating a successful gallery wall. Start by laying out your framed gift bag art on the floor to experiment with different arrangements. Consider the size, shape, and color of each piece, and try to create a balanced and visually appealing composition. Use painter’s tape to mark the placement of each frame on the wall before you start hanging them. This will help you avoid making unnecessary holes. Use a level to ensure that each frame is hung straight. Don’t be afraid to mix and match different frame styles and sizes to create a more eclectic look.
Leave a Comment