

DIY Mattress Cleaner: Is your mattress harboring more than just dreams? Let’s face it, our mattresses are silent sponges, soaking up sweat, dust mites, and who-knows-what-else while we sleep. And while we diligently wash our sheets, the mattress itself often gets neglected. But fear not, fellow slumber enthusiasts! I’m here to share some amazing DIY mattress cleaner tricks that will leave your bed feeling fresh, hygienic, and ready for a good night’s rest.
Humans have been sleeping on elevated surfaces for millennia, from simple straw pallets to the elaborate, canopied beds of royalty. Throughout history, keeping these sleeping surfaces clean has been a concern, though the methods have certainly evolved. While our ancestors might have relied on sunning and beating their bedding, we have the advantage of modern cleaning solutions – and the ingenuity to create our own!
Why is a clean mattress so important? Beyond the obvious ick factor, a dirty mattress can contribute to allergies, asthma, and even skin irritations. Plus, a fresh, clean bed just feels better, doesn’t it? This DIY mattress cleaner guide will provide you with simple, effective, and affordable ways to tackle stains, odors, and allergens, ensuring a healthier and more restful sleep environment. So, ditch the expensive professional cleaning services and let’s get started on creating your very own DIY mattress cleaner!
DIY Mattress Cleaner: Banish Dust Mites and Stains!
Okay, let’s face it, we all love our beds. They’re our havens, our comfort zones, the place we recharge after a long day. But, and this is a big but, mattresses can get pretty gross. We’re talking dust mites, dead skin cells, sweat, and maybe even the occasional spill. Yuck! That’s why I’m going to walk you through my favorite DIY mattress cleaning method. It’s surprisingly easy, uses ingredients you probably already have, and will leave your mattress feeling fresh and clean.
Why Clean Your Mattress?
Before we dive in, let’s quickly cover why this is so important.
* Improved Sleep Quality: A clean mattress means fewer allergens and irritants, leading to better sleep. Trust me, you’ll notice the difference!
* Allergy Relief: Dust mites are a major trigger for allergies and asthma. Regular cleaning helps keep them at bay.
* Extended Mattress Life: Cleaning helps prevent stains from setting in and keeps your mattress in good condition for longer.
* Overall Hygiene: Let’s be honest, a clean mattress is just more hygienic. It’s a place where you spend a significant portion of your life, so keeping it clean is essential.
What You’ll Need
Here’s a list of everything you’ll need to get started. Don’t worry, it’s not a long list!
* Vacuum Cleaner with Upholstery Attachment: This is crucial for removing surface dust and debris.
* Baking Soda: Our star ingredient! Baking soda is a natural deodorizer and absorbent.
* Essential Oil (Optional): Lavender, tea tree, or eucalyptus are great choices for a fresh scent and added antibacterial properties.
* Spray Bottle: For applying a cleaning solution (if needed).
* White Vinegar: A natural disinfectant and stain remover.
* Dish Soap (Optional): For tackling stubborn stains.
* Clean Cloths or Sponges: For blotting and wiping.
* Cold Water: For diluting cleaning solutions.
* Sieve or Flour Sifter (Optional): For evenly distributing baking soda.
* Rubber Gloves (Optional): To protect your hands.
Step-by-Step Mattress Cleaning Guide
Alright, let’s get down to business! Here’s how I clean my mattress, step-by-step:
1. Strip the Bed: Remove all bedding, including sheets, blankets, pillowcases, and mattress protectors. Wash them in hot water to kill any dust mites that may be lurking.
2. Vacuum Thoroughly: This is a crucial first step. Use the upholstery attachment on your vacuum cleaner to thoroughly vacuum the entire surface of the mattress. Pay special attention to seams, edges, and any areas where dust tends to accumulate. Vacuum the sides of the mattress as well. I usually go over the entire mattress twice, just to be sure I’ve gotten everything.
3. Deodorize with Baking Soda: This is where the magic happens! Pour baking soda into a sieve or flour sifter (if you have one) for even distribution. Generously sprinkle baking soda over the entire surface of the mattress. The goal is to create a thin, even layer.
4. Add Essential Oils (Optional): If you’re using essential oils, now’s the time to add them. I like to add a few drops of lavender or tea tree oil to the baking soda before sprinkling it on the mattress. This will give your mattress a lovely, fresh scent and add some extra antibacterial power. About 10-15 drops is usually enough.
5. Let it Sit: This is the most important part! Let the baking soda sit on the mattress for at least 4-6 hours, or even better, overnight. The longer it sits, the more time it has to absorb odors and moisture. I usually do this in the morning so it can sit all day while I’m at work.
6. Vacuum Again: After the baking soda has had its time to work its magic, vacuum it up thoroughly. Again, use the upholstery attachment and go over the entire surface of the mattress, paying attention to seams and edges. Make sure you get all the baking soda up!
Tackling Stains
Sometimes, vacuuming and baking soda aren’t enough to get rid of stubborn stains. Here’s how I tackle those:
1. Identify the Stain: Different stains require different approaches. Is it a blood stain, a urine stain, or something else? Knowing what you’re dealing with will help you choose the right cleaning solution.
2. Spot Clean with Vinegar Solution: For most stains, a simple solution of equal parts white vinegar and cold water works wonders. Pour the solution into a spray bottle and lightly spray the stained area. Don’t saturate the mattress!
3. Blot, Don’t Rub: Use a clean cloth or sponge to blot the stain. Rubbing can spread the stain and damage the mattress fibers. Blot gently, working from the outside of the stain towards the center.
4. For Tougher Stains, Add Dish Soap: If the vinegar solution isn’t doing the trick, try adding a few drops of dish soap to the solution. Again, spray lightly and blot gently.
5. Rinse (If Necessary): If you’ve used dish soap, you may need to rinse the area with a clean, damp cloth to remove any soap residue. Be sure to use as little water as possible.
6. Dry Thoroughly: This is crucial! Moisture can lead to mold and mildew growth. Use a clean, dry towel to blot up as much moisture as possible. Then, allow the mattress to air dry completely. You can speed up the drying process by opening windows, using a fan, or placing the mattress in direct sunlight (if possible). I usually leave mine to dry for a full day.
Specific Stain Solutions
Here are a few specific stain solutions that I’ve found helpful:
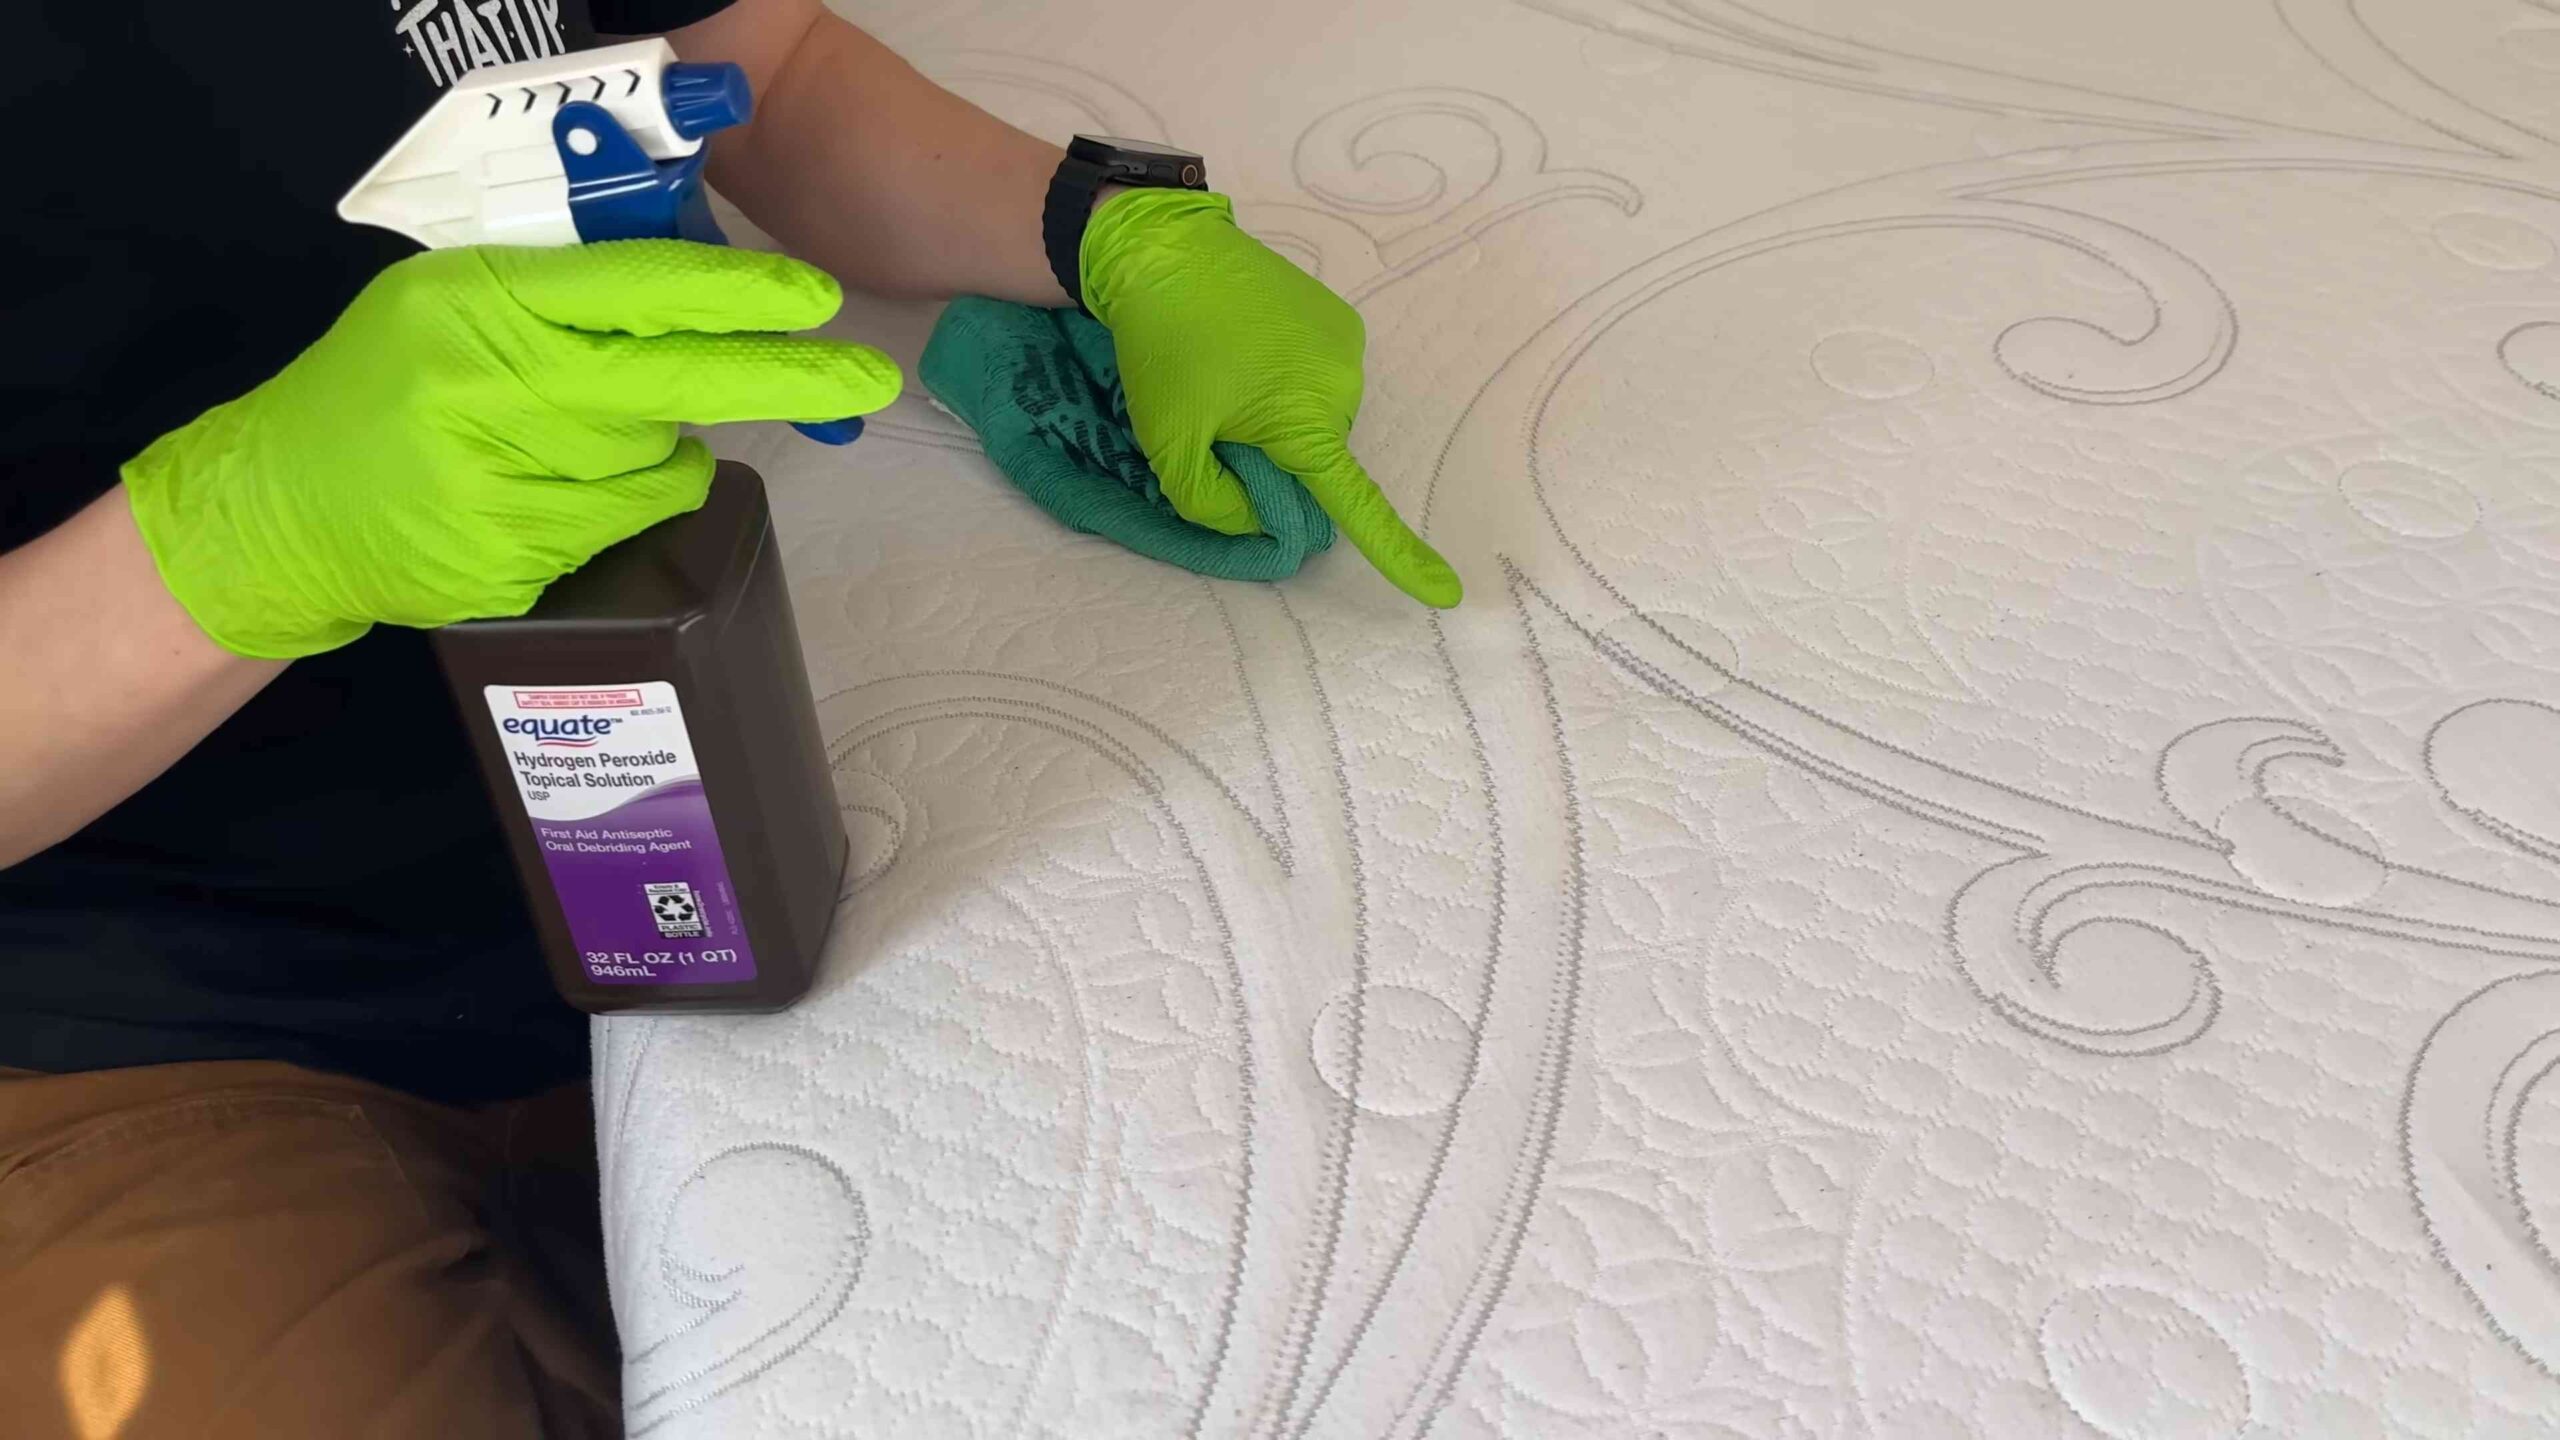
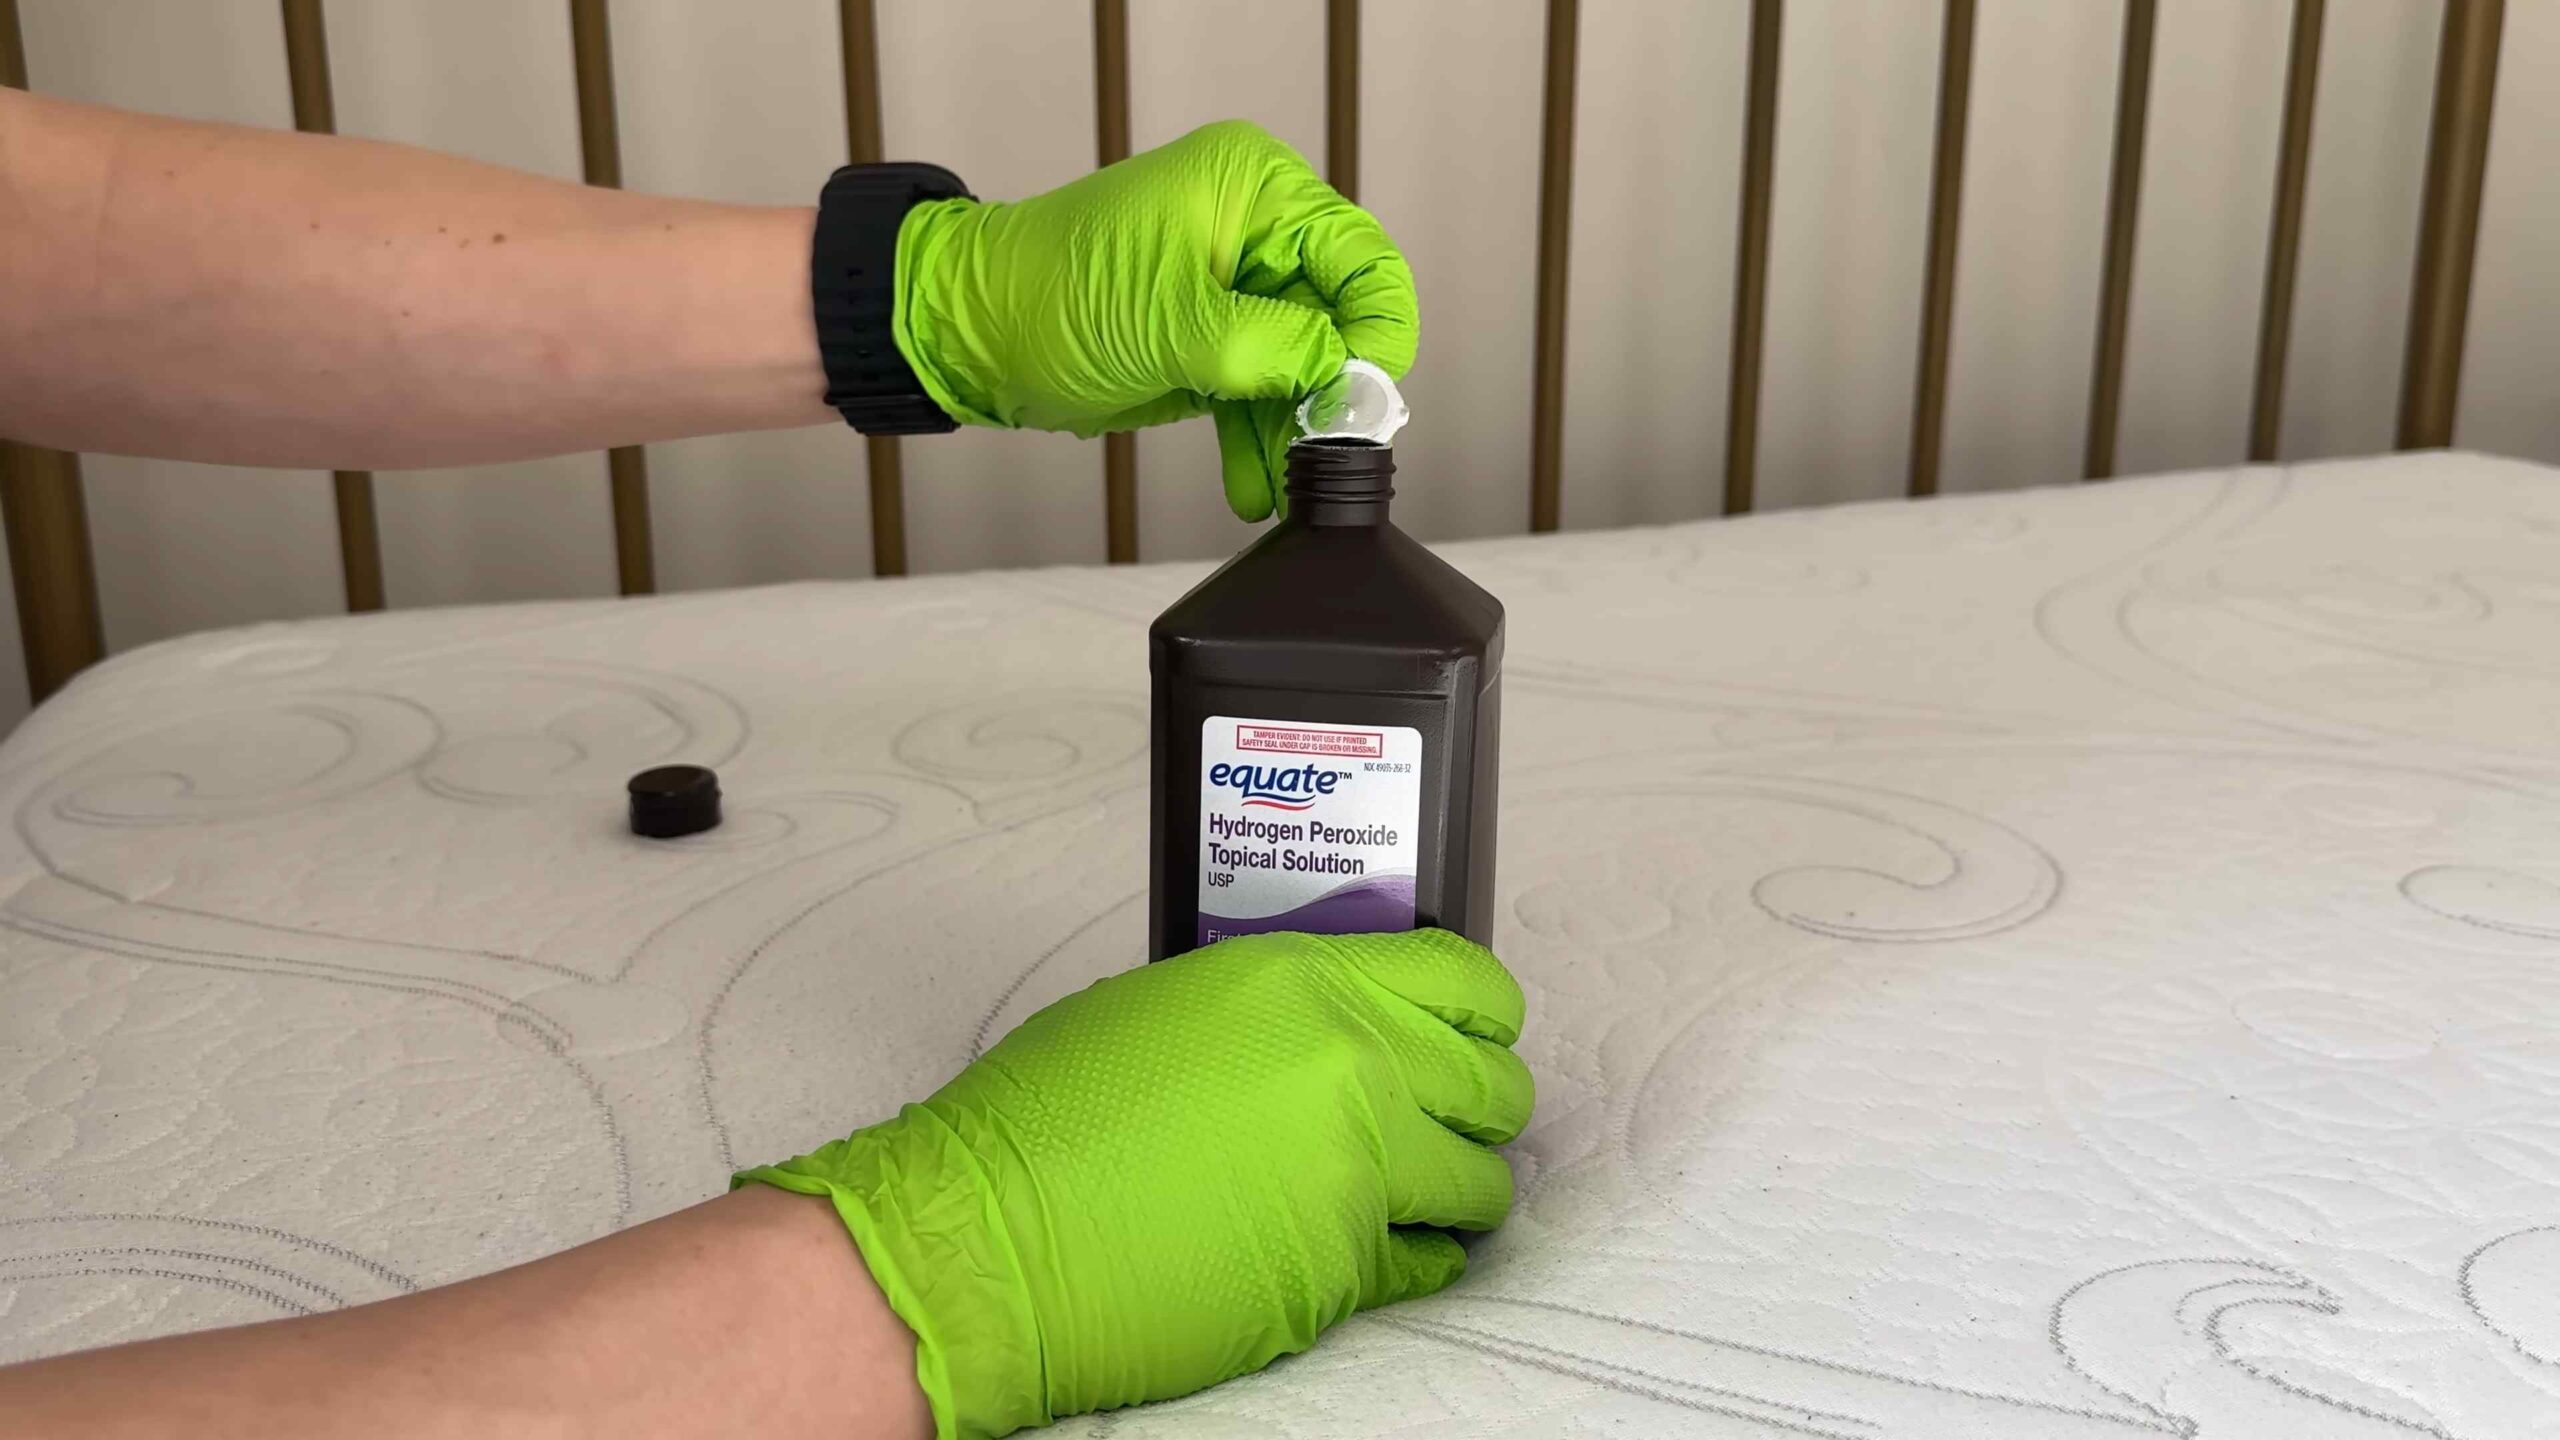
* Blood Stains: Mix cold water with a small amount of hydrogen peroxide. Apply to the stain, let it sit for a few minutes, and then blot with a clean cloth.
* Urine Stains: Mix equal parts white vinegar and water. Apply to the stain, let it sit for a few minutes, and then blot with a clean cloth. You can also sprinkle baking soda on the area after blotting to absorb any remaining moisture and odor.
* Vomit Stains: Remove any solid material first. Then, mix equal parts white vinegar and water. Apply to the stain, let it sit for a few minutes, and then blot with a clean cloth. Sprinkle baking soda on the area after blotting to absorb any remaining moisture and odor.
Preventative Measures
Once you’ve cleaned your mattress, you’ll want to keep it clean! Here are a few preventative measures I recommend:
* Use a Mattress Protector: A mattress protector is a waterproof barrier that protects your mattress from spills, stains, and dust mites. It’s an essential investment for keeping your mattress clean and extending its lifespan.
* Wash Your Bedding Regularly: Wash your sheets, blankets, and pillowcases at least once a week in hot water to kill dust mites.
* Vacuum Your Mattress Regularly: Vacuum your mattress every few months to remove dust and debris.
* Air Out Your Mattress: Occasionally, remove your bedding and let your mattress air out for a few hours. This will help to prevent moisture buildup and keep it fresh.
* Avoid Eating and Drinking in Bed: This is a tough one, I know! But eating and drinking in bed increases the risk of spills and stains.
Final Thoughts
Cleaning your mattress is a simple but important task that can improve your sleep quality, allergy symptoms, and overall hygiene. By following these steps, you can keep your mattress clean, fresh, and comfortable for years to come. So, grab your vacuum cleaner, baking soda, and essential oils, and get ready to give your mattress some much-needed TLC! You’ll be amazed at the difference it makes. Happy cleaning!
Conclusion
So, there you have it! A simple, effective, and budget-friendly way to breathe new life into your mattress. This DIY mattress cleaner isn’t just about removing visible stains; it’s about creating a healthier sleep environment for you and your family. Think about it: we spend a third of our lives in bed, and our mattresses can become havens for dust mites, allergens, and lingering odors. Regularly cleaning your mattress is an investment in your well-being.
Why is this DIY trick a must-try? Because it’s incredibly accessible. You likely already have the ingredients in your pantry – baking soda, essential oils (optional, but highly recommended!), and a little bit of elbow grease. It avoids harsh chemicals found in many commercial cleaners, making it a safer option for those with sensitivities or allergies, and it’s significantly cheaper than professional cleaning services or replacing your mattress. Plus, the satisfaction of knowing you’ve created a clean and healthy sleep space is truly rewarding.
But the beauty of this DIY method lies in its adaptability. Feel free to experiment with different essential oils to create a scent that promotes relaxation and sleep. Lavender is a classic choice, known for its calming properties. Tea tree oil offers antibacterial benefits, while eucalyptus can help clear sinuses. For a more invigorating scent, try lemon or orange essential oils. You can also adjust the amount of baking soda depending on the size of your mattress and the severity of the stains. For heavily soiled areas, create a paste of baking soda and water, apply it directly to the stain, let it dry completely, and then vacuum it up.
Consider this more than just a cleaning chore; think of it as a self-care ritual. Put on some music, open the windows to let in fresh air, and take your time with the process. The act of cleaning and caring for your sleep space can be incredibly therapeutic.
We wholeheartedly encourage you to try this DIY mattress cleaner. It’s a small investment of time and effort that yields significant benefits for your health and well-being. Don’t just take our word for it – experience the difference for yourself!
And most importantly, we want to hear about your experience! Did you try a different essential oil blend? Did you find a particularly stubborn stain that this method conquered? Share your tips, tricks, and before-and-after photos in the comments below. Let’s create a community of clean-sleep enthusiasts and help each other achieve the best possible sleep environment. Your feedback is invaluable and will help others discover the power of this simple yet effective DIY mattress cleaner. Let us know if you have any questions, and happy cleaning!
Frequently Asked Questions (FAQ)
1. How often should I clean my mattress using this DIY method?
We recommend cleaning your mattress at least twice a year, ideally during seasonal changes. However, if you have allergies, pets, or frequently spill things on your bed, you might want to clean it more often, perhaps every three months. Regular cleaning helps prevent the buildup of dust mites, allergens, and odors, ensuring a healthier sleep environment. Also, spot clean any spills immediately to prevent stains from setting in.
2. What type of vacuum cleaner is best for cleaning a mattress?
A vacuum cleaner with a strong suction and a HEPA filter is ideal for cleaning a mattress. The HEPA filter will trap dust mites, allergens, and other microscopic particles, preventing them from being released back into the air. Use the upholstery attachment to thoroughly vacuum the entire surface of the mattress, paying special attention to seams and crevices where dust and debris tend to accumulate. If you have a handheld vacuum cleaner, that can also work well for spot cleaning.
3. Can I use this DIY mattress cleaner on all types of mattresses?
This DIY mattress cleaner is generally safe for most types of mattresses, including innerspring, memory foam, and latex mattresses. However, it’s always a good idea to check the manufacturer’s instructions or warranty information before using any cleaning product on your mattress. For memory foam mattresses, avoid using excessive moisture, as it can damage the foam. If you’re unsure, test the cleaner on a small, inconspicuous area of the mattress first to ensure it doesn’t cause any discoloration or damage.
4. What if I don’t have essential oils? Can I still use this method?
Yes, you can definitely still use this method without essential oils. The baking soda itself is a powerful deodorizer and absorbent. The essential oils are primarily for adding a pleasant scent and providing additional antibacterial or calming benefits. If you don’t have essential oils, simply skip that step and proceed with the baking soda application and vacuuming. Your mattress will still be cleaner and fresher.
5. How long should I leave the baking soda on the mattress?
For optimal results, leave the baking soda on the mattress for at least 30 minutes, but preferably for several hours, or even overnight. The longer the baking soda sits on the mattress, the more effectively it will absorb odors, moisture, and allergens. If you’re dealing with a particularly stubborn odor or stain, leaving the baking soda on overnight is highly recommended. Just be sure to vacuum it up thoroughly before making your bed.
6. What if I have a very deep or old stain on my mattress?
For deep or old stains, you might need to take a more targeted approach. Create a paste of baking soda and water (or hydrogen peroxide for tougher stains), apply it directly to the stain, and let it dry completely. Once dry, vacuum up the residue. You may need to repeat this process several times to completely remove the stain. For very stubborn stains, consider consulting a professional mattress cleaner.
7. Is it safe to use hydrogen peroxide on my mattress?
Hydrogen peroxide can be effective for removing stains, but it’s important to use it with caution, as it can potentially bleach or discolor certain fabrics. Always test it on a small, inconspicuous area of the mattress first to ensure it doesn’t cause any damage. Use a 3% solution of hydrogen peroxide and apply it sparingly. Avoid saturating the mattress, and allow it to dry completely before making your bed.
8. How can I prevent my mattress from getting dirty in the first place?
Prevention is key to keeping your mattress clean and fresh. Use a mattress protector to shield your mattress from spills, stains, and allergens. Wash your bedding regularly, including sheets, pillowcases, and blankets. Avoid eating or drinking in bed, and keep pets off the mattress. Regularly vacuum your mattress to remove dust and debris. These simple steps can significantly extend the life of your mattress and keep it clean and healthy.
9. Can I use this method on other upholstered furniture, like couches or chairs?
Yes, this DIY cleaning method can also be used on other upholstered furniture, such as couches, chairs, and even car seats. The baking soda will help to absorb odors and freshen up the fabric. Just be sure to test it on a small, inconspicuous area first to ensure it doesn’t cause any discoloration or damage.
10. What are the benefits of using a DIY mattress cleaner compared to commercial cleaners?
DIY mattress cleaners offer several advantages over commercial cleaners. They are typically more affordable, use natural ingredients, and avoid harsh chemicals that can be harmful to your health and the environment. DIY cleaners also allow you to customize the scent and strength of the cleaner to suit your preferences and needs. Plus, you have complete control over the ingredients, ensuring that you’re using safe and effective cleaning solutions. This DIY mattress cleaner is a great alternative to store-bought products.
Leave a Comment