

DIY Sink Cleaner: Is your kitchen sink staging a protest with foul odors and sluggish drainage? You’re not alone! We’ve all been there, battling the gunk and grime that accumulates in our drains. But before you reach for those harsh, chemical-laden cleaners, let’s explore a natural and effective solution you can whip up right in your own kitchen.
For generations, resourceful homemakers have relied on simple, readily available ingredients to keep their homes sparkling. Think back to your grandmother’s cleaning rituals – chances are, she had a few tricks up her sleeve that didn’t involve a trip to the store for expensive products. This tradition of using natural remedies extends beyond just cleaning; it’s a testament to our ability to find sustainable and eco-friendly solutions within our own environment.
Why is a DIY Sink Cleaner so essential? Because those commercial drain cleaners, while seemingly effective, often contain harsh chemicals that can damage your pipes and harm the environment. Plus, they can be quite costly! With a simple DIY approach, you can save money, protect your plumbing, and breathe easy knowing you’re using safe and natural ingredients. I’m excited to share this easy-to-follow recipe that will have your sink sparkling and smelling fresh in no time!

DIY Drain Cleaning Power: Say Goodbye to Clogs!
Okay, let’s face it: dealing with a clogged sink drain is one of the most annoying household chores. Store-bought drain cleaners can be harsh, expensive, and sometimes not even that effective. But don’t despair! I’m going to show you how to create a powerful, eco-friendly drain cleaner using ingredients you probably already have in your pantry. This method is safe for most pipes, but always test a small amount first, especially if you have older or delicate plumbing.
What You’ll Need: The Arsenal Against Clogs
Before we dive in, let’s gather our supplies. This is a simple recipe, so you won’t need anything fancy:
* 1 cup Baking Soda
* 2 cups White Vinegar
* Boiling Water (a kettle or pot will do)
* A Plunger (just in case!)
* Rubber Gloves (to protect your hands)
* Eye Protection (safety first!)
* A Measuring Cup
* A Teaspoon (for optional additions)
* Essential Oils (optional, for a fresh scent) – I like lemon or tea tree oil.
The Baking Soda & Vinegar Blitz: Step-by-Step Instructions
This is where the magic happens! The combination of baking soda and vinegar creates a fizzing reaction that helps to break down grease, hair, and other gunk that’s clogging your drain.
1. Clear the Area: Remove any standing water from the sink. You want the baking soda and vinegar to directly attack the clog, not just sit on top of water. If there’s a lot of water, you can use a cup or small container to scoop it out.
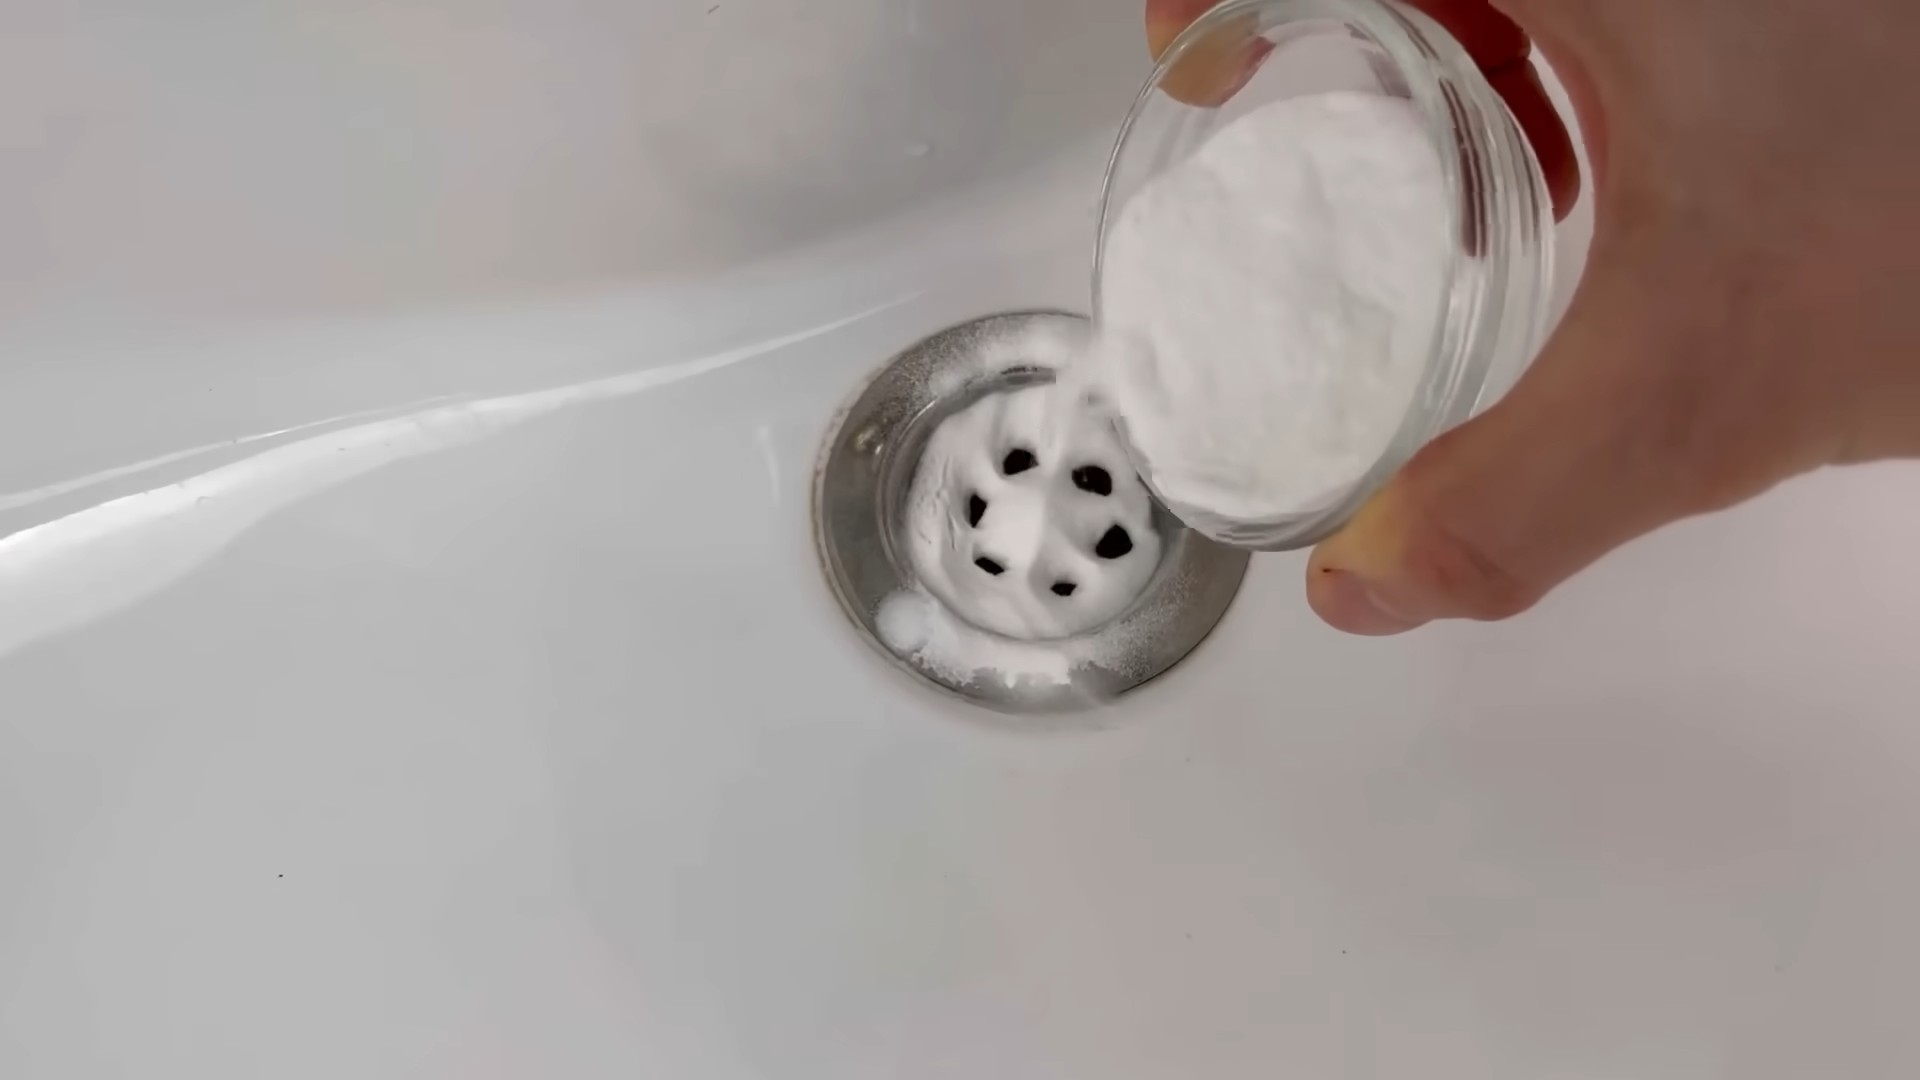
2. Baking Soda Blast: Pour one cup of baking soda down the drain. Try to get as much of it down the drain opening as possible. A funnel can be helpful here if you have one.
3. Vinegar Volcano: Now, slowly pour two cups of white vinegar down the drain after the baking soda. You’ll immediately notice a fizzing and bubbling reaction. This is exactly what we want!
4. The Fizzing Frenzy: Let the mixture fizz and bubble for at least 30 minutes. For stubborn clogs, I recommend letting it sit for even longer – up to a few hours or even overnight. The longer it sits, the more time it has to break down the clog. Don’t use the sink during this time!
5. Boiling Water Flush: After the waiting period, carefully pour a kettle or pot of boiling water down the drain. The hot water helps to flush away the loosened debris. Be careful not to splash yourself with the boiling water.
6. Assess the Situation: Turn on the faucet and see if the water drains freely. If it does, congratulations! You’ve successfully cleared the clog. If the water is still draining slowly, or not at all, proceed to the next step.
7. Plunger Power: If the drain is still clogged, it’s time to bring out the plunger. Make sure there’s enough water in the sink to cover the cup of the plunger. Create a tight seal around the drain opening and plunge vigorously for several minutes.
8. Repeat if Necessary: If the plunger doesn’t do the trick on the first try, repeat steps 1-7. Sometimes it takes a few attempts to completely clear a stubborn clog.
9. Optional Freshness Boost: Once the drain is clear, you can add a few drops of your favorite essential oil to the drain for a fresh scent. Lemon and tea tree oil are great choices because they also have antibacterial properties. Just a few drops will do!
Dealing with Stubborn Clogs: When the Fizz Isn’t Enough
Sometimes, the baking soda and vinegar method isn’t enough to tackle really tough clogs. Here are a few additional strategies you can try:
* The Baking Soda & Salt Combo: Instead of using just baking soda, try mixing equal parts baking soda and salt (about 1/2 cup of each) and pouring it down the drain, followed by boiling water. The salt adds extra abrasive power to help break down the clog.
* The Wire Hanger Trick: Straighten a wire coat hanger and bend one end into a small hook. Carefully insert the hook into the drain and try to pull out any visible debris, like hair or clumps of gunk. Be careful not to push the clog further down the drain.
* Check the P-Trap: The P-trap is the curved pipe under your sink. It’s designed to trap debris and prevent sewer gases from entering your home. Sometimes, the clog is located right in the P-trap. To clean it, place a bucket under the P-trap to catch any water, then loosen the slip nuts that connect the P-trap to the drain pipes. Carefully remove the P-trap and clean out any debris. Reassemble the P-trap and tighten the slip nuts.
* Enzyme Drain Cleaners: If you’re still having trouble, you can try an enzyme drain cleaner. These cleaners use enzymes to break down organic matter, like hair and grease. They’re generally safer for pipes than chemical drain cleaners, but they may take longer to work. Follow the instructions on the product label.
Preventing Future Clogs: A Proactive Approach
The best way to deal with clogs is to prevent them from happening in the first place. Here are a few tips to keep your drains clear:
* Use a Drain Strainer: A drain strainer is a simple and inexpensive device that sits in your drain and catches hair, food scraps, and other debris before they can enter the pipes.
* Avoid Pouring Grease Down the Drain: Grease is a major culprit when it comes to clogged drains. Never pour grease down the drain. Instead, let it cool and solidify, then scrape it into the trash.
* Flush with Hot Water Regularly: Once a week, flush your drains with hot water to help prevent the buildup of grease and other debris.
* Baking Soda & Vinegar Maintenance: As a preventative measure, you can periodically pour a mixture of baking soda and vinegar down your drains, followed by hot water. This will help to keep your drains clean and clear. I usually do this once a month.
* Be Mindful of What Goes Down the Drain: Avoid flushing anything down the drain that doesn’t belong there, such as coffee grounds, eggshells, and feminine hygiene products.
Safety First: Important Precautions
While this DIY drain cleaner is generally safe, it’s important to take a few precautions:
* Wear Rubber Gloves and Eye Protection: Baking soda and vinegar can be irritating to the skin and eyes. Wear rubber gloves and eye protection to protect yourself.
* Avoid Mixing with Other Cleaners: Never mix baking soda and vinegar with other drain cleaners, especially chemical drain cleaners. This can create dangerous fumes.
* Ventilate the Area: Make sure the area is well-ventilated when you’re working with baking soda and vinegar.
* Test on a Small Area First: If you have older or delicate plumbing, test the baking soda and vinegar mixture on a small, inconspicuous area first to make sure it doesn’t damage the pipes.
* Keep Out of Reach of Children and Pets: Store baking soda and vinegar out of reach of children and pets.
Why This Works: The Science Behind the Fizz
The magic behind this DIY drain cleaner lies in the chemical reaction between baking soda (sodium bicarbonate) and vinegar (acetic acid). When these two substances are combined, they create carbon dioxide gas and water. The fizzing and bubbling action of the carbon dioxide helps to loosen and break down the clog. The vinegar also acts as a mild disinfectant, helping to kill bacteria and eliminate odors.
Troubleshooting: What to Do If It Doesn’t Work
Even with the best efforts, sometimes a clog just won’t budge. If you’ve tried all of the above methods and your drain is still clogged, it may be time to call a professional plumber. A plumber has the tools and expertise to diagnose and fix more serious plumbing problems. They can also use a drain snake or other specialized equipment to clear stubborn clogs. Don’t be afraid to call in the pros if you’re in over your head!
I hope this guide helps you conquer those pesky drain clogs and keep your plumbing flowing smoothly! Remember, a little prevention goes a long way. Happy cleaning!
Conclusion
So, there you have it! A simple, effective, and budget-friendly way to tackle those stubborn sink clogs and keep your drains flowing freely. This DIY sink cleaner isn’t just about saving money; it’s about taking control of your home maintenance with natural, readily available ingredients. Forget harsh chemicals and expensive plumbers for minor blockages. This method is a game-changer for maintaining a clean and efficient plumbing system.
Why is this DIY trick a must-try? Because it’s powerful, safe for your pipes (when used correctly, of course – always follow the instructions!), and incredibly satisfying to witness the gunk and grime disappear down the drain. Plus, you likely already have the ingredients in your pantry! No special trips to the store required.
But the beauty of DIY lies in its adaptability. Feel free to experiment with variations to suit your specific needs. For instance, if you’re dealing with a particularly stubborn clog, you can increase the amount of baking soda and vinegar. Or, for a refreshing scent, add a few drops of your favorite essential oil (lemon, tea tree, or eucalyptus are excellent choices) to the baking soda before adding the vinegar. Just be cautious about using too much oil, as some oils can solidify and contribute to clogs over time. Another variation is to use washing soda (sodium carbonate) instead of baking soda (sodium bicarbonate) for an extra boost of cleaning power. Washing soda is more alkaline and can be more effective at dissolving grease and grime. However, it’s also more caustic, so be sure to wear gloves and eye protection when handling it.
If you have a garbage disposal, you can also incorporate this DIY cleaner into your regular maintenance routine. After the baking soda and vinegar fizzing action, run the disposal with cold water for a minute or two to flush out any remaining debris. This will help keep your disposal clean and odor-free.
Remember, prevention is key! To avoid future clogs, be mindful of what you’re putting down your drain. Avoid pouring grease, oil, or coffee grounds down the sink. These substances can solidify and accumulate over time, leading to stubborn blockages. Regularly flush your drain with hot water to help prevent buildup.
We’re confident that this DIY sink cleaner will become a staple in your home cleaning arsenal. It’s a simple, effective, and environmentally friendly way to keep your drains clear and your plumbing system running smoothly.
Now, it’s your turn! Give this DIY trick a try and see the amazing results for yourself. We’re eager to hear about your experience. Did it work wonders on your clogged sink? Did you try any variations? Share your tips, tricks, and success stories in the comments below! Let’s build a community of DIY enthusiasts who are passionate about keeping their homes clean and efficient. Your feedback will not only help other readers but also inspire us to create more helpful and informative content. So, grab your baking soda, vinegar, and kettle, and get ready to say goodbye to those pesky sink clogs! Happy cleaning!
Frequently Asked Questions (FAQ)
1. Is this DIY sink cleaner safe for all types of pipes?
Generally, yes, this DIY sink cleaner is safe for most types of pipes, including PVC, copper, and older metal pipes. The baking soda and vinegar reaction is relatively mild and shouldn’t cause any damage. However, it’s always a good idea to exercise caution, especially with older or more fragile plumbing systems. If you have any concerns, consult with a plumber before trying this method. Avoid using excessive amounts of vinegar or leaving the mixture in the pipes for extended periods, as this could potentially corrode older pipes over time. If you have plastic pipes, ensure the hot water you use isn’t scalding, as extremely hot water can soften or warp some types of plastic.
2. How often can I use this DIY sink cleaner?
You can use this DIY sink cleaner as often as needed, but it’s generally recommended to use it every few weeks as a preventative measure. If you’re dealing with a recurring clog, you might need to use it more frequently. However, avoid using it every day, as excessive use could potentially disrupt the natural balance of your plumbing system. If you find yourself needing to use it very frequently, it might be a sign of a more serious underlying plumbing issue that requires professional attention.
3. What if the clog is really stubborn and this DIY method doesn’t work?
If the clog is particularly stubborn and the DIY method doesn’t work after a couple of attempts, it’s time to consider other options. First, try using a plunger to manually dislodge the clog. Make sure to create a tight seal around the drain opening and use a firm, up-and-down motion. If the plunger doesn’t work, you can try using a drain snake or auger to physically break up and remove the clog. These tools are available at most hardware stores and are relatively easy to use. As a last resort, if none of these methods work, it’s best to call a professional plumber. They have the expertise and equipment to diagnose and resolve more complex plumbing issues.
4. Can I use this DIY sink cleaner in my toilet?
While you can technically use this DIY sink cleaner in your toilet, it’s generally not as effective as it is in sinks. Toilets often have larger and more complex clogs that require more powerful methods. If you’re dealing with a clogged toilet, try using a toilet plunger first. If that doesn’t work, you can try using a toilet auger, which is specifically designed to break up and remove clogs in toilets. For serious toilet clogs, it’s always best to call a plumber.
5. What kind of vinegar should I use?
White distilled vinegar is the best type of vinegar to use for this DIY sink cleaner. It’s inexpensive, readily available, and has a high acidity level, which makes it effective at dissolving grease and grime. Avoid using other types of vinegar, such as apple cider vinegar or balsamic vinegar, as they may contain sugars or other additives that could potentially contribute to clogs.
6. Can I use this DIY sink cleaner in my shower drain?
Yes, you can absolutely use this DIY sink cleaner in your shower drain. Shower drains are often prone to clogs caused by hair, soap scum, and other debris. This method can be particularly effective at dissolving these types of clogs. Just be sure to remove any visible hair or debris from the drain opening before applying the baking soda and vinegar mixture.
7. Is there anything I should avoid pouring down my drain to prevent clogs?
Yes, there are several things you should avoid pouring down your drain to prevent clogs. These include:
* Grease and oil: These substances solidify and accumulate over time, leading to stubborn blockages.
* Coffee grounds: Coffee grounds don’t dissolve and can easily clog drains.
* Hair: Hair is a major culprit when it comes to shower and sink clogs.
* Food scraps: Avoid pouring large amounts of food scraps down the drain.
* Paper towels and other paper products: These items don’t break down easily and can cause clogs.
* Chemical drain cleaners: While they may seem like a quick fix, chemical drain cleaners can damage your pipes and are harmful to the environment.
8. Can I use lemon juice instead of vinegar?
While lemon juice has some cleaning properties, it’s not as effective as vinegar for dissolving grease and grime. Vinegar has a higher acidity level, which makes it a more powerful cleaning agent. If you want to add a refreshing scent to your DIY sink cleaner, you can add a few drops of lemon essential oil to the baking soda before adding the vinegar.
9. What if I don’t have baking soda? Can I use something else?
Baking soda is a key ingredient in this DIY sink cleaner because it reacts with vinegar to create a fizzing action that helps to dislodge clogs. If you don’t have baking soda, you can try using washing soda (sodium carbonate) instead. Washing soda is more alkaline and can be more effective at dissolving grease and grime. However, it’s also more caustic, so be sure to wear gloves and eye protection when handling it.
10. How do I know if the DIY sink cleaner worked?
You’ll know the DIY sink cleaner worked if the water starts draining freely down the sink. You may also hear a gurgling sound as the clog is dislodged. If the water is still draining slowly or not at all after a couple of attempts, it’s likely that the clog is too stubborn for this method and you’ll need to try another approach, such as using a plunger or drain snake, or calling a plumber.


Leave a Comment