

DIY Sofa Stain Removal: the words alone might send shivers down your spine, especially if you’ve just witnessed a rogue coffee cup take a dive onto your pristine couch! But fear not, fellow home dwellers, because I’m here to tell you that conquering those unsightly blemishes is totally achievable without resorting to expensive professional cleaning services.
Throughout history, keeping our homes clean and presentable has been a sign of care and respect, both for ourselves and our guests. While the materials and methods have evolved, the desire for a spotless living space remains constant. Think about it – our sofas are the heart of our living rooms, the place where we relax, entertain, and create memories. A stained sofa can be a real eyesore, detracting from the overall comfort and aesthetic of your home.
Let’s be honest, life happens! Spills are inevitable, especially with kids, pets, or even just a clumsy moment. Instead of panicking and resigning yourself to a permanently marked sofa, I’m going to share some incredibly effective and easy DIY sofa stain removal tricks that utilize common household items. These hacks will not only save you money but also empower you to tackle those unexpected messes head-on, keeping your sofa looking fresh and inviting for years to come. Get ready to say goodbye to stains and hello to a revitalized living space!
DIY Sofa Stain Removal: A Comprehensive Guide
Okay, so you’ve got a stain on your sofa. Don’t panic! We’ve all been there. Before you call in the professionals (and spend a fortune!), let’s try some DIY magic. I’m going to walk you through a comprehensive guide to tackle those pesky sofa stains using common household items. Remember, acting quickly is key! The longer a stain sits, the harder it is to remove.
Understanding Your Enemy: Identifying the Stain
Before you grab any cleaning supplies, it’s crucial to figure out what kind of stain you’re dealing with. Different stains require different approaches. Here’s a quick rundown:
* Water-based stains: These include things like juice, coffee, tea, soda, and even mud.
* Oil-based stains: Think grease, butter, makeup, and oily food spills.
* Protein-based stains: These are things like blood, milk, eggs, and vomit.
* Tannin-based stains: Wine, coffee, tea, and some fruits fall into this category.
* Ink stains: Pen ink, marker ink, and printer ink.
Knowing what you’re up against will help you choose the right cleaning method.
Gathering Your Arsenal: Essential Supplies
Now that you know what you’re fighting, let’s gather our weapons! Here’s what you’ll likely need:
* Clean white cloths or paper towels: Avoid colored cloths, as the dye could transfer to your sofa.
* Baking soda: A fantastic natural cleaner and deodorizer.
* White vinegar: Another cleaning powerhouse, great for breaking down stains.
* Dish soap: Mild dish soap is effective for many types of stains.
* Rubbing alcohol (isopropyl alcohol): Especially useful for ink stains.
* Hydrogen peroxide: Use with caution, as it can lighten fabrics. Test in an inconspicuous area first!
* Spray bottle: For applying cleaning solutions.
* Soft-bristled brush: An old toothbrush works well for scrubbing gently.
* Vacuum cleaner with upholstery attachment: For removing loose debris and drying the area.
* Iron (optional): For stubborn stains, heat can sometimes help.
* Steam cleaner (optional): If you have one, a steam cleaner can be very effective.
The Golden Rule: Testing, Testing, 1, 2, 3!
Before you apply any cleaning solution to the stain, always test it in an inconspicuous area of your sofa. This could be on the back, underneath, or on a hidden seam. Apply a small amount of the solution, let it sit for a few minutes, and then blot it with a clean white cloth. Check for any discoloration or damage to the fabric. If everything looks good, you can proceed with cleaning the stain.
General Stain Removal Steps: A Universal Approach
These steps are a good starting point for most stains:
1. Blot, Don’t Rub: Immediately blot the stain with a clean white cloth or paper towel. Rubbing will only spread the stain and push it deeper into the fibers. Work from the outside of the stain inwards to prevent it from spreading.
2. Vacuum the Area: Use the upholstery attachment on your vacuum cleaner to remove any loose debris or dried particles from the stained area.
3. Apply Your Chosen Cleaning Solution: Based on the type of stain, choose the appropriate cleaning solution from the options below. Apply it sparingly to the stained area.
4. Gently Agitate: Use a soft-bristled brush or a clean cloth to gently agitate the cleaning solution into the stain. Avoid scrubbing too hard, as this can damage the fabric.
5. Blot Again: Blot the area with a clean white cloth to absorb the cleaning solution and the stain. Repeat steps 4 and 5 until the stain is gone or significantly reduced.
6. Rinse (If Necessary): If you used a cleaning solution that leaves a residue, rinse the area with a clean, damp cloth. Be careful not to over-wet the fabric.
7. Dry the Area: Blot the area with a clean, dry cloth to remove excess moisture. You can also use a fan or a hairdryer on a low setting to speed up the drying process.
8. Vacuum Again: Once the area is completely dry, vacuum it again to restore the fabric’s texture.
Specific Stain Solutions: Tailored Treatments
Now, let’s dive into specific solutions for different types of stains:
Water-Based Stains (Juice, Coffee, Tea, Soda, Mud)
1. Blot Immediately: As mentioned before, blot up as much of the liquid as possible with a clean cloth.
2. Baking Soda Paste: Make a paste of baking soda and water. Apply the paste to the stain and let it dry completely.
3. Vacuum Up the Residue: Once the paste is dry, vacuum it up with the upholstery attachment.
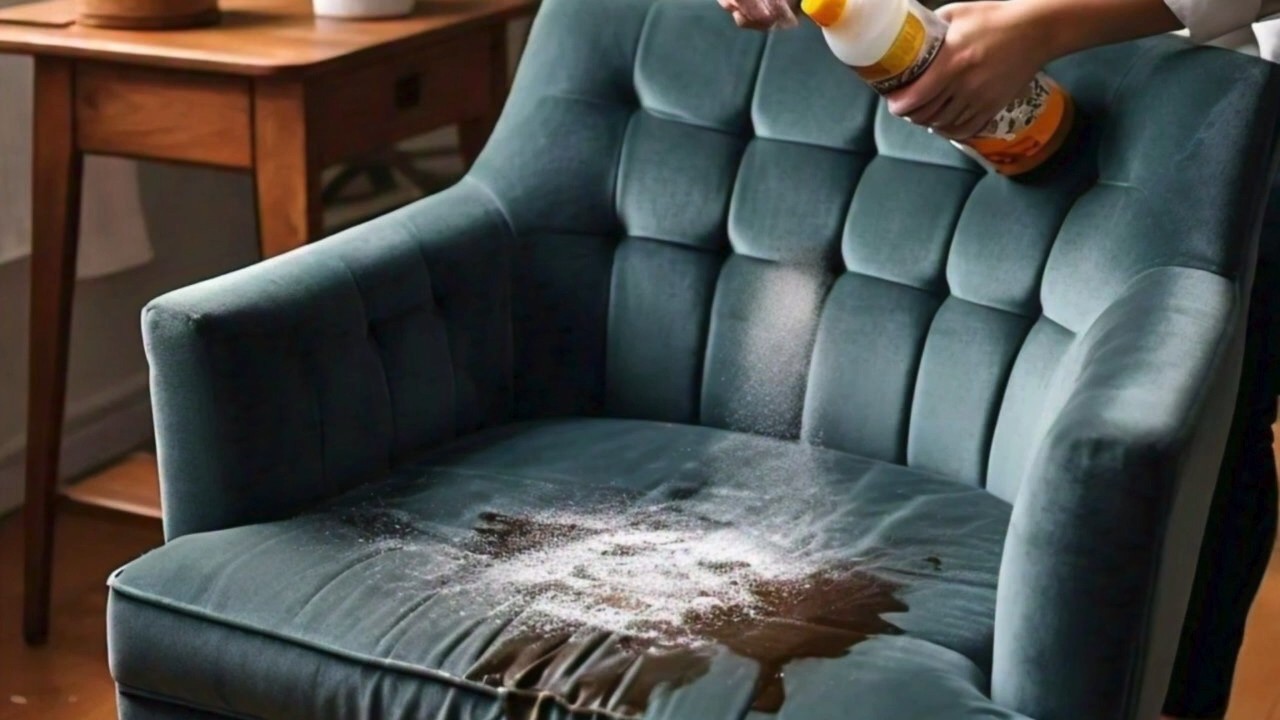
4. Vinegar Solution (Optional): If the stain persists, mix equal parts white vinegar and water in a spray bottle. Lightly spray the stained area, let it sit for a few minutes, and then blot with a clean cloth.
5. Dry Thoroughly: Ensure the area is completely dry.
Oil-Based Stains (Grease, Butter, Makeup)
1. Blot Excess Oil: Use a clean cloth or paper towel to blot up as much of the oil as possible.
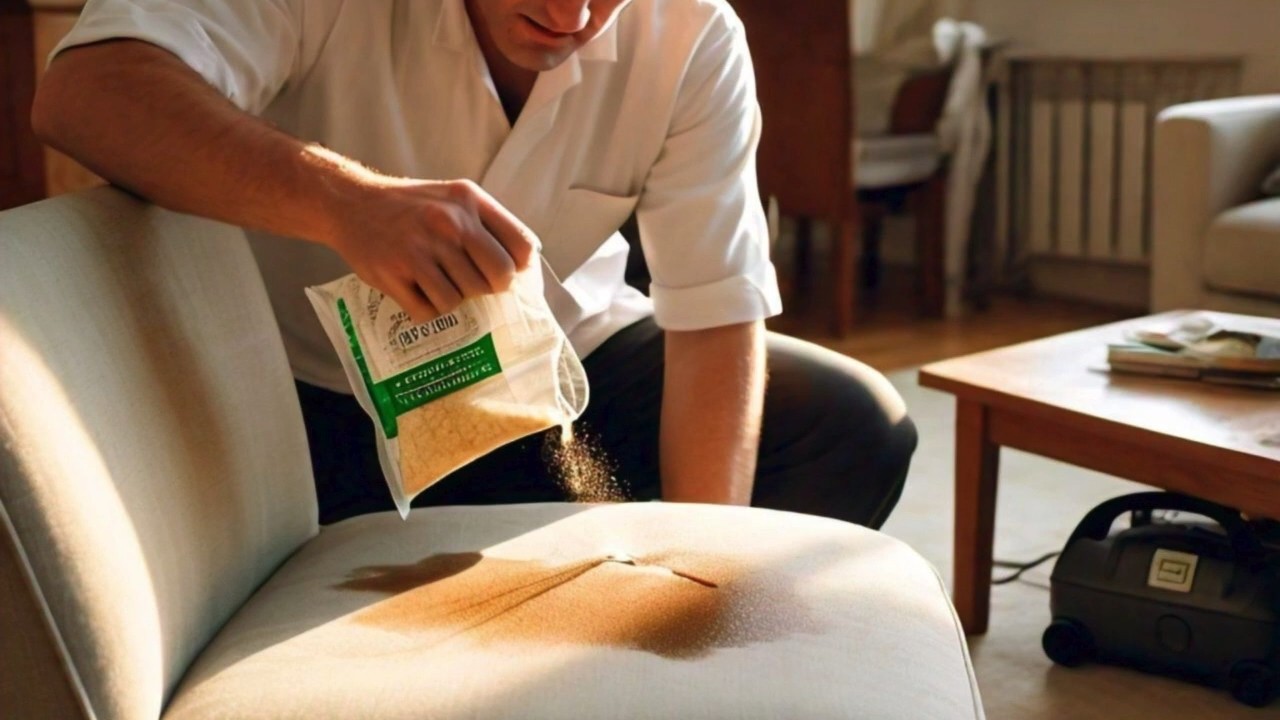
2. Baking Soda Power: Generously sprinkle baking soda over the stain. The baking soda will absorb the oil. Let it sit for at least 30 minutes, or even overnight for stubborn stains.
3. Vacuum Up the Baking Soda: Vacuum up the baking soda with the upholstery attachment.
4. Dish Soap Solution: Mix a few drops of mild dish soap with warm water. Gently dab the solution onto the stain with a clean cloth.
5. Blot and Rinse: Blot the area with a clean, damp cloth to remove the soap residue.
6. Dry Completely: Make sure the area is completely dry.
Protein-Based Stains (Blood, Milk, Eggs, Vomit)
Important: Use cold water only! Hot water will set the stain.
1. Blot with Cold Water: Blot the stain with a clean cloth dampened with cold water.
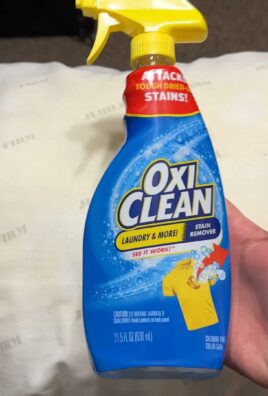
2. Enzyme Cleaner: If the stain is stubborn, consider using an enzyme cleaner. These cleaners contain enzymes that break down protein-based stains. Follow the instructions on the product label.
3. Dish Soap Solution (Alternative): If you don’t have an enzyme cleaner, mix a few drops of mild dish soap with cold water. Gently dab the solution onto the stain with a clean cloth.
4. Blot and Rinse: Blot the area with a clean, damp cloth to remove the soap residue.
5. Dry Thoroughly: Ensure the area is completely dry.
Tannin-Based Stains (Wine, Coffee, Tea)
1. Blot Immediately: Blot up as much of the liquid as possible with a clean cloth.
2. Salt Power (For Wine): For red wine stains, immediately cover the stain with a generous amount of salt. The salt will absorb the wine. Let it sit for several hours, or even overnight.
3. Vacuum Up the Salt: Vacuum up the salt with the upholstery attachment.
4. Vinegar Solution: Mix equal parts white vinegar and water in a spray bottle. Lightly spray the stained area, let it sit for a few minutes, and then blot with a clean cloth.
5. Dry Thoroughly: Ensure the area is completely dry.
Ink Stains (Pen Ink, Marker Ink)
Important: Work quickly! Ink stains can be tricky to remove.
1. Rubbing Alcohol: Dampen a clean cloth with rubbing alcohol (isopropyl alcohol).
2. Blot, Don’t Rub: Gently blot the ink stain with the alcohol-dampened cloth. Work from the outside of the stain inwards.
3. Repeat: Repeat the blotting process with a clean area of the cloth until the ink is no longer transferring to the cloth.
4. Dish Soap Solution (Optional): If the stain persists, mix a few drops of mild dish soap with warm water. Gently dab the solution onto the stain with a clean cloth.
5. Blot and Rinse: Blot the area with a clean, damp cloth to remove the soap residue.
6. Dry Thoroughly: Ensure the area is completely dry.
Stubborn Stain Strategies: When All Else Fails
Sometimes, despite your best efforts, a stain just won’t budge. Here are a few more tricks you can try:
* Hydrogen Peroxide: Use hydrogen peroxide with extreme caution,
Conclusion
So, there you have it! This DIY sofa stain removal trick is more than just a quick fix; it’s a game-changer for anyone who wants to keep their furniture looking its best without resorting to expensive professional cleaning or harsh chemicals. We’ve armed you with a simple, effective, and budget-friendly method to tackle those inevitable spills and mishaps that life throws our way.
Why is this a must-try? Because it’s practical, accessible, and yields impressive results. Think about it: how many times have you cringed at a newly formed stain, dreading the potential damage and the cost of repair? This method empowers you to take control, using ingredients you likely already have in your home. No more panic, no more expensive bills – just a straightforward solution that works.
But the beauty of this DIY approach lies in its adaptability. Feel free to experiment with variations to suit your specific needs and preferences. For instance, if you’re dealing with a particularly stubborn stain, consider pre-treating it with a paste of baking soda and water before applying the vinegar solution. Or, if you’re sensitive to the smell of vinegar, add a few drops of your favorite essential oil (like lavender or lemon) to the spray bottle for a more pleasant aroma. Remember to always test any solution on an inconspicuous area of your sofa first to ensure colorfastness.
For leather sofas, a slightly different approach is recommended. Instead of a vinegar solution, try a mixture of mild dish soap and warm water, applied with a soft cloth. Follow up with a leather conditioner to keep the leather supple and prevent cracking. Always blot, never rub, to avoid damaging the surface.
This DIY sofa stain removal method isn’t just about cleaning; it’s about extending the life of your furniture and creating a more comfortable and inviting living space. A clean sofa is a happy sofa, and a happy sofa contributes to a happy home.
We’re confident that this trick will become your go-to solution for tackling sofa stains. But don’t just take our word for it – try it out for yourself! We encourage you to put this method to the test and see the amazing results firsthand.
And most importantly, we want to hear about your experience! Share your before-and-after photos, your tips and tricks, and any variations you’ve discovered in the comments section below. Let’s create a community of stain-fighting experts and help each other keep our sofas looking their absolute best. Your feedback will not only help other readers but also inspire us to continue developing and sharing even more helpful DIY solutions. So go ahead, give it a try, and let us know what you think! You might be surprised at how easy and effective DIY sofa stain removal can be.
Frequently Asked Questions (FAQ)
What types of stains does this DIY method work best on?
This DIY sofa stain removal method is effective on a wide range of common household stains, including food spills (like coffee, tea, juice, and sauces), pet accidents, dirt, and some types of ink. However, its effectiveness can vary depending on the age and severity of the stain, as well as the type of fabric. Fresh stains are generally easier to remove than old, set-in stains. For particularly stubborn stains, multiple applications or a specialized stain remover might be necessary. It’s always a good idea to test the solution on a hidden area of the sofa first to ensure it doesn’t damage the fabric or cause discoloration.
Is this method safe for all types of sofa fabrics?
While this DIY method is generally safe for most common sofa fabrics, it’s crucial to exercise caution and test the solution on an inconspicuous area before applying it to the entire stain. Fabrics like microfiber, cotton, and polyester typically respond well to this method. However, more delicate fabrics like silk, velvet, or wool may require a different approach or professional cleaning. For leather sofas, a specialized leather cleaner and conditioner are recommended to avoid damaging the material. Always check the manufacturer’s care instructions for your sofa before attempting any stain removal method.
How often can I use this DIY stain removal method on my sofa?
You can use this DIY stain removal method as needed to address spills and stains. However, it’s important to avoid over-saturating the fabric, as this can lead to water damage or mildew growth. Allow the sofa to dry completely between applications. For regular cleaning and maintenance, consider vacuuming your sofa regularly to remove dust and debris. Spot cleaning with this DIY method can help keep your sofa looking fresh and clean between professional cleanings.
What if the stain doesn’t come out completely after the first try?
If the stain doesn’t come out completely after the first application, don’t give up! Try repeating the process, allowing the solution to sit on the stain for a longer period (but not so long that it dries completely). You can also try gently blotting the stain with a clean cloth or sponge. For particularly stubborn stains, consider pre-treating the area with a paste of baking soda and water before applying the vinegar solution. If the stain persists after multiple attempts, it may be necessary to consult a professional upholstery cleaner.
Can I use a different type of vinegar besides white vinegar?
White vinegar is generally recommended for DIY stain removal due to its acidity and lack of color, which minimizes the risk of staining the fabric. While other types of vinegar, such as apple cider vinegar, may also work, they can potentially leave a residue or stain, especially on lighter-colored fabrics. If you choose to use a different type of vinegar, be sure to test it on an inconspicuous area first to ensure it doesn’t cause any discoloration.
How long does it take for the sofa to dry after using this method?
The drying time will depend on several factors, including the amount of solution used, the type of fabric, and the ambient humidity. Generally, it can take anywhere from a few hours to overnight for the sofa to dry completely. To speed up the drying process, you can use a fan or open windows to improve ventilation. Avoid sitting on the sofa until it is completely dry to prevent transferring the stain or causing further damage.
What are some alternative DIY stain removal solutions I can try?
Besides the vinegar solution, there are several other DIY stain removal solutions you can try, depending on the type of stain and fabric. For example, a paste of baking soda and water can be effective for absorbing odors and lifting stains. A mixture of mild dish soap and warm water can be used to clean many types of stains. Club soda can also be effective for removing fresh spills. Always test any solution on an inconspicuous area first to ensure it doesn’t damage the fabric.
How can I prevent stains from happening in the first place?
Prevention is always better than cure! To minimize the risk of stains, consider using sofa covers or throws to protect your furniture from spills and dirt. Avoid eating or drinking on the sofa, especially if you have children or pets. Clean up spills immediately to prevent them from setting in. Regularly vacuum your sofa to remove dust and debris. You can also apply a fabric protector spray to create a barrier against stains. By taking these simple precautions, you can keep your sofa looking clean and fresh for longer.
Leave a Comment