

Easy cleaning habits for home – sounds like a dream, right? I know, I used to dread cleaning. It felt like a monumental task that always loomed over me. But what if I told you that transforming your home into a sparkling sanctuary doesn’t require hours of scrubbing and endless bottles of harsh chemicals? What if it could be, dare I say, enjoyable?
For centuries, cultures around the world have understood the importance of a clean and organized living space. From the ancient practice of Feng Shui, which emphasizes harmony and balance through decluttering, to the simple satisfaction of a tidy home passed down through generations, the desire for a clean home is deeply ingrained in us. But in today’s fast-paced world, finding the time and energy for extensive cleaning can feel impossible.
That’s where these easy cleaning habits for home come in! I’m going to share some simple, actionable DIY tricks and hacks that will revolutionize your cleaning routine. These aren’t just about making your home look good; they’re about creating a healthier, more peaceful, and more productive environment for you and your family. Imagine coming home to a space that instantly relaxes you, where you can focus on what truly matters. Ready to ditch the cleaning overwhelm and embrace a simpler, cleaner life? Let’s get started!

DIY Home Cleaning Hacks: Making Life Easier, One Tip at a Time
Okay, let’s be honest, cleaning isn’t exactly anyone’s favorite pastime. But a clean home is a happy home, right? So, I’ve compiled some of my favorite DIY cleaning hacks that are not only super effective but also surprisingly easy. These are the tricks I use to keep my place sparkling without spending hours scrubbing. Get ready to ditch the harsh chemicals and embrace a cleaner, simpler way of life!
Hack 1: Sparkling Clean Microwave in Minutes
Microwaves, those culinary workhorses, often become magnets for splatters and spills. But fear not! This hack will have your microwave looking brand new in just a few minutes.
What You’ll Need:
* 1 cup of water
* 1 tablespoon of white vinegar or lemon juice
* Microwave-safe bowl
* Clean cloth or sponge
Step-by-Step Instructions:
1. Prepare the Cleaning Solution: In your microwave-safe bowl, combine the water and vinegar (or lemon juice). I personally prefer lemon juice for the fresh scent it leaves behind.
2. Microwave the Solution: Place the bowl in the microwave and heat it on high for 5-7 minutes. The goal is to get the water boiling and create steam. This steam will loosen all the grime and splatters inside.
3. Let it Sit: Once the timer goes off, don’t open the microwave immediately! Let the bowl sit inside for another 3-5 minutes. This allows the steam to work its magic even further.
4. Wipe it Down: Carefully remove the bowl (it will be hot!). Then, using your clean cloth or sponge, wipe down the inside of the microwave. You’ll be amazed at how easily the dirt comes off. For stubborn spots, you might need a little extra elbow grease, but usually, it’s a breeze.
5. Dry and Admire: Finally, dry the inside of the microwave with a clean cloth. And there you have it – a sparkling clean microwave with minimal effort!
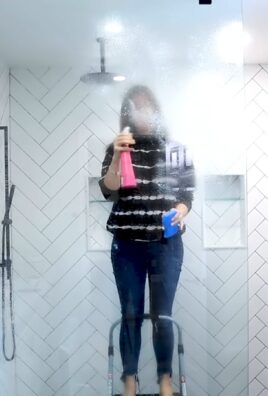
Hack 2: Unclog Your Showerhead with Vinegar
Hard water can wreak havoc on showerheads, causing mineral buildup that reduces water pressure and makes your shower less enjoyable. This simple vinegar soak will dissolve those deposits and restore your showerhead to its former glory.
What You’ll Need:
* White vinegar
* Plastic bag (a sandwich bag or grocery bag works)
* Rubber band or twist tie
Step-by-Step Instructions:
1. Fill the Bag with Vinegar: Pour enough white vinegar into the plastic bag to completely submerge the showerhead.
2. Secure the Bag: Carefully position the bag over the showerhead, ensuring that the showerhead is fully immersed in the vinegar. Use a rubber band or twist tie to secure the bag tightly around the shower arm.
3. Soak Overnight: Let the showerhead soak in the vinegar overnight (or for at least a few hours). This gives the vinegar ample time to dissolve the mineral deposits.
4. Remove and Rinse: The next morning, remove the bag and discard the vinegar. Turn on the shower and let the water run for a few minutes to flush out any remaining vinegar and loosened debris.
5. Wipe Clean: Use a clean cloth to wipe down the showerhead. If there are any stubborn deposits remaining, you can gently scrub them with an old toothbrush.
6. Enjoy Your Improved Shower: Now, enjoy your shower with improved water pressure and a cleaner showerhead! I usually do this every couple of months to keep my showerhead in tip-top shape.
Hack 3: Freshen Up Your Garbage Disposal
Garbage disposals can get pretty stinky if not properly maintained. This easy hack will not only freshen up your disposal but also help to clean and sharpen the blades.
What You’ll Need:
* Ice cubes
* Lemon or lime wedges
* Coarse salt (like kosher salt)
Step-by-Step Instructions:
1. Prepare the Ingredients: Gather your ice cubes, lemon or lime wedges, and coarse salt. I usually use about a tray of ice cubes, half a lemon, and a handful of salt.
2. Add Ice and Salt: Turn on the cold water tap to a slow, steady stream. Then, pour the ice cubes and salt into the garbage disposal.
3. Grind Away: Turn on the garbage disposal. The ice cubes will help to scrub the sides of the disposal and dislodge any stuck-on food particles, while the salt acts as an abrasive to clean and sharpen the blades.
4. Add Citrus: After the ice and salt have been grinding for a minute or two, add the lemon or lime wedges. The citrus will help to freshen the disposal and leave a pleasant scent.
5. Continue Grinding: Continue running the cold water and grinding the mixture for another minute or two.
6. Rinse and Repeat (If Necessary): Turn off the garbage disposal and the water. If you still notice any lingering odors, you can repeat the process. I find that this usually does the trick!
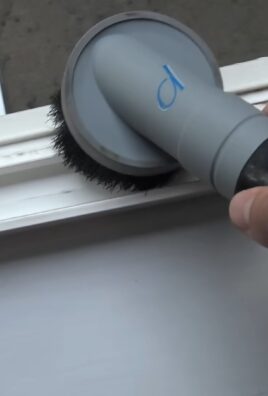
Hack 4: Clean Your Blinds with a Sock
Cleaning blinds can be a tedious task, but this clever hack makes it much easier and faster.
What You’ll Need:
* Old sock (clean, of course!)
* White vinegar or all-purpose cleaner
* Bowl of water (optional)
Step-by-Step Instructions:
1. Prepare the Sock: Dampen the sock with either white vinegar or your favorite all-purpose cleaner. You can either dip the sock directly into a bowl of water mixed with cleaner or spray the cleaner onto the sock. Make sure the sock is damp, not soaking wet.
2. Slip the Sock On: Put the sock on your hand, like a puppet.
3. Wipe the Blinds: Use your sock-covered hand to wipe each slat of the blinds. The sock will act as a dust magnet, picking up dirt and grime with ease. Start from the top and work your way down.
4. Rinse and Repeat: If the sock gets too dirty, rinse it in a bowl of clean water and reapply the cleaner. You may need to use a fresh sock if your blinds are particularly dusty.
5. Dry (Optional): If you used a lot of water, you can dry the blinds with a clean, dry cloth. However, if you used a minimal amount of cleaner, they should air dry quickly. This is one of my go-to hacks because it’s so quick and easy!
Hack 5: Deodorize Your Mattress
Mattresses can accumulate odors over time, from sweat, spills, and general wear and tear. This simple deodorizing trick will leave your mattress smelling fresh and clean.
What You’ll Need:
* Baking soda
* Essential oil (optional, like lavender or eucalyptus)
* Vacuum cleaner with upholstery attachment
* Sifter or strainer (optional)
Step-by-Step Instructions:
1. Prepare the Baking Soda: In a bowl, combine the baking soda with a few drops of your favorite essential oil (if using). I love using lavender for its calming scent. Mix well to distribute the oil evenly.
2. Sprinkle the Baking Soda: Sprinkle a generous layer of the baking soda mixture over the entire surface of your mattress. You can use a sifter or strainer to help distribute it evenly.
3. Let it Sit: Allow the baking soda to sit on the mattress for at least 30 minutes, or even better, for a few hours. The baking soda will absorb odors and moisture.
4. Vacuum Thoroughly: Use the upholstery attachment of your vacuum cleaner to thoroughly vacuum the entire surface of the mattress. Make sure to get into all the crevices and seams.
5. Flip and Repeat: Flip the mattress over and repeat the process on the other side.
6. Enjoy a Fresh Mattress: Now, your mattress should be deodorized and smelling fresh! I usually do this every few months to keep my mattress in good condition.
Hack 6: Clean Burnt Food from Pots and Pans
Burnt food stuck to the bottom of pots and pans is a common kitchen mishap. But don’t despair! This simple trick will help you remove even the most stubborn burnt-on food.
What You’ll Need:
* Baking soda
* Water
* Dish soap
* Scrubbing sponge or pad
Step-by-Step Instructions:
1. Cover the Burnt Area: Pour a generous amount of baking soda into the pot or pan, covering the burnt area completely.
2. Add Water: Add enough water to cover the baking soda and the burnt food.
3. Boil the Mixture: Bring the mixture to a boil on the stovetop. Let it simmer for 10-15 minutes, stirring

Conclusion
So, there you have it! This simple yet incredibly effective DIY cleaning trick is more than just a shortcut; it’s a game-changer for maintaining a sparkling clean home with minimal effort. We’ve shown you how to harness the power of readily available ingredients to create a cleaning solution that’s not only budget-friendly but also environmentally conscious. Forget harsh chemicals and expensive store-bought cleaners – this method offers a natural and equally potent alternative.
Why is this a must-try? Because it saves you time, money, and reduces your exposure to potentially harmful substances. Imagine spending less time scrubbing and more time enjoying your clean and comfortable living space. This DIY approach empowers you to take control of your cleaning routine and customize it to your specific needs.
But the benefits don’t stop there!
Feel free to experiment with variations to tailor this cleaning trick to your preferences. For instance, if you’re dealing with particularly stubborn stains, consider adding a tablespoon of baking soda to the mixture for extra scrubbing power. Or, if you prefer a specific scent, a few drops of your favorite essential oil (like lavender, lemon, or tea tree) can add a refreshing aroma to your cleaning routine. Remember to always test any new cleaning solution on an inconspicuous area first to ensure it doesn’t damage the surface.
Another variation involves using different types of vinegar. While white vinegar is the most common and readily available, apple cider vinegar can also be used, especially for cleaning surfaces where you want a slightly milder scent. Just be mindful that apple cider vinegar might leave a slight residue, so rinsing might be necessary.
This easy cleaning habit is designed to seamlessly integrate into your existing routine. Whether you’re a seasoned cleaning pro or just starting to establish good habits, this trick is accessible and adaptable to all skill levels. It’s about making cleaning less of a chore and more of a manageable part of your daily or weekly life.
We wholeheartedly encourage you to give this DIY cleaning trick a try. We’re confident that you’ll be amazed by the results. Not only will your home be cleaner, but you’ll also feel a sense of accomplishment knowing that you’re using a safe, effective, and sustainable cleaning method.
Once you’ve tried it, we’d love to hear about your experience! Share your tips, variations, and before-and-after photos in the comments section below. Let’s build a community of clean-home enthusiasts who are passionate about finding innovative and eco-friendly cleaning solutions. Your feedback will not only help others but also inspire us to continue sharing valuable cleaning tips and tricks. Let’s revolutionize the way we clean, one DIY solution at a time!
FAQ
What exactly is the DIY cleaning trick you’re referring to?
The DIY cleaning trick we’re highlighting involves using a mixture of common household ingredients, typically vinegar and water, to create an effective and natural cleaning solution. The specific ratio and additional ingredients can vary depending on the surface you’re cleaning and your personal preferences. The beauty of this trick lies in its simplicity, affordability, and eco-friendliness. It’s a great alternative to harsh chemical cleaners that can be harmful to your health and the environment.
Is vinegar safe to use on all surfaces?
While vinegar is a fantastic cleaning agent, it’s not suitable for all surfaces. Avoid using vinegar on natural stone surfaces like marble, granite, and limestone, as the acidity can etch and damage them. It’s also best to avoid using vinegar on waxed wood, cast iron, and electronics screens. Always test the cleaning solution on an inconspicuous area first to ensure it doesn’t cause any discoloration or damage. For delicate surfaces, consider diluting the vinegar solution further or using a different cleaning method altogether.
Can I use essential oils in the cleaning solution? Which ones are best?
Yes, you can definitely add essential oils to your DIY cleaning solution! Essential oils not only provide a pleasant scent but also offer additional cleaning and disinfecting properties. Some of the best essential oils for cleaning include:
* **Lemon:** Known for its degreasing and disinfecting properties.
* **Tea Tree:** A powerful antibacterial and antifungal agent.
* **Lavender:** Offers a calming scent and has antiseptic properties.
* **Eucalyptus:** Effective against germs and provides a refreshing aroma.
* **Peppermint:** Has antibacterial properties and a stimulating scent.
When adding essential oils, start with a few drops (5-10 drops per cup of cleaning solution) and adjust to your preference. Be sure to use pure, high-quality essential oils for the best results.
How often should I use this DIY cleaning trick?
The frequency of using this DIY cleaning trick depends on your cleaning habits and the specific area you’re cleaning. For daily cleaning tasks like wiping down kitchen counters and sinks, you can use the solution daily. For deeper cleaning tasks like cleaning bathrooms or floors, you can use it weekly or bi-weekly. The key is to incorporate this easy cleaning habit into your regular cleaning routine to maintain a clean and healthy home.
What if I don’t like the smell of vinegar?
The smell of vinegar can be off-putting to some people, but there are several ways to mitigate it. First, you can add essential oils to the cleaning solution to mask the vinegar scent. Lemon, lavender, and eucalyptus essential oils are particularly effective at neutralizing the vinegar smell. Second, the vinegar scent typically dissipates quickly after cleaning, especially if you ventilate the area well. Finally, you can try using apple cider vinegar instead of white vinegar, as it has a slightly milder scent.
How do I store the DIY cleaning solution?
Store your DIY cleaning solution in a clean, labeled spray bottle. It’s best to use a dark-colored bottle to protect the solution from light, which can degrade the ingredients over time. Store the bottle in a cool, dry place away from direct sunlight and heat. The solution should last for several weeks, but it’s always a good idea to make a fresh batch every month or so to ensure its effectiveness.
Can I use this DIY cleaning trick on my floors?
Yes, you can use this DIY cleaning trick on many types of floors, but it’s crucial to check the manufacturer’s recommendations first. Avoid using vinegar on hardwood floors with a wax finish, as it can strip the wax. For sealed hardwood floors, tile floors, and laminate floors, a diluted vinegar solution can be effective. Always test the solution on an inconspicuous area first to ensure it doesn’t damage the floor. When cleaning floors, use a damp mop or cloth to avoid oversaturating the surface.
Is this DIY cleaning trick safe for pets and children?
This DIY cleaning trick is generally safer for pets and children than harsh chemical cleaners, as it uses natural ingredients. However, it’s still important to exercise caution. Keep the cleaning solution out of reach of children and pets. If your pet or child ingests the solution, contact a veterinarian or poison control center immediately. When cleaning areas where pets and children play, ensure the surface is completely dry before allowing them to access it.
What are some other uses for this DIY cleaning solution?
Besides general cleaning, this DIY cleaning solution can be used for a variety of other purposes, including:
* **Cleaning windows and mirrors:** The vinegar helps to remove streaks and leave a sparkling shine.
* **Deodorizing drains:** Pour a cup of the solution down the drain to eliminate odors.
* **Removing hard water stains:** Spray the solution on hard water stains and let it sit for a few minutes before wiping clean.
* **Cleaning coffee makers:** Run a cycle with the solution to remove mineral buildup.
* **Freshening up laundry:** Add a cup of the solution to the washing machine to help remove odors and brighten clothes.
What if the DIY cleaning trick doesn’t work on a particular stain?
While this DIY cleaning trick is effective for many stains, some stubborn stains may require additional treatment. For grease stains, try using a paste of baking soda and water. For mildew stains, try using a solution of bleach and water (use with caution and always wear gloves). For ink stains, try using rubbing alcohol. Remember to always test any new cleaning solution on an inconspicuous area first to avoid damaging the surface.

Leave a Comment