

Fast kitchen deep cleaning – just the phrase alone can send shivers down your spine, right? I get it! The kitchen, the heart of the home, can quickly become a chaotic battleground of splatters, spills, and lingering odors. But fear not, my friend! What if I told you that you could conquer that kitchen chaos without sacrificing an entire weekend? This isn’t just about wiping down counters; it’s about reclaiming your space and your sanity with some clever DIY tricks.
For generations, a clean kitchen has been synonymous with a healthy and happy home. Think back to your grandmother’s meticulously kept kitchen – a symbol of care and nourishment. While we might not have the time for that level of dedication every day, we can certainly borrow some of her wisdom and adapt it to our modern, busy lives. These DIY deep cleaning hacks are designed to be quick, effective, and use ingredients you likely already have on hand.
Let’s face it, a grimy kitchen isn’t just unsightly; it can also be a breeding ground for bacteria. Nobody wants that! That’s why mastering the art of fast kitchen deep cleaning is essential. I’m going to share my favorite time-saving tips and tricks that will transform your kitchen from a disaster zone to a sparkling sanctuary in no time. Get ready to roll up your sleeves and discover how to achieve a deep clean without the deep dread!

DIY Fast Kitchen Deep Clean: My Secret Weapon Against Grime!
Okay, let’s be honest, nobody *loves* deep cleaning the kitchen. But a sparkling clean kitchen makes cooking so much more enjoyable, and it’s way healthier too! I’ve developed a system that lets me tackle even the grimiest kitchen in a surprisingly short amount of time. I’m going to share all my secrets with you!
The Pre-Game: Gathering Your Supplies
Before you even think about scrubbing, you need to get your arsenal ready. Trust me, having everything at hand will save you tons of time and frustration.
* Cleaning Solutions: I swear by a combination of things.
* All-purpose cleaner (I prefer a natural one, but use what you like!).
* Dish soap (a good degreasing one is key!).
* Baking soda (a powerhouse for scrubbing and deodorizing!).
* White vinegar (another natural wonder, great for cutting grease and grime!).
* Glass cleaner (for those shiny surfaces!).
* Stainless steel cleaner (if you have stainless steel appliances).
* Tools of the Trade:
* Microfiber cloths (lots of them! They’re amazing for picking up dirt and grime).
* Sponges (I like to have a few different types – one for general cleaning, one for tougher scrubbing).
* Scrub brush (for those really stubborn spots).
* Old toothbrush (perfect for getting into tight corners and grout).
* Spray bottles (for your cleaning solutions).
* Rubber gloves (protect those hands!).
* Trash bags (for all the discarded gunk).
* Bucket (for rinsing and soaking).
* Paper towels (for quick cleanups and drying).
* Magic Eraser (optional, but incredibly effective on scuff marks and tough stains).
* Optional but Helpful:
* Steamer (a handheld steamer can be a game-changer for loosening stubborn grime).
* Vacuum cleaner with attachments (for getting into crevices and under appliances).
* Dishwasher (if you have one, obviously!).
* Oven cleaner (if you’re tackling the oven – I’ll cover that separately).
* Music! (Because cleaning is always better with a good soundtrack).
Phase 1: Declutter and Prep
This is crucial! You can’t clean effectively if you’re constantly moving things around.
1. Clear the Counters: Remove everything from your countertops – appliances, utensils, mail, everything! Find a temporary home for it all. This gives you a clear surface to work with.
2. Empty the Sink: Get rid of any dirty dishes. Load them into the dishwasher or wash them by hand. A clean sink is essential for the cleaning process.
3. Take Out the Trash: Empty all trash cans and replace the liners. You don’t want to be dealing with overflowing trash while you’re trying to clean.
4. Clear the Floor: Pick up any loose items on the floor, like toys, shoes, or pet bowls. Sweep or vacuum the floor to remove loose dirt and debris.
5. Open Windows: Ventilation is key! Open windows to air out the kitchen and help the cleaning solutions dry faster.
Phase 2: Tackling the Appliances
Appliances are often the dirtiest part of the kitchen, so let’s get them sparkling!
1. Microwave Magic:
* Fill a microwave-safe bowl with 1 cup of water and 2 tablespoons of white vinegar.
* Microwave on high for 5 minutes. The steam will loosen the grime.
* Carefully remove the bowl (it will be hot!).
* Wipe down the inside of the microwave with a clean cloth. The grime should come off easily.
* Wash the turntable in the sink with soap and water.
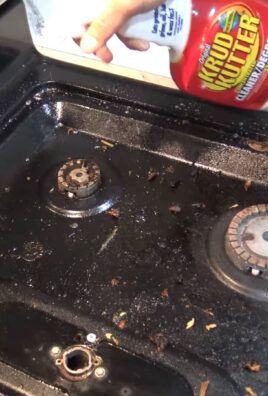
2. Oven Overhaul (Optional, but Recommended):
* If you have a self-cleaning oven: Run the self-cleaning cycle. Be sure to remove any racks or pans beforehand. This process can take several hours, so plan accordingly.
* If you don’t have a self-cleaning oven:
* Remove the racks and soak them in hot, soapy water.
* Spray the inside of the oven with oven cleaner, following the manufacturer’s instructions. Be sure to wear gloves and eye protection.
* Let the oven cleaner sit for the recommended time (usually several hours or overnight).
* Wipe down the inside of the oven with a damp cloth, rinsing frequently. You may need to scrub stubborn spots with a sponge or scrub brush.
* Wash the oven racks and dry them thoroughly before replacing them.
3. Refrigerator Refresh:
* Unplug the refrigerator.
* Remove all food items. Discard any expired or spoiled food.
* Remove all shelves and drawers. Wash them in the sink with hot, soapy water.
* Wipe down the inside of the refrigerator with a solution of warm water and baking soda. This will help to deodorize and clean.
* Pay special attention to spills and stains.
* Dry all shelves and drawers thoroughly before replacing them.
* Replace the food items, organizing them as you go.
* Plug the refrigerator back in.
4. Dishwasher Deep Clean:
* Remove any food debris from the bottom of the dishwasher.
* Place a dishwasher-safe cup filled with white vinegar on the top rack.
* Run the dishwasher on a hot cycle. This will help to clean and deodorize the dishwasher.
* For extra cleaning power, you can also sprinkle baking soda on the bottom of the dishwasher before running the cycle.
5. Small Appliance Shine:
* Wipe down the exterior of all small appliances (toaster, blender, coffee maker, etc.) with a damp cloth.
* For stubborn stains, use a magic eraser or a solution of baking soda and water.
* Clean the crumb tray of the toaster.
* Clean the carafe and filter basket of the coffee maker.
Phase 3: Countertops, Sink, and Backsplash Blitz
These surfaces get a lot of action, so they need some serious attention.
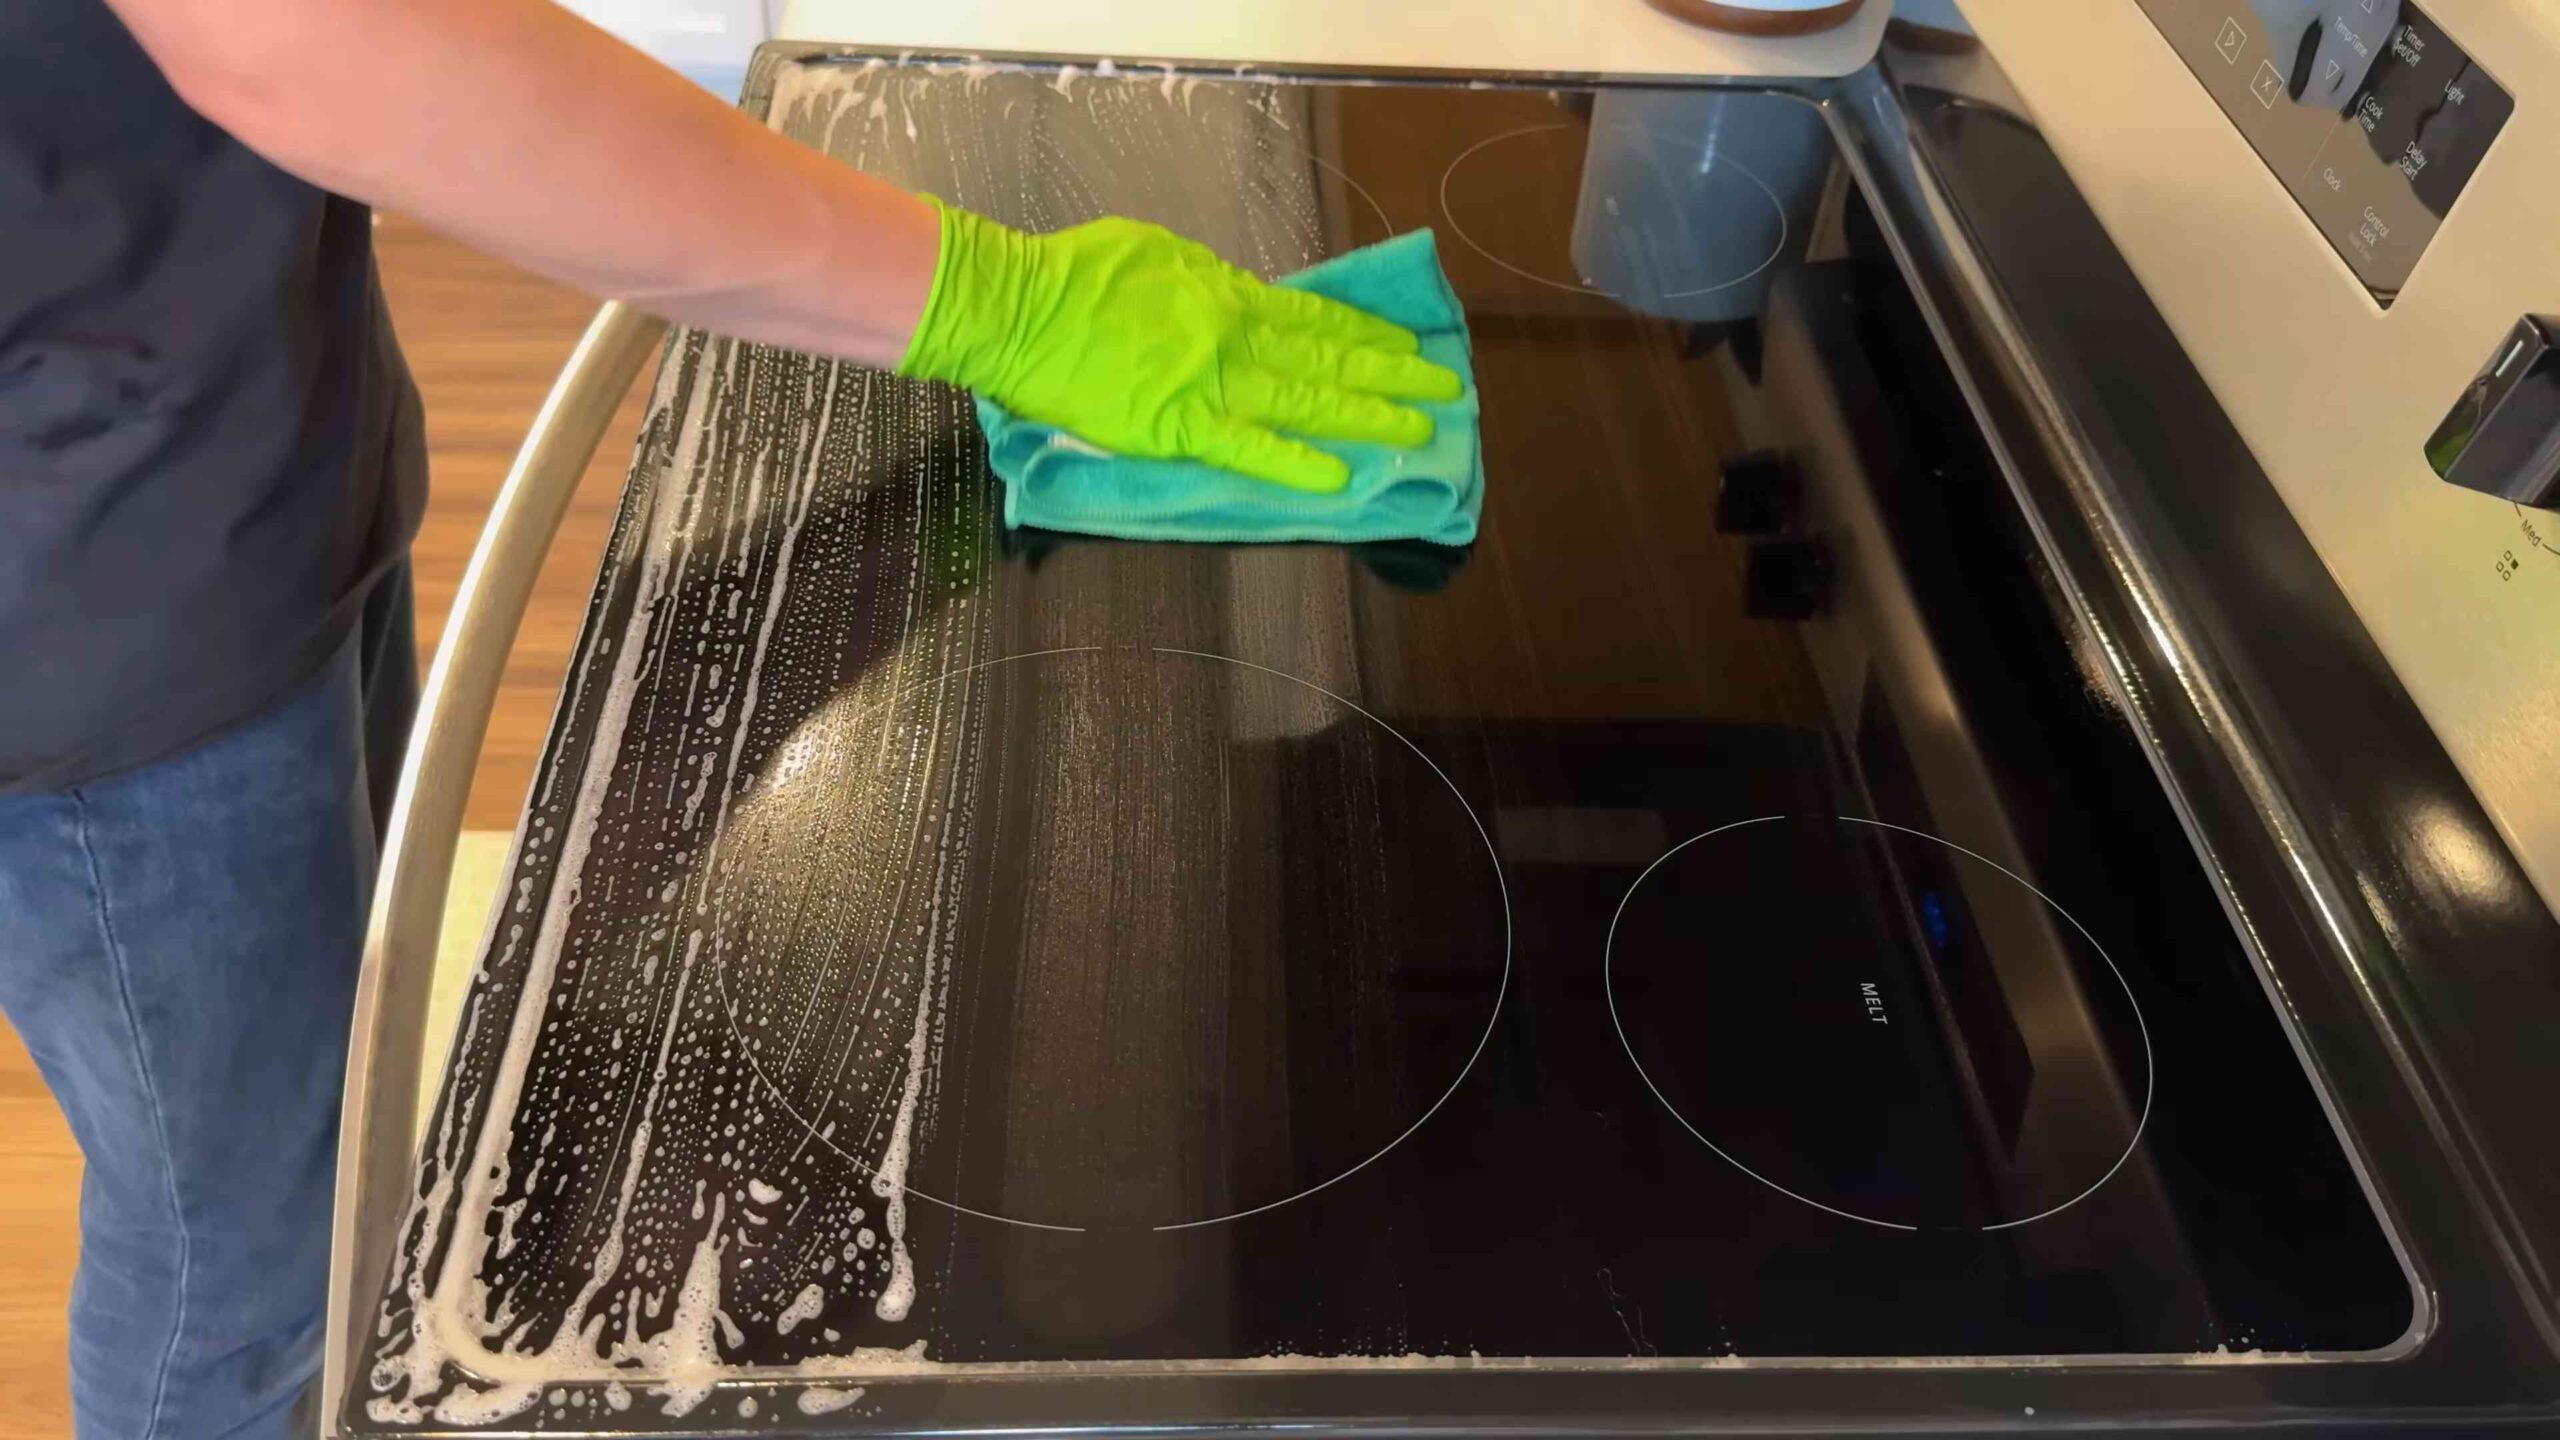
1. Countertop Cleanse:
* Spray your countertops with all-purpose cleaner.
* Let it sit for a few minutes to loosen the grime.
* Wipe down the countertops with a clean microfiber cloth.
* For stubborn stains, use a baking soda paste.
* Rinse the countertops with a damp cloth and dry them thoroughly.
2. Sink Scrub:
* Sprinkle baking soda in the sink.
* Scrub the sink with a sponge or scrub brush.
* Rinse the sink with water.
* For stainless steel sinks, use a stainless steel cleaner to polish and protect the surface.
* Clean the drain with a drain cleaner or a mixture of baking soda and vinegar.
3. Backsplash Brilliance:
* Spray your backsplash with all-purpose cleaner.
* Let it sit for a few minutes to loosen the grime.
* Wipe down the backsplash with a clean microfiber cloth.
* For tile backsplashes, use an old toothbrush to scrub the grout.
* Rinse the backsplash with a damp cloth and dry it thoroughly.
Phase 4: Floor Focus
A clean floor makes a huge difference in the overall cleanliness of the kitchen.
1. Sweep or Vacuum: Sweep or vacuum the floor to remove any remaining dirt and debris. Pay special attention to corners and edges.
2. Mop It Up:
* Fill a bucket with hot water and your favorite floor cleaner.
* Mop the floor, starting at the far end of the kitchen and working your way towards the entrance.
* Rinse the mop frequently in the bucket of clean water.
* For stubborn stains, use a scrub brush or a magic eraser.
* Allow the floor to air dry completely.
Phase 5: The Finishing Touches
These little details make a big difference!
1. Cabinet Care:
* Wipe down the exterior of your cabinets with a damp cloth.
* For greasy cabinets, use a solution of warm water and dish soap.
* Dry the cabinets thoroughly.
* Clean cabinet hardware with a metal cleaner.
2. Light Fixture Love:
* Dust or wipe down light fixtures.
* Replace any burned-out light bulbs.
3. Window Wonders:
* Clean the windows with glass cleaner.
* Wipe down the window sills.
4. Organize and
Conclusion
So, there you have it! This fast kitchen deep cleaning trick isn’t just another cleaning hack; it’s a game-changer for anyone who values a sparkling clean kitchen without sacrificing precious time. We’ve all been there – staring at a greasy stovetop or a grimy microwave, dreading the hours of scrubbing ahead. But with this simple, effective method, you can transform your kitchen from chaos to clean in a fraction of the time.
The beauty of this approach lies in its efficiency and adaptability. It’s not a rigid, one-size-fits-all solution. Feel free to tailor it to your specific needs and preferences. For instance, if you’re dealing with particularly stubborn grease buildup on your oven door, consider adding a paste of baking soda and water to the cleaning solution and letting it sit for a few minutes before wiping it away. For stainless steel appliances, a microfiber cloth dampened with white vinegar will leave them streak-free and gleaming.
Consider these variations to personalize your fast kitchen deep cleaning routine:
* **Scent Boost:** Add a few drops of your favorite essential oil (lemon, lavender, or tea tree are excellent choices) to your cleaning solution for a refreshing aroma that lingers long after you’re done.
* **Natural Disinfectant:** If you’re concerned about germs, incorporate a splash of hydrogen peroxide into your cleaning spray. It’s a powerful disinfectant that’s safe for most surfaces.
* **Focus on Problem Areas:** If your sink is the main culprit, dedicate a little extra time to scrubbing it with a paste of baking soda and lemon juice. The abrasive action of the baking soda combined with the citric acid in the lemon will effectively remove stains and odors.
* **Appliance Specific Solutions:** For your dishwasher, run an empty cycle with a cup of white vinegar in the top rack to remove mineral buildup and freshen the interior. For your garbage disposal, toss in some citrus peels and run it with cold water to eliminate unpleasant smells.
This fast kitchen deep cleaning method isn’t just about achieving a spotless kitchen; it’s about reclaiming your time and creating a more enjoyable cooking environment. A clean kitchen is a happy kitchen, and a happy kitchen leads to more delicious meals and memorable moments.
We wholeheartedly encourage you to give this DIY trick a try. You’ll be amazed at how quickly and easily you can achieve a deep clean that lasts. Don’t just take our word for it – experience the difference for yourself!
And most importantly, we want to hear about your experience! Share your before-and-after photos, your favorite variations, and any tips or tricks you discover along the way. Let’s create a community of clean kitchen enthusiasts who are passionate about making their homes shine. Leave a comment below, tag us on social media, and let us know how this fast kitchen deep cleaning method has transformed your kitchen. We can’t wait to see your sparkling results!
Frequently Asked Questions (FAQ)
What exactly does “fast kitchen deep cleaning” entail? Is it just a quick wipe-down?
No, it’s much more than a quick wipe-down! Fast kitchen deep cleaning is a strategic approach to cleaning your kitchen thoroughly and efficiently, focusing on the areas that accumulate the most grime and dirt. It involves using effective cleaning solutions and techniques to remove grease, stains, and buildup from surfaces like countertops, stovetops, sinks, microwaves, and appliances. The goal is to achieve a deep clean in a shorter amount of time compared to traditional cleaning methods. It’s about working smarter, not harder.
How often should I perform a fast kitchen deep cleaning?
The frequency depends on how often you cook and use your kitchen. For most households, a fast kitchen deep cleaning once a week is sufficient to maintain a clean and hygienic environment. However, if you cook frequently or have a busy household, you might consider doing it twice a week. You can also incorporate mini-cleaning sessions throughout the week to address spills and messes as they happen, making the weekly deep clean even easier.
What are the essential supplies I need for a fast kitchen deep cleaning?
You’ll need a few key supplies:
* **All-purpose cleaner:** Choose a cleaner that’s effective on grease and grime.
* **Microfiber cloths:** These are excellent for wiping surfaces without leaving streaks.
* **Scrub brush or sponge:** For tackling stubborn stains and buildup.
* **Baking soda:** A natural abrasive cleaner and deodorizer.
* **White vinegar:** A versatile cleaner and disinfectant.
* **Dish soap:** For washing dishes and cleaning greasy surfaces.
* **Spray bottles:** For mixing and applying cleaning solutions.
* **Rubber gloves:** To protect your hands.
* **Paper towels:** For quick cleanups and drying.
Is this fast kitchen deep cleaning method safe for all kitchen surfaces?
While the recommended cleaning solutions are generally safe for most kitchen surfaces, it’s always a good idea to test them in an inconspicuous area first, especially on delicate materials like granite or marble. Avoid using abrasive cleaners on stainless steel, as they can scratch the surface. Always read the manufacturer’s instructions for your appliances and countertops to ensure you’re using the appropriate cleaning methods.
Can I use natural cleaning alternatives instead of commercial cleaners?
Absolutely! Natural cleaning alternatives like baking soda, white vinegar, lemon juice, and essential oils are excellent for fast kitchen deep cleaning. They’re effective, eco-friendly, and safe for your family and pets. For example, you can use a mixture of white vinegar and water to clean countertops, baking soda to scrub sinks, and lemon juice to deodorize your garbage disposal.
How do I tackle stubborn grease buildup on my stovetop?
For stubborn grease buildup, create a paste of baking soda and water and apply it to the affected area. Let it sit for 15-20 minutes to soften the grease, then scrub with a scrub brush or sponge. Rinse with warm water and wipe clean. You can also use a degreasing cleaner specifically designed for stovetops.
What’s the best way to clean a microwave quickly?
Place a microwave-safe bowl filled with water and a few slices of lemon or a tablespoon of vinegar in the microwave. Heat on high for 3-5 minutes, or until the water boils and the microwave is steamy. Let it sit for a few minutes to allow the steam to loosen the grime, then carefully remove the bowl and wipe the interior of the microwave with a clean cloth.
How can I prevent my kitchen from getting too dirty in the first place?
Prevention is key! Wipe up spills and messes immediately, wash dishes after each meal, and regularly clean your countertops and stovetop. Consider using placemats and coasters to protect your surfaces. By incorporating these simple habits into your daily routine, you can significantly reduce the amount of time and effort required for your weekly fast kitchen deep cleaning.
What if I have a very specific cleaning challenge, like a burnt pot or a stained countertop?
For specific cleaning challenges, research targeted solutions. For burnt pots, try boiling water with baking soda or vinegar. For stained countertops, create a paste of baking soda and hydrogen peroxide. Always test any new cleaning method in an inconspicuous area first to ensure it doesn’t damage the surface. If you’re unsure, consult a professional cleaning service.
How can I make this fast kitchen deep cleaning routine more enjoyable?
Put on some music, listen to a podcast, or invite a friend to help you. Make it a fun and social activity! Reward yourself with a treat or a relaxing activity after you’re done. The key is to make the process as enjoyable as possible so you’re more likely to stick to it.


Leave a Comment