

Genius House Cleaning Tips – who doesn’t crave a sparkling clean home without spending hours scrubbing? I know I do! Let’s face it, cleaning isn’t usually anyone’s favorite pastime, but a tidy space can dramatically improve our mood and overall well-being. For centuries, cultures around the globe have developed unique and effective cleaning methods, passing down wisdom from generation to generation. Think of the ancient Egyptians using natron (a naturally occurring salt mixture) for cleaning and preserving, or the Romans employing olive oil and ashes for laundry. These historical practices highlight our enduring quest for cleanliness and order.
In today’s busy world, finding the time and energy for deep cleaning can feel impossible. That’s where these Genius House Cleaning Tips come in! I’m sharing some of my favorite DIY tricks and hacks that will save you time, money, and effort. From tackling stubborn stains with natural ingredients to organizing your space for maximum efficiency, these tips are designed to make your life easier and your home cleaner. So, ditch the harsh chemicals and embrace these simple, effective solutions that will transform your cleaning routine. Get ready to unlock the secrets to a spotless home without breaking a sweat!
Genius House Cleaning Tips: DIY Hacks That Will Save You Time and Money!
Okay, let’s be honest, cleaning isn’t exactly anyone’s favorite pastime. But a clean house is a happy house, right? I’ve gathered some of my absolute favorite DIY cleaning hacks that are not only super effective but also incredibly budget-friendly. Get ready to ditch those expensive store-bought cleaners and embrace the power of simple ingredients!
Cleaning Your Microwave Like a Pro
Microwaves are notorious for becoming splattered messes. Instead of scrubbing for ages, try this steam cleaning method. It’s seriously a game-changer!
What You’ll Need:
* 1 cup water
* 1/4 cup white vinegar
* Microwave-safe bowl
* Sponge or cloth
Step-by-Step Instructions:
1. Mix the Solution: In your microwave-safe bowl, combine the water and white vinegar. The vinegar smell might be a bit strong, but trust me, it’s worth it!
2. Microwave Magic: Place the bowl in the microwave and heat on high for 5-7 minutes. You want the solution to boil and create steam.
3. Let it Steam: Once the timer goes off, don’t open the microwave immediately! Let the steam work its magic for another 3-5 minutes. This will loosen all the grime and splatters.
4. Wipe it Clean: Carefully remove the bowl (it will be hot!). Use a sponge or cloth to easily wipe away all the loosened food particles. You’ll be amazed at how effortlessly everything comes off!
5. Final Touches: For any stubborn spots, you can dip your sponge in the remaining vinegar solution and give them a little extra attention.
De-Gunking Your Showerhead for Better Water Pressure
Hard water can wreak havoc on your showerhead, leading to mineral buildup and reduced water pressure. Here’s how to restore your showerhead to its former glory.
What You’ll Need:
* White vinegar
* Plastic bag (gallon-sized works best)
* Rubber band or twist tie
* Old toothbrush
Step-by-Step Instructions:
1. Vinegar Bath: Fill the plastic bag with enough white vinegar to completely submerge your showerhead.
2. Secure the Bag: Carefully attach the bag to the showerhead, making sure the showerhead is fully immersed in the vinegar. Use a rubber band or twist tie to secure the bag tightly.
3. Soak Overnight: Let the showerhead soak in the vinegar overnight (or for at least a few hours). This will give the vinegar plenty of time to dissolve the mineral deposits.
4. Scrub Away: Remove the bag and discard the vinegar. Use an old toothbrush to scrub away any remaining mineral buildup.
5. Rinse and Enjoy: Rinse the showerhead thoroughly with water. Turn on the shower and let the water run for a few minutes to flush out any remaining debris. Enjoy your improved water pressure!
Making Your Own All-Purpose Cleaner
Why spend a fortune on commercial cleaners when you can make your own effective and eco-friendly version? This all-purpose cleaner is perfect for countertops, sinks, and other surfaces.
What You’ll Need:
* Spray bottle
* 1 cup water
* 1/4 cup white vinegar
* 10-20 drops essential oil (lemon, lavender, or tea tree are great choices)
Step-by-Step Instructions:
1. Combine Ingredients: In your spray bottle, combine the water, white vinegar, and essential oil.
2. Shake it Up: Secure the lid and shake the bottle well to mix the ingredients.
3. Spray and Wipe: Spray the cleaner onto the surface you want to clean and wipe with a clean cloth or sponge.
4. Enjoy the Fresh Scent: The essential oils will leave your home smelling fresh and clean!
Important Note: Avoid using this cleaner on natural stone surfaces like granite or marble, as the vinegar can damage them.
Cleaning Your Grout with Baking Soda and Vinegar
Grungy grout can make your entire bathroom look dirty. This simple baking soda and vinegar paste will work wonders!
What You’ll Need:
* Baking soda
* White vinegar
* Old toothbrush
* Spray bottle (optional)
Step-by-Step Instructions:
1. Create a Paste: Mix baking soda and a small amount of water to form a thick paste.
2. Apply to Grout: Apply the paste to the grout lines, making sure to cover them completely.
3. Vinegar Power: Pour or spray white vinegar onto the baking soda paste. It will fizz – that’s a good thing!
4. Let it Sit: Let the mixture sit for 5-10 minutes to allow the vinegar to break down the grime.
5. Scrub Away: Use an old toothbrush to scrub the grout lines. You’ll see the dirt and grime start to lift away.
6. Rinse Thoroughly: Rinse the grout with water to remove the baking soda and vinegar residue.
7. Repeat if Necessary: For heavily soiled grout, you may need to repeat the process.
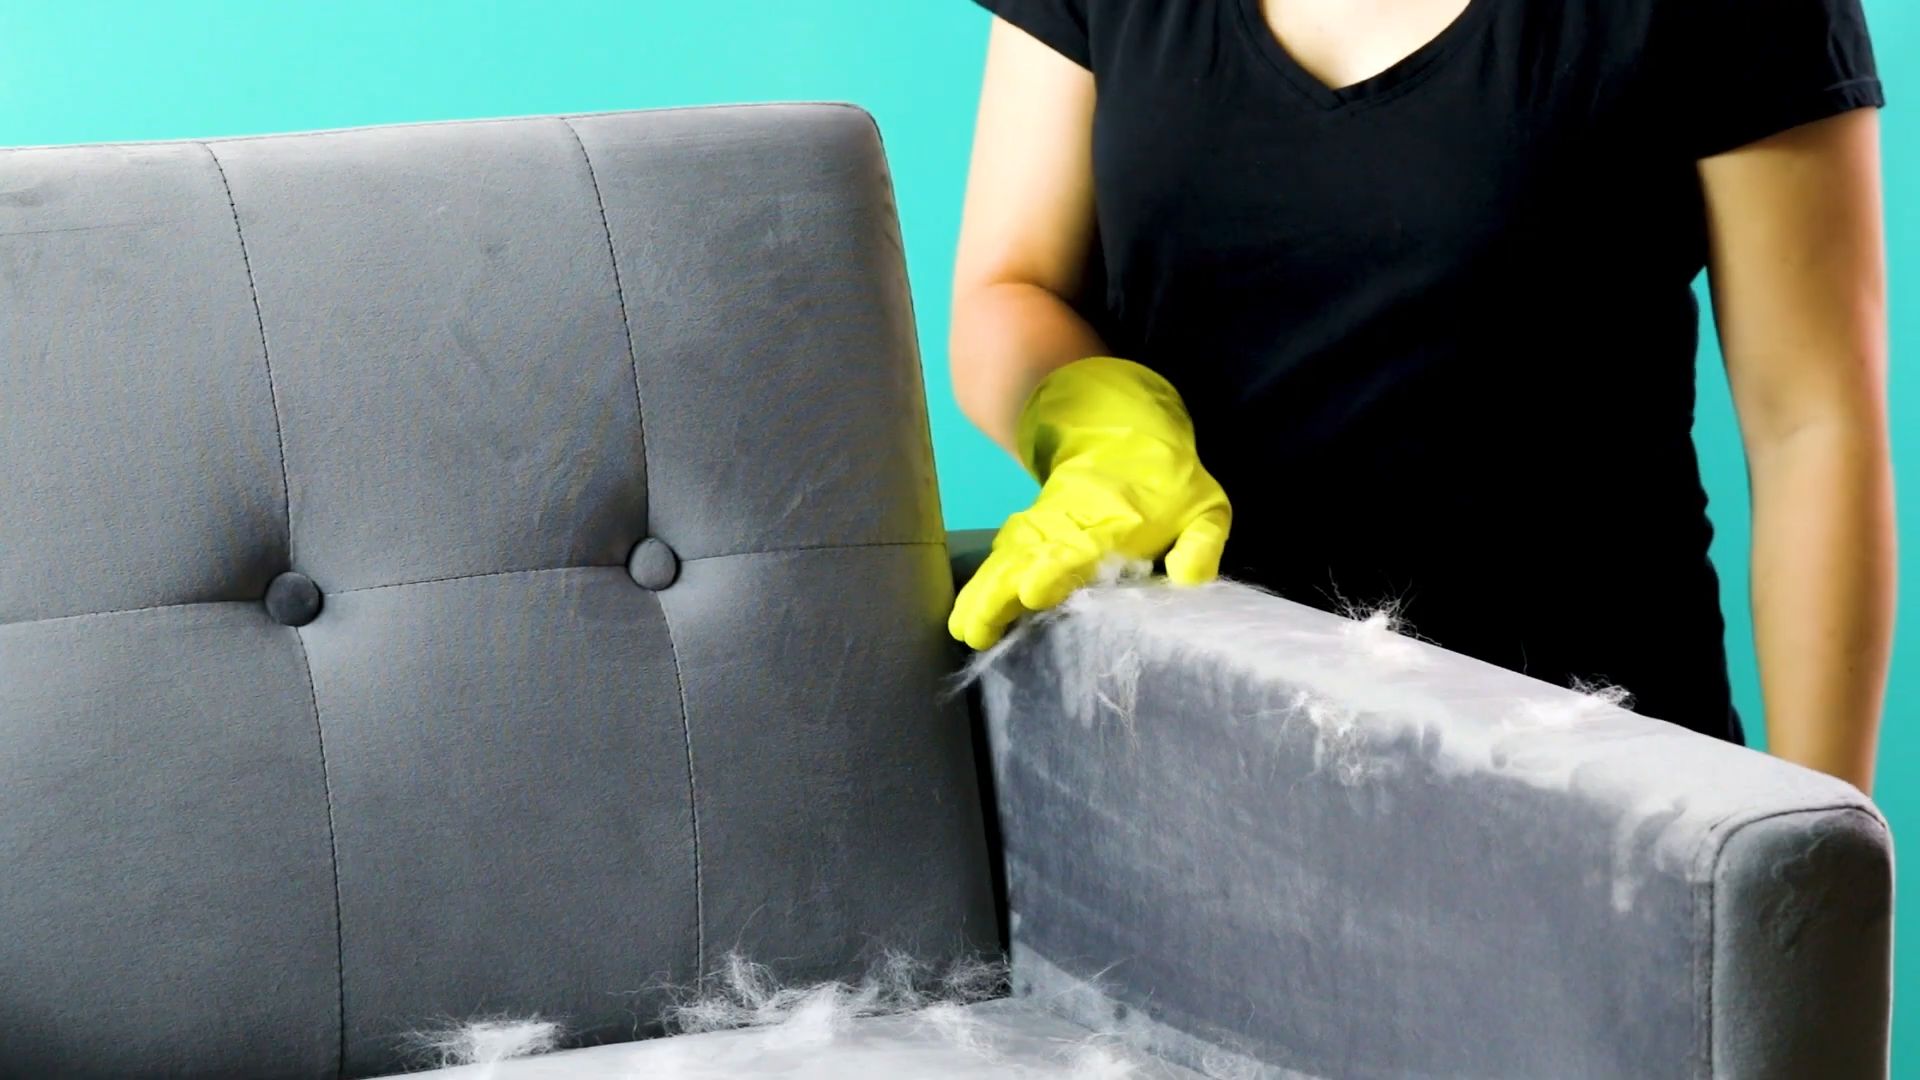
Freshening Your Mattress Without Harsh Chemicals
Mattresses can harbor dust mites and odors. This simple baking soda trick will leave your mattress feeling fresh and clean.
What You’ll Need:
* Baking soda
* Sieve or strainer
* Essential oil (optional)
* Vacuum cleaner with upholstery attachment
Step-by-Step Instructions:
1. Prepare the Baking Soda: In a bowl, mix baking soda with a few drops of your favorite essential oil (lavender is a great choice for relaxation). This is optional, but it will add a pleasant scent.
2. Sprinkle Evenly: Using a sieve or strainer, sprinkle a generous layer of baking soda over the entire surface of your mattress.
3. Let it Sit: Let the baking soda sit on the mattress for at least 30 minutes, or even better, a few hours. This will allow the baking soda to absorb odors and moisture.
4. Vacuum Thoroughly: Use the upholstery attachment on your vacuum cleaner to thoroughly vacuum the entire mattress, removing all traces of baking soda.
5. Flip and Repeat: Flip the mattress and repeat the process on the other side.
Cleaning Your Blender Easily
Blenders can be a pain to clean, especially after making smoothies or sauces. This simple trick will save you time and effort.
What You’ll Need:
* Water
* Dish soap
Step-by-Step Instructions:
1. Fill with Water: Fill your blender halfway with warm water.
2. Add Soap: Add a squirt of dish soap.
3. Blend Away: Secure the lid and blend on high speed for 30-60 seconds.
4. Rinse and Dry: Pour out the soapy water and rinse the blender thoroughly. Let it air dry.
Removing Water Stains from Wood Furniture
Those pesky water rings on your wood furniture can be frustrating. Here’s a simple way to remove them using something you probably already have in your house.
What You’ll Need:
* Hair dryer
* Soft cloth
Step-by-Step Instructions:
1. Heat it Up: Set your hair dryer to a low or medium setting.
2. Apply Heat: Hold the hair dryer a few inches away from the water stain and move it back and forth over the stain.
3. Wipe Away Moisture: As the heat evaporates the moisture, wipe the area with a soft cloth.
4. Repeat if Necessary: You may need to repeat the process a few times to completely remove the stain.
Cleaning Burnt Food from Pots and Pans
Burnt food stuck to the bottom of your pots and pans? Don’t despair! This baking soda and vinegar method is your best friend.
What You’ll Need:
* Baking soda
* White vinegar
* Water
* Dish soap
* Sponge or scouring pad
Step-by-Step Instructions:
1. Cover the Bottom: Sprinkle a generous layer of baking soda over the burnt food.
2. Add Vinegar: Pour a layer of white vinegar over the baking soda. It will fizz.
3. Add Water: Add enough water to cover the burnt food.
4. Boil it Up: Bring the mixture to a boil on the stovetop.
5. Simmer and Scrape: Reduce the heat and simmer for 10-15 minutes, scraping the bottom of the pot or pan with a wooden spoon or spatula.
6. Cool and Wash:
Conclusion
So, there you have it! This simple yet incredibly effective DIY cleaning trick is a game-changer for anyone looking to maintain a sparkling clean home without breaking the bank or relying on harsh chemicals. We’ve shown you how to harness the power of readily available ingredients to tackle common household messes with ease.
Why is this a must-try? Because it’s not just about cleaning; it’s about creating a healthier, more sustainable living environment. It’s about saving money, reducing waste, and knowing exactly what you’re using to clean the surfaces your family touches every day. It’s about empowering yourself to take control of your cleaning routine and achieve professional-level results with minimal effort.
But don’t just take our word for it. The real magic happens when you try it yourself. Imagine effortlessly wiping away stubborn grime, banishing unpleasant odors, and restoring the shine to your surfaces, all with a solution you made in minutes. Think of the satisfaction of knowing you’re contributing to a cleaner planet while enjoying a cleaner home.
Ready to elevate your cleaning game?
Here are a few suggestions and variations to get you started:
* **For extra stubborn stains:** Add a tablespoon of baking soda to your cleaning solution for added scrubbing power. The gentle abrasive nature of baking soda can help lift even the most persistent messes.
* **To customize the scent:** Experiment with different essential oils to create a cleaning solution that smells divine. Lavender, lemon, tea tree, and eucalyptus are all excellent choices for their antibacterial and antiviral properties, as well as their refreshing aromas.
* **For delicate surfaces:** Always test your cleaning solution in an inconspicuous area first to ensure it doesn’t cause any damage or discoloration. Dilute the solution further if necessary.
* **To clean your microwave:** Heat a cup of the solution in your microwave for a few minutes. The steam will loosen any splatters and make them easy to wipe away.
* **To freshen your garbage disposal:** Pour the solution down your garbage disposal and let it sit for a few minutes before running the water. This will help eliminate odors and keep your disposal clean.
We are confident that once you experience the effectiveness and versatility of this DIY cleaning trick, you’ll wonder how you ever lived without it. It’s a simple, sustainable, and satisfying way to keep your home looking its best.
Now, it’s your turn! We encourage you to try this **genius house cleaning tip** and see the amazing results for yourself. Don’t be afraid to experiment with different variations and find what works best for you and your home.
Most importantly, we want to hear about your experience! Share your before-and-after photos, your favorite variations, and any tips or tricks you discover along the way. Let’s create a community of clean-home enthusiasts who are passionate about sustainable and effective cleaning solutions. Leave a comment below and let us know how this DIY cleaning trick has transformed your home! We can’t wait to hear from you.
FAQ
Here are some frequently asked questions about this DIY cleaning trick to help you get started:
What exactly is the “genius house cleaning tip” you’re referring to?
The “genius house cleaning tip” refers to using a homemade cleaning solution made from readily available ingredients like vinegar, baking soda, lemon juice, and essential oils. The specific recipe can vary depending on the cleaning task, but the core principle is to create a powerful and effective cleaner without harsh chemicals.
Is this DIY cleaning solution safe to use around children and pets?
Generally, yes, this DIY cleaning solution is safer than many commercial cleaners because it avoids harsh chemicals and synthetic fragrances. However, it’s still important to exercise caution. Keep the solution out of reach of children and pets. If you’re using essential oils, research their safety for pets, as some can be toxic. Always ensure surfaces are dry before allowing children or pets to come into contact with them. If you have any concerns, consult with your pediatrician or veterinarian.
Can I use this cleaning solution on all surfaces?
No, not all surfaces are suitable for this DIY cleaning solution. Avoid using vinegar-based solutions on natural stone surfaces like marble or granite, as the acidity can etch and damage them. Also, be cautious when using it on wood, especially unfinished wood, as it can cause discoloration or warping. Always test the solution in an inconspicuous area first to ensure it doesn’t cause any damage.
How long does this DIY cleaning solution last?
The shelf life of this DIY cleaning solution depends on the ingredients used. Solutions containing fresh lemon juice are best used within a week or two, as the lemon juice can spoil. Solutions made with vinegar and essential oils can last for several months. Store the solution in a cool, dark place in a tightly sealed container to prolong its shelf life. If the solution changes color, develops an odor, or shows signs of mold growth, discard it.
What are the benefits of using a DIY cleaning solution instead of commercial cleaners?
There are numerous benefits to using a DIY cleaning solution:
* **Cost-effective:** DIY cleaning solutions are significantly cheaper than commercial cleaners.
* **Environmentally friendly:** They reduce your reliance on plastic packaging and harsh chemicals that can pollute the environment.
* **Healthier:** They eliminate exposure to potentially harmful chemicals and synthetic fragrances found in many commercial cleaners.
* **Customizable:** You can tailor the ingredients and scents to your preferences and needs.
* **Transparency:** You know exactly what’s in your cleaning solution, giving you peace of mind.
What essential oils are best to use in this DIY cleaning solution?
Several essential oils are excellent choices for DIY cleaning solutions, each offering unique benefits:
* **Lemon:** Has a refreshing scent and powerful degreasing properties.
* **Tea Tree:** Possesses antibacterial, antiviral, and antifungal properties.
* **Lavender:** Has a calming scent and antibacterial properties.
* **Eucalyptus:** Has a refreshing scent and antiseptic properties.
* **Peppermint:** Has a refreshing scent and insect-repelling properties.
When using essential oils, be sure to use high-quality, pure essential oils and follow dilution guidelines.
How do I dilute the cleaning solution for different cleaning tasks?
The dilution ratio will depend on the specific cleaning task and the concentration of your ingredients. As a general guideline:
* **For general cleaning:** Use a 1:1 ratio of vinegar to water.
* **For tougher stains:** Use a 2:1 ratio of vinegar to water.
* **For delicate surfaces:** Use a 1:3 ratio of vinegar to water.
Always start with a more diluted solution and increase the concentration as needed.
Can I use this cleaning solution to clean my toilet?
Yes, you can use this cleaning solution to clean your toilet. Pour a cup of the solution into the toilet bowl and let it sit for 15-30 minutes. Then, scrub the bowl with a toilet brush and flush. For extra cleaning power, add a tablespoon of baking soda to the bowl before scrubbing.
What if I don’t have vinegar? Can I use something else?
If you don’t have vinegar, you can use lemon juice as a substitute, although it may not be as effective for all cleaning tasks. Lemon juice has natural antibacterial and degreasing properties. You can also try using a diluted solution of castile soap.
How do I get rid of the vinegar smell after cleaning?
The vinegar smell will dissipate quickly on its own. You can speed up the process by opening windows to ventilate the area. Adding essential oils to your cleaning solution can also help mask the vinegar smell.

Leave a Comment