

Grow angled luffa at home and unlock a world of natural sponges right in your backyard! Have you ever imagined harvesting your own eco-friendly, exfoliating wonders? This isn’t just about gardening; it’s about embracing a sustainable lifestyle and connecting with nature in a truly unique way. For centuries, luffa, also known as angled gourd or Chinese okra, has been cultivated in Asia, not only for its delicious edible young fruits but also for its mature fibrous skeleton – the perfect natural sponge.
But why should you bother with growing your own luffa? Well, think about it: ditching those synthetic, plastic-based sponges that end up polluting our landfills. Plus, imagine the satisfaction of gifting a homegrown, handcrafted sponge to your friends and family! This DIY project is more than just a gardening trick; it’s a step towards a greener, healthier you. I’m excited to share some simple yet effective tips and tricks that will help you successfully grow angled luffa at home, even if you’re a beginner gardener. Get ready to transform your garden into a sustainable sponge factory!
Grow Angled Luffa at Home: A Comprehensive DIY Guide
Hey there, fellow gardening enthusiasts! Ever dreamt of growing your own natural sponges? Well, angled luffa, also known as Chinese okra or ridged gourd, is your answer! It’s surprisingly easy to cultivate at home, and the satisfaction of harvesting your own bath scrubbies is truly rewarding. This guide will walk you through every step, from seed to sponge, ensuring you have a thriving luffa crop.
Choosing the Right Variety and Starting Seeds
Before we dive into the nitty-gritty, let’s talk about variety. While all luffa species produce sponges, *Luffa acutangula* (angled luffa) is generally preferred for its ease of growth and slightly softer texture compared to *Luffa aegyptiaca* (smooth luffa).
Here’s what you’ll need to get started with seeds:
* Angled luffa seeds
* Seed starting trays or small pots (2-3 inches in diameter)
* Seed starting mix (a light, well-draining mix is crucial)
* Heat mat (optional, but highly recommended for faster germination)
* Spray bottle with water
* Grow lights (if starting indoors early in the season)
Now, let’s get those seeds germinating!
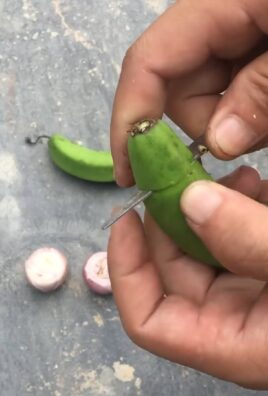
1. Scarify the Seeds (Optional but Recommended): Luffa seeds have a tough outer shell. To speed up germination, gently scarify them. You can do this by lightly rubbing the seeds with sandpaper or nicking them with a knife. Be careful not to damage the inner seed!
2. Soak the Seeds: Place the scarified seeds in a small bowl of lukewarm water and let them soak for 24-48 hours. This helps soften the seed coat and encourages germination.
3. Prepare the Seed Starting Trays: Fill your seed starting trays or pots with seed starting mix. Moisten the mix thoroughly with water, allowing excess water to drain.
4. Sow the Seeds: Make a small hole (about 1/2 inch deep) in the center of each pot or cell. Place one seed in each hole and cover it gently with the seed starting mix.
5. Water Gently: Use a spray bottle to gently water the surface of the soil. Avoid overwatering, as this can lead to rot.
6. Provide Warmth: Luffa seeds need warmth to germinate. Place the seed starting trays on a heat mat, if you have one. The ideal soil temperature is between 70-85°F (21-29°C).
7. Provide Light: If you’re starting seeds indoors early in the season (6-8 weeks before the last expected frost), place the trays under grow lights. Provide 14-16 hours of light per day.
8. Maintain Moisture: Keep the soil consistently moist, but not soggy. Check the moisture level daily and water as needed.
9. Be Patient: Germination can take anywhere from 7-21 days, depending on the temperature and seed quality. Once the seedlings emerge, remove them from the heat mat and continue to provide light and water.
Preparing the Garden Bed and Transplanting Seedlings
Luffa vines are vigorous growers and need plenty of space and sunshine. Choose a location that receives at least 6-8 hours of direct sunlight per day.
Here’s what you’ll need to prepare your garden bed:
* Well-draining soil (amend with compost if necessary)
* Compost or well-rotted manure
* Trellis or sturdy support structure (at least 6-8 feet tall)
* Gardening gloves
* Trowel or shovel
Now, let’s get that garden bed ready!
1. Choose a Sunny Location: As mentioned, luffa needs lots of sun. Pick a spot in your garden that gets plenty of it.
2. Prepare the Soil: Luffa prefers well-draining soil that is rich in organic matter. Amend the soil with compost or well-rotted manure to improve drainage and fertility.
3. Build a Trellis: Luffa vines are heavy and need a strong trellis to support their growth. You can use a wooden trellis, a metal fence, or even a sturdy pergola. Make sure the trellis is at least 6-8 feet tall. I’ve even seen people use old ladders!
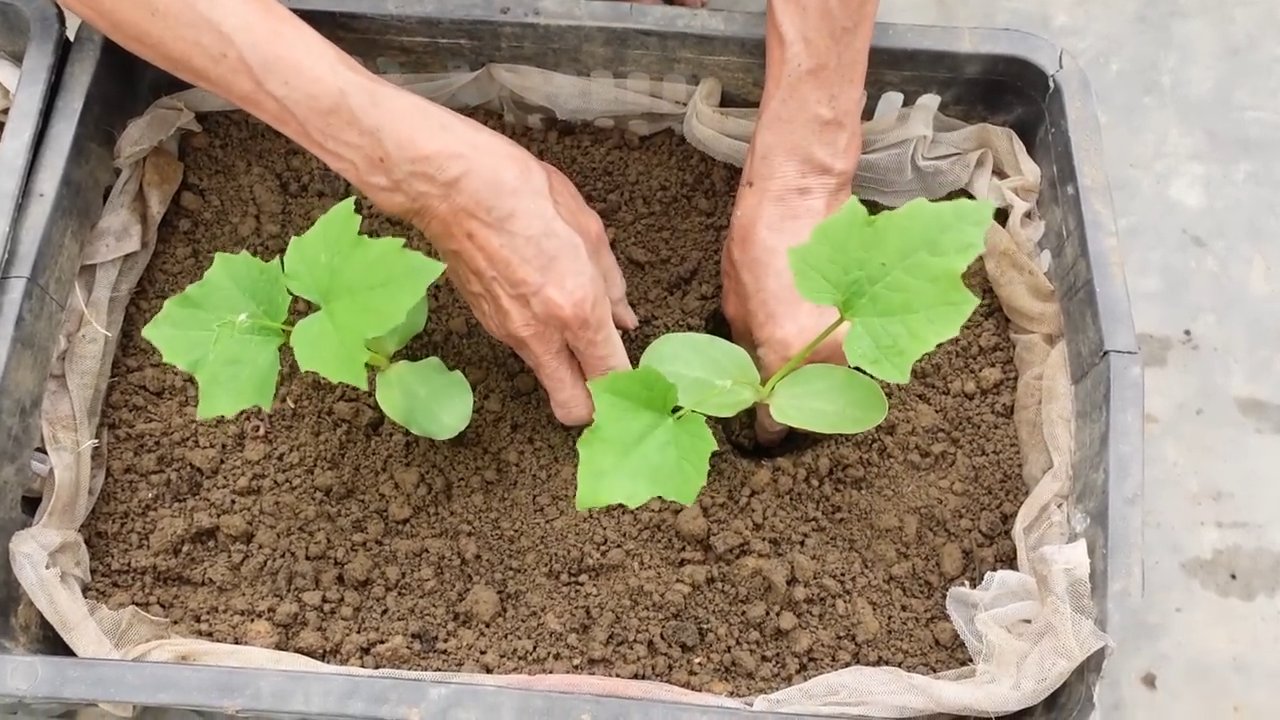
4. Harden Off Seedlings: Before transplanting your seedlings outdoors, you need to harden them off. This means gradually exposing them to outdoor conditions over a period of 7-10 days. Start by placing the seedlings in a sheltered location outdoors for a few hours each day, gradually increasing the amount of time they spend outside.
5. Transplant Seedlings: Once the seedlings are hardened off and the danger of frost has passed, it’s time to transplant them into the garden. Space the seedlings about 2-3 feet apart along the base of the trellis.
6. Water Thoroughly: After transplanting, water the seedlings thoroughly.
Caring for Your Luffa Vines
Once your luffa vines are established, they’re relatively easy to care for. Here’s what you need to do:
* Water regularly, especially during dry periods.
* Fertilize every 2-3 weeks with a balanced fertilizer.
* Prune the vines to encourage branching and fruit production.
* Monitor for pests and diseases.
Let’s break down each of these points:
1. Watering: Luffa vines need consistent moisture, especially during hot weather. Water deeply and regularly, ensuring the soil is moist but not waterlogged. Drip irrigation is a great option for luffa, as it delivers water directly to the roots.
2. Fertilizing: Luffa vines are heavy feeders and benefit from regular fertilization. Use a balanced fertilizer (e.g., 10-10-10) every 2-3 weeks. You can also side-dress the plants with compost or well-rotted manure.
3. Pruning: Pruning can help encourage branching and fruit production. Remove any dead or diseased leaves and stems. You can also pinch back the tips of the vines to encourage them to branch out.
4. Pest and Disease Control: Luffa vines are generally resistant to pests and diseases, but they can be susceptible to problems like squash bugs, aphids, and powdery mildew. Inspect your plants regularly for signs of pests or diseases and take action promptly. Insecticidal soap or neem oil can be used to control many common pests. For powdery mildew, improve air circulation and apply a fungicide if necessary.
5. Training the Vines: As the luffa vines grow, you’ll need to train them to climb the trellis. Gently guide the vines up the trellis and tie them in place with twine or plant ties.
Harvesting and Processing Your Luffa Sponges
The real magic happens when it’s time to harvest and process your luffa sponges!
Here’s what you’ll need:
* Sharp knife or pruning shears
* Gloves
* Bucket of water
* Sunlight
Let’s get those sponges ready!
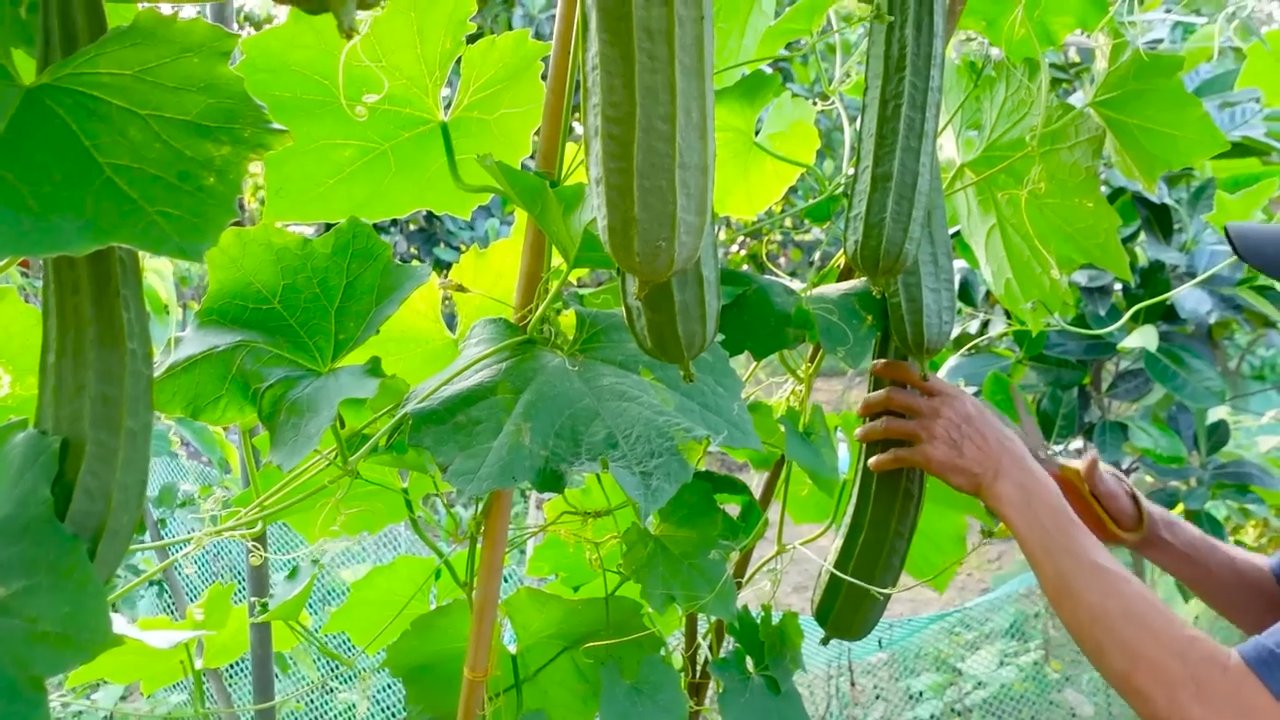
1. Harvesting: Luffa fruits are ready to harvest when they turn yellow or brown and the skin begins to dry and separate from the flesh. The fruit should feel lightweight and hollow. If you wait too long, the fruit will become too dry and brittle.
2. Peeling: Use a sharp knife or pruning shears to cut the luffa fruit from the vine. Wear gloves to protect your hands from the rough skin. To peel the luffa, gently squeeze the fruit to crack the skin. Then, peel away the skin, starting from the stem end.
3. Seed Removal: Once the skin is removed, shake out the seeds. You can save these seeds for planting next year!
4. Washing: Rinse the luffa sponge thoroughly with water to remove any remaining flesh or debris. You can use a hose or soak the sponge in a bucket of water.
5. Drying: Hang the luffa sponge in a sunny location to dry completely. This can take several days or even weeks, depending on the weather. Make sure the sponge is completely dry before storing it, to prevent mold growth.
6. Bleaching (Optional): If you want a whiter sponge, you can soak it in a diluted bleach solution (1 part bleach to 10 parts water) for a few minutes. Rinse the sponge thoroughly with water after bleaching.
7. Cutting and Shaping: Once the sponge is dry, you can cut it into smaller pieces or shape it to your liking. Use a sharp knife or scissors to cut the sponge.
Storing Your Luffa Sponges
Proper storage is key to keeping your luffa sponges fresh and usable. Store them in a dry, well-ventilated area. Avoid storing them in damp or humid conditions, as
Conclusion
So, there you have it! Growing angled luffa at home, especially with our angled approach, isn’t just about cultivating a unique vegetable; it’s about embracing a sustainable lifestyle, connecting with nature, and enjoying the unparalleled satisfaction of harvesting something you nurtured from seed to sponge. Forget those mass-produced, often chemically treated sponges from the store. Imagine the pride you’ll feel using a completely natural, homegrown luffa in your kitchen, bathroom, or even as a gentle exfoliant.
This method of growing angled luffa offers several advantages. By training the vines to grow at an angle, you maximize sunlight exposure, promote better air circulation (reducing the risk of fungal diseases), and encourage straighter, more uniform fruit development. This translates to higher quality luffa sponges that are easier to process and use. Plus, the visual appeal of a trellis laden with perfectly angled luffa is simply stunning! It transforms your garden into a conversation starter and a testament to your green thumb.
But the beauty of this DIY project lies in its adaptability. Feel free to experiment with different trellis designs. A simple A-frame trellis works wonders, but you could also get creative with arches, tunnels, or even repurpose old materials like ladders or fencing. Consider companion planting to further enhance your luffa’s growth. Marigolds can deter pests, while basil can improve the flavor of nearby vegetables.
Don’t be afraid to try different varieties of angled luffa. Some produce larger, coarser sponges, while others are finer and more delicate. Explore your local seed catalogs or online retailers to find the perfect fit for your needs and preferences. You can even save seeds from your best-performing plants to ensure a continuous supply of homegrown luffa for years to come.
The process of growing angled luffa is incredibly rewarding. From the initial excitement of planting the seeds to the anticipation of the first sprouts, and finally, the joy of harvesting your own natural sponges, it’s an experience that connects you to the earth in a profound way. It’s a tangible reminder of the power of nature and the satisfaction of self-sufficiency.
We wholeheartedly encourage you to give this DIY trick a try. It’s easier than you might think, and the rewards are well worth the effort. Once you’ve experienced the joy of using your own homegrown luffa, you’ll never go back to store-bought sponges again.
And most importantly, we want to hear about your experiences! Share your photos, tips, and challenges in the comments below. Let’s create a community of angled luffa enthusiasts and learn from each other. Together, we can unlock the full potential of this amazing plant and enjoy the countless benefits of growing our own natural sponges. So, grab your seeds, build your trellis, and get ready to embark on a rewarding journey of growing angled luffa at home! Let us know how your angled luffa growing goes!
FAQ
Frequently Asked Questions About Growing Angled Luffa
1. What exactly is angled luffa, and how is it different from regular luffa?
Angled luffa (Luffa acutangula), also known as Chinese okra or ridged gourd, is a vine-grown vegetable that belongs to the cucumber family. Unlike smooth luffa (Luffa aegyptiaca), angled luffa has prominent ridges running along its length. When young, it’s edible and used in various cuisines. As it matures, the flesh dries out, leaving behind a fibrous skeleton that can be processed into a natural sponge. The angled ridges contribute to a slightly different texture in the sponge compared to smooth luffa.
2. When is the best time to plant angled luffa seeds?
Angled luffa requires a long growing season (around 150-200 days) and warm temperatures. Start seeds indoors 6-8 weeks before the last expected frost. Transplant seedlings outdoors after the danger of frost has passed and the soil has warmed up to at least 65°F (18°C). If you live in a region with a short growing season, consider starting seeds even earlier or using a greenhouse to extend the growing period.
3. What are the ideal growing conditions for angled luffa?
Angled luffa thrives in full sun (at least 6-8 hours of direct sunlight per day) and well-drained soil that is rich in organic matter. The soil pH should be between 6.0 and 7.0. Provide consistent moisture, especially during hot and dry periods. Regular fertilization with a balanced fertilizer will also promote healthy growth and abundant fruit production.
4. How do I train angled luffa vines to grow at an angle?
The key to growing angled luffa successfully is to provide a sturdy trellis or support structure. As the vines grow, gently guide them along the trellis at a 45-degree angle. You can use plant ties or clips to secure the vines in place. Pruning side shoots can also help to direct the plant’s energy towards the main stem and encourage more uniform fruit development. The angled growth promotes better air circulation and sunlight exposure, leading to healthier plants and higher quality sponges.
5. What are some common pests and diseases that affect angled luffa, and how can I prevent them?
Common pests that may attack angled luffa include aphids, squash bugs, and cucumber beetles. Diseases such as powdery mildew and downy mildew can also be a problem, especially in humid conditions. To prevent these issues, practice good garden hygiene, such as removing plant debris and weeds. Encourage beneficial insects like ladybugs and lacewings to control aphids. Use organic pesticides or fungicides if necessary, following the instructions carefully. Ensure good air circulation around the plants by spacing them properly and pruning excess foliage.
6. How do I know when to harvest angled luffa for sponges?
The best time to harvest angled luffa for sponges is when the fruit is fully mature and the skin has turned brown and dry. The fruit should feel lightweight and hollow. You can test for ripeness by gently shaking the luffa; if you hear the seeds rattling inside, it’s ready to harvest.
7. How do I process angled luffa into a sponge?
Once harvested, soak the luffa in water for a few days to soften the skin. Then, peel off the skin and remove the seeds. Rinse the sponge thoroughly to remove any remaining pulp. You can then bleach the sponge with a diluted bleach solution (1 part bleach to 10 parts water) to lighten its color and disinfect it. Rinse the sponge again and allow it to dry completely in the sun.
8. Can I eat angled luffa?
Yes, young angled luffa fruits are edible and can be used in various culinary dishes. They have a mild, slightly sweet flavor and a texture similar to zucchini. They can be stir-fried, steamed, added to soups and stews, or even eaten raw in salads. However, as the fruit matures, it becomes too fibrous to eat.
9. How long will a homegrown angled luffa sponge last?
With proper care, a homegrown angled luffa sponge can last for several months. Rinse the sponge thoroughly after each use and allow it to dry completely. Avoid using harsh chemicals or abrasive cleaners on the sponge. You can also sanitize the sponge periodically by soaking it in a diluted vinegar solution or boiling it for a few minutes.
10. Where can I find angled luffa seeds?
Angled luffa seeds can be found at many local garden centers, nurseries, and online seed retailers. Look for reputable seed companies that offer high-quality seeds and provide detailed growing instructions. You can also save seeds from your own plants to ensure a continuous supply for future seasons.

Leave a Comment