

Grow Bean Sprouts DIY: Unlock the secrets to fresh, crunchy sprouts right in your kitchen! Forget those pricey supermarket containers – I’m going to show you how incredibly easy and rewarding it is to cultivate your own bean sprouts at home. For centuries, bean sprouts have been a staple in Asian cuisine, prized not only for their delicate flavor and satisfying crunch but also for their impressive nutritional value. Think of them as tiny powerhouses packed with vitamins and enzymes, ready to boost your salads, stir-fries, and sandwiches.
But why should you bother with this DIY project? Well, for starters, it’s a fantastic way to save money and reduce your reliance on store-bought produce. Plus, you’ll have complete control over the growing process, ensuring that your sprouts are free from harmful chemicals and pesticides. Imagine the satisfaction of harvesting your own fresh, organic bean sprouts whenever you need them! In this article, I’ll guide you through a simple, step-by-step method to grow bean sprouts DIY, even if you have zero gardening experience. Get ready to embark on a fun and delicious journey into the world of home sprouting!
Grow Your Own Crunchy Bean Sprouts at Home!
Forget buying those limp, sad-looking bean sprouts at the grocery store! I’m going to show you how incredibly easy it is to grow your own fresh, crunchy, and delicious bean sprouts right in your kitchen. Trust me, once you taste homemade sprouts, you’ll never go back. Plus, it’s a super rewarding and budget-friendly project.
What You’ll Need
Before we dive in, let’s gather our supplies. The best part? You probably already have most of these things lying around!
* **Bean Seeds:** Mung beans are the most common and easiest to sprout, but you can also use adzuki beans, lentils, chickpeas, or even radish seeds for a spicier sprout. Make sure they are specifically labeled for sprouting or food use, not for planting in the garden. About 1/4 to 1/2 cup of dry beans is a good starting point.
* **A Wide-Mouthed Jar:** A quart-sized mason jar works perfectly. You could also use a clean glass container.
* **Sprouting Lid or Cheesecloth:** You’ll need something to cover the jar that allows for drainage and airflow. A sprouting lid is ideal, but a piece of cheesecloth secured with a rubber band works just as well.
* **Water:** Clean, filtered water is best.
* **A Dark Place:** Sprouts need darkness to grow properly. A cupboard, pantry, or even a covered bowl will do the trick.
* **A Bowl or Tray:** To catch any excess water that drains from the jar.
Getting Started: Soaking the Beans
This is a crucial first step to wake up those dormant beans and get them ready to sprout.
1. **Rinse the Beans:** Place your bean seeds in a colander and rinse them thoroughly under cool water. This removes any dust or debris.
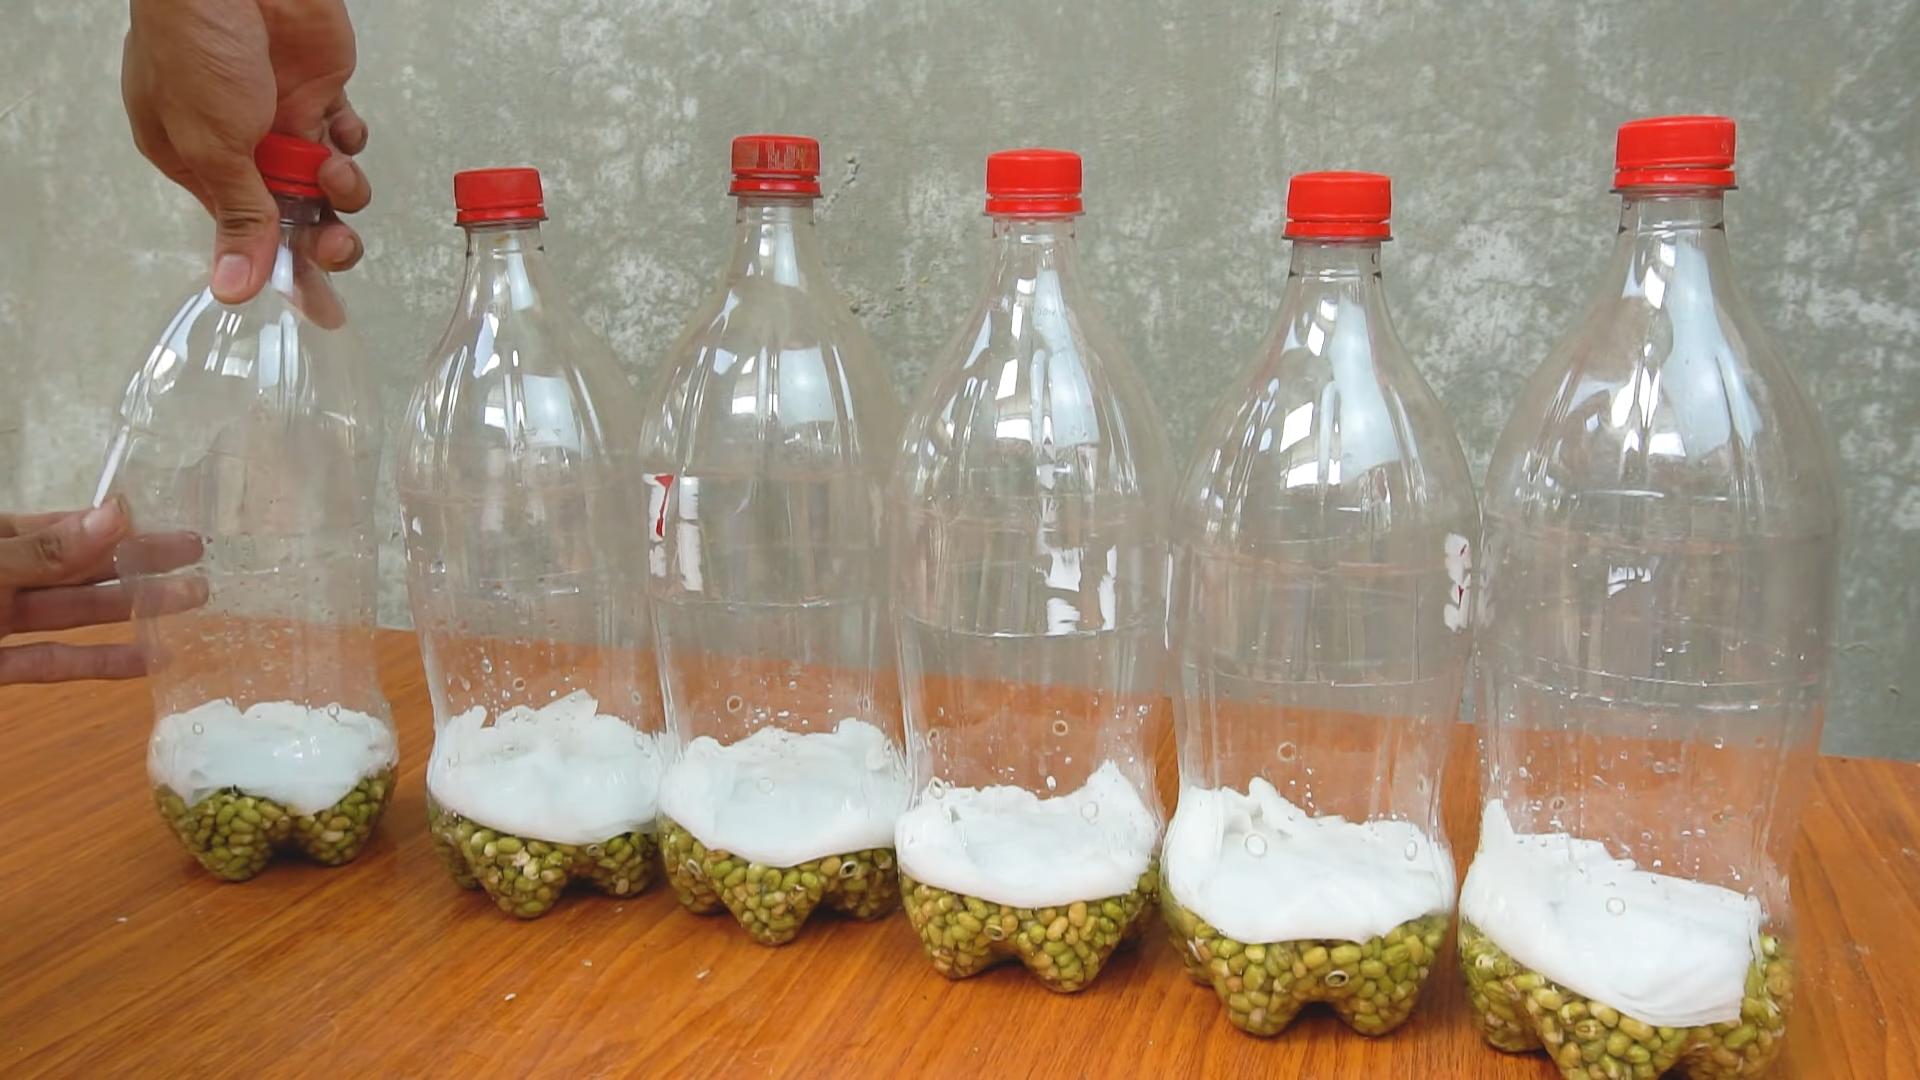
2. **Transfer to the Jar:** Put the rinsed beans into your wide-mouthed jar.
3. **Add Water:** Cover the beans with plenty of cool, filtered water. You’ll want at least 2-3 times the volume of water to beans, as they will absorb a lot of it.
4. **Secure the Lid:** Cover the jar with your sprouting lid or cheesecloth and rubber band.
5. **Soak for 8-12 Hours:** Let the beans soak in a dark place at room temperature for 8-12 hours. I usually soak them overnight so they’re ready to go in the morning.
The Sprouting Process: Rinse and Repeat!
This is where the magic happens! The key to successful sprouting is consistent rinsing and draining.
1. **Drain the Soaking Water:** After the soaking period, drain all the water from the jar through the sprouting lid or cheesecloth. Make sure to get rid of all the water; you don’t want the beans sitting in it.
2. **Rinse Thoroughly:** Rinse the beans with fresh, cool water. Swirl the water around to ensure all the beans are rinsed.
3. **Drain Again:** Drain all the rinse water completely.
4. **Invert the Jar:** Place the jar upside down in a bowl or tray at an angle. This allows any remaining water to drain out and provides good airflow.
5. **Darkness is Key:** Return the jar to a dark place.
6. **Repeat 2-3 Times Daily:** Rinse and drain the beans 2-3 times a day. Consistency is important to prevent mold and ensure even sprouting.
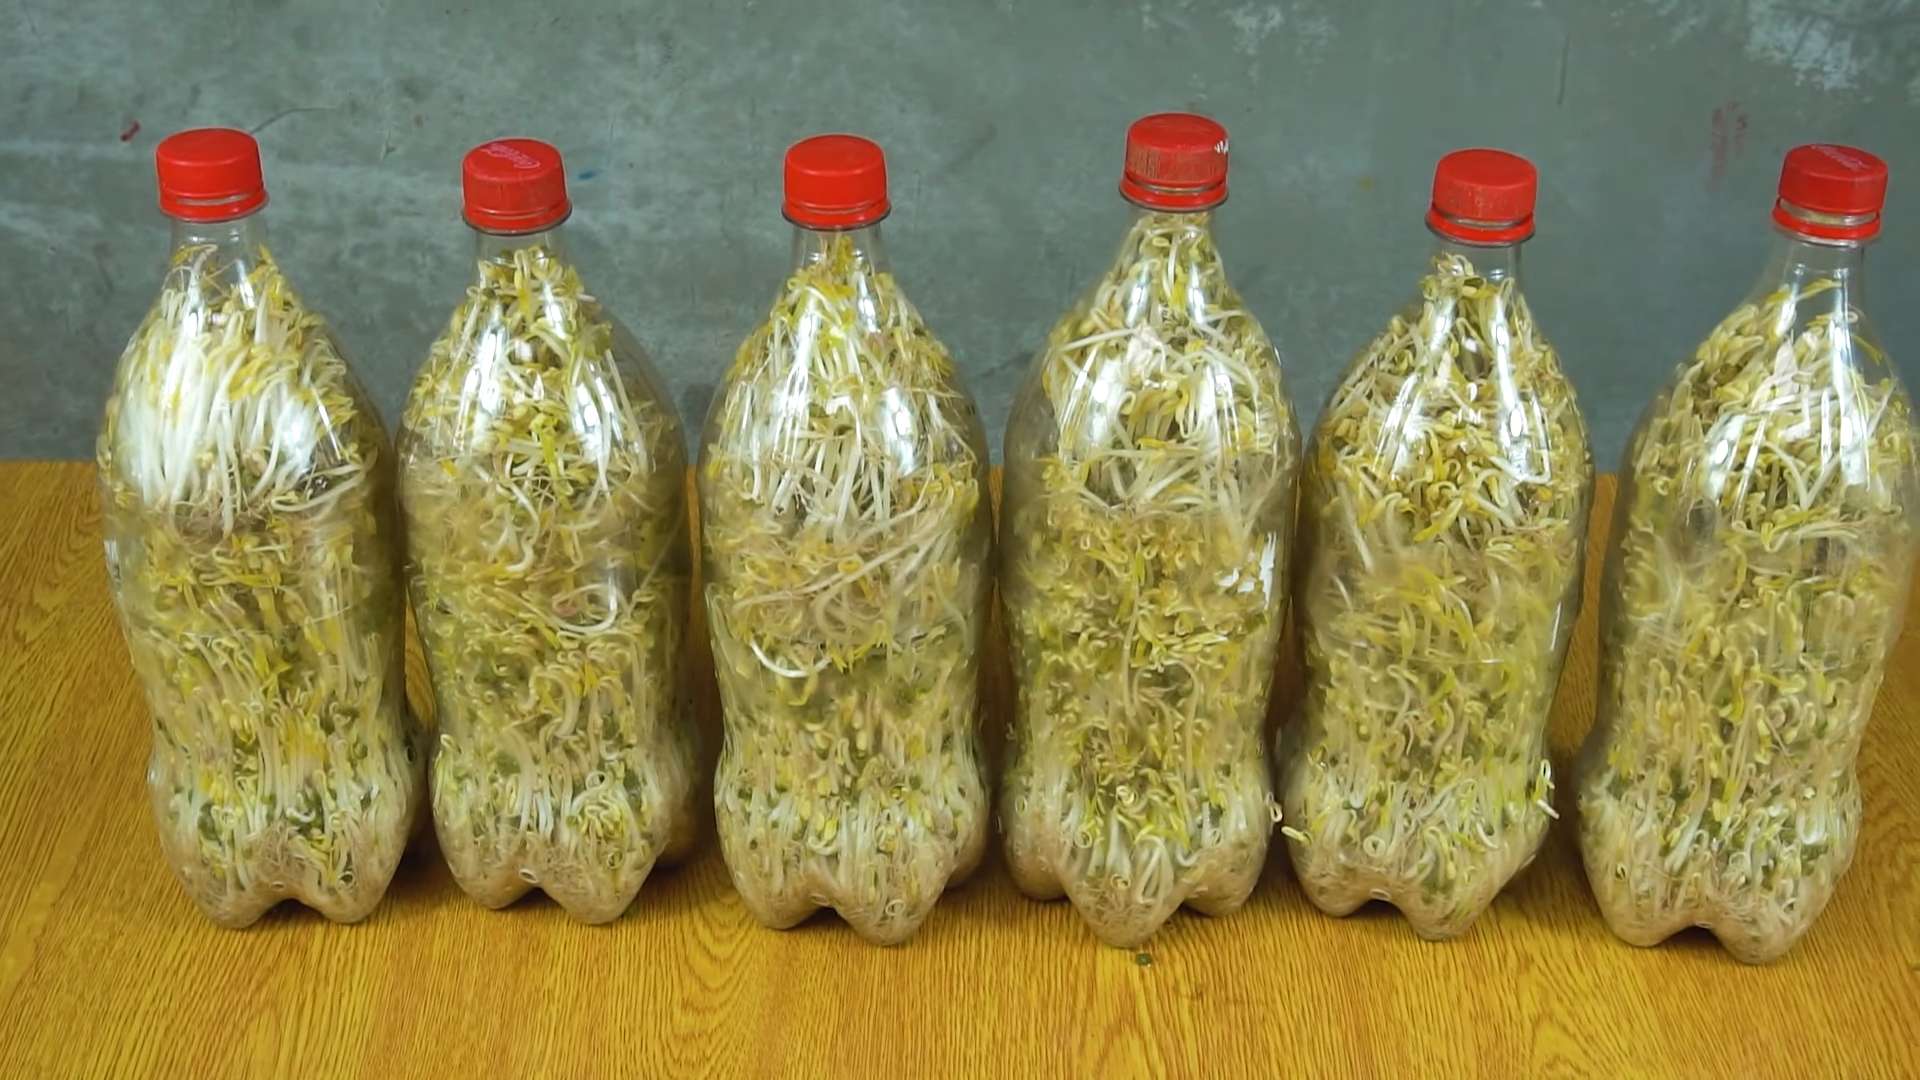
7. **Observe the Sprouts:** You should start to see tiny sprouts emerging within 12-24 hours. As they grow, they’ll fill the jar.
Harvesting and Storing Your Sprouts
After a few days of rinsing and draining, your bean sprouts will be ready to harvest!
1. **Check for Readiness:** The sprouts are usually ready in 3-5 days, depending on the type of bean and your desired sprout length. They should be crisp and white with small green leaves starting to appear.
2. **Final Rinse:** Give the sprouts a final thorough rinse to remove any remaining seed hulls. You can gently rub them between your hands to help loosen the hulls.
3. **Drain Well:** Drain the sprouts very well. Excess moisture will cause them to spoil faster.
4. **Optional: Green Them Up:** If you want greener sprouts, you can expose them to indirect sunlight for a few hours before harvesting. Be careful not to put them in direct sunlight, as this can overheat them.
5. **Storage:** Store the sprouts in a clean container lined with a paper towel in the refrigerator. They should last for up to a week. Change the paper towel every day or two to absorb excess moisture.
Troubleshooting: Common Sprouting Problems and Solutions
Even with the best intentions, sometimes things can go wrong. Here are some common issues and how to fix them:
* **Mold:** Mold is usually caused by insufficient rinsing or poor drainage. If you see mold, discard the entire batch. To prevent mold, make sure you’re rinsing thoroughly 2-3 times a day and that the jar is draining well.
* **Rotting Smell:** A rotting smell indicates that the beans are decaying, usually due to overwatering or poor airflow. Discard the batch and start over. Ensure proper drainage and airflow in future batches.
* **Slow Sprouting:** Slow sprouting can be caused by several factors, including old seeds, cold temperatures, or insufficient soaking. Make sure your seeds are fresh, keep the jar at room temperature, and ensure the beans are soaked for the full 8-12 hours.
* **Bitter Taste:** A bitter taste can be caused by exposing the sprouts to too much light. Keep them in a dark place during the sprouting process.
* **Uneven Sprouting:** Uneven sprouting can be caused by inconsistent rinsing or uneven distribution of beans in the jar. Make sure you’re rinsing thoroughly and swirling the water around to ensure all the beans are rinsed.
Tips and Tricks for Sprouting Success
Here are a few extra tips to help you become a sprouting pro:
* Use fresh, high-quality seeds. Old seeds may not sprout well.
* Don’t overcrowd the jar. Start with a smaller amount of beans if you’re new to sprouting.
* Rinse with cool water. Warm water can encourage mold growth.
* Ensure good airflow. Proper drainage and airflow are essential for preventing mold.
* Experiment with different types of beans. Mung beans are the easiest, but you can also try adzuki beans, lentils, chickpeas, or radish seeds.
* Enjoy your sprouts in salads, sandwiches, stir-fries, or as a crunchy topping for soups.
* Keep a sprouting journal. Note the type of bean, soaking time, rinsing frequency, and harvest time. This will help you fine-tune your sprouting process.
* Consider investing in a multi-tiered sprouting system. If you plan to sprout regularly, a multi-tiered system can make the process even easier.
Beyond Mung Beans: Exploring Other Sprouting Options
While mung beans are the classic choice, don’t limit yourself! The world of sprouting is vast and delicious. Here are a few other options to explore:
* **Adzuki Beans:** These have a slightly sweeter and nuttier flavor than mung beans.
* **Lentils:** Lentil sprouts are packed with protein and fiber. They have a mild, earthy flavor.
* **Chickpeas:** Chickpea sprouts are larger and have a slightly crunchy texture.
* **Radish Seeds:** Radish sprouts are spicy and peppery, adding a kick to salads and sandwiches.
* **Alfalfa Seeds:** Alfalfa sprouts are delicate and have a mild, grassy flavor.
* **Broccoli Seeds:** Broccoli sprouts are incredibly nutritious, packed with antioxidants and sulforaphane.
Remember to research the specific sprouting requirements for each type of seed, as soaking and sprouting times may vary.
Sprouting for Health: Why You Should Grow Your Own
Beyond the delicious taste and satisfying process, sprouting offers significant health benefits.
* Increased Nutrient Availability: Sprouting increases the bioavailability of vitamins and minerals in beans and seeds.
* Improved Digestion: Sprouting breaks down complex carbohydrates, making them easier to digest.
* Higher Enzyme Content: Sprouts are rich in enzymes, which aid in digestion and nutrient absorption.
* Rich in Antioxidants: Sprouts are packed with antioxidants, which protect against cell damage.
* Good Source of Fiber: Sprouts are a good source of fiber, which promotes digestive health.
* Cost-Effective and Sustainable: Growing your own sprouts is a budget-friendly and sustainable way to add fresh, nutritious food to your diet.
So, what are you waiting for? Grab some beans and a jar, and get sprouting! It’s a fun, easy, and rewarding way to enjoy fresh, healthy food right from your own kitchen. Happy sprouting!
Conclusion
So, there you have it! Growing your own bean sprouts at home is not only incredibly easy and cost-effective, but it also provides you with a constant supply of fresh, nutritious ingredients right at your fingertips. Forget those limp, pre-packaged sprouts from the grocery store – with this simple DIY trick, you can enjoy crisp, flavorful bean sprouts whenever you want.
The beauty of this method lies in its simplicity. You don’t need any fancy equipment or specialized knowledge. Just a jar, some beans, water, and a little patience. The minimal effort required yields a surprisingly large return, making it a truly rewarding experience. Plus, you have complete control over the growing process, ensuring that your sprouts are free from any unwanted additives or preservatives.
But the benefits extend beyond just convenience and cost savings. Homegrown bean sprouts are bursting with flavor and nutrients. They add a delightful crunch to salads, sandwiches, stir-fries, and countless other dishes. They are a fantastic source of vitamins, minerals, and enzymes, contributing to a healthier and more balanced diet.
Don’t be afraid to experiment with different types of beans. While mung beans are the most common choice for sprouting, you can also try adzuki beans, lentils, or even chickpeas. Each variety offers a unique flavor profile and texture, allowing you to customize your sprouts to suit your preferences. Consider adding a touch of lemon juice or apple cider vinegar to the rinsing water for an extra boost of flavor and to help prevent mold growth. You can also adjust the sprouting time to achieve your desired sprout length and crispness. Some people prefer shorter sprouts with a more delicate flavor, while others prefer longer sprouts with a more pronounced crunch.
This DIY grow bean sprouts method is a game-changer for anyone looking to add fresh, healthy ingredients to their diet without breaking the bank. It’s a fun and educational activity that can be enjoyed by people of all ages. Imagine the satisfaction of harvesting your own sprouts and incorporating them into your favorite meals.
We highly encourage you to give this DIY trick a try. It’s a simple, rewarding, and delicious way to enhance your culinary creations. Once you experience the joy of growing your own bean sprouts, you’ll never go back to store-bought again.
And most importantly, we want to hear about your experience! Share your photos, tips, and variations in the comments below. Let us know what types of beans you tried, what dishes you used your sprouts in, and any challenges you encountered along the way. Your feedback will help other readers learn and improve their own sprouting techniques. Let’s build a community of sprout enthusiasts and spread the word about this amazing DIY trick!
Frequently Asked Questions (FAQ)
What types of beans are best for sprouting?
Mung beans are the most popular and readily available choice for sprouting, known for their mild flavor and reliable sprouting rate. However, you can also experiment with other types of beans and legumes, such as adzuki beans, lentils, chickpeas, and even alfalfa seeds. Each variety offers a unique flavor and texture profile. Keep in mind that some beans, like kidney beans, should not be sprouted raw as they contain toxins that are neutralized by cooking. Always research the specific type of bean before sprouting to ensure it is safe to consume raw.
How long does it take to grow bean sprouts?
The sprouting time typically ranges from 3 to 5 days, depending on the type of bean, the temperature, and the humidity. Mung beans usually sprout within 3 to 4 days. You’ll know they’re ready when the sprouts are about 1-2 inches long and have a small root tail. Check your sprouts daily and adjust the sprouting time accordingly to achieve your desired length and crispness.
What kind of jar should I use?
A wide-mouth mason jar is ideal for sprouting beans. The wide mouth makes it easy to rinse and drain the beans. You can also use a glass jar with a mesh lid or cheesecloth secured with a rubber band. The key is to ensure proper ventilation and drainage to prevent mold growth. Avoid using plastic containers, as they can leach chemicals into the sprouts.
How often should I rinse the beans?
Rinse the beans at least twice a day, preferably in the morning and evening. This helps to keep them moist and prevents them from drying out or developing mold. Use cool, clean water for rinsing. Ensure that you drain the water thoroughly after each rinse.
How do I prevent mold growth?
Mold growth is a common concern when sprouting beans. To prevent it, ensure proper ventilation and drainage. Rinse the beans thoroughly at least twice a day and make sure to drain all the water after each rinse. Avoid overcrowding the jar with too many beans. You can also add a tablespoon of lemon juice or apple cider vinegar to the rinsing water to help inhibit mold growth. If you notice any signs of mold, discard the entire batch of sprouts.
Where should I store the jar while the beans are sprouting?
Store the jar in a cool, dark place, away from direct sunlight. Direct sunlight can cause the sprouts to turn bitter. A kitchen cabinet or pantry is a good option. The ideal temperature for sprouting is between 70-75°F (21-24°C).
How do I store the bean sprouts after they are grown?
Once the bean sprouts have reached your desired length, rinse them thoroughly and drain them well. Store them in an airtight container lined with a paper towel in the refrigerator. The paper towel will help to absorb excess moisture and keep the sprouts fresh. They should last for up to a week in the refrigerator.
Are there any health benefits to eating bean sprouts?
Yes, bean sprouts are a nutritional powerhouse. They are a good source of vitamins, minerals, and enzymes. They are also low in calories and high in fiber. Bean sprouts are known to aid digestion, boost the immune system, and promote overall health. They are a great addition to a healthy and balanced diet.
Can I sprout any type of seed or grain?
While beans are a popular choice for sprouting, you can also sprout other types of seeds and grains, such as alfalfa seeds, radish seeds, broccoli seeds, quinoa, and wheat berries. Each type of seed or grain requires slightly different sprouting conditions, so it’s important to research the specific requirements before you begin.
What if my bean sprouts don’t sprout?
If your bean sprouts don’t sprout, there could be several reasons. The beans may be old or damaged, the temperature may be too low, or the beans may not be getting enough moisture. Ensure that you are using fresh, high-quality beans and that you are rinsing them regularly. Also, make sure that the temperature is within the ideal range for sprouting. If you have tried these steps and the beans still don’t sprout, try using a different batch of beans.

Leave a Comment