

Grow Bird’s Eye Chili, and unlock a world of fiery flavor right in your own backyard! Have you ever dreamed of adding a zesty kick to your meals with chilies you’ve nurtured from seed to spice? This isn’t just about gardening; it’s about embarking on a culinary adventure, and I’m here to guide you every step of the way.
Chili peppers, including the potent Bird’s Eye variety, boast a rich history, tracing back to ancient civilizations in the Americas. For centuries, they’ve been prized not only for their heat but also for their medicinal properties and cultural significance. Imagine connecting with that history as you grow Bird’s Eye Chili in your own garden!
But why should you bother with this DIY project? Well, store-bought chilies can sometimes lack the vibrant flavor and intense heat you crave. Plus, knowing exactly where your food comes from and how it’s grown is incredibly satisfying. With a few simple tricks and hacks, you can cultivate a thriving chili plant, ensuring a constant supply of fresh, fiery peppers for your favorite dishes. Let’s dive in and discover the secrets to successfully growing these little firecrackers!
Growing Bird’s Eye Chili: A Fiery DIY Adventure!
Okay, chili lovers, buckle up! We’re about to embark on a journey to grow our own Bird’s Eye Chili peppers. These little guys pack a serious punch, and there’s nothing quite like the satisfaction of harvesting your own homegrown heat. I’m going to walk you through everything you need to know, from seed to spicy success.
What You’ll Need
Before we dive in, let’s gather our supplies. Here’s a checklist to make sure we’re ready to go:
* Bird’s Eye Chili Seeds: Obviously! Make sure you get them from a reputable source to ensure good germination rates.
* Seed Starting Tray or Small Pots: These will be our nurseries for the baby chili plants.
* Seed Starting Mix: This is a light, well-draining soil mix specifically designed for seedlings.
* Larger Pots (at least 5 gallons): Once the seedlings are big enough, they’ll need a bigger home.
* Potting Soil: A good quality potting mix is essential for healthy growth.
* Watering Can or Spray Bottle: For gentle watering.
* Grow Lights (Optional but Recommended): Especially if you’re starting seeds indoors during the colder months.
* Fertilizer: A balanced fertilizer for the vegetative stage and a bloom-boosting fertilizer for when the plants start flowering.
* Gardening Gloves: To keep your hands clean and protected.
* Small Shovel or Trowel: For transplanting.
* Pest Control (Optional): Neem oil or insecticidal soap, just in case.
* A Sunny Spot: Chili peppers love sunshine!
Phase 1: Starting from Seed
This is where the magic begins! Getting your seeds to sprout is the first hurdle, but don’t worry, I’ll guide you through it.
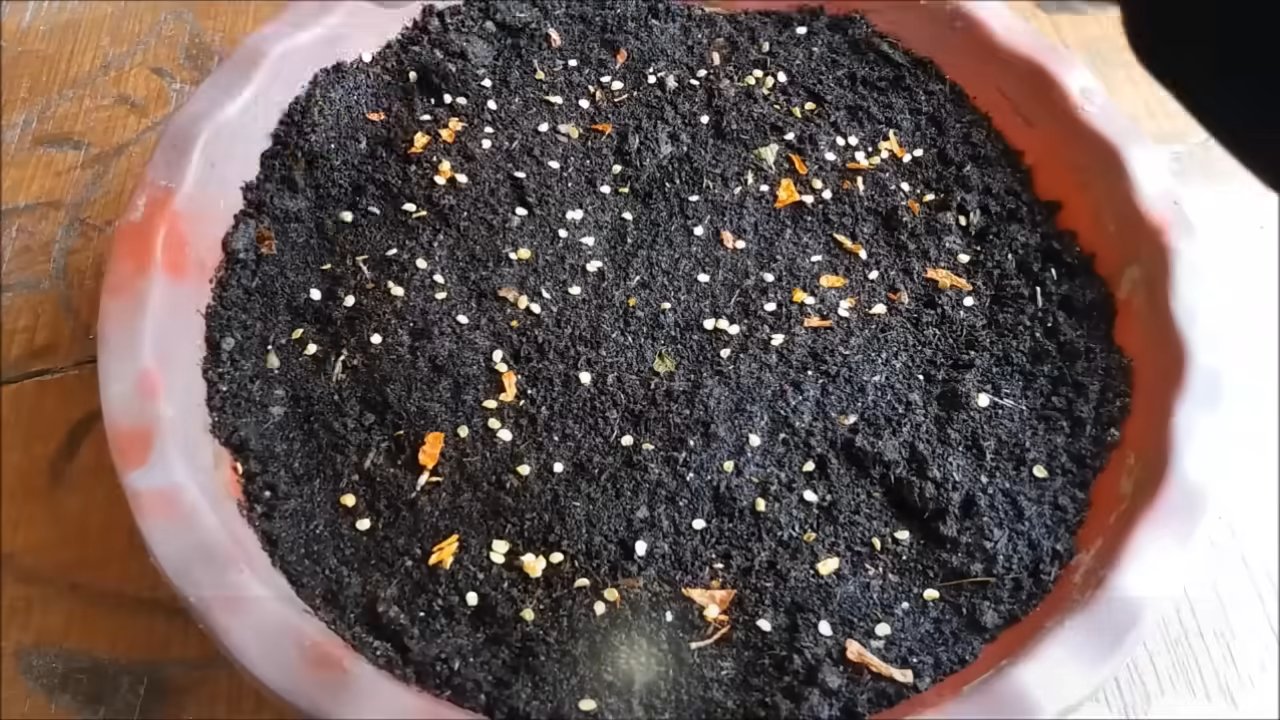
1. Prepare Your Seed Starting Tray or Pots: Fill your seed starting tray or small pots with seed starting mix. Gently pat it down, but don’t compact it too much. We want the roots to be able to easily penetrate the soil.
2. Sow the Seeds: Make a small indentation (about ¼ inch deep) in the center of each cell or pot. Place 1-2 chili seeds in each indentation. Cover the seeds with a thin layer of seed starting mix.
3. Water Gently: Use a spray bottle or watering can with a gentle nozzle to moisten the soil. Avoid overwatering, as this can lead to the seeds rotting. The soil should be damp, not soggy.
4. Provide Warmth and Light: Chili seeds need warmth to germinate. The ideal temperature is between 75-85°F (24-29°C). If you’re starting seeds indoors, place them in a warm location or use a heat mat. If you’re using grow lights, position them a few inches above the tray.
5. Maintain Moisture: Keep the soil consistently moist, but not waterlogged. You can cover the tray with a clear plastic lid or plastic wrap to help retain moisture. Remember to remove the cover once the seeds start to germinate to prevent fungal growth.
6. Be Patient: Germination can take anywhere from 1-3 weeks, so don’t get discouraged if you don’t see sprouts right away. Just keep the soil moist and warm, and they’ll eventually pop up.
Phase 2: Nurturing the Seedlings
Once your seeds have sprouted, it’s time to nurture those little seedlings into strong, healthy plants.
1. Provide Adequate Light: Seedlings need plenty of light to grow properly. If you’re using grow lights, keep them on for 14-16 hours per day. If you’re relying on natural sunlight, place the seedlings in a sunny window. Rotate the tray or pots regularly to ensure even growth.
2. Water Carefully: Water the seedlings when the top inch of soil feels dry to the touch. Avoid overwatering, as this can lead to root rot. Water at the base of the plants to avoid wetting the leaves, which can also promote fungal growth.
3. Thin the Seedlings (If Necessary): If you planted multiple seeds in each cell or pot, you’ll need to thin them out once they have a few sets of true leaves. Choose the strongest seedling in each cell and snip off the others at the soil line. Don’t pull them out, as this can disturb the roots of the remaining seedling.
4. Fertilize Gently: Once the seedlings have a few sets of true leaves, you can start fertilizing them with a diluted balanced fertilizer. Follow the instructions on the fertilizer package. I usually start with half the recommended strength to avoid burning the delicate seedlings.
5. Harden Off the Seedlings: Before transplanting the seedlings outdoors, you’ll need to harden them off. This process gradually acclimates them to the outdoor environment. Start by placing the seedlings outdoors in a sheltered location for a few hours each day, gradually increasing the amount of time they spend outside over the course of a week or two. Protect them from direct sunlight and strong winds during this process.
Phase 3: Transplanting and Growing On
Now that your seedlings are strong and healthy, it’s time to give them a permanent home in larger pots.
1. Choose the Right Pot: Select a pot that is at least 5 gallons in size. This will give the chili plants plenty of room to grow. Make sure the pot has drainage holes to prevent waterlogging.
2. Prepare the Potting Soil: Fill the pot with a good quality potting mix. You can also add some compost or other organic matter to improve the soil’s fertility and drainage.
3. Transplant the Seedlings: Gently remove the seedlings from their seed starting tray or pots. Be careful not to damage the roots. Dig a hole in the potting soil that is large enough to accommodate the root ball. Place the seedling in the hole and backfill with potting soil. Gently pat down the soil around the base of the plant.
4. Water Thoroughly: Water the transplanted seedlings thoroughly. This will help settle the soil and encourage root growth.
5. Provide Sunlight and Warmth: Place the pots in a sunny location that receives at least 6-8 hours of direct sunlight per day. Chili peppers thrive in warm weather.
6. Water Regularly: Water the chili plants when the top inch of soil feels dry to the touch. Avoid overwatering, as this can lead to root rot. Water at the base of the plants to avoid wetting the leaves.
7. Fertilize Regularly: Fertilize the chili plants every 2-3 weeks with a balanced fertilizer. Once the plants start flowering, switch to a bloom-boosting fertilizer to encourage fruit production.
8. Support the Plants (If Necessary): As the chili plants grow, they may need support to prevent them from falling over. You can use stakes or cages to support the plants.
9. Pest Control: Keep an eye out for pests such as aphids, spider mites, and whiteflies. If you notice any pests, treat the plants with neem oil or insecticidal soap. Follow the instructions on the product label.
Phase 4: Harvesting and Enjoying Your Chilies
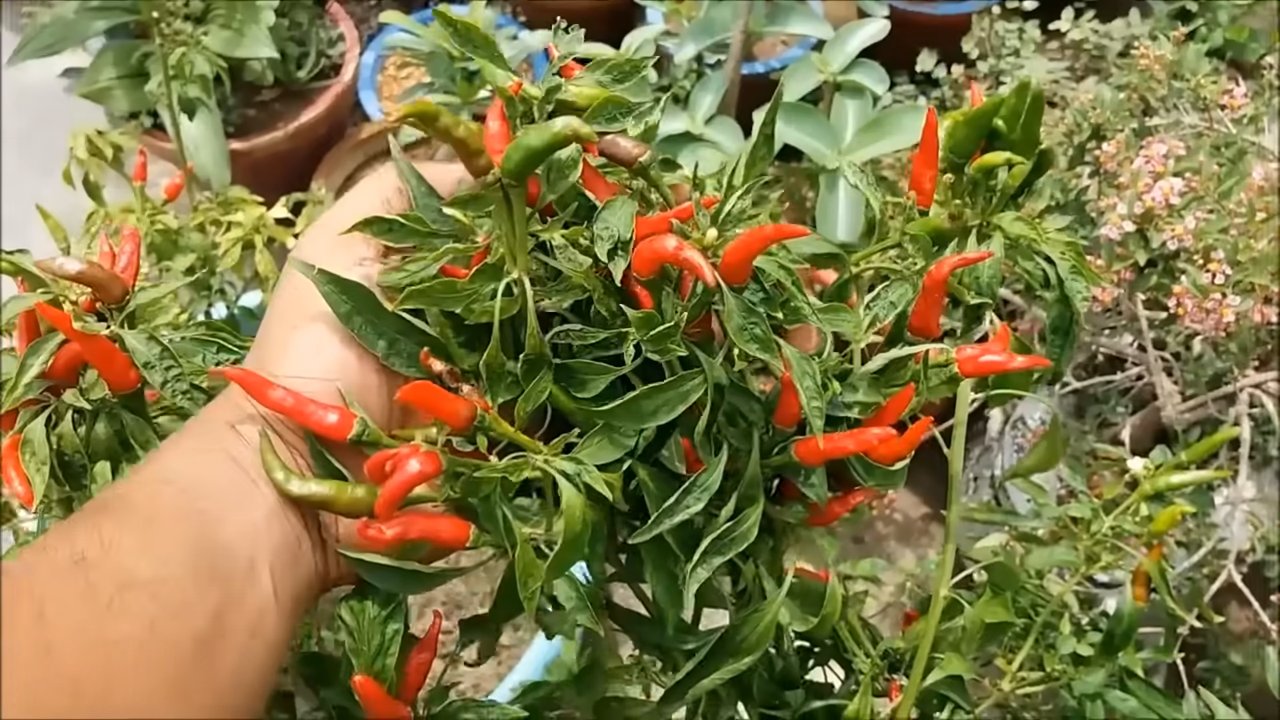
The moment we’ve all been waiting for! Harvesting your own Bird’s Eye Chilies is incredibly rewarding.
1. Harvest When Ripe: Bird’s Eye Chilies are typically ready to harvest when they turn red. You can also harvest them when they are green, but they will be less spicy.
2. Use Pruning Shears or Scissors: Use pruning shears or scissors to cut the chilies from the plant. Be careful not to damage the plant.
3. Handle with Care: Bird’s Eye Chilies are very spicy, so handle them with care. Wear gloves when handling them to avoid getting chili oil on your skin. Avoid touching your eyes or face after handling chilies.
4. Enjoy Your Harvest: Use your homegrown Bird’s Eye Chilies to add a fiery kick to your favorite dishes. You can use them fresh, dried, or pickled.
Tips for Success
Here are a few extra tips to help you grow the best Bird’s Eye Chilies possible:
* Choose the Right Variety: There are many different varieties of Bird’s Eye Chili, so choose one that is well-suited to your climate.
* Provide Good Drainage: Chili peppers need well-draining soil to prevent root rot.
* Protect from Frost: Chili peppers are sensitive to frost, so protect them from freezing temperatures.
* Prune Regularly: Pruning can help encourage bushier growth and more fruit production.
* Be Patient: Growing chili peppers takes time and patience. Don’t get discouraged if you don’t see results right away.
Growing Bird’s Eye Chilies is a fun and rewarding experience. With a little care and
Conclusion
So, there you have it! Growing your own Bird’s Eye Chili plants is not only achievable, but it’s also incredibly rewarding. Imagine the satisfaction of harvesting fiery peppers that you nurtured from seed to fruit, ready to add a punch of flavor to your favorite dishes. This DIY project is a must-try for anyone who loves fresh ingredients, enjoys a bit of spice, and appreciates the connection to the food they consume.
Why is this a must-try? Because store-bought chilies, while convenient, often lack the vibrancy and intense heat of freshly grown ones. Plus, you have complete control over the growing process, ensuring your chilies are free from unwanted pesticides and chemicals. You’ll also find that the flavor profile of homegrown Bird’s Eye Chilies is far superior, offering a complex blend of heat and fruity notes that you simply can’t replicate with commercially available options.
Beyond the basic method outlined, there are plenty of ways to experiment and customize your Bird’s Eye Chili growing experience. Consider trying different soil mixes to see which yields the best results in your specific climate. You could also explore companion planting, pairing your chilies with herbs like basil or rosemary, which are known to deter pests and enhance flavor. For those with limited space, container gardening is an excellent option. Choose a pot that’s at least 12 inches in diameter to provide ample room for root growth.
Another exciting variation is to experiment with different varieties of Bird’s Eye Chili. While the standard variety is already quite potent, you might discover other cultivars with unique flavor profiles or varying levels of heat. Research different seed sources and see what’s available in your region.
Don’t be afraid to get creative with your harvest! Beyond using them fresh in your cooking, Bird’s Eye Chilies can be dried, pickled, or even infused into oils and vinegars. Imagine creating your own signature chili oil to drizzle over pizzas, noodles, or grilled meats. The possibilities are endless!
We wholeheartedly encourage you to embark on this exciting journey of growing your own Bird’s Eye Chili. It’s a relatively simple project that yields significant rewards, both in terms of flavor and personal satisfaction. Once you’ve tasted the difference between homegrown and store-bought chilies, you’ll never go back.
And most importantly, we want to hear about your experience! Share your tips, tricks, and challenges in the comments below. Let us know what worked for you, what didn’t, and any unique variations you tried. Your feedback will not only help other aspiring chili growers but also contribute to a vibrant community of passionate gardeners. So, grab your seeds, get your hands dirty, and prepare to experience the fiery delight of homegrown Bird’s Eye Chili! Let’s cultivate a community of chili enthusiasts, one pepper at a time. Remember, the key to successful chili growing is patience, observation, and a willingness to learn. Happy growing!
Frequently Asked Questions (FAQ)
What is the ideal climate for growing Bird’s Eye Chili?
Bird’s Eye Chilies thrive in warm, tropical climates. They require plenty of sunshine and temperatures between 70°F and 85°F (21°C and 29°C) for optimal growth. If you live in a cooler climate, you can still grow them successfully indoors or in a greenhouse, providing supplemental heat and light as needed. Protecting them from frost is crucial.
How long does it take for Bird’s Eye Chili plants to produce fruit?
From seed to harvest, it typically takes around 90 to 120 days for Bird’s Eye Chili plants to produce mature fruit. The exact timeframe can vary depending on factors such as climate, soil quality, and watering practices. Be patient and consistent with your care, and you’ll be rewarded with a bountiful harvest.
What type of soil is best for growing Bird’s Eye Chili?
Bird’s Eye Chilies prefer well-draining, fertile soil with a slightly acidic to neutral pH (around 6.0 to 7.0). A good potting mix for chilies should contain a blend of compost, perlite, and peat moss or coco coir. This combination provides adequate drainage, aeration, and nutrient retention. Avoid heavy clay soils, as they can become waterlogged and hinder root growth.
How often should I water my Bird’s Eye Chili plants?
Water your Bird’s Eye Chili plants regularly, especially during hot and dry periods. The soil should be kept consistently moist but not waterlogged. Check the soil moisture by inserting your finger about an inch deep. If the soil feels dry, it’s time to water. Avoid overwatering, as this can lead to root rot. During cooler weather, you can reduce the frequency of watering.
What are some common pests and diseases that affect Bird’s Eye Chili plants?
Common pests that can affect Bird’s Eye Chili plants include aphids, spider mites, whiteflies, and chili thrips. These pests can suck the sap from the leaves, causing them to become yellow and distorted. Regularly inspect your plants for signs of infestation and take appropriate action, such as spraying with insecticidal soap or neem oil. Diseases that can affect Bird’s Eye Chilies include fungal infections like powdery mildew and anthracnose. Ensure good air circulation around your plants and avoid overhead watering to prevent these diseases.
How do I harvest Bird’s Eye Chilies?
Harvest Bird’s Eye Chilies when they have reached their mature color, typically red or green, depending on the variety. Use sharp scissors or pruning shears to cut the chilies from the plant, leaving a small stem attached. Handle the chilies with care, as they can be quite spicy. Wear gloves if you have sensitive skin.
Can I grow Bird’s Eye Chili in containers?
Yes, Bird’s Eye Chili plants are well-suited for container gardening. Choose a pot that is at least 12 inches in diameter to provide ample room for root growth. Use a well-draining potting mix and ensure the container has drainage holes. Place the container in a sunny location that receives at least 6-8 hours of direct sunlight per day.
How do I store Bird’s Eye Chilies?
There are several ways to store Bird’s Eye Chilies. You can dry them by stringing them together and hanging them in a well-ventilated area. You can also pickle them in vinegar or brine. Another option is to freeze them whole or chopped. Dried chilies can be stored in an airtight container in a cool, dark place for up to a year. Pickled chilies can be stored in the refrigerator for several months. Frozen chilies can be stored in the freezer for up to a year.
How hot are Bird’s Eye Chilies?
Bird’s Eye Chilies are known for their intense heat. They typically range from 50,000 to 100,000 Scoville Heat Units (SHU) on the Scoville scale, which measures the pungency of chili peppers. This makes them significantly hotter than jalapeños but less hot than habaneros. Use them sparingly in your cooking, especially if you are not accustomed to spicy food.
Can I save seeds from my Bird’s Eye Chili plants to grow more plants?
Yes, you can save seeds from your Bird’s Eye Chili plants to grow more plants. Allow the chilies to fully ripen on the plant before harvesting them for seeds. Remove the seeds from the chilies and spread them out on a paper towel to dry completely. Once the seeds are dry, store them in an airtight container in a cool, dark place. Be aware that if your plants were cross-pollinated with other chili varieties, the seeds may not produce plants that are true to type.

Leave a Comment