

Grow Cauliflower at Home? Absolutely! Imagine strolling into your backyard, not to a grocery store aisle, and harvesting a crisp, creamy cauliflower head you nurtured from a tiny seed. It’s not just a dream; it’s an achievable reality with a little know-how and some simple DIY techniques. For centuries, cauliflower has been a culinary staple, tracing its roots back to the Mediterranean, where it was selectively bred from wild cabbage. Now, you can bring that rich history and fresh flavor directly to your table.
Let’s be honest, store-bought cauliflower can sometimes be disappointing – bland, bruised, or just plain expensive. That’s where the magic of DIY comes in! Growing your own allows you to control every aspect, from soil quality to pest management, ensuring a delicious and healthy harvest. Plus, there’s an undeniable satisfaction in nurturing something from seed to table. This article is packed with easy-to-follow tricks and hacks that will empower even the most novice gardener to successfully grow cauliflower at home. We’ll cover everything from seed starting to harvesting, ensuring you have all the information you need to enjoy fresh, homegrown cauliflower all season long. So, grab your gardening gloves, and let’s get started!
Growing Cauliflower at Home: A Beginner’s Guide
Hey there, fellow gardening enthusiasts! I’m so excited to share my experience and tips on growing cauliflower right in your own backyard. It might seem intimidating at first, but trust me, with a little patience and the right guidance, you can harvest your own delicious, homegrown cauliflower. Let’s dive in!
Choosing the Right Cauliflower Variety
Before we get our hands dirty, it’s crucial to pick the right cauliflower variety for your climate and growing season. Different varieties have different maturity times and are better suited for specific conditions.
* Consider your climate: If you live in a warmer region, opt for heat-tolerant varieties like ‘Snow Crown’ or ‘Cheddar’. For cooler climates, ‘Snowball Y Improved’ or ‘Early White Vienna’ are excellent choices.
* Think about maturity time: Cauliflower varieties range from early-maturing (50-60 days) to late-maturing (75-85 days). Choose a variety that fits your growing season length.
* Explore different colors: While white cauliflower is the most common, you can also find purple, orange, and green varieties. These add a fun and colorful twist to your garden and meals!
Preparing the Soil and Planting
Cauliflower thrives in rich, well-drained soil with a slightly acidic to neutral pH (6.0-7.0). Proper soil preparation is key to a successful harvest.
1. Choose a sunny location: Cauliflower needs at least 6 hours of direct sunlight per day.
2. Amend the soil: Incorporate plenty of compost or well-rotted manure into the soil to improve drainage and fertility. I usually add a generous amount – about 2-3 inches – and mix it in thoroughly.
3. Test the soil pH: Use a soil testing kit to determine the pH level. If the soil is too acidic, add lime to raise the pH. If it’s too alkaline, add sulfur to lower it.
4. Start seeds indoors (optional): To get a head start, you can start cauliflower seeds indoors 4-6 weeks before the last expected frost. Sow seeds ¼ inch deep in seed-starting trays or pots. Keep the soil moist and provide plenty of light.
5. Transplant seedlings or direct sow: Once the seedlings have developed 4-6 true leaves, they’re ready to be transplanted outdoors. Alternatively, you can direct sow seeds directly into the garden after the last frost.
6. Space plants properly: Space cauliflower plants 18-24 inches apart in rows that are 24-36 inches apart. This allows for adequate air circulation and prevents overcrowding.
7. Water thoroughly: After planting, water the seedlings or seeds thoroughly to help them establish.
Caring for Your Cauliflower Plants
Consistent care is essential for healthy cauliflower growth. This includes watering, fertilizing, and protecting the plants from pests and diseases.
1. Water regularly: Cauliflower needs consistent moisture, especially during head formation. Water deeply and regularly, aiming for about 1-1.5 inches of water per week. Avoid overhead watering, as this can promote fungal diseases. I prefer using a soaker hose or drip irrigation to deliver water directly to the roots.
2. Fertilize regularly: Cauliflower is a heavy feeder and requires regular fertilization. Apply a balanced fertilizer (e.g., 10-10-10) every 2-3 weeks, following the package instructions. You can also use organic fertilizers like compost tea or fish emulsion.
3. Weed diligently: Keep the garden free of weeds, as they compete with cauliflower plants for nutrients and water. Hand-pull weeds regularly or use a hoe to cultivate the soil.
4. Mulch the soil: Apply a layer of mulch around the plants to help retain moisture, suppress weeds, and regulate soil temperature. Organic mulches like straw, wood chips, or shredded leaves are excellent choices.
5. Protect from pests: Cauliflower is susceptible to several pests, including cabbage worms, aphids, and flea beetles.
* Cabbage worms: These green caterpillars can devour cauliflower leaves. Handpick them off the plants or use Bacillus thuringiensis (Bt), a natural insecticide.
* Aphids: These tiny insects suck sap from the plants, causing them to weaken. Spray aphids with a strong stream of water or use insecticidal soap.
* Flea beetles: These small beetles chew tiny holes in the leaves. Cover the plants with row covers to prevent flea beetle infestations.
6. Watch out for diseases: Cauliflower can also be affected by diseases like black rot and clubroot.
* Black rot: This bacterial disease causes dark lesions on the leaves and can eventually kill the plant. Prevent black rot by using disease-free seeds and practicing crop rotation.
* Clubroot: This fungal disease causes swollen roots and stunted growth. Prevent clubroot by liming the soil to raise the pH and practicing crop rotation.
Blanching Cauliflower Heads
Blanching is the process of covering the developing cauliflower head to prevent it from turning yellow or brown. This results in a whiter, more appealing head.
1. When to blanch: Start blanching when the cauliflower head is about 2-3 inches in diameter.
2. How to blanch: Gently pull the large outer leaves over the head and secure them with twine, rubber bands, or clothespins. Make sure the head is completely covered but not too tightly bound.
3. Check regularly: Check the head every few days to ensure it’s still covered and to monitor its growth.
4. Blanching alternatives: If you don’t want to blanch, you can grow self-blanching varieties or simply accept that the head may have a slightly off-white color.
Harvesting Your Cauliflower
Harvesting cauliflower at the right time is crucial for optimal flavor and texture.
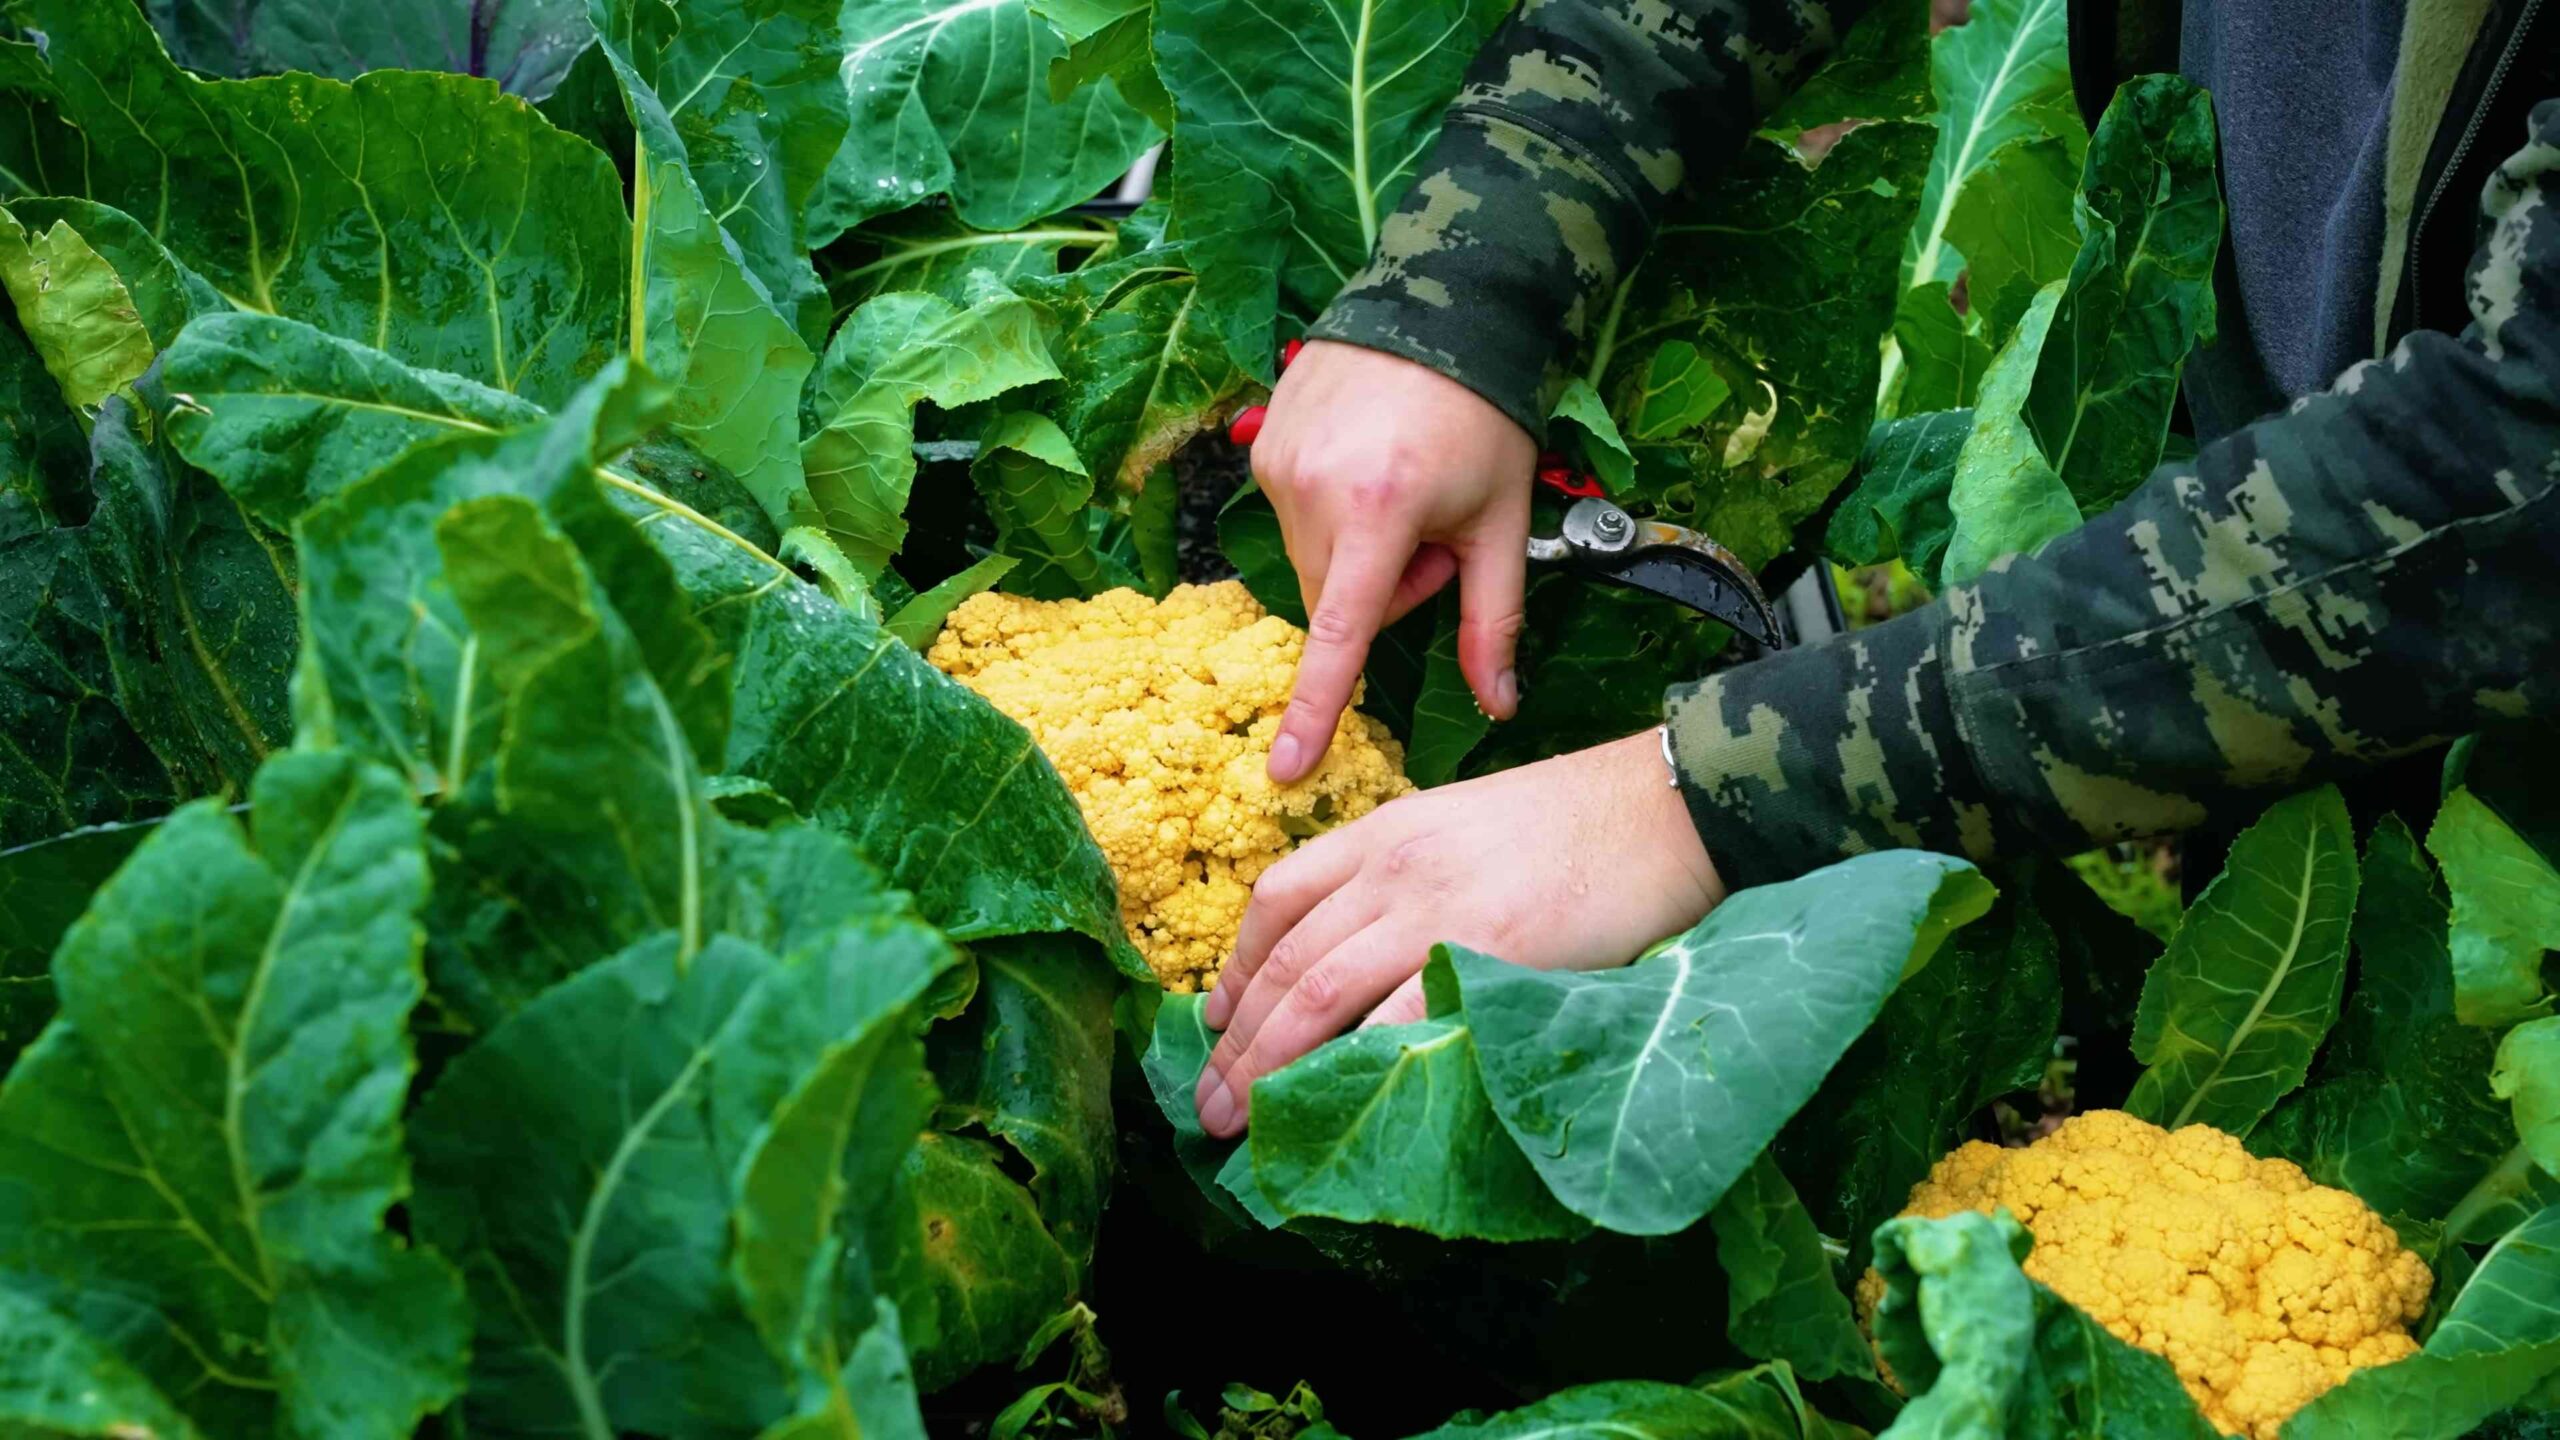
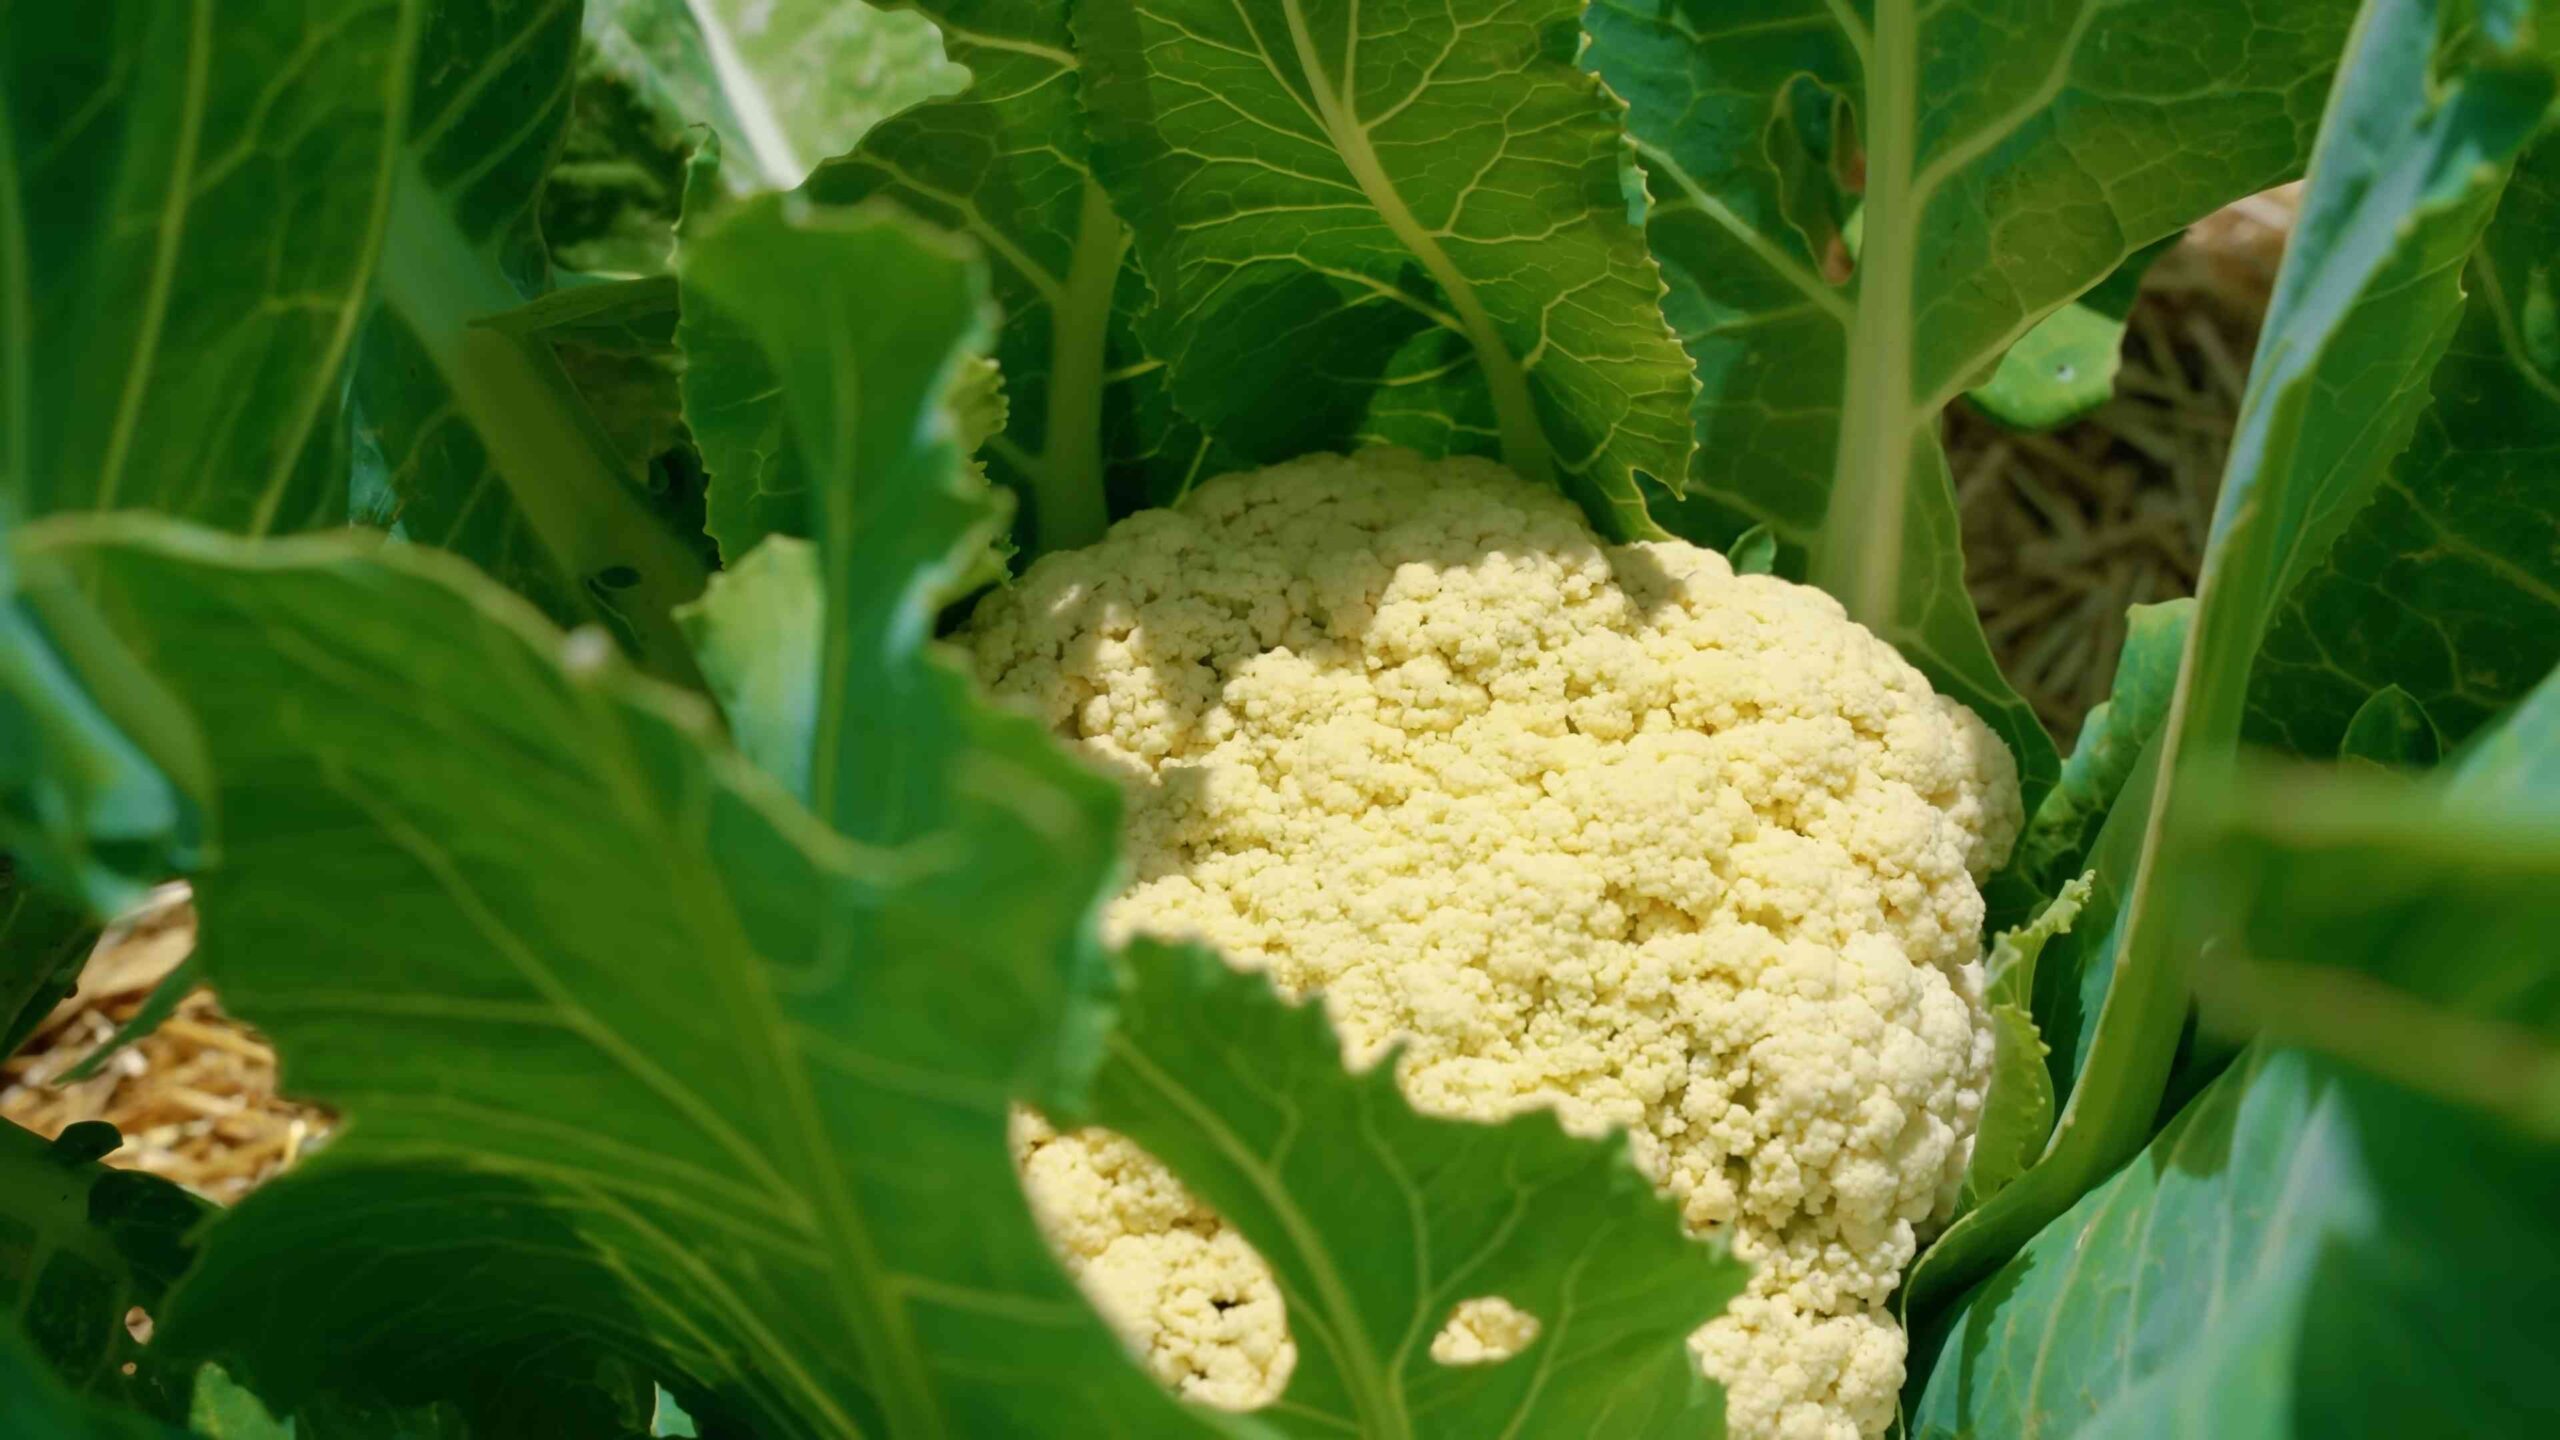
1. When to harvest: Harvest cauliflower when the head is firm, compact, and about 6-8 inches in diameter. The curds (the small, tightly packed florets) should be smooth and even.
2. How to harvest: Use a sharp knife to cut the head from the plant, leaving a few inches of stem attached.
3. Harvesting colored varieties: Colored cauliflower varieties may change color slightly as they mature. Harvest them when the color is vibrant and the head is firm.
4. Storage: Store cauliflower in the refrigerator for up to a week. To prolong its shelf life, wrap the head in a damp paper towel and place it in a plastic bag.
Troubleshooting Common Problems
Even with the best care, you might encounter some challenges while growing cauliflower. Here are some common problems and how to address them:
* Buttoning: This occurs when the cauliflower head forms prematurely and remains small. It’s often caused by stress, such as lack of water or nutrients. Ensure consistent watering and fertilization to prevent buttoning.
* Ricey heads: This refers to a cauliflower head with loose, grainy curds. It’s usually caused by hot weather or inconsistent watering. Provide shade during hot periods and water regularly.
* Bolting: This happens when the cauliflower plant prematurely flowers, resulting in a bitter taste. It’s often triggered by temperature fluctuations or stress. Choose bolt-resistant varieties and provide consistent care.
* Pest infestations: As mentioned earlier, cauliflower is susceptible to various pests. Regularly inspect your plants for signs of infestation and take appropriate action.
* Diseases: Diseases can also affect cauliflower growth. Practice crop rotation, use disease-free seeds, and maintain good air circulation to prevent diseases.
Extra Tips for Success
Here are a few extra tips to help you grow the best cauliflower possible:
* Crop rotation: Avoid planting cauliflower in the same spot year after year. Rotate crops to prevent soilborne diseases and nutrient depletion.
* Succession planting: Plant cauliflower seeds or seedlings every few weeks to ensure a continuous harvest throughout the growing season.
* Companion planting: Plant cauliflower alongside beneficial companion plants like rosemary, thyme, and marigolds to deter pests and attract pollinators.
* Record keeping: Keep a gardening journal to track your progress, note any problems you encounter, and learn from your experiences.
Growing cauliflower at home can be a rewarding experience. With a little planning, preparation, and care, you can enjoy fresh, delicious cauliflower straight from your garden. Happy gardening!
Conclusion
So, there you have it! Growing cauliflower at home isn’t just a gardening project; it’s an investment in fresh, flavorful, and potentially more affordable produce. It’s about connecting with your food source and experiencing the satisfaction of nurturing something from seed to table. While it might seem daunting at first, the steps are manageable, and the rewards are well worth the effort.
Why is this DIY trick a must-try? Because store-bought cauliflower, while convenient, often lacks the vibrant flavor and crisp texture of freshly harvested, homegrown heads. Plus, you have complete control over the growing process, ensuring your cauliflower is free from unwanted pesticides and chemicals. Imagine the pride of serving a dish featuring cauliflower you nurtured yourself!
Beyond the basic method outlined, there are numerous ways to personalize your cauliflower growing experience. Consider experimenting with different varieties. ‘Snowball’ is a classic choice, but you might also try ‘Cheddar’ for its unique orange hue or ‘Graffiti’ for its stunning purple color. Each variety offers a slightly different flavor profile and visual appeal, adding excitement to your garden and your plate.
Another variation to explore is companion planting. Certain plants, like marigolds and nasturtiums, can help deter pests and attract beneficial insects, creating a healthier environment for your cauliflower to thrive. Interplanting with herbs like rosemary or thyme can also enhance the flavor of your cauliflower and provide additional culinary benefits.
Furthermore, don’t be afraid to adjust the watering and fertilizing schedule based on your local climate and soil conditions. Observe your plants closely and respond to their needs. If the leaves are wilting, they likely need more water. If the heads are small and underdeveloped, they might benefit from a boost of fertilizer.
Growing cauliflower at home is a journey of learning and experimentation. Embrace the challenges, celebrate the successes, and most importantly, have fun!
We strongly encourage you to give this DIY trick a try. Start small, perhaps with just a few plants, and gradually expand your operation as you gain confidence. The taste of homegrown cauliflower is simply unmatched, and the satisfaction of knowing you grew it yourself is incredibly rewarding.
Once you’ve harvested your first head of homegrown cauliflower, we’d love to hear about your experience! Share your tips, tricks, and triumphs in the comments below. What variety did you grow? What challenges did you face? What delicious dishes did you create? Your insights can help other aspiring gardeners embark on their own cauliflower-growing adventures. Let’s build a community of homegrown cauliflower enthusiasts!
Frequently Asked Questions (FAQ)
Q: How much space do I need to grow cauliflower?
A: Cauliflower plants typically require about 18-24 inches of space between each other. This allows them adequate room to grow and develop healthy heads. Consider the mature size of the specific variety you’re planting, as some may require slightly more space. If you’re growing in containers, choose pots that are at least 12 inches in diameter.
Q: What kind of soil is best for growing cauliflower?
A: Cauliflower thrives in well-drained, fertile soil that is rich in organic matter. The ideal soil pH is between 6.0 and 7.0. Before planting, amend your soil with compost or well-rotted manure to improve its fertility and drainage. If your soil is heavy clay, consider adding sand or perlite to improve drainage.
Q: How often should I water my cauliflower plants?
A: Cauliflower needs consistent moisture to thrive. Water deeply and regularly, especially during dry periods. Aim to keep the soil consistently moist but not waterlogged. A good rule of thumb is to water when the top inch of soil feels dry to the touch. Mulching around the plants can help retain moisture and suppress weeds.
Q: What kind of fertilizer should I use for cauliflower?
A: Cauliflower is a heavy feeder and benefits from regular fertilization. Use a balanced fertilizer with a ratio of 10-10-10 or 14-14-14. Apply fertilizer according to the package instructions, typically every 2-3 weeks during the growing season. You can also supplement with organic fertilizers like compost tea or fish emulsion.
Q: How do I protect my cauliflower from pests?
A: Cauliflower is susceptible to several pests, including cabbage worms, aphids, and flea beetles. To protect your plants, consider using row covers to create a physical barrier. You can also handpick pests off the plants or use organic insecticides like neem oil or insecticidal soap. Companion planting with herbs like rosemary and thyme can also help deter pests.
Q: How do I prevent cauliflower from bolting (going to seed)?
A: Bolting is often caused by stress, such as extreme temperatures or inconsistent watering. To prevent bolting, choose heat-tolerant varieties if you live in a warm climate. Water regularly and deeply, especially during hot weather. Mulching can also help keep the soil cool and moist. Harvest your cauliflower as soon as it reaches maturity to prevent it from bolting.
Q: When is the best time to harvest cauliflower?
A: Cauliflower is ready to harvest when the head is firm, compact, and reaches the desired size. The exact size will depend on the variety, but most heads are ready when they are 6-8 inches in diameter. Check the head regularly for signs of loosening or discoloration, which indicate that it is overripe. To harvest, cut the stem just below the head, leaving a few leaves attached.
Q: How do I store harvested cauliflower?
A: Store harvested cauliflower in the refrigerator for up to a week. Wrap the head loosely in plastic wrap or place it in a perforated plastic bag. Do not wash the cauliflower until you are ready to use it, as moisture can promote spoilage. You can also freeze cauliflower for longer storage. Blanch the florets in boiling water for 3 minutes, then cool them in ice water before freezing.
Q: Can I grow cauliflower in containers?
A: Yes, you can grow cauliflower in containers, but you’ll need to choose a large enough pot (at least 12 inches in diameter) and use a well-draining potting mix. Container-grown cauliflower may require more frequent watering and fertilizing than plants grown in the ground. Choose compact varieties that are well-suited for container gardening.
Q: My cauliflower head is turning yellow. What should I do?
A: Yellowing of the cauliflower head can be caused by several factors, including sun exposure, overwatering, or nutrient deficiencies. To prevent sun scalding, blanch the head by tying the outer leaves together over the developing head. Ensure that the soil is well-draining and that you are not overwatering. Fertilize regularly with a balanced fertilizer to provide the necessary nutrients. If the yellowing is severe, it may be a sign of disease, in which case you should remove the affected plant to prevent the spread of disease.

Leave a Comment