

Grow Eggplants Backyard – sounds like a dream, right? Imagine stepping out your back door and harvesting plump, glossy eggplants, ready to be transformed into delicious baba ghanoush, hearty ratatouille, or crispy eggplant parmesan. It’s more achievable than you think, and this DIY guide is your secret weapon to making that dream a reality!
For centuries, eggplants have been a staple in cuisines around the world, from the Mediterranean to Asia. Believed to have originated in India, these versatile vegetables have journeyed across continents, adapting to different climates and cultures. Now, you can bring that rich history and culinary potential right to your own backyard.
Why should you learn to grow eggplants backyard? Well, store-bought eggplants often lack the vibrant flavor and freshness of homegrown produce. Plus, gardening is incredibly therapeutic! But let’s be honest, growing eggplants can sometimes feel tricky. They’re a bit sensitive and require specific conditions to thrive. That’s where these DIY tricks and hacks come in. I’m going to share my tried-and-true methods for overcoming common challenges, from pest control to maximizing your yield. Get ready to roll up your sleeves and transform your backyard into an eggplant paradise!
Growing Eggplants in Your Backyard: A Comprehensive DIY Guide
Hey there, fellow gardening enthusiasts! I’m so excited to share my tried-and-true method for growing plump, juicy eggplants right in your own backyard. Forget those bland, expensive grocery store eggplants – nothing beats the taste of homegrown! This guide will walk you through every step, from seed starting to harvesting, ensuring you have a bountiful eggplant harvest. Let’s get our hands dirty!
Choosing the Right Eggplant Variety
Before we even think about planting, it’s crucial to choose the right eggplant variety for your climate and preferences. There are so many options, from classic large purple varieties to smaller, more exotic types. Here are a few of my favorites:
* Black Beauty: This is a classic, reliable variety that produces large, dark purple eggplants. It’s a great choice for beginners.
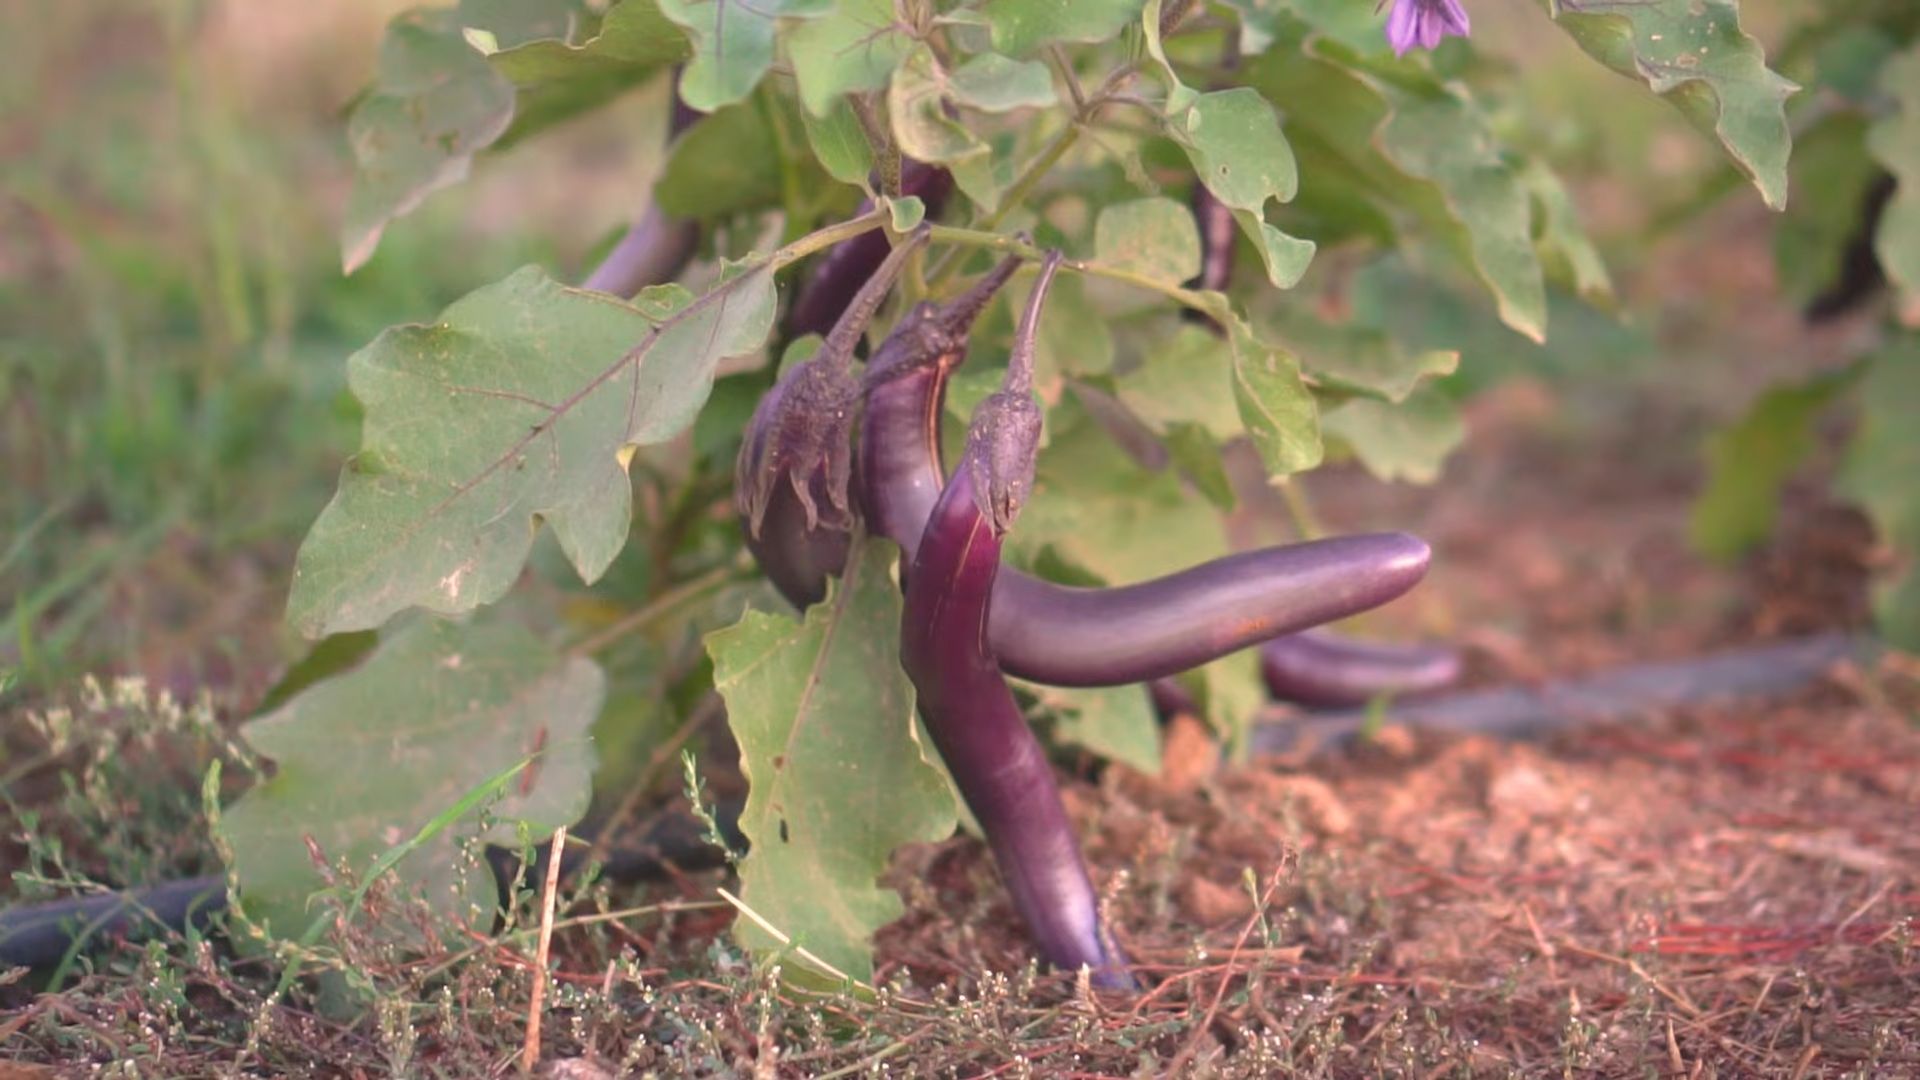
* Ichiban: A Japanese variety that yields long, slender, dark purple fruits. They have a delicate flavor and are perfect for stir-fries.
* Rosa Bianca: An Italian heirloom with beautiful lavender and white striped fruits. They’re known for their mild, creamy flavor.
* Little Fingers: A compact variety that produces clusters of small, finger-sized eggplants. Ideal for container gardening.
* Thai Green: These small, round, green eggplants are common in Thai cuisine. They have a slightly bitter flavor and are great in curries.
Consider your local climate and growing season when making your choice. Some varieties are more heat-tolerant than others, while some mature faster. Check seed packets or consult with your local nursery for recommendations.
Starting Eggplant Seeds Indoors
Eggplants need a long growing season, so starting them indoors is essential, especially if you live in a cooler climate. I usually start my seeds about 8-10 weeks before the last expected frost.
What You’ll Need:
* Eggplant seeds
* Seed starting trays or small pots
* Seed starting mix
* Spray bottle
* Heat mat (optional, but recommended)
* Grow lights (optional, but highly recommended)
Step-by-Step Instructions:
1. Prepare the Seed Starting Mix: Moisten the seed starting mix with water until it’s damp but not soggy. Fill your seed starting trays or pots with the mix, leaving about half an inch of space at the top.
2. Sow the Seeds: Plant 2-3 seeds per cell or pot, about ¼ inch deep. Gently cover the seeds with the seed starting mix.
3. Water Gently: Use a spray bottle to gently water the seeds. Avoid overwatering, as this can lead to damping off (a fungal disease that kills seedlings).
4. Provide Warmth: Eggplant seeds need warmth to germinate. Place the seed starting trays or pots on a heat mat, if you have one. The ideal soil temperature is around 80-90°F (27-32°C).
5. Provide Light: Once the seeds germinate (usually within 7-14 days), they’ll need plenty of light. Place them under grow lights or in a sunny window. If using a window, rotate the trays or pots regularly to prevent the seedlings from leaning towards the light.
6. Thin the Seedlings: Once the seedlings have their first true leaves (the second set of leaves), thin them to one seedling per cell or pot. Choose the strongest, healthiest-looking seedling and snip off the others at the soil line.
7. Harden Off the Seedlings: About a week before you plan to transplant the seedlings outdoors, you’ll need to harden them off. This process gradually acclimates them to the outdoor conditions. Start by placing the seedlings outdoors in a sheltered location for an hour or two each day, gradually increasing the amount of time they spend outside. Protect them from direct sunlight and strong winds.
Preparing the Garden Bed
Eggplants need a sunny location with well-drained soil. Choose a spot in your backyard that gets at least 6-8 hours of sunlight per day.
What You’ll Need:
* Garden fork or tiller
* Compost or well-rotted manure
* Fertilizer (optional)
* pH testing kit (optional)
Step-by-Step Instructions:
1. Clear the Area: Remove any weeds, rocks, or debris from the garden bed.
2. Loosen the Soil: Use a garden fork or tiller to loosen the soil to a depth of at least 12 inches. This will improve drainage and allow the eggplant roots to grow easily.
3. Amend the Soil: Eggplants are heavy feeders, so it’s important to amend the soil with plenty of organic matter. Add a generous layer of compost or well-rotted manure to the garden bed and mix it in thoroughly.
4. Test the Soil pH (Optional): Eggplants prefer a slightly acidic soil pH of 6.0-6.8. Use a pH testing kit to test your soil and amend it accordingly. If the soil is too acidic, add lime. If it’s too alkaline, add sulfur.
5. Fertilize (Optional): If your soil is poor, you may want to add a fertilizer to give your eggplants a boost. Choose a fertilizer that is high in phosphorus and potassium, which are essential for fruit production. Follow the instructions on the fertilizer package.
Transplanting Eggplant Seedlings Outdoors
Once the danger of frost has passed and the soil has warmed up, it’s time to transplant your eggplant seedlings outdoors.
What You’ll Need:
* Eggplant seedlings
* Trowel
* Watering can or hose
* Mulch (optional)
* Stakes or cages (optional)
Step-by-Step Instructions:
1. Choose a Cloudy Day: Transplanting on a cloudy day will help prevent the seedlings from getting stressed by the sun.
2. Dig Holes: Dig holes that are slightly larger than the root balls of the seedlings. Space the holes about 18-24 inches apart.
3. Remove Seedlings from Pots: Gently remove the seedlings from their pots, being careful not to damage the roots. If the roots are pot-bound (tightly circling the pot), gently loosen them before planting.
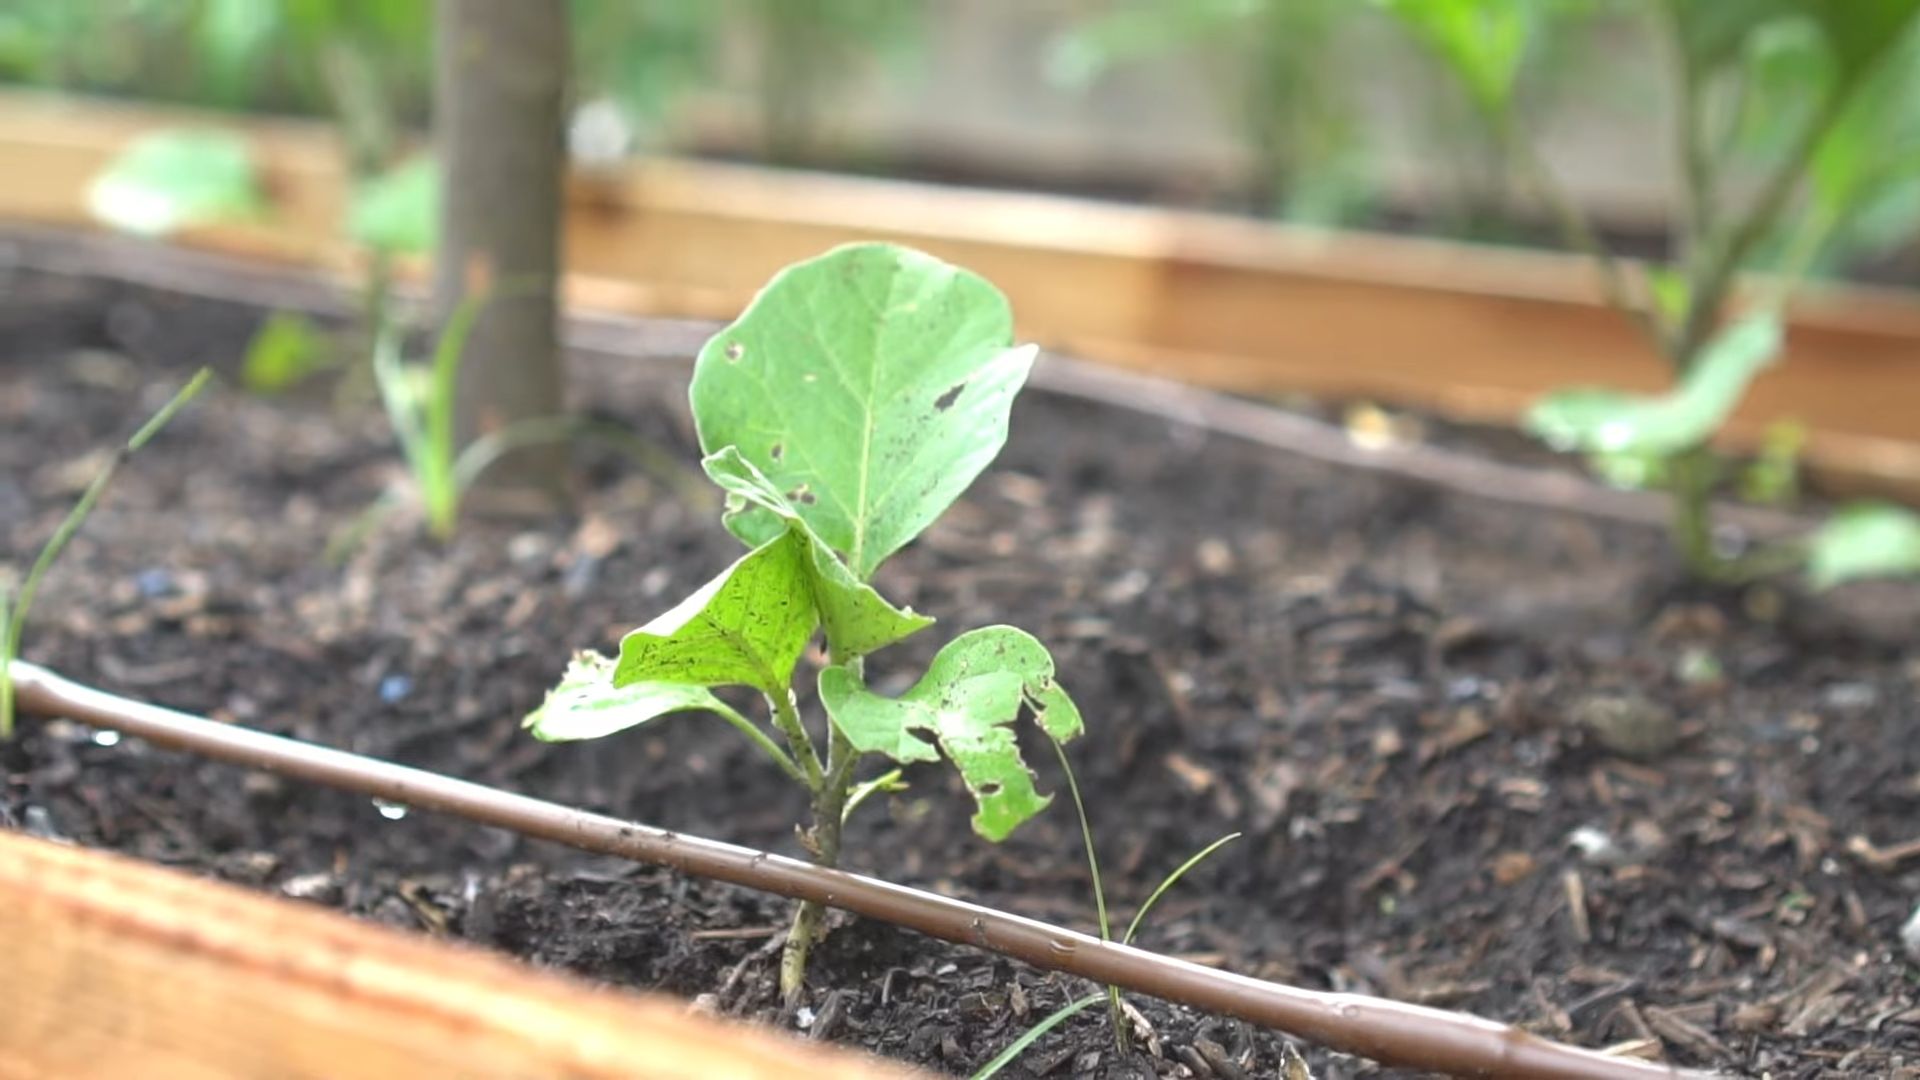
4. Plant the Seedlings: Place the seedlings in the holes and backfill with soil. Gently firm the soil around the base of the plants.
5. Water Thoroughly: Water the seedlings thoroughly after planting.
6. Mulch (Optional): Apply a layer of mulch around the base of the plants to help retain moisture, suppress weeds, and regulate soil temperature.
7. Stake or Cage (Optional): Eggplants can get quite heavy with fruit, so you may want to stake or cage them to provide support. This will prevent the branches from breaking and keep the fruits off the ground.
Caring for Your Eggplant Plants
Once your eggplants are planted, it’s important to provide them with proper care to ensure a healthy and productive harvest.
Watering: Eggplants need consistent moisture, especially during hot, dry weather. Water deeply and regularly, aiming for about 1 inch of water per week. Avoid overhead watering, as this can lead to fungal diseases.
Fertilizing: Eggplants are heavy feeders and benefit from regular fertilization. Side-dress the plants with a balanced fertilizer every 2-3 weeks. You can also use a liquid fertilizer, such as fish emulsion or seaweed extract.
Weeding: Keep the garden bed free of weeds, as they can compete with the eggplants for nutrients and water. Hand-pull weeds regularly or use a hoe to cultivate the soil.
Pest Control: Eggplants are susceptible to a variety of pests, including aphids, flea beetles, and tomato hornworms. Inspect your plants regularly for signs of pests and take action promptly. You can use insecticidal soap, neem oil, or other organic pest control methods.
Disease Control: Eggplants can also be affected by fungal diseases, such as early blight and verticillium wilt. To prevent diseases, provide good air circulation, avoid overhead watering, and remove any infected leaves or plants. You can also use a fungicide if necessary.
Pruning: Pruning eggplants can help improve air circulation and encourage fruit production. Remove any suckers (small shoots that grow from the base of the plant) and any yellowing or diseased leaves. You can also pinch off the tips of the branches to encourage branching and more fruit.
Harvesting Your Eggplants
The moment we’ve all been waiting for! Knowing when to harvest your eggplants is key to getting the best flavor and texture.
When to Harvest:
Eggplants are typically ready to harvest about 60-80 days after transplanting, depending on the variety. The fruits should be firm, glossy, and have a deep, rich color. Gently press the skin of the eggplant. If it gives slightly, it’s ready to harvest. If it’s hard and
Conclusion
So, there you have it! Growing eggplants in your backyard doesn’t have to be a daunting task. With a little planning, preparation, and the right DIY trick, you can transform your garden into a thriving eggplant paradise. We’ve explored a simple yet incredibly effective method for boosting your eggplant yield and ensuring healthier, more robust plants. This isn’t just about growing eggplants; it’s about cultivating a deeper connection with your food and experiencing the satisfaction of nurturing something from seed to table.
Why is this DIY trick a must-try? Because it addresses some of the most common challenges faced by home gardeners attempting to grow eggplants. It provides a targeted solution for improving soil drainage, enhancing nutrient availability, and creating a more favorable microclimate for your plants. The result? Stronger, healthier eggplants that are less susceptible to disease and produce a more abundant harvest. Plus, it’s a cost-effective and environmentally friendly alternative to relying solely on chemical fertilizers and pesticides.
But don’t stop there! Feel free to experiment with variations on this DIY trick to suit your specific needs and preferences. For example, if you live in an area with particularly acidic soil, you might consider adding a small amount of lime to your planting hole to raise the pH level. Or, if you’re growing your eggplants in containers, you could incorporate slow-release fertilizer pellets into the soil mix to provide a steady supply of nutrients over time. Another variation is to use different types of organic matter, such as composted leaves or aged manure, depending on what’s readily available to you.
Remember, the key is to observe your plants closely and adjust your approach as needed. Eggplants are relatively resilient, but they will thrive best when given the right conditions.
We’re confident that this DIY trick will make a significant difference in your eggplant-growing endeavors. It’s a simple, effective, and rewarding way to enhance your garden and enjoy the delicious taste of homegrown eggplants.
Now, it’s your turn! We encourage you to try this DIY trick in your own backyard and see the results for yourself. Don’t be afraid to get your hands dirty and experiment with different variations. And most importantly, we want to hear about your experience! Share your tips, successes, and challenges in the comments below. Let’s create a community of eggplant enthusiasts who are passionate about growing their own food.
Growing eggplants can be a truly rewarding experience, and we believe that this DIY trick will help you achieve your gardening goals. So, go ahead, give it a try, and let us know what you think! Happy gardening!
Frequently Asked Questions (FAQ)
Q: What exactly is the DIY trick you’re referring to?
A: The DIY trick involves amending the soil in your planting hole with a mixture of compost, well-rotted manure, and a small amount of bone meal. This creates a nutrient-rich and well-draining environment that promotes healthy root development and vigorous growth in your eggplant plants. The specific ratios can be adjusted based on your soil type and the availability of materials.
Q: Why is soil preparation so important for growing eggplants?
A: Eggplants are heavy feeders, meaning they require a significant amount of nutrients to thrive. They also prefer well-drained soil to prevent root rot. Proper soil preparation ensures that your eggplants have access to the nutrients they need and that their roots can breathe freely. This leads to stronger, healthier plants that are more resistant to pests and diseases and produce a more abundant harvest.
Q: Can I use this DIY trick for other vegetables besides eggplants?
A: Yes, absolutely! This DIY trick can be beneficial for other heavy-feeding vegetables, such as tomatoes, peppers, and squash. The principles of providing nutrient-rich and well-drained soil apply to many different types of plants. However, you may need to adjust the specific amendments based on the individual needs of each vegetable. For example, tomatoes may benefit from the addition of Epsom salts to prevent blossom-end rot.
Q: How often should I fertilize my eggplants after planting?
A: After planting, you should fertilize your eggplants every 2-3 weeks with a balanced liquid fertilizer. Look for a fertilizer with an NPK ratio (nitrogen, phosphorus, potassium) of around 10-10-10 or 14-14-14. You can also supplement with organic fertilizers, such as compost tea or fish emulsion. Be sure to follow the instructions on the fertilizer label and avoid over-fertilizing, as this can lead to excessive foliage growth at the expense of fruit production.
Q: What are some common pests and diseases that affect eggplants, and how can I prevent them?
A: Common pests that affect eggplants include aphids, flea beetles, and spider mites. Diseases include verticillium wilt, fusarium wilt, and early blight. To prevent these problems, start with healthy seedlings, practice crop rotation, and keep your garden free of weeds and debris. You can also use organic pest control methods, such as insecticidal soap or neem oil, to control pests. For diseases, choose disease-resistant varieties and avoid overhead watering, which can create a humid environment that favors fungal growth.
Q: What are the best eggplant varieties to grow in my backyard?
A: The best eggplant varieties to grow in your backyard will depend on your climate and personal preferences. Some popular varieties include ‘Black Beauty,’ ‘Ichiban,’ ‘Japanese Long,’ and ‘Rosa Bianca.’ ‘Black Beauty’ is a classic variety that produces large, dark purple fruits. ‘Ichiban’ is a Japanese variety that produces long, slender fruits with a mild flavor. ‘Japanese Long’ is another Japanese variety that produces very long, thin fruits. ‘Rosa Bianca’ is an Italian variety that produces beautiful, lavender-striped fruits. Consider your local climate and growing conditions when choosing your eggplant varieties.
Q: How much sunlight do eggplants need?
A: Eggplants need at least 6-8 hours of direct sunlight per day to thrive. Choose a sunny location in your backyard for your eggplant plants. If you live in a particularly hot climate, you may need to provide some afternoon shade to prevent the fruits from sunscald.
Q: When is the best time to harvest eggplants?
A: Eggplants are typically ready to harvest about 60-80 days after transplanting. The fruits should be firm, glossy, and have a deep, rich color. Gently press the skin of the eggplant; if it springs back slightly, it’s ready to harvest. Use a sharp knife or pruning shears to cut the eggplant from the plant, leaving a small stem attached.
Q: Can I grow eggplants in containers?
A: Yes, you can definitely grow eggplants in containers! Choose a large container that is at least 18 inches in diameter and 18 inches deep. Use a high-quality potting mix that is well-draining. Be sure to water your container-grown eggplants regularly, as they will dry out more quickly than plants grown in the ground. You may also need to fertilize them more frequently.
Q: What if my eggplant flowers are falling off without producing fruit?
A: This is a common problem called blossom drop. It can be caused by a number of factors, including temperature extremes (too hot or too cold), inconsistent watering, poor pollination, or nutrient deficiencies. To prevent blossom drop, try to maintain consistent soil moisture, provide adequate sunlight, and fertilize your plants regularly. You can also try hand-pollinating the flowers by gently shaking the plant or using a small paintbrush to transfer pollen from one flower to another.

Leave a Comment